
























What Are Key Fob Embroidery Designs?Keyfobs
A friendly beginner guide to one of the easiest ways to try in-the-hoop embroidery
Welcome
If you're new to machine embroidery, key fobs are such a fun little project to try. They're quick, useful, easy to personalize, and they're a great way to learn how in-the-hoop embroidery works without jumping into a big project.
Key fobs are one of the most popular in-the-hoop (ITH) projects — small, quick to stitch, and a great way to use up scrap fabric and vinyl while making a genuinely useful gift.
So, What Exactly Is a Key Fob Embroidery Design?
A key fob embroidery design is a small embroidery project that turns into a finished keychain or tag.
A lot of key fobs are made in the hoop, often shortened to ITH. That just means your embroidery machine does most of the work while the project stays in the hoop.
Instead of stitching a design onto a piece of fabric and then sewing everything together later, the embroidery file guides you through the construction too.
Your machine may stop and have you add fabric, vinyl, felt, or backing at different points. Then it stitches those pieces together for you. That is one of the things that makes ITH projects so much fun.
Why Key Fobs Are Great for Beginners
Key fobs are small enough that they don't feel overwhelming, but you still get to practice several important embroidery skills.
- how to hoop stabilizer
- how placement stitches work
- what a tackdown stitch does
- how to add material while the project is still in the hoop
- when to add the backing
- how color stops work
- how to finish and trim an ITH project
You may even get to use snaps, rings, clips, or other fun hardware depending on the design. It is a nice way to learn a lot without starting with a huge project.
Key fob designs are built entirely inside the embroidery hoop, from stitching down your materials to finishing the edges — no separate sewing machine steps required. That makes them a fantastic beginner project for trying in-the-hoop techniques for the first time.
How Does an ITH Key Fob Work?
Every key fob design can be a little different, so always read the instructions that come with your design first. But most follow a pretty similar process.

- Hoop your stabilizer. You'll usually begin by hooping stabilizer. The stabilizer gives your stitches something firm to hold onto while the project is being made. The type of stabilizer can depend on the design, so use whatever the instructions recommend. Make sure it is nice and secure in the hoop before you start.
- Stitch the placement line. The machine will usually stitch an outline first. This is called a placement stitch. It shows you exactly where your fabric, felt, vinyl, or other material needs to go. Think of it as your little roadmap.
- Add your material. Place your material over the placement line. Make sure it covers the entire outline with a little extra around the edges. You may need to secure it with embroidery tape or a temporary adhesive so it doesn't move.
- Stitch the tackdown. The tackdown holds your material in place so it doesn't shift while the rest of the design stitches. Placement stitch = shows you where it goes. Tackdown stitch = holds it there. You'll see these two steps a lot in ITH projects.
- Let the design stitch. Once your material is secure, your machine will stitch the design details — a cute animal face, flowers, lettering, a monogram, holiday designs, decorative borders, or fun sayings. Just follow the color chart and instructions that came with the design.
When Do You Add the Back?
This is the part that feels a little strange the first time.
Usually, most of the front embroidery is finished first. Then the machine stops so you can add the backing material.
You will remove the hoop from the machine, but leave the project inside the hoop. That part is important.
Turn the hoop over, add the backing material where the instructions tell you to, and secure it in place. Then put the hoop back on the machine.
The last stitches usually sew the front and back together. That is when it really starts looking like a finished key fob.
Finishing Your Key Fob
Once the stitching is done, you can finally remove the project from the hoop. Depending on the design, you may need to trim around the outside edge.
Take your time here. You want to trim close enough that the key fob looks neat, but not so close that you cut through the stitches.
Then add your hardware. That might be:
- a key ring
- snap hardware
- a swivel hook
- a lobster clasp
- a key fob clamp
- another type of keychain hardware
Some key fobs fold over the hardware. Others have a small tab or opening made for a ring. Just follow the directions for that particular design.
What Do You Need to Make a Key Fob?
Your supply list will depend on the design, but you'll usually need:
- your embroidery machine
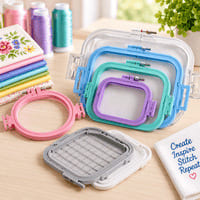
- an embroidery hoop
- stabilizer
- the embroidery design file for your machine
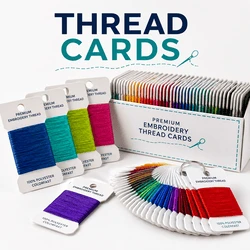
- embroidery thread
- bobbin thread
- fabric, felt, vinyl, or faux leather
- scissors
- temporary tape or adhesive if needed
- key fob hardware
Some designs may also need snaps or a snap tool.
Before you start, it's always a good idea to read the instructions all the way through. That way you won't get halfway through and suddenly realize you needed another piece of material or special hardware.
How Do You Pick a Good First Key Fob?
For your first one, keep it easy. You do not need the fanciest design you can find. Look for something with a simple shape and only a few construction steps.
Check the hoop size. Always check the actual design measurements. A design may look tiny on your screen but still need a 5" x 7" hoop. Make sure the design fits inside your machine's embroidery area.
Check the file format. Different embroidery machines use different file formats. Make sure you download the correct one for your machine.
Check the materials. Some key fobs are made for felt. Others are designed for vinyl, faux leather, or fabric. Using the material recommended in the instructions will usually make your first project go much more smoothly.
Make sure instructions are included. ITH projects are much easier when you have step-by-step instructions. Two key fobs may look almost the same when they are finished but stitch in a completely different order. Never assume one project will work exactly like the last one.
A Few Beginner Tips
One of the best things you can do is read the instructions before stitching anything. You will know when fabric gets added, when the backing goes on, and when trimming happens.
Keep your material secure during the project so it doesn't shift.
And remember: when the directions say to add something to the back of the hoop, you usually remove the hoop from the machine but leave everything hooped.
Sharp scissors also make a huge difference when trimming the finished key fob.
And if it is your very first one, practice with inexpensive material. Once you understand the stitch order, you can pull out your favorite vinyl or specialty fabric.
Common Beginner Mistakes
Taking the project out of the hoop too soon. This is an easy mistake to make. If the design stops so you can add backing, remove the hoop from the machine but do not unhoop the project. Once everything is unhooped, it can be very hard to line it back up correctly.
Using a design that is too big. Always check the actual design size before starting. Do not judge the size by the picture alone.
Not using enough material. Your fabric or vinyl needs to completely cover the placement line. Give yourself a little extra room around the edge so the tackdown stitches can catch it.
Changing thread at every stop. Remember, a machine stop may be there for construction, not because the thread color needs to change. Always look at the instructions before changing thread.
Cutting too close. When you trim your finished project, leave enough room so you do not cut through the stitching. Slow and careful is better here.
What Can You Use Key Fobs For?
Obviously, you can put them on your keys. But they are also cute on:
- backpacks
- purses
- project bags
- zipper pulls
- luggage
- tote bags
- USB drives
- gifts
They're also really fun to personalize. You can pick a design based on someone's favorite animal, hobby, holiday, name, or initials.
A Great First ITH Project
Key fobs are one of those projects that may seem a little confusing until you actually make one. Then suddenly it clicks.
Once you have made a couple, placement stitches, tackdowns, backing, and color stops start making a lot more sense. And those same steps show up in all kinds of other in-the-hoop embroidery projects too.
So if you are ready to try ITH embroidery, a key fob is a great place to start.
Pick a simple design, follow the instructions one step at a time, and have fun with it.
Ready to try one? Browse our key fob embroidery designs, or explore the wider world of in-the-hoop embroidery for more quick, self-contained projects.
Yes. They are small, useful, and teach core ITH skills — placement stitches, tackdowns, adding backing, and reading color stops — without a huge project.
No. Remove the hoop from the machine if needed, but leave the project in the hoop so registration stays correct when you continue stitching.
Not always. In ITH key fobs, a stop may tell you to add material, trim, or flip the hoop. Always check the design instructions before changing thread.
Choose a simple shape with few construction steps, confirm the design fits your sewing field, download the correct file format, and use the materials and instructions recommended for that design.