
























Understanding Machine Embroidery HoopsHoop
A beginner-friendly guide to hoop types, sizes, sewing fields, and choosing the right hoop
Welcome
When you first start machine embroidery, the hoop seems pretty straightforward. You put the fabric in it, attach it to the machine, and start stitching. Then you hear things like 4" x 4" hoop, 5" x 7" hoop, magnetic hoop, sewing field, and floating the fabric. Suddenly, there is a lot more to hoops than you expected. The good news is that you do not need every type of hoop to start embroidering. Your machine probably came with at least one standard hoop, and you can do a lot with it. The important part is understanding what your hoop actually does, how hoop sizes work, and when a different type of hoop can make a project easier.
What Does an Embroidery Hoop Actually Do?
Your embroidery hoop holds your fabric and stabilizer in position while the machine stitches. That sounds simple, but it is doing a very important job. While your embroidery machine is running, the hoop moves back and forth underneath the needle. The machine relies on that movement to place every stitch exactly where it belongs. If the fabric moves around inside the hoop, your embroidery can shift with it.
- outlines that do not line up
- gaps between sections
- puckering
- crooked designs
- distorted stitching
The goal is to keep everything smooth, secure, and stable while the machine is stitching. You want the fabric held firmly, but you usually do not want to stretch it out of shape just to get it tight.
Understanding Hoop Size
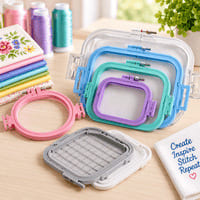
You will often hear embroiderers talk about hoop sizes such as:
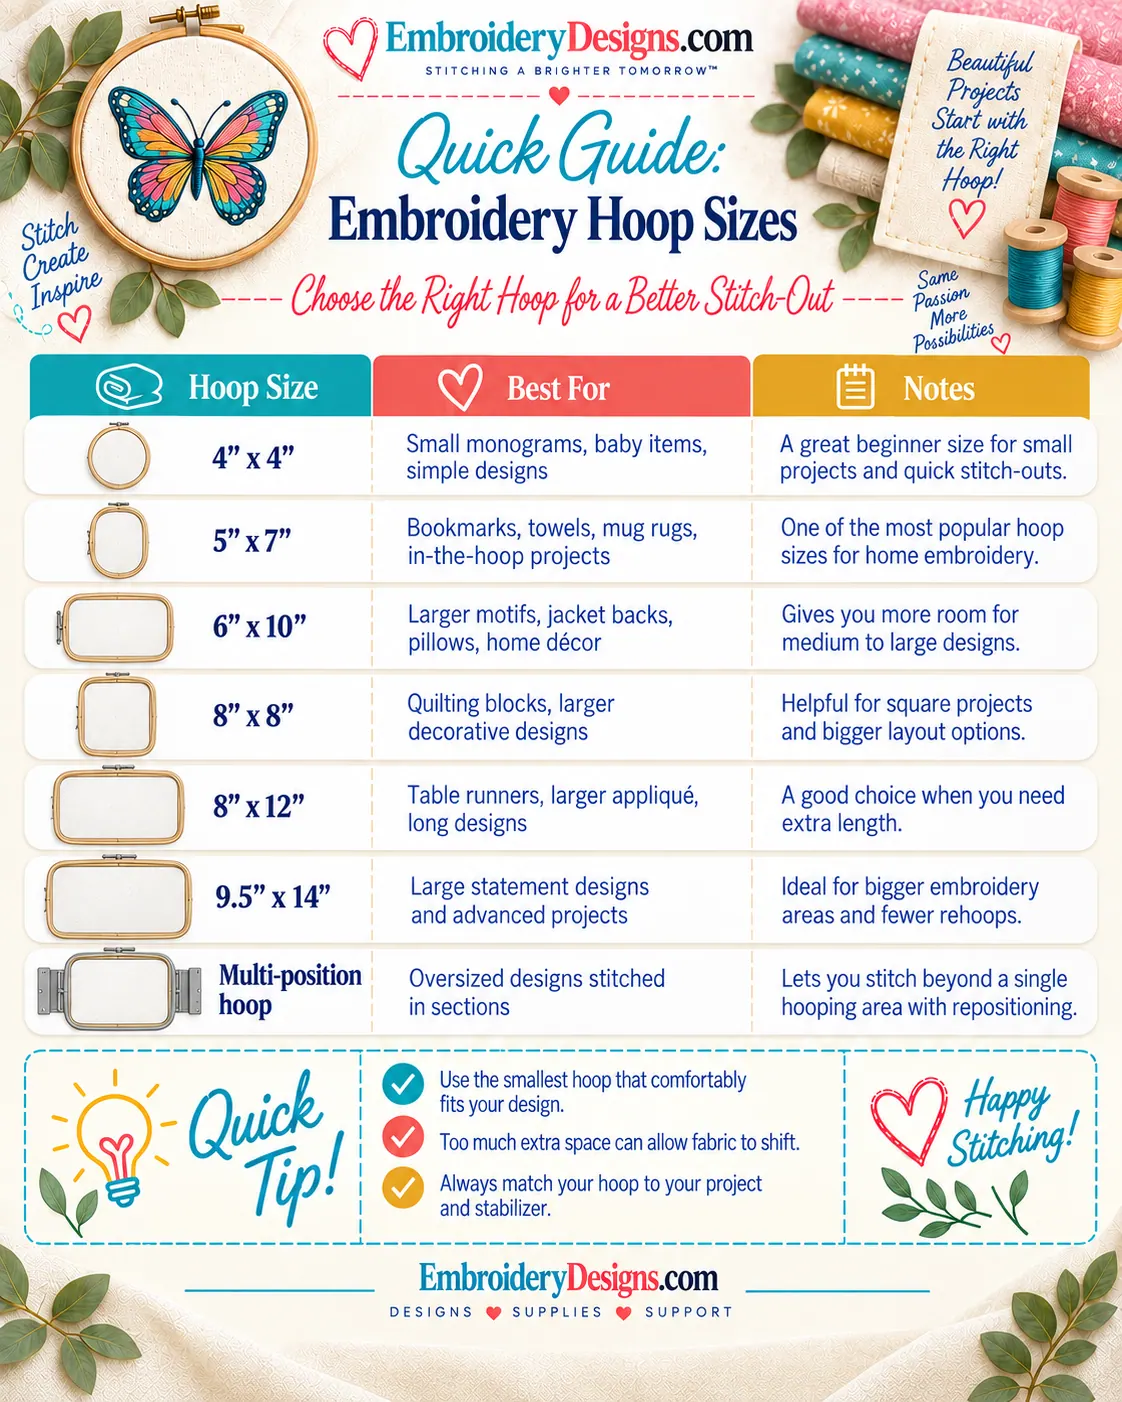
- 4" x 4"
- 5" x 7"
- 6" x 10"
- 8" x 12"
These names give you a general idea of the embroidery area that hoop is designed for. But here is the part that can confuse beginners: a 4" x 4" hoop does not necessarily mean your machine can stitch a design that measures exactly 4 inches by 4 inches. The actual sewing area is often slightly smaller, and it varies by machine and hoop. That is why it is important to know your machine's maximum embroidery field, sometimes called its sewing field.
Hoop Size and Sewing Field Are Different
This is one of the most important hoop concepts to understand. Your hoop size describes the hoop. Your sewing field tells you how large an area your machine can actually embroider. For example, a hoop may be called a 4" x 4" hoop even though the usable embroidery area is a little smaller than that. So when you are choosing a design, do not rely only on the words 'fits a 4 x 4 hoop.' Check the actual width and height of the design too. If the design is too large for the sewing field your machine allows, the machine may not let you load or stitch it.
A Bigger Hoop Doesn't Give Your Machine a Bigger Embroidery Area
This surprises a lot of beginners. You cannot usually turn a machine with a 4" x 4" maximum embroidery field into a 5" x 7" machine just by purchasing a larger hoop. Your machine itself determines how far it can move the hoop while stitching. So before buying an additional hoop, always check that:
- your machine supports it
- the hoop is compatible with your exact machine model
- your machine can stitch within that hoop's intended embroidery area A hoop that physically attaches to a machine is not automatically a usable hoop for every design size.
Standard Embroidery Hoops
The hoop that came with your machine is probably a standard embroidery hoop. These usually have two pieces: an outer hoop and an inner hoop. Your fabric and stabilizer go between them. You place the stabilizer and fabric over the outer hoop, press the inner hoop into place, and tighten the screw until everything is held securely. Standard hoops are great for beginners because they are dependable and work for a huge variety of embroidery projects.
- cotton fabric
- towels
- shirts
- home decor projects
- applique
- quilting
- many in-the-hoop projects
If you are just getting started, learn to use your standard hoop well before worrying about buying several specialty hoops.
Magnetic Embroidery Hoops
Magnetic hoops are very popular because they can make hooping certain projects much easier.
Instead of pressing one hoop frame inside another, magnets hold the project against the hoop frame. They are especially handy for bulky or difficult-to-hoop items.
- jackets
- quilts
- thick towels
- bags
- layered projects
- items you do not want to clamp tightly between two hoop pieces
Another nice thing about a magnetic hoop is that repositioning fabric can be easier. You can remove or adjust the magnets instead of completely unhooping the project. But magnetic hoops are not automatically better for every project. A standard hoop may hold some lightweight fabrics perfectly well and may be all you need. Think of magnetic hoops as a helpful option rather than something every beginner has to buy immediately.
Continuous or Border Hoops
You may also come across continuous hoops, sometimes called border hoops. These are designed to make repeating embroidery easier. Instead of completely removing and rehooping the project each time, the hoop opens or releases so the fabric can be repositioned for the next section. They are especially helpful when you are stitching:
- borders
- repeated motifs
- decorative edges
- long rows of embroidery
For example, if you wanted to embroider a repeating design all the way across a table runner, a continuous hoop could make the repositioning much easier. Again, this is more of a specialty tool. You do not need one to learn basic machine embroidery.
What About Hat Hoops?
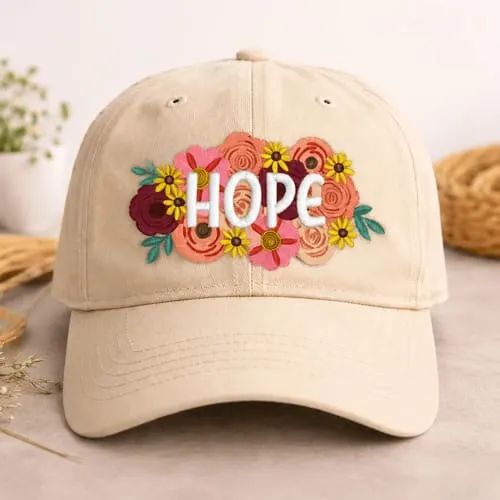
Hat and cap embroidery comes with its own challenges because a hat is not flat. Some embroidery machines, especially multi-needle machines, can use special cap frames or cap hoop systems that hold the hat while it stitches. Home embroidery machines may also have accessories designed to help with caps or other curved items, depending on the machine. The important thing is to check what your specific machine supports. Do not assume that any hat hoop you see online will work with your machine. Hat embroidery can also be a little trickier than embroidering a flat piece of cotton, so it is perfectly fine to save this type of project until you are comfortable with basic hooping.
Do You Always Have to Hoop the Fabric?
No. Sometimes embroiderers float the fabric instead. Floating means you hoop the stabilizer and then place the fabric or item on top of the hooped stabilizer rather than putting both layers inside the hoop. The fabric is then secured so it stays in the correct position during stitching. Floating is useful when something is difficult or impossible to hoop normally.
- very small items
- bulky towels
- bags
- certain in-the-hoop materials
- items with seams or thick edges
- fabric that could be damaged by hoop marks
Temporary embroidery adhesive, pins placed safely outside the stitching area, or other embroidery-safe methods may be used to help secure the project depending on the technique. Floating is a very useful skill, but when you are first learning, practicing traditional hooping will help you understand what properly stabilized fabric should feel like.
What Are Hoop Marks?
Sometimes when you remove your project from the hoop, you will see a temporary outline where the hoop was pressing against the fabric. These are often called hoop marks or hoop burn. Some fabrics are more sensitive to hoop pressure than others. You may notice it more on:
- velvet
- fleece
- towels
- fabrics with a nap
- delicate materials
- some knits
This does not necessarily mean you did something wrong. If you are worried about marking the fabric, floating the item or using a magnetic hoop may be a better option. It is always a good idea to test an unfamiliar fabric before hooping an important project.
Which Hoop Size Should You Use?
If your design will fit into more than one hoop, you may wonder whether you should automatically choose the largest one. Usually, you do not need to. A good beginner rule is: use a hoop that comfortably fits the design without being much larger than necessary.
For example, if you have a small 3-inch design, you probably do not need to put it in your largest hoop. Using an appropriately sized hoop can:
- make the project easier to handle
- use less stabilizer
- make positioning easier
- help keep the area around the design supported
You do not need to squeeze the design into the smallest possible hoop either. Give yourself enough room to position the design comfortably.
How Tight Should Fabric Be in the Hoop?
You will sometimes hear people say the fabric should be 'drum tight.' That can make beginners think they need to pull the fabric as hard as possible. You do not. You want your hooped project to be smooth and secure without stretching the fabric out of shape. Once the fabric is in the hoop, avoid pulling hard on the edges to make it tighter. If you stretch the fabric while it is hooped, it may relax when you remove it. That can contribute to puckering around the finished embroidery. Instead, try to get the fabric and stabilizer positioned smoothly when you first hoop them. With practice, you will get a feel for what secure hooping looks like.
Make Sure Your Hoop Is Attached Correctly
Before you start stitching, make sure the hoop is completely attached to the embroidery arm. It should sit in the position your machine expects and lock into place according to your machine's instructions. Also take a quick look around the machine before pressing Start. Make sure:
- the fabric is not caught underneath the hoop
- sleeves are not folded into the embroidery area
- excess fabric cannot slide under the needle
- nothing is blocking the hoop's movement
This is especially important when embroidering shirts, bags, or other finished items. It is surprisingly easy for the back of a shirt to sneak underneath the hoop.
Be Careful With Hoop Compatibility
Embroidery hoops are not universal. Two hoops may look almost identical but attach differently or have different sewing areas. Before buying an additional hoop, check:
- machine brand
- exact machine model
- supported hoop sizes
- maximum embroidery field
- whether the hoop is manufacturer-approved or designed to be compatible with that machine
Your machine manual is one of the best places to start.
Which Hoops Does a Beginner Really Need?
Probably fewer than you think. Start with the hoops that came with your machine. Learn how to:
- hoop stabilizer
- hoop fabric smoothly
- center a project
- attach the hoop correctly
- remove the project without damaging it
Once you have done a few projects, you will start noticing where another hoop could actually help you. Maybe you are constantly embroidering thick towels and would love a magnetic hoop. Maybe you want to stitch long borders. Maybe you are working on quilts and want a larger embroidery area. That is the time to start adding hoops. Buy them because they solve a problem you are actually having, not because you think you are supposed to own every size.
The Easy Beginner Rule
When choosing a hoop, remember these four things:
- Your machine determines your maximum embroidery area. A larger hoop cannot automatically make your machine stitch larger designs.
- Check the actual design dimensions. Do not rely only on a label like 4 x 4 or 5 x 7.
- Use a hoop that is appropriate for the size of your design. Bigger is not always better.
- Check compatibility before buying additional hoops. Hoops are made for specific machines and embroidery systems.
Once you understand those four things, hoops become much less confusing. And after you have hooped a few projects, you will find that what once felt like one of the trickiest parts of machine embroidery becomes just another normal step before you press Start.
Browse our full selection of embroidery hoops, including magnetic and hat hoop options, to find the right fit for your machine and projects.
No. Hoop size names the hoop; the sewing field is the actual area your machine can embroider, which is often slightly smaller.
Not by itself. Your machine’s maximum embroidery field determines how large a design you can stitch.
Floating means you hoop the stabilizer and place the fabric or item on top instead of clamping both layers inside the hoop.