























The Best Machine Embroidery Supplies for BeginnersSupplies
A simple, practical starter guide for your first machine embroidery projects
Welcome
The Best Machine Embroidery Supplies for Beginners You have your embroidery machine. You're ready to make something. Then you start looking at supplies. Stabilizer comes in rolls, sheets, different weights, and several types. There are shelves full of thread colors, different needles, tiny scissors, sprays, bobbins, marking tools, and all kinds of gadgets that suddenly look like things you absolutely must have. It can get overwhelming pretty quickly. The good news is that you really do not need a huge collection of supplies to start machine embroidery. A few basic supplies will get you through a lot of beginner projects. Once you start stitching, you'll figure out what you actually use and can add to your collection from there. Here's what I would start with.
1. Embroidery Thread
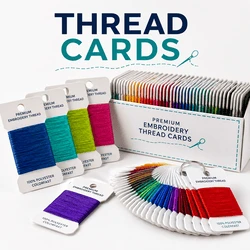
This is the fun one. Machine embroidery thread is what creates the design you see on the front of your project. For most everyday machine embroidery, 40-weight embroidery thread is a common choice. You do not need every color available when you're starting out. Choose a small selection of colors you know you'll use. A few basics might include:
- black
- white
- red
- blue
- green
- yellow
- a few colors you simply love
You can build your thread collection as you go.
If you download a design that calls for twelve colors, you also do not have to match every suggested shade exactly. Color charts are a helpful guide, but changing the colors is one of the best parts of machine embroidery. Want a pink flower instead of a purple one? Go for it. Just make sure you are using thread made for machine embroidery rather than regular sewing thread for the main design.
2. Bobbin Thread
Your embroidery machine uses thread on the top and thread underneath the fabric. The thread underneath is your bobbin thread. For many embroidery projects, the bobbin thread does not need to match every color on the front of the design. A lightweight embroidery bobbin thread is commonly used instead. White works well for many projects, and black can be useful when you are working with dark fabrics. Some machines use prewound bobbins, while others may require you to wind your own. Check your machine manual because bobbin sizes and requirements can vary. One beginner tip: keep extra bobbins ready. Running out of bobbin thread halfway through a design is something every embroiderer experiences eventually. Having a few extras nearby makes it much easier.
3. Embroidery Needles
You do not need a dozen different needle types to begin. For many everyday projects, a 75/11 embroidery needle is a great starting point. Embroidery needles are made to handle embroidery thread passing through them repeatedly while the machine is stitching. Keep an extra package near your machine. Needles get dull, and sometimes a needle that looks perfectly fine is the reason you suddenly start seeing thread breaks or skipped stitches. If your machine starts behaving strangely, replacing the needle is one of the first things worth trying. As you start embroidering stretchy fabrics, delicate materials, or specialty threads, you can learn about other needle types. For now, keep it easy.

4. Stabilizer
If there is one supply beginners tend to underestimate, it is stabilizer. Stabilizer supports the fabric while the embroidery machine is stitching.
Without the right support, fabric can stretch, wrinkle, shift, or pucker around the design. There are several kinds of stabilizer, but you do not need all of them on day one. I would start with these two:
Tear-Away Stabilizer
Tear-away stabilizer is designed to tear away from the back of the embroidery after the design is finished. It is useful for many stable, woven fabrics. You might use it for projects such as:
- quilting cotton
- napkins
- some home decor fabrics
- other fabrics that do not stretch much
Cut-Away Stabilizer Cut-away stabilizer stays behind the embroidery after you finish stitching. You trim the extra stabilizer from around the design rather than tearing it away. This continued support makes it especially useful for fabrics that stretch or move. Think:
- T-shirts
- sweatshirts
- knit fabrics
- many garments
If you plan to embroider clothing, having cut-away stabilizer in your beginner supplies is a very good idea.
What About Wash-Away Stabilizer?
You will probably hear about wash-away, or water-soluble, stabilizer too. It dissolves when exposed to water and is especially useful for projects where you do not want stabilizer left behind. For example, freestanding lace (FSL) designs are commonly stitched directly onto water-soluble stabilizer. It is worth having once you want to try those projects, but you do not necessarily need it for your very first basic embroidery project. Start with tear-away and cut-away. Add wash-away when you have a project that calls for it.
5. A Good Pair of Small Scissors or Thread Snips
You are going to trim a lot of thread. A small, sharp pair of scissors or embroidery snips makes this much easier. You will use them for things like:
- clipping loose threads
- trimming jump stitches
- cutting thread after color changes
- cleaning up the back of a project
You do not need anything fancy. What matters most is that they are small, comfortable, and sharp enough to cut thread cleanly. Keep them next to your embroidery machine. You will reach for them constantly.
6. Fabric Scissors
Your tiny embroidery scissors are wonderful for thread. They are not what you want to use when you need to cut a piece of fabric. Keep a separate pair of good fabric scissors for cutting:
- fabric
- stabilizer
- felt
- applique pieces
- project materials
And try not to use your fabric scissors for paper. Paper can dull them much faster than fabric.
7. Some Practice Fabric
Before you embroider your favorite shirt, bag, or expensive towel, practice. You do not need special practice fabric. Scraps of quilting cotton are wonderful when you're learning because they are stable and easy to work with. Practice fabric gives you a chance to learn how to:
- hoop your fabric
- attach stabilizer
- thread your machine
- load a design
- change thread colors
- watch how the design stitches
- remove the project from the hoop
And if your first design isn't perfect? That's exactly what the practice fabric was for.
A good place to start is your own closet! Check out those clothes you don’t wear anymore and practice aways on them!
8. Temporary Embroidery Adhesive Spray
This is one of those supplies that I would call very useful, but not required for every project. Temporary or repositionable adhesive spray can help hold fabric, stabilizer, batting, or applique pieces in position while you're working. It becomes especially handy when you are doing projects where the fabric is placed on top of the stabilizer rather than hooped together. You'll see it used often in:
- in-the-hoop projects
- applique
- quilting projects
- projects using batting
- items that are difficult to hoop
If you buy some, make sure it is intended for temporary textile or embroidery use and follow the manufacturer's instructions. A light amount is usually all you need.
9. A Fabric Marking Tool
A washable, removable, or otherwise fabric-appropriate marking tool can be very helpful when you're trying to place a design exactly where you want it. You might use one to mark:
- the center of a towel
- the center of a shirt
- placement lines
- horizontal and vertical guide lines
You do not need one for every project, but it can make design placement much less stressful. Always make sure the marking method you choose is appropriate for your fabric and test it first when you are unsure.
10. Designs That Fit Your Machine
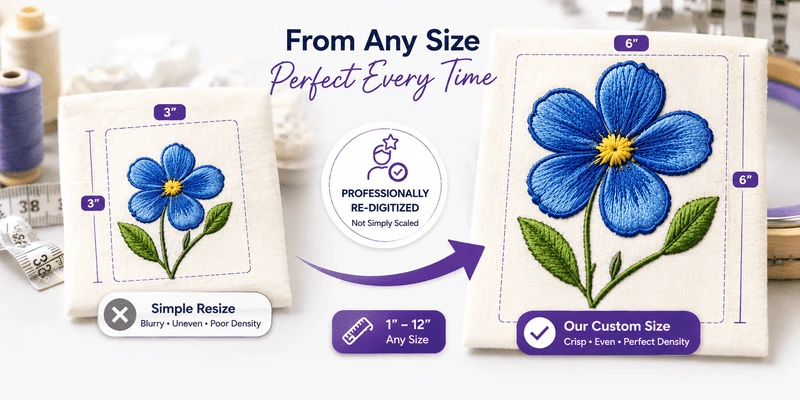
This may sound obvious, but it is an important beginner supply. You need embroidery designs in a file format your machine can read and in a size that fits inside your embroidery hoop. For example, one machine may use PES files while another uses JEF, DST, EXP, or another format. Your machine manual should tell you which format you need. You also need to check the actual size of the embroidery design. If your machine has a 4" x 4" embroidery area, a design that measures 5" x 7" will not fit just because you can download the file. When you're choosing your first designs on EmbroideryDesigns.com, start with designs that comfortably fit your hoop and do not have an overwhelming number of color changes. Your first few projects are about getting comfortable with the process.
Make sure any design you download is available in the file format your machine reads — for example, PES for Brother and Baby Lock, or JEF for Janome. Our guide to embroidery file formats explains which format matches which machine, and our free file conversion tool can convert designs you already own.
What You Probably Don't Need Yet
This is worth talking about because embroidery supplies can become a hobby all by themselves. You may eventually want specialty needles, every type of stabilizer, specialty threads, applique scissors, placement tools, embroidery software, magnetic hoops, thread stands, and plenty of other accessories. Some of them are wonderful. But you do not need all of them before you stitch your first design. Start with the basics:
- embroidery thread
- bobbin thread
- 75/11embroidery needles
- tear-away stabilizer
- cut-away stabilizer
- small thread scissors or snips
- fabric scissors
- practice fabric
- a few beginner-friendly designs
Then add supplies when you have a project that actually needs them. That makes learning much less overwhelming - and keeps you from buying a drawer full of things before you know what they do.
A Simple Beginner Embroidery Supply Kit
Must Have Embroidery thread Start with a small group of useful colors. Bobbin thread and extra bobbins Having extras ready will save you a lot of interruptions. 75/11embroidery needles A dependable starting needle for many everyday projects. Tear-away stabilizer Useful for many stable woven fabrics. Cut-away stabilizer Especially useful if you want to embroider garments or stretchy fabrics. Small embroidery scissors or snips Keep these right beside your machine. Fabric scissors Use these for fabric, stabilizer, and project materials. Practice fabric Cotton scraps are perfect for your first stitch-outs. Then I would add these when you need them:
- temporary adhesive spray
- fabric marking tool
- water-soluble stabilizer
- specialty needles
- specialty embroidery threads
That's really enough to get started.
Don't Buy Everything at Once
Machine embroidery has a way of making us want all the supplies. Thread comes in gorgeous colors. There are tools for practically everything. And before you know it, you're looking at something online wondering, Do I need that too?
Maybe eventually. But when you are learning, fewer supplies can actually make things easier. Start with a basic project. Learn what the stabilizer does. Get comfortable threading your machine. Learn how your hoop works. Watch how the needle, thread, and fabric behave while a design stitches. Then try something new. Every project will teach you a little more about what you like to use. Pretty soon, you won't be buying supplies because someone told you that you need them. You'll be buying them because you'll know exactly what you want to make next.
What Should You Try First?
For your first project, choose something simple and forgiving. A piece of quilting cotton, a basic towel, or another stable fabric paired with a beginner-friendly embroidery design is a great place to start. EmbroideryDesigns.com also has beginner projects that can help you practice the skills you will use again and again - hooping, stabilizing, threading your machine, and working with embroidery designs. You do not need to master everything before you begin. Gather a few good supplies, choose a design you love, and stitch it. That's where the fun really starts.
With this kit in hand, a simple single-color design — like something from our redwork collection — is a great first project. It's light on stitch count and thread changes, so you can focus on learning to hoop, stabilize, and stitch out a clean design. Browse our full range of hoops, stabilizers, and needles to build out your kit.
Start with embroidery thread, bobbin thread, 75/11embroidery needles, tear-away and cut-away stabilizer, small snips, fabric scissors, practice fabric, and a few designs that fit your hoop.
No. Add spray, marking tools, wash-away stabilizer, and specialty needles when a project actually requires them.