Border OptionsHugging border, circle, square, or rectangle — with a 3mm satin stitch.
Backing OptionsAvailable with iron-on, sew-on, or velcro backing.
Fast ShippingShipped quickly from the USA.
Free Online Tools
Powerful embroidery utilities that save time and prevent costly mistakes.
Stitch AssistantRECOMMENDED
Get the exact stabilizer, machine settings, needle, and thread color sequence for every embroidery design you purchase — based on that design's stitch density, dimensions, and color count.
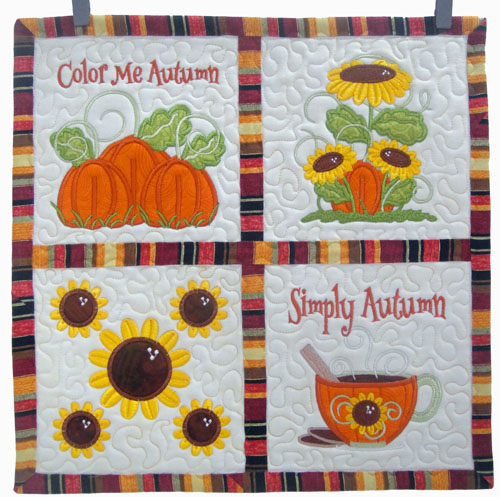
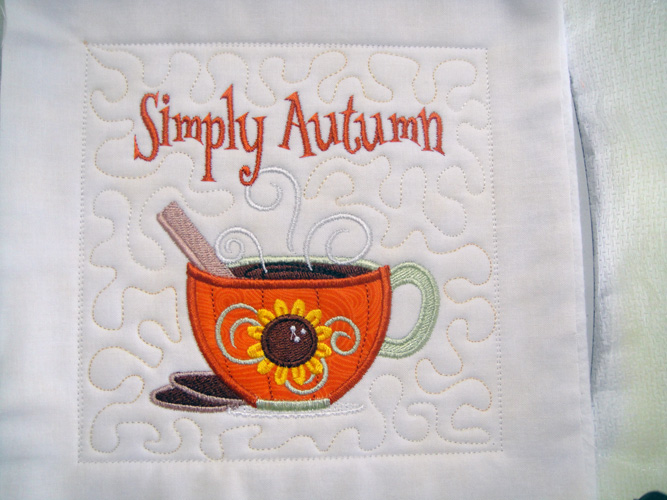
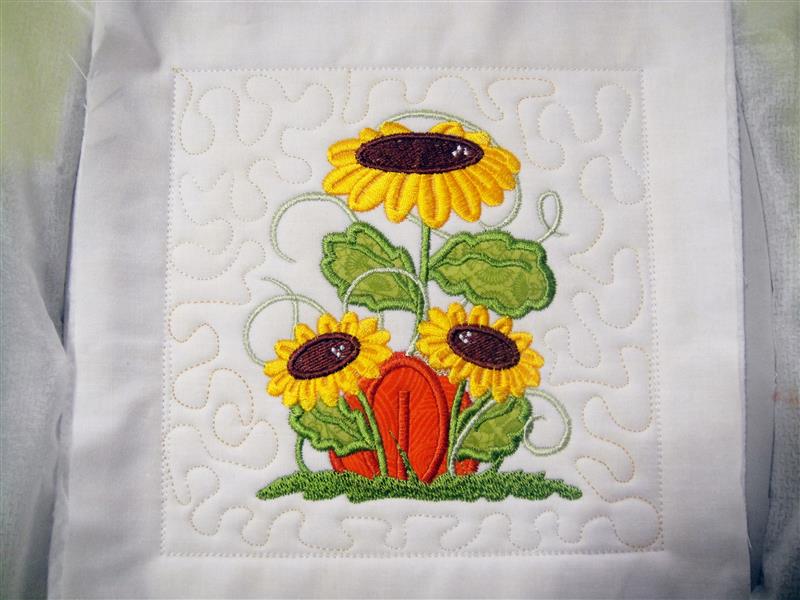
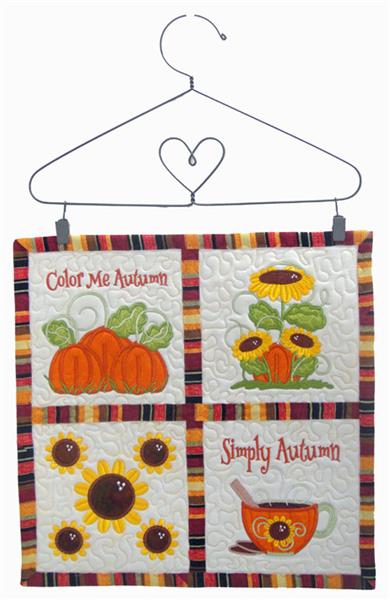
Celebrate the beauty of autumn with this delightful applique wall hanging, featuring vibrant pumpkins, sunflowers, and cozy motifs. Perfect for adding a seasonal touch to your home decor. Step-by-step instructions are included.
This project is the first project in which I cut the appliques with my new Brother Scan N Cut. As this is my first project with this cutter, I’m not an expert with it yet, but I will tell you what steps I took in this project to use it. You may use the outline files (all start with the letters OL) you receive with the design files to precut the applique pieces or use the traditional Stitch and Trim method to apply your appliques. See our article on the “Stitch and Trim Applique” if you need assistance with that. Use which ever method suits your situation.
Step 1:
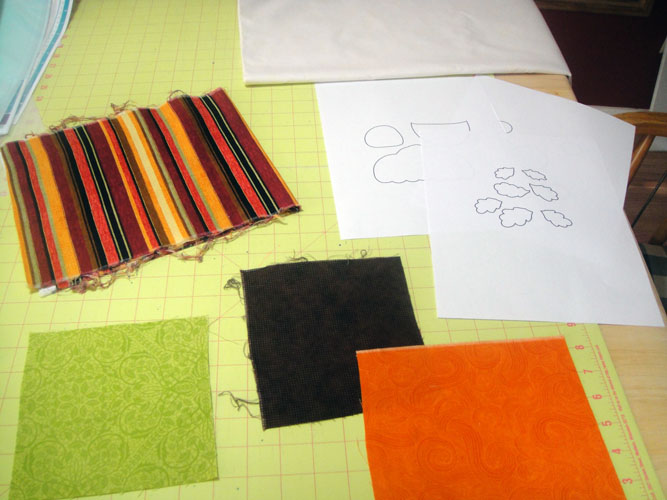
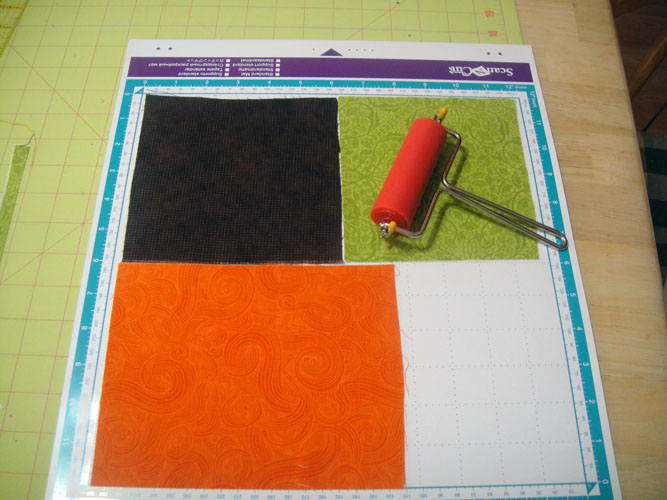
Prewash and press all fabrics with Best Press or Magic Sizing. Cut 8 8” squares of your batting and from the background fabric as well as your quilt back fabric. I used the same fabric for the background and quilt back. Press all applique pieces with Best Press or Magic Sizing twice. Since I was using the Scan n Cut, and could group the applique pieces, I only had to use a six inch rectangle of each applique fabric to cut all of the appliques for this project. If you are using the stitch and trim method you will need rectangles of fabric that are 2” larger than the various applique pieces.
(Click Image to Enlarge)
Step 2:
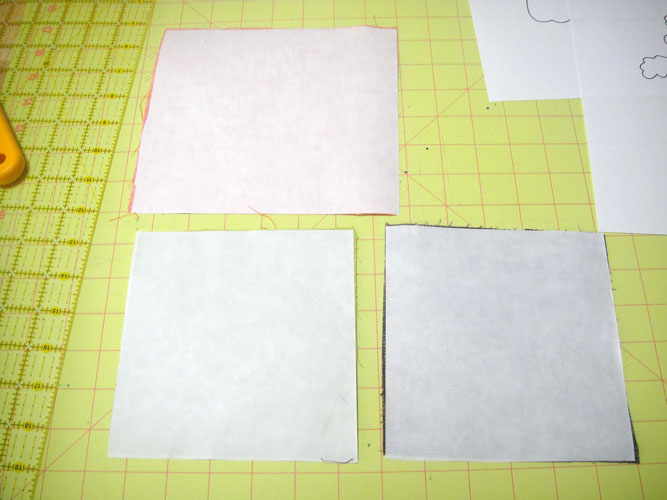
Apply applique backing to your applique fabrics. If you are going to precut your applique pieces with the Scan N Cut iron on Heat and Bond Lite or other applique backing that is not pressure sensitive to the wrong side of your applique fabric. The pressure sensitive backings do not do well in the Scan N Cut. If you are using the traditional Stitch N Trim method, iron Appli-Kay Wonder or other pressure sensitive backing to your fabric pieces following the manufacturer’s instructions.
(Click Image to Enlarge)
Step 3:
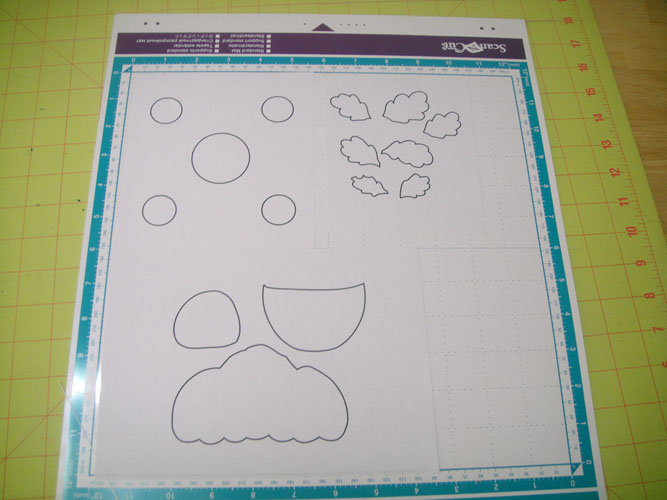
Scan N Cut instructions - In my embroidery software I was able to convert the OL files to vector files. I was then able to print out the graphic files, trim down the pages so all the pieces would fit onto one scanning sheet and scan them into the Scan N Cut. If you do not have software that will do that you could print out the OL files or stitch out the OL files onto a cut away backing and then scan those into your Scan N Cut. If you are using the Stitch and Trim method you will skip this step.
(Click Image to Enlarge)
Step 4:
Scan N Cut instructions-I removed the paper backing from the applique pieces and arranged them on the cutting mat.
(Click Image to Enlarge)
Step 5:
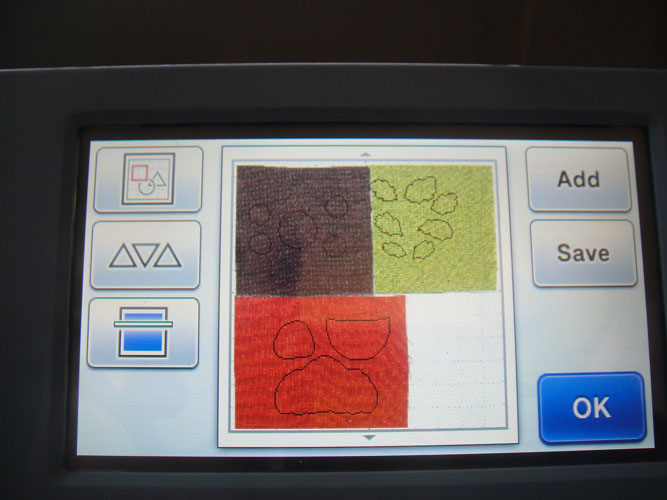
Scan N Cut instructions – I then scanned the fabrics into the Scan N Cut and rearranged the graphic scans so that each piece would be cut from the proper fabric following the manufacturer’s instructions.
(Click Image to Enlarge)
Step 6:
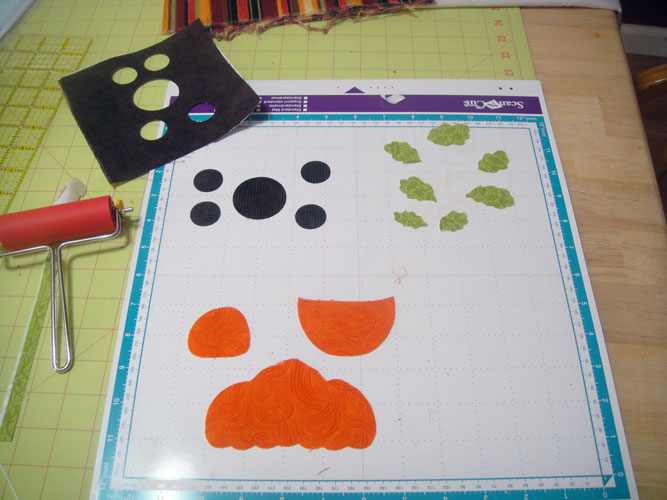
Scan N Cut instructions – Perform the cut functions on the Scan N Cut and remove the excess fabric from the cutting mat.
(Click Image to Enlarge)
Step 7:
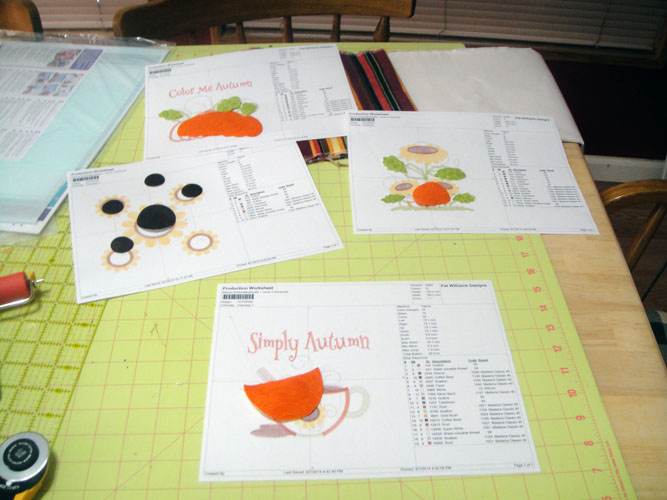
Scan N Cut instructions – Open the design files in your software and print out run sheets for each design. Separate the cut appliques onto their respective sheets so you are sure you are using the correct pieces as needed.
(Click Image to Enlarge)
Step 8:
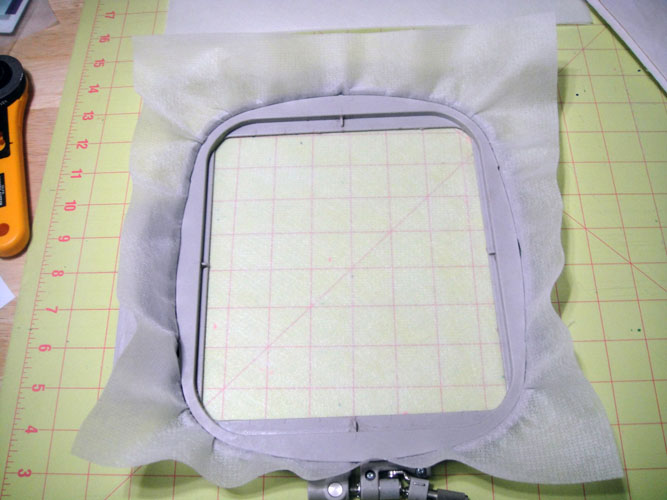
Load AUTWH01 in your embroidery machine. Hoop a piece of poly-mesh stabilizer tautly in your hoop.
(Click Image to Enlarge)
Step 9:
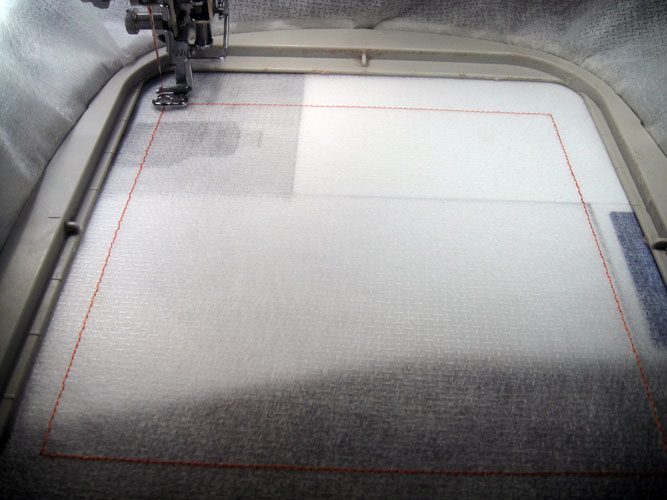
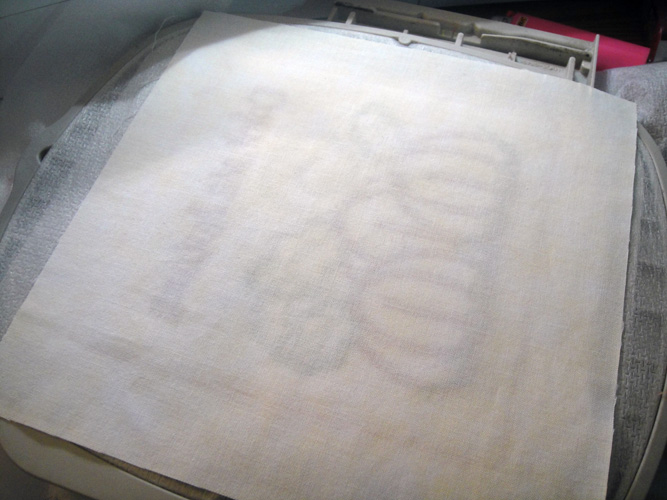
Run the 1st color stop which is an outline of your block. You may use a neutral thread for this color stop or Water Soluble Thread. I used a dark color just so that it would photograph better.
(Click Image to Enlarge)
Step 10:
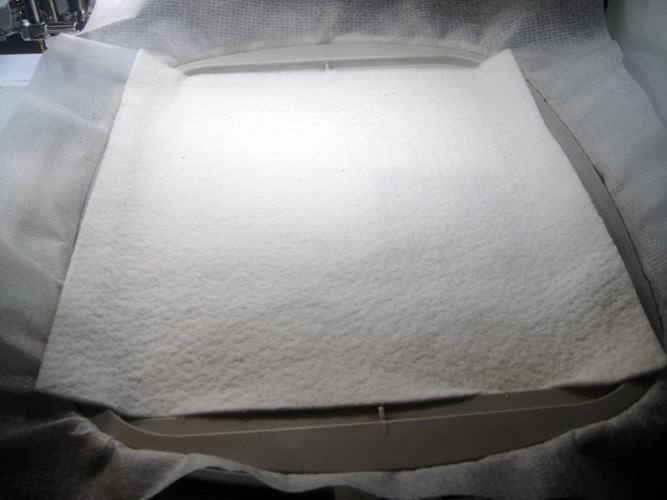
Spray an 8” piece of batting with spray adhesive and place over the outline just sewn. Make sure all edges of the batting exceed the outline by ½”.
(Click Image to Enlarge)
Step 11:
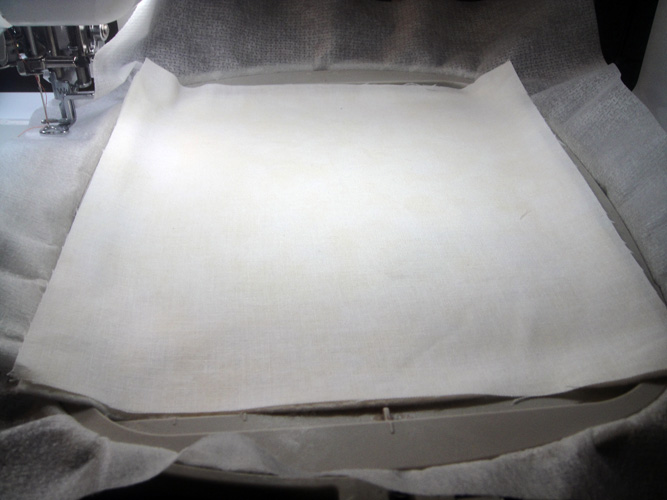
Spay an 8” square of your background fabric and place over the batting. Make sure all edges of the fabric exceed the outlines by ½”.
(Click Image to Enlarge)
Step 12:
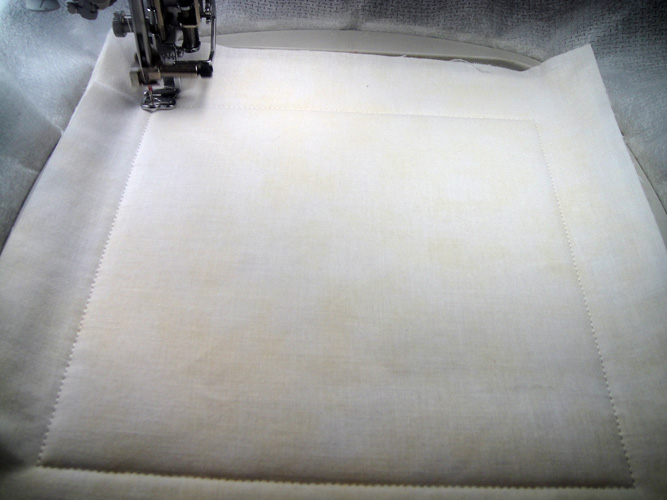
With Water Soluble Thread in the top of your machine stitch the second color stop which is the outline of the block. We use water soluble thread for this step as after the block is completed this stitching would be like to show. With water soluble thread it will disappear when the quilt is washed.
(Click Image to Enlarge)
Step 13:
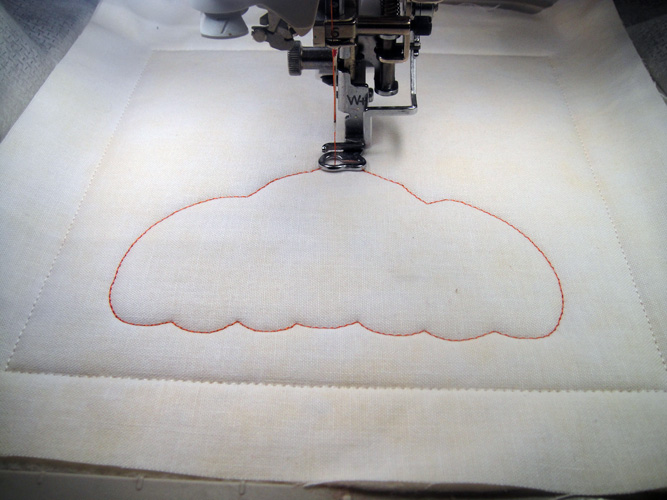
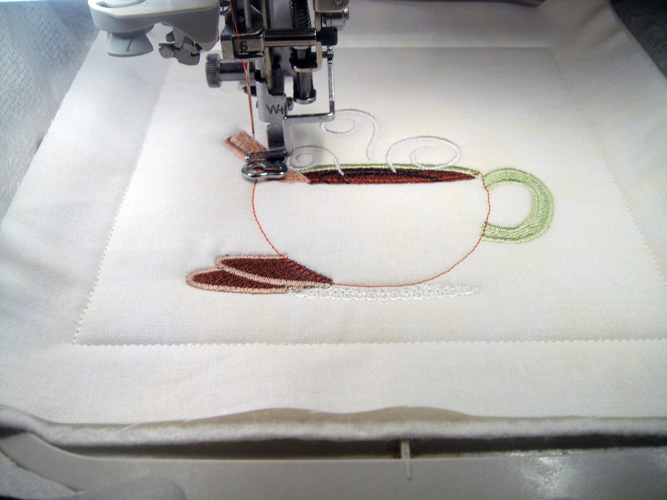
With a neutral thread or the rust thread run the next color stop which is an outline for the applique.
(Click Image to Enlarge)
Step 14:
Separate instructions depending on method.
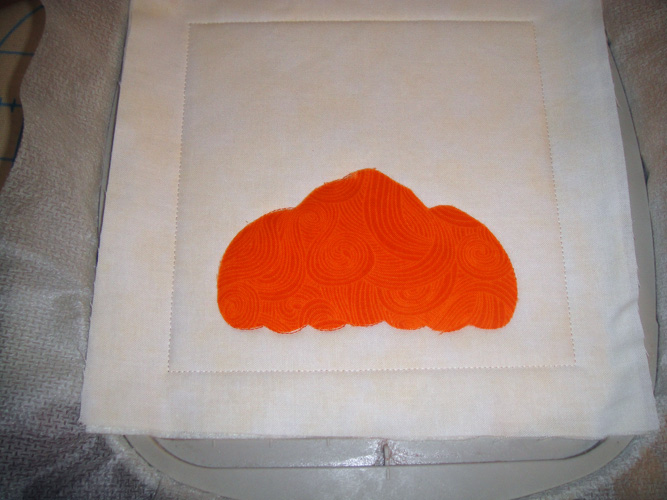
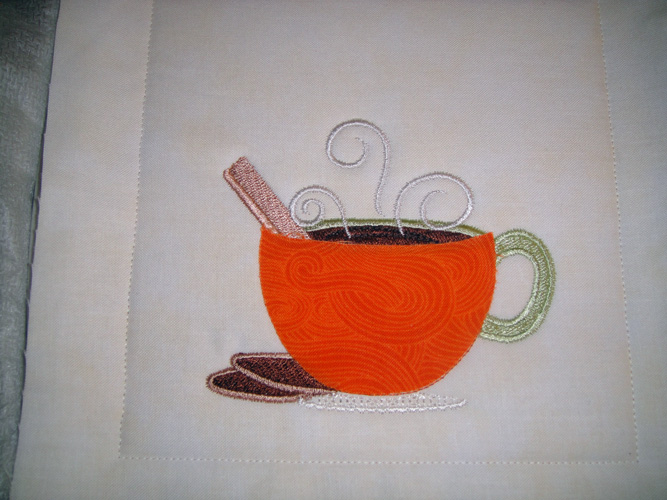
• Scan N Cut – place the precut applique over the outlines.
• Stitch N Trim – remove the paper backing from an applique fabric that is 1” larger that the applique in all directions and place over the outline.
(Click Image to Enlarge)
Step 15:
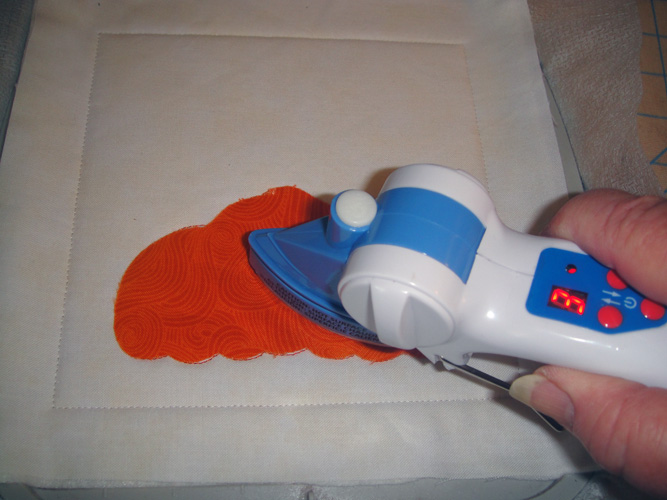
Scan N Cut instructions – remove the hoop from the machine. With an applique iron, press the applique to the fabric securely following the applique backing manufacturer’s instructions.
(Click Image to Enlarge)
Step 16:
(Click Image to Enlarge)
The next color stop, #4, is the tack down line for the applique. If you are using the Stitch n Trim method, run this color stop. You can use Rust or a neutral thread. Then trim the excess applique fabric with small sharp scissors right up to the tack down line. If you are using the Scan N Cut precut applique you can either run this color stop or forward your machine to the next color stop as the tack down line stitching will sew just off the edges of your fused applique piece and won’t really serve a purpose.
Step 17:
The next color stop, #5, is the outline for the leaves; this may be sewn in a neutral color.
(Click Image to Enlarge)
Step 18:
Follow steps 14, 15 and 16 to place the appliques for the leaves.
(Click Image to Enlarge)
Step 19:
Follow the color chart for color stops #7 through #12 to embroider the borders and detail in the design.
(Click Image to Enlarge)
Step 20:
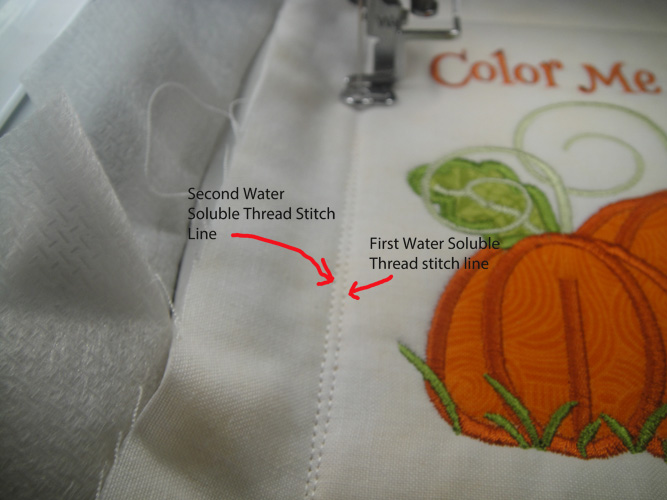
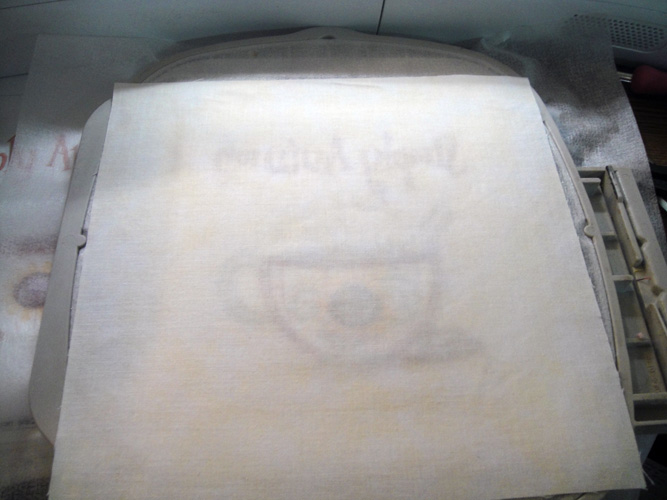
Sew through the color stop just before the next to last color stop which will be for Water Soluble Thread. Load Water Soluble Thread in the top of your machine. Remove the hoop from the machine. Do not un-hoop the embroidery. Turn the hoop over, spray a quilt back fabric 8” square with spray adhesive and place over the outline on the back of the block. Smooth into place. Return the hoop to the machine and run the Water Soluble Thread color stop to secure the back fabric to the block.
(Click Image to Enlarge)
Step 21:
This is a good example of why we use water soluble thread. You can see as the water soluble tack down line was sewn to secure the back of the quilt block that it does not line up perfectly with the initial tack down line. This is due to the pull that embroidering on the block through the thickness of the batting has had on the block. The pull has distorted the block. The new water soluble line sewn to secure the back fabric is the one that we will be measuring from when we trim and sew the blocks together. Then we wash the wall hanging after it is complete and that inside stitch line will be gone.
(Click Image to Enlarge)
Step 22:
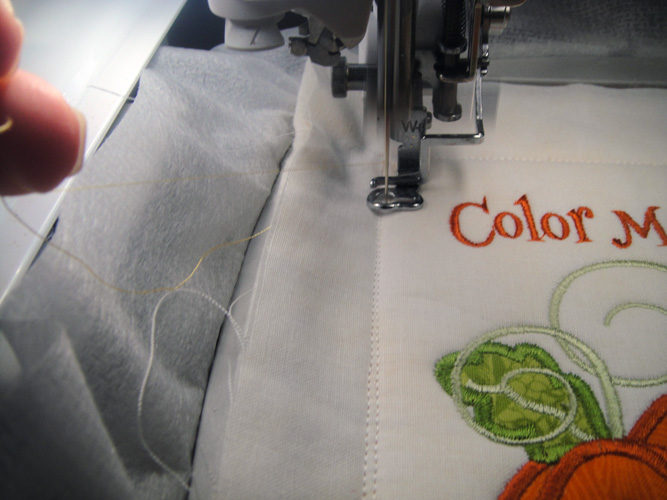
Load variegated yellow thread or the color you wish to use for the quilting of your block. To maintain the neatness of the back of the quilt block we want to bring up the bobbin thread to the top of the work. Do this by threading the top thread through the presser foot. Press the needle up button on your machine twice while slightly pulling on the top thread tail. The bobbin thread will come to the top. Use tweezers to pull the bobbin thread to the same length as the top thread. Sew a few stitches while holding on to the thread tails. Stop the machine and clip the thread tails. Continue sewing the quilting.
(Click Image to Enlarge)
Step 23:
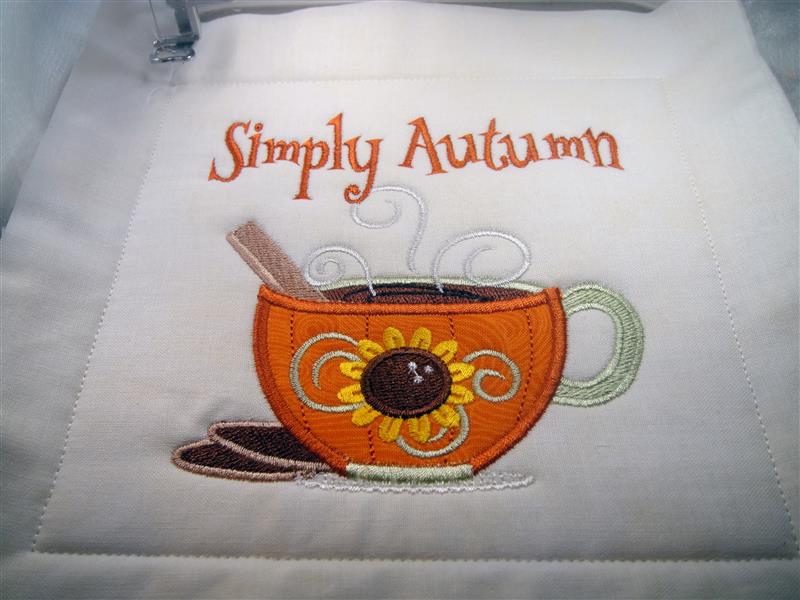
The first block is complete. Un-hoop and set aside for now.
(Click Image to Enlarge)
Step 24:
Hoop poly mesh stabilizer in your hoop. Load design AUTWH02 into your embroidery machine. Layer your batting and fabric in the hoop following steps 10 – 12.
Step 25:
Some embroidery needs to happen in this block before the applique is sewn down. Follow the color chart through color stop 9 which is the outline for the applique.
(Click Image to Enlarge)
Step 26:
Separate instructions depending on method.
• Scan N Cut – place the precut applique over the outlines.
• Stitch N Trim – remove the paper backing from an applique fabric that is 1” larger that the applique in all directions and place over the outline.
(Click Image to Enlarge)
Step 27:
Scan N Cut instructions – remove the hoop from the machine. With an applique iron, press the applique to the fabric securely following the applique backing manufacturer’s instructions.
Step 28:
The next color stop, #10, is the tack down line for the applique. If you are using the Stitch n Trim method, run this color stop. You can use Rust or a neutral thread. Then trim the excess applique fabric with small sharp scissors right up to the tack down line. If you are using the Scan N Cut precut applique you can either run this color stop or forward your machine to the next color stop as the tack down line stitching will sew just off the edges of your fused applique piece and won’t really serve a purpose.
Step 29:
Follow the color chart through color stop 16 to complete the graphic embroidery.
(Click Image to Enlarge)
Step 30:
Remove the hoop from the machine – do not un-hoop. Spray adhesive on a back fabric square and apply over the back of the embroidery as you did for the first block.
(Click Image to Enlarge)
Step 31:
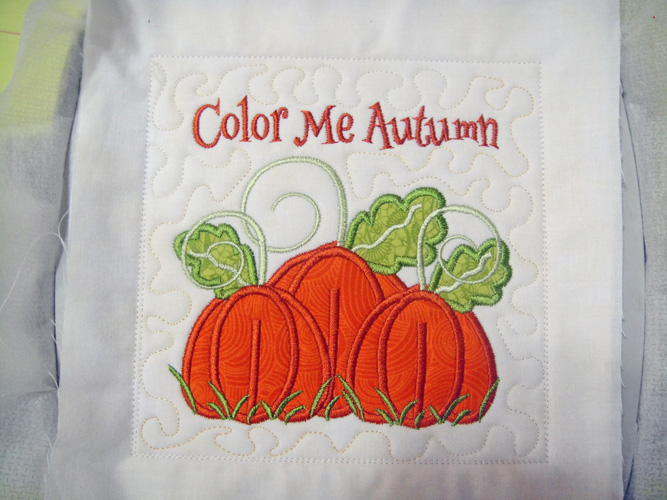
Tack down the back of the block with water soluble thread in color stop 17 and stitch the quilting with variegated thread in step 18. This block is now complete.
(Click Image to Enlarge)
Step 32:
Load AUTWH03 into your embroidery machine. Hoop poly mesh stabilizer in your embroidery hoop. Layer your batting and fabric in the hoop following steps 10-12.
Step 33:
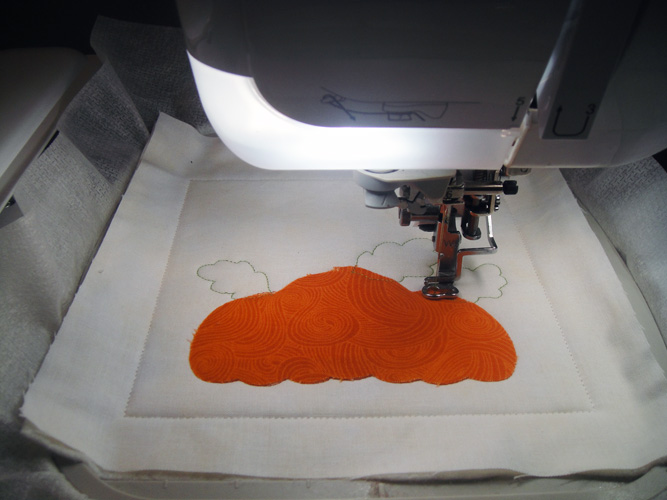
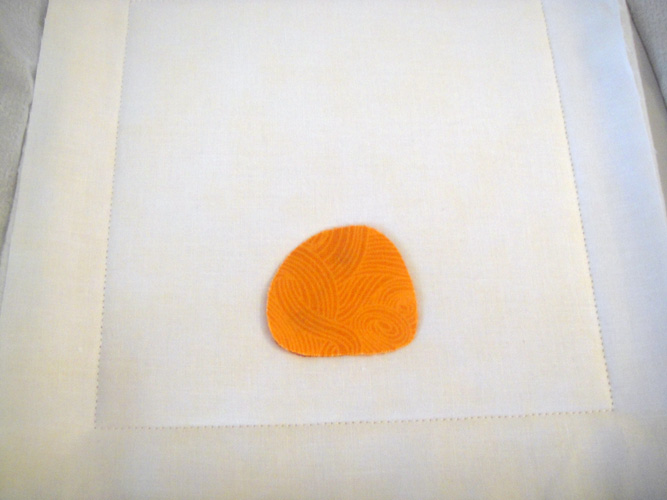
Color stop 3 is the outline for the pumpkin applique and color stop 4 is the tack down line. Follow the Step 26 and 27 to apply your applique.
(Click Image to Enlarge)
Step 34:
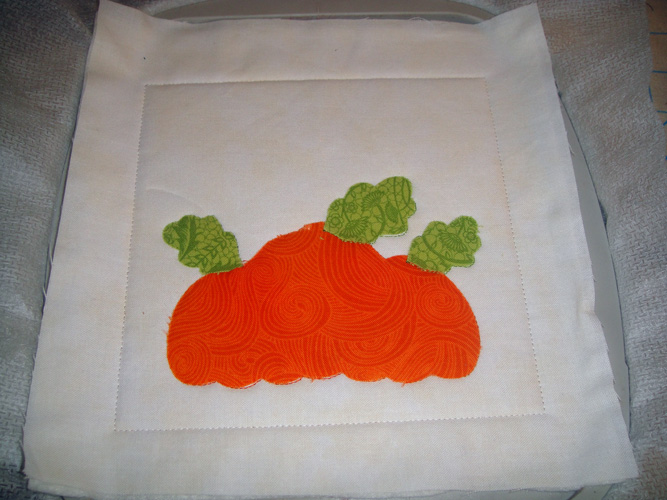
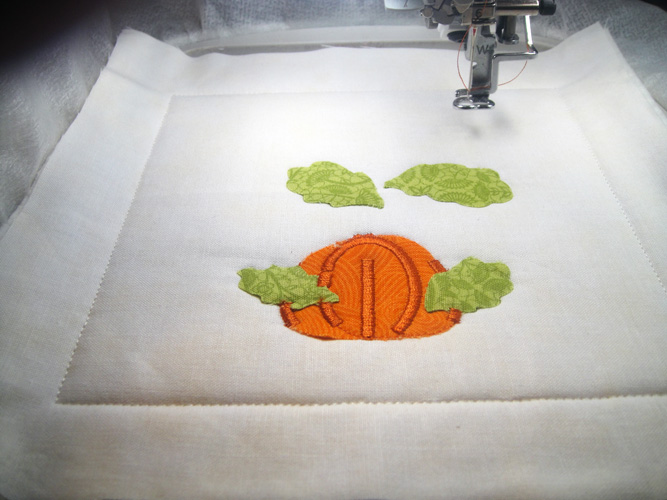
Color stop 5, Rust (1021), will stitch some detail on the pumpkin before color stop 6 will sew the outlines for the leaves. Apply the leaves using your applique method.
(Click Image to Enlarge)
Step 35:
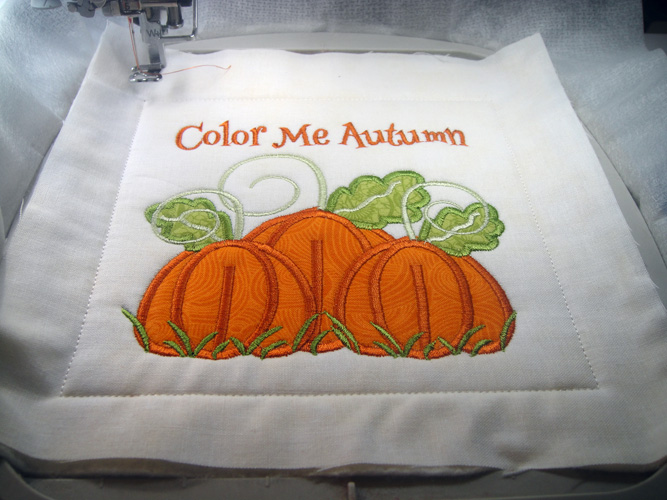
Follow the color chart through color stop 13 to complete the embroidery of the graphic.
(Click Image to Enlarge)
Step 36:
Remove the hoop from the machine. Spray and attach the fabric block back fabric and tack down with water soluble thread as in the previous blocks. Load the variegated yellow thread and sew the final color stop to quilt the block as before.
(Click Image to Enlarge)
Step 37:
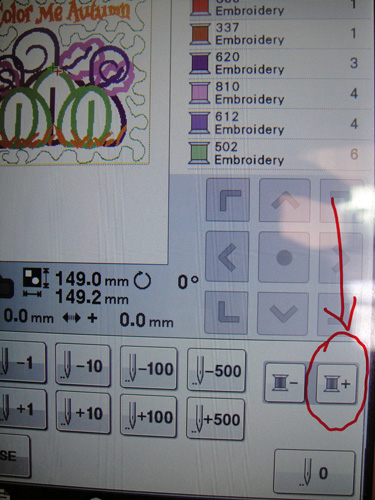
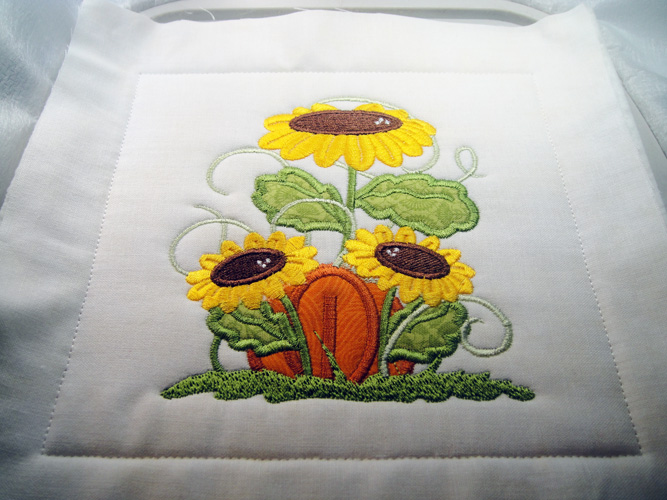
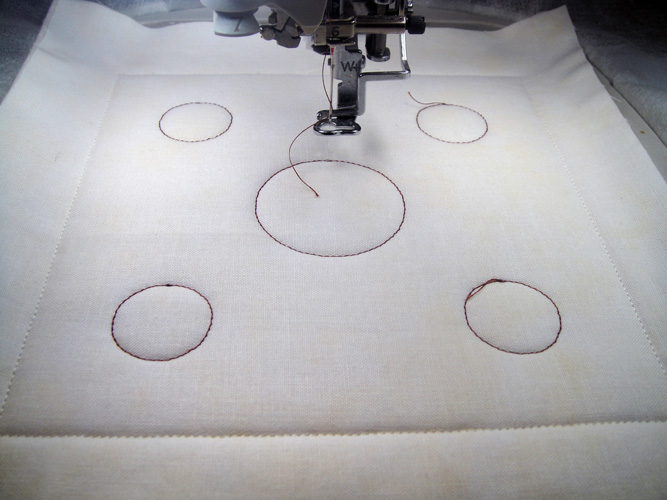
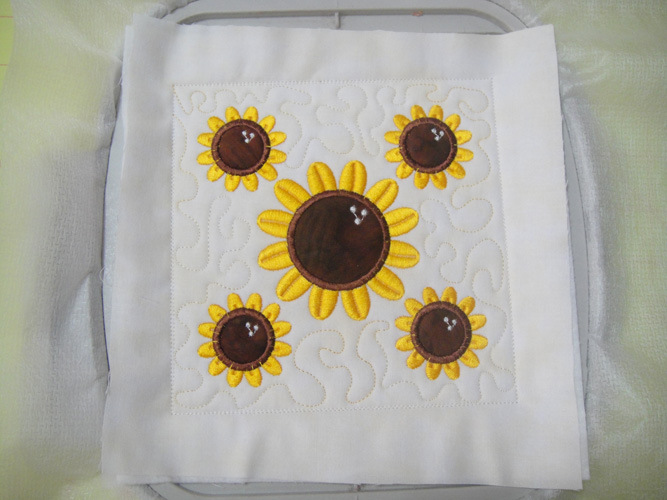
Load AUTWH04 into your embroidery machine. Hoop poly mesh stabilizer in your hoop and use color stops 1 and 2 to layer your batting and fabric as before. Run color stop #3 which is the outline for the flowers.
(Click Image to Enlarge)
Step 38:
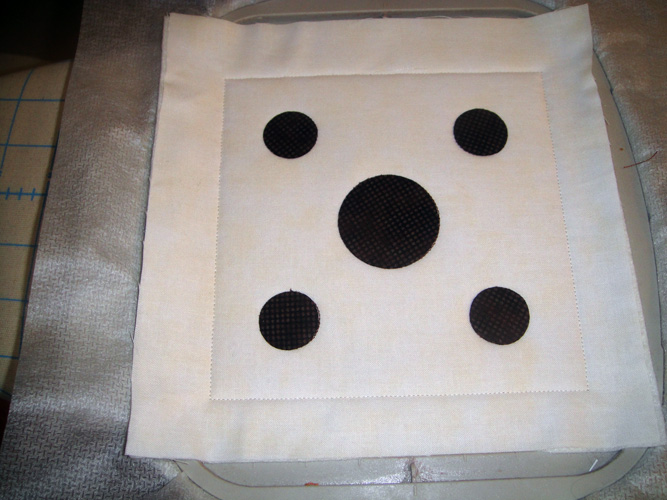
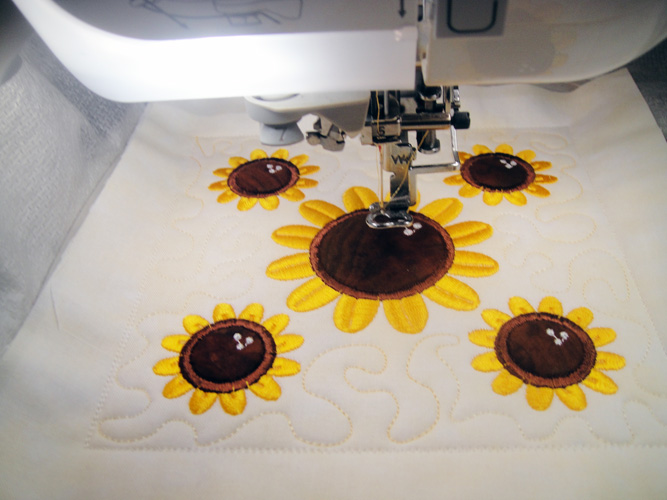
Apply the appliques using the applique method of your choice. As I knew the petals of all the sunflowers were going to push in against the center applique I went ahead and ran the tack down for the flower centers instead of by passing that step as I had done in the previous appliques. If using the Scan N Cut precut appliques, be sure to iron them down well so the petal stitches do not lift the applique.
(Click Image to Enlarge)
Step 39:
Follow the color chart through color stop 7 to complete the embroidery of the graphic.
(Click Image to Enlarge)
Step 40:
Remove the hoop from the machine. Spray and attach the fabric block back fabric and tack down with water soluble thread as in the previous blocks. Load the variegated yellow thread and sew the final color stop to quilt the block as before.
(Click Image to Enlarge)
Step 41:
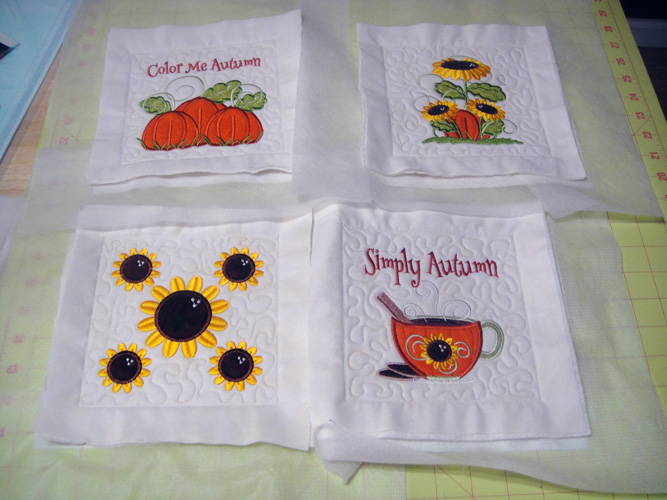
Lay out your blocks on a table in the sequence that you want them to be in your wall hanging.
(Click Image to Enlarge)
Step 42:
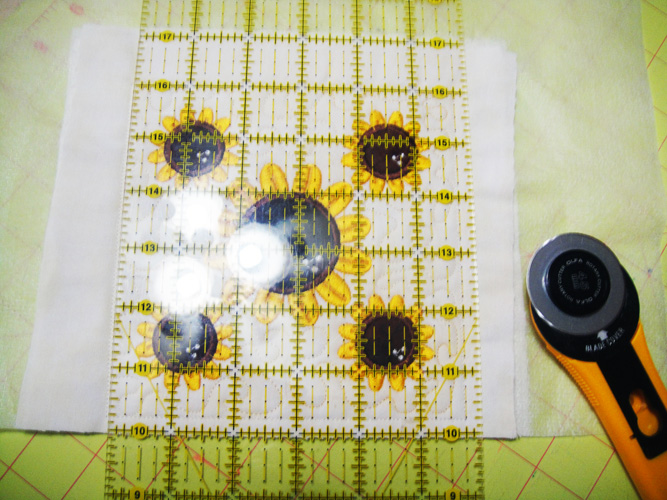
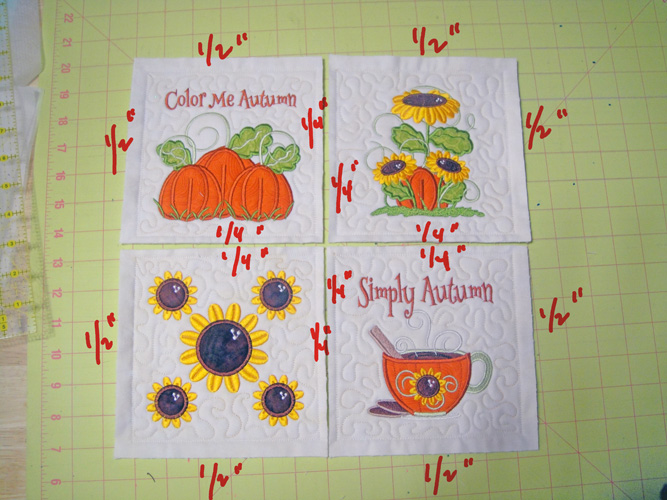
We now need to trim the edges of the blocks. We will trim the inside edges of the blocks to ¼” and the outside edges of the blocks to ½” by laying the ruler on the appropriate mark on the final water soluble thread stitching on the block and trimming with a rotary cutter.
(Click Image to Enlarge)
Step 43:
A further picture for you to see which edges are trimmed at ¼” and ½”.
(Click Image to Enlarge)
Step 44:
Cut your sashing and border strips as follows:
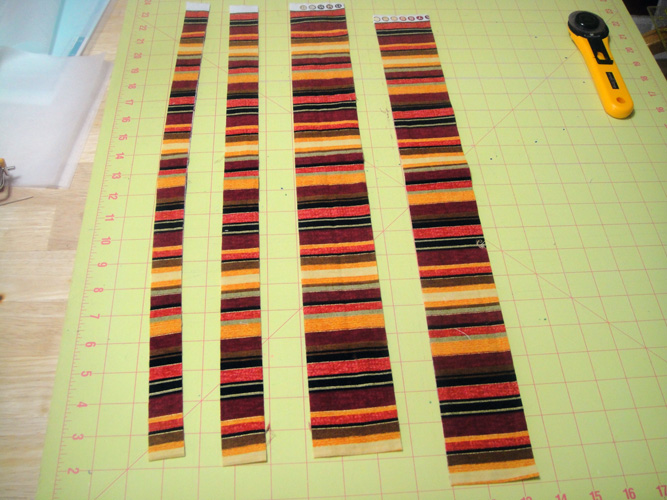
• 1 strip 1” wide for back sashing
• 1 strip 1.25” wide for front sashing
• 2 strips 2.5” wide for binding
(Click Image to Enlarge)
Step 45:
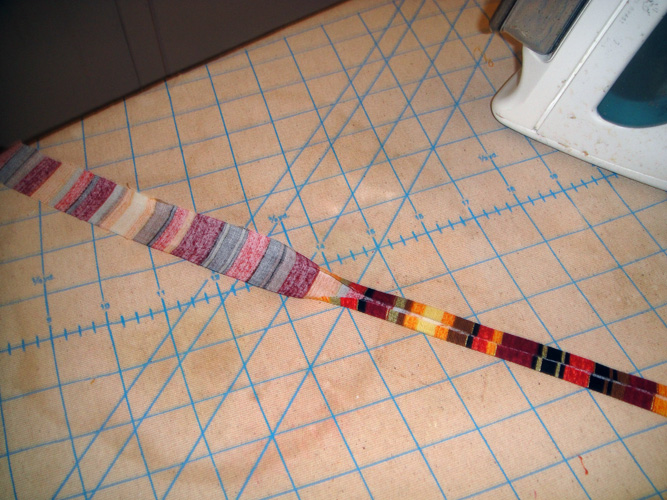
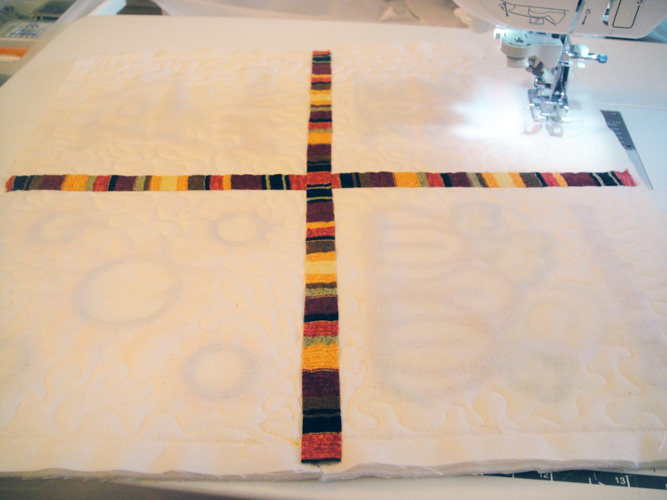
Fold the length wise edges in on the two sashing strips to meet in the center and press.
(Click Image to Enlarge)
Step 46:
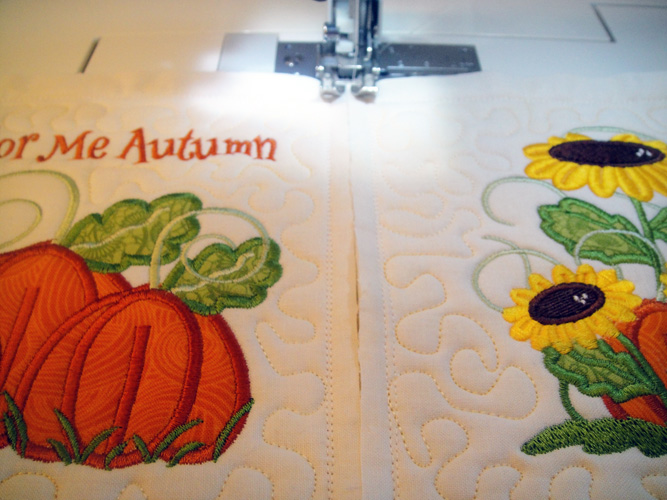
At your regular sewing machine with neutral regular sewing thread, and with a walking foot attached, butt the inside edges of the top two blocks together. Do not overlap just butt them up to each other. With a wide zigzag stitch the two blocks together.
(Click Image to Enlarge)
Step 47:
Join the bottom to blocks together at the center in the same manner.
(Click Image to Enlarge)
Step 48:
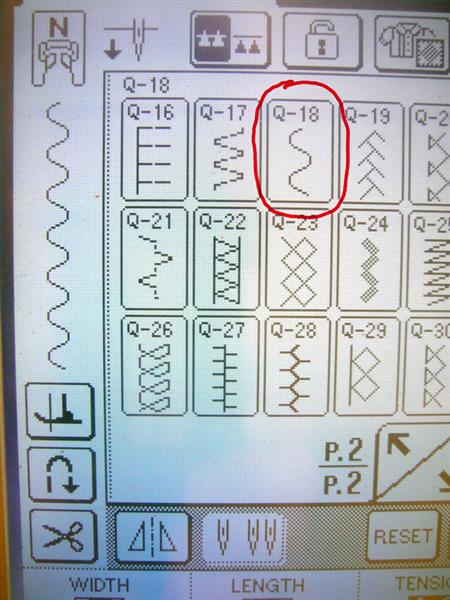
Load invisible thread into the top and bobbin of your sewing machine. Change the stitch type to a Serpentine stitch. If you do not have a serpentine stitch choose something that is not a straight stitch. It will help blend the stitching of the sashing into the quilt block.
(Click Image to Enlarge)
Step 49:
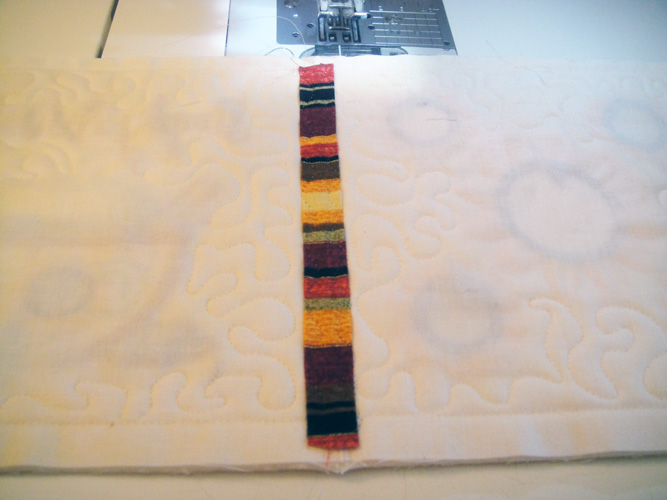
Take the smaller of the two sashing strips and lay over the zigzag stitching line on the back side of the two quilt blocks. You can use a little fabric glue if you like to hold it in place. Place the ends of the sashing just over the bottom and top edges of the water soluble stitching lines. Stitch down both long edges of the sashing with the serpentine stitch. Attach the sashing to the back of both sets or blocks.
(Click Image to Enlarge)
Step 50:
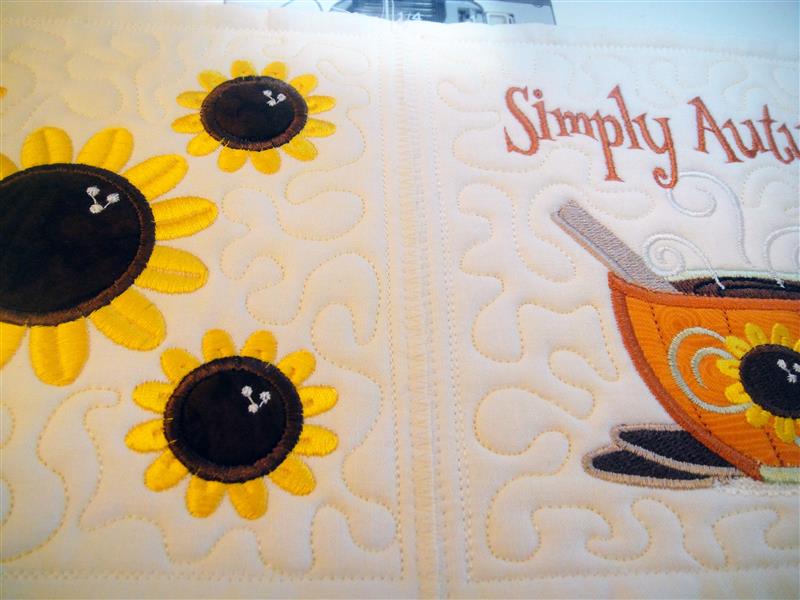
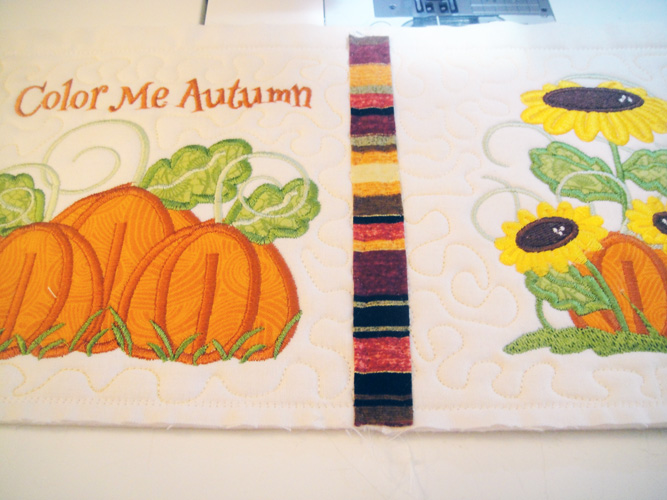
Take the wider of the two sashing strips and apply to the front of the two sets of blocks in the same manner.
(Click Image to Enlarge)
Step 51:
Align and zigzag the top two blocks to the bottom two blocks and zigzag together. I just stitched this with the invisible thread as it was already loaded into the machine.
(Click Image to Enlarge)
Step 52:
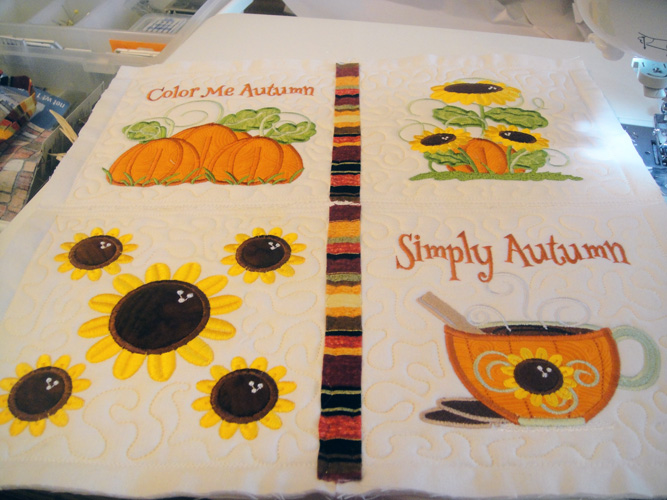
Switching back to the Serpentine stitch apply the narrow sashing to the back of the quilt blocks across the whole panel. Then apply the wider sashing to the front.
(Click Image to Enlarge)
Step 53:
(Click Image to Enlarge)
Apply binding with your favorite method or see our article on “Binding and In the Hoop Quilt Project” and attach to a cute quilt wall hanger with clips. Congratulations your wall hanging is complete!
Award winning Digitizer, Embroidery Educator, Author and a Consultant to the Industry, Pat Williams has 30 years of experience in the embroidery industry. Pat has won multiple awards for her digitizing expertise including the 2007 Impressions Awards Grand Championship, Best of Show as well as the 1st and 2nd Place Awards. Pat’s love of digitizing has afforded her the opportunity to write numerous articles for Impressions magazine in the United States and Images Magazine in Europe. In 2001 Pat was named “Embroidery Educator of the Year.” For many years Pat taught digitizing seminars at the ISS Shows in Long Beach, CA and for Compucon software. She now resides in Tucson, AZ.