Live Chat
Embroidery Designs
Welcome, Embroiderer
Login
Talavera Tiles Wall Hanging
{{mainImageAlt || (productInfo._source && productInfo._source.name) || ''}}

Talavera Tiles Wall Hanging Embroidery Project

By   Pat Williams   on   June 13, 2023
  • SKILL LEVELSome Experience
  • TIME REQUIRED24:00
  • FINISHED SIZE16.5 x 20 inches
Description

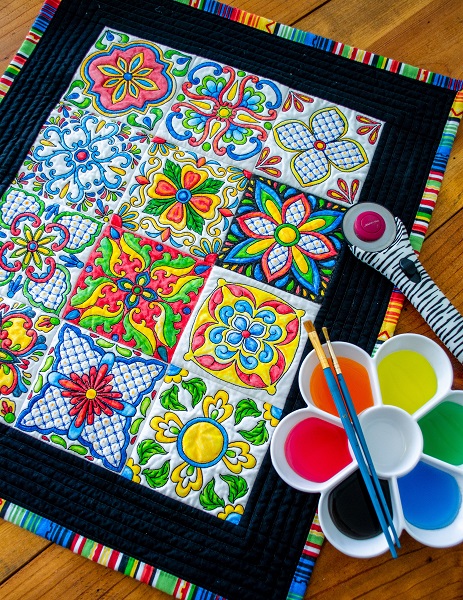
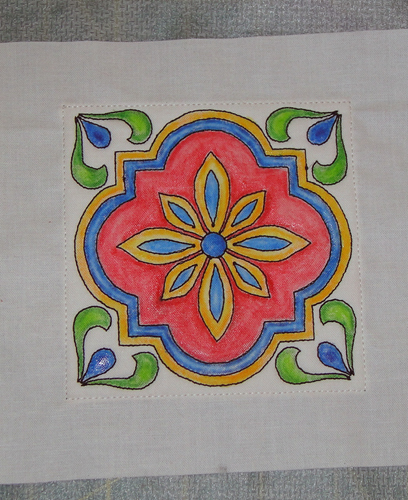
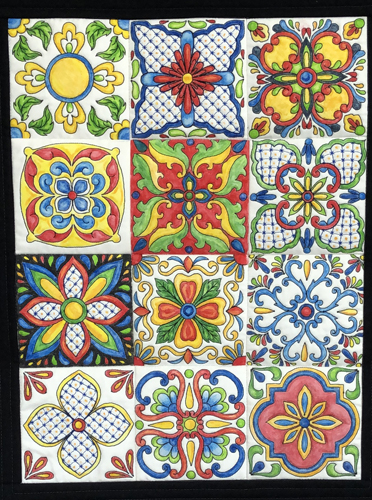
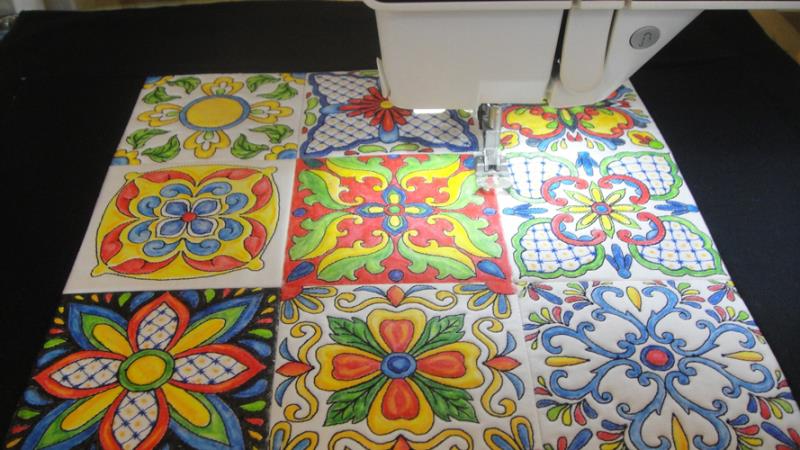
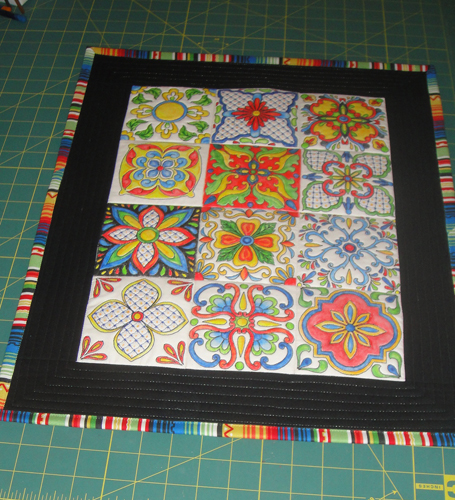
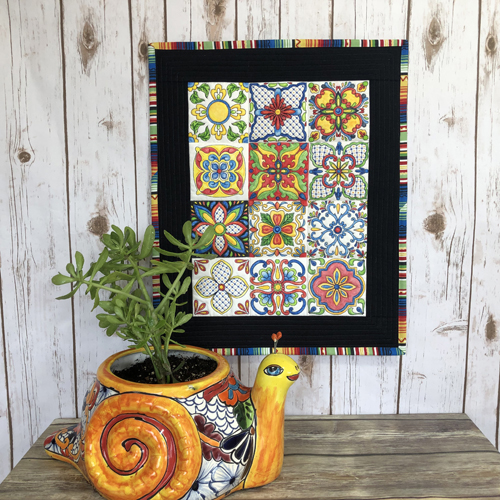
This spectacular wall hanging is created by painting embroidered and quilted in the hoop outline embroidery designs. A fun way to take your embroidery projects to the next level.

Step of

Materials

Project Preview Video

Materials
  • 5” x 7” embroidery hoop
  • ½ yard of PFD (Prepared for dying) White Kona® cloth
  • Or ½ yard of prewashed White Kona Cloth
  • 1 yard Black Kona Cloth
  • ¼ yard of “South of the Border Stripe” Robert Kaufman fabric for binding
  • 1 ¼ yard of Battilizer®, Bosal Stable –Batt® or low loft batting
  • 1 1.4 yards of No show Stabilizer
  • Fabric Medium
  • Clear Aloe Gel
  • Spray Adhesive
  • Hair Dryer
  • Fabric Paint Brushes
  • Derwenk® Intense Ink Pencils (the 72 set is nice, but the 12 set) can be used with some color substitution
  • Black Polyester Embroidery thread
  • Invisible thread
  • Water soluble thread
  • Pencil Sharpener

  • Designs used in this project
  • https://www.embroiderydesigns.com/productdetails/pat-williams/designs/1/talvt04
  • https://www.embroiderydesigns.com/productdetails/pat-williams/designs/1/talvt02
  • https://www.embroiderydesigns.com/productdetails/pat-williams/designs/1/talvt10
  • https://www.embroiderydesigns.com/productdetails/pat-williams/designs/1/talvt09
  • https://www.embroiderydesigns.com/productdetails/pat-williams/designs/1/talvt08
  • https://www.embroiderydesigns.com/productdetails/pat-williams/designs/1/talvt07
  • https://www.embroiderydesigns.com/productdetails/pat-williams/designs/1/talvt06
  • https://www.embroiderydesigns.com/productdetails/pat-williams/designs/1/talvt05
  • https://www.embroiderydesigns.com/productdetails/pat-williams/designs/1/talvt11
  • https://www.embroiderydesigns.com/productdetails/pat-williams/designs/1/talvt12
  • https://www.embroiderydesigns.com/productdetails/pat-williams/designs/1/talvt03
  • https://www.embroiderydesigns.com/productdetails/pat-williams/designs/1/talvt01

  • Final Product: What You Will Create

    Preface:
    This is a project that you can really sink your teeth into. It is not fast, but it is simple. The embroidery of the quilted blocks is quick to stitch. I cannot really tell you how long it will take you to paint the blocks. A good estimate is 1 hour per block, but it you fill in the background of the blocks they could take you an hour or more. It depends on how much paint you put down. The process is mesmerizing and very relaxing. Please read the article on “Tips for Painting Embroidery with Intense Ink Pens” for an explanation of the techniques.


    Step 1:
    (Click Image to Enlarge)
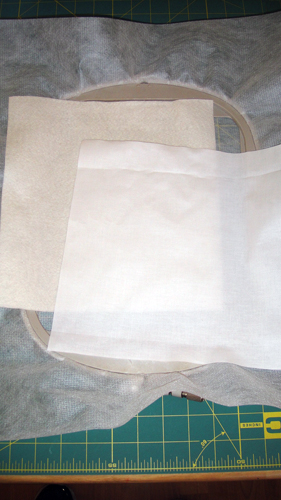
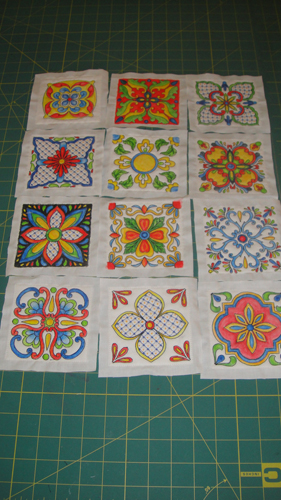
    Cut 12 6” squares of PDF Kona Cloth and your Bosal Stable-Batt or equivalents. For each block, you will need no show stabilizer in the hoop as well as one square of your Kona cloth and batting.


    Step 2:
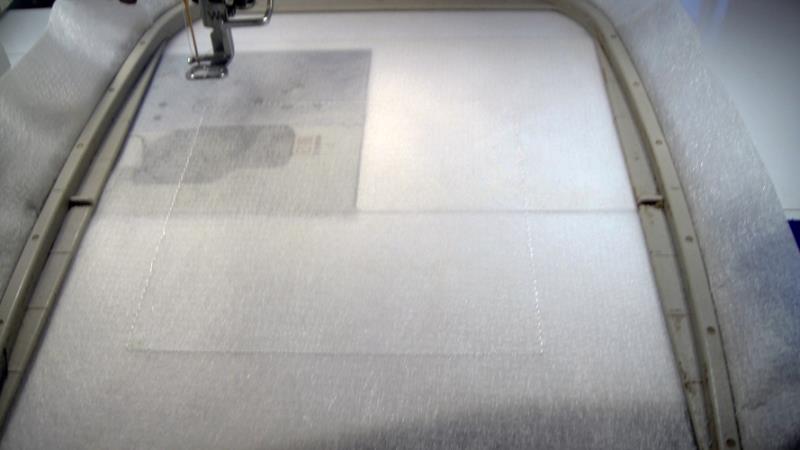
    Run color stop (CS) 1 in white as a placement line for the batting.

    (Click Image to Enlarge)


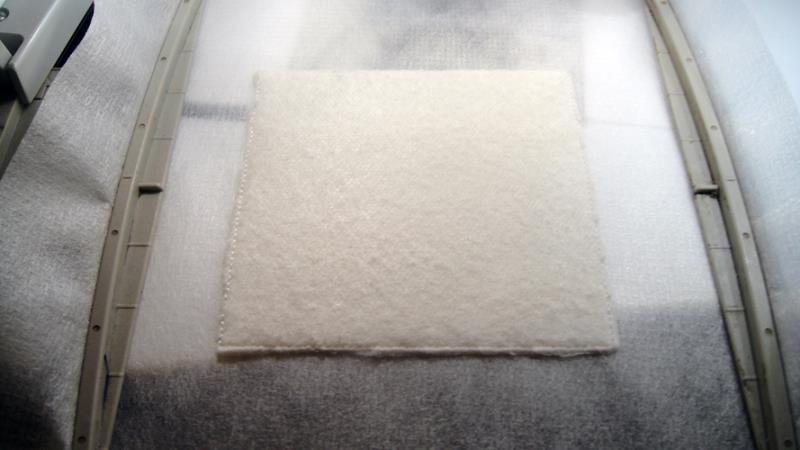
    Step 3:
    Spray adhesive on the batting and position over the placement line so that the batting exceeds the placement line by ½” on all side. Run CS 2 in white to tack down the batting.

    (Click Image to Enlarge)


    Step 4:
    Trim the batting as close as possible to the tack down lines.

    (Click Image to Enlarge)


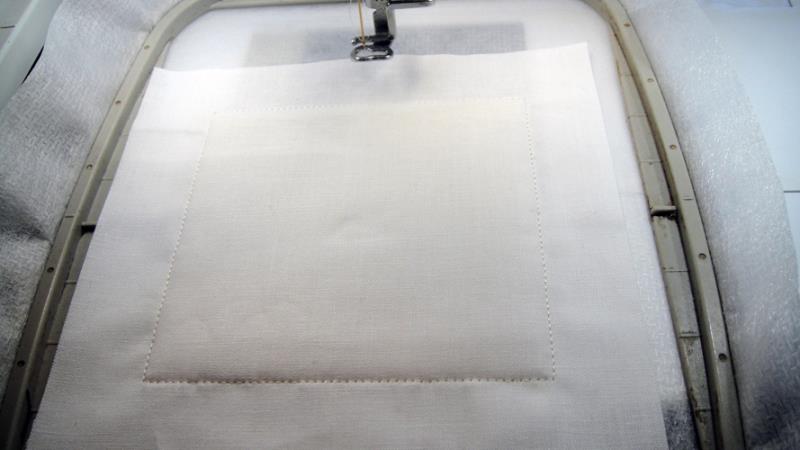
    Step 5:
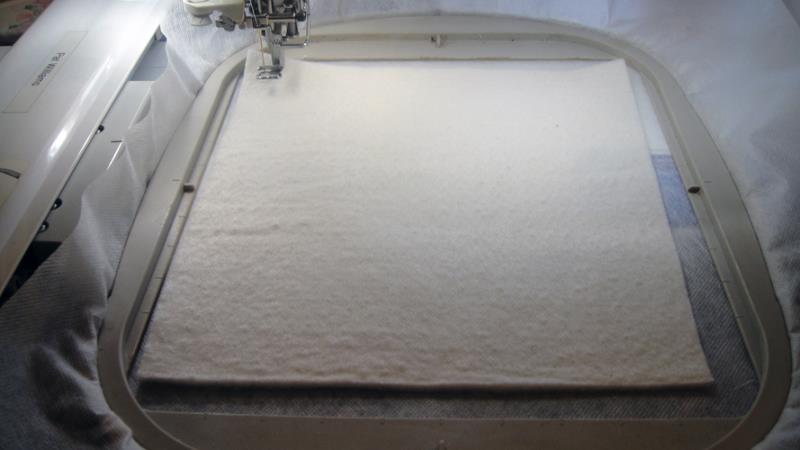
    Spray adhesive on the Kona cloth square and position it over the batting so that the fabric exceeds the outlines by ½” in all directions. Run CS 3 and to tack down the fabric.

    (Click Image to Enlarge)


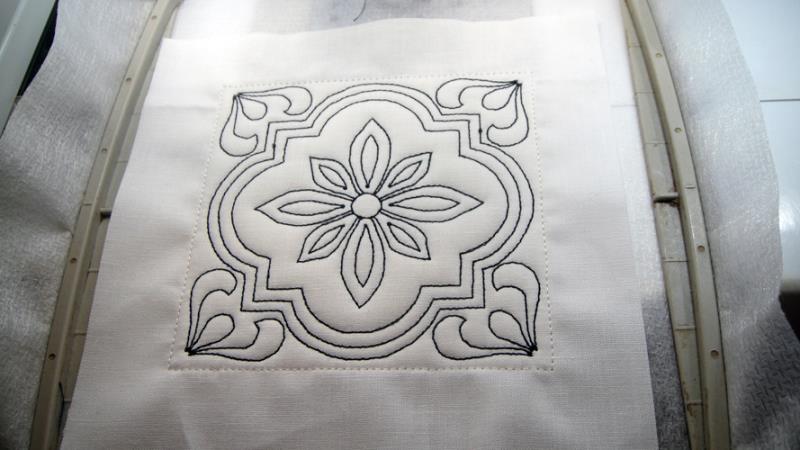
    Step 6:
    Run the embroidery design. Some designs will only have a single color – black polyester thread A couple of the blocks in this series have a blue color change before the back run if so run both of those colors.

    (Click Image to Enlarge)


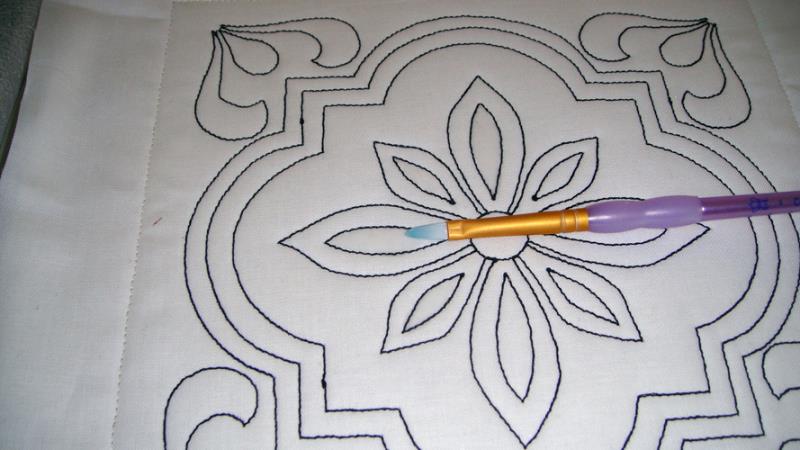
    Step 7:
    Please read the article on “Tips for Painting Embroidery with Intense Ink Pens” for an explanation of the techniques.

    (Click Image to Enlarge)


    Step 8:
    When your block is completely painted set it aside for at least 24 hours.


    Step 9:
    (Click Image to Enlarge)
    The colors you paint the blocks are up to you and what you have available. The colors used in the sample are:
    Cherry 0510
    Apple Green 1400
    Golden Yellow 0230
    Bright Blue 1000
    Peacock Blue 00820
    Hookers Green1520
    Hot Red 0410
    Iris blue 0900
    Deep Blue 0850
    Chinese Ink 2030
    Cadmium Orange 0250
    Deep Indigo 1100


    Step 10:
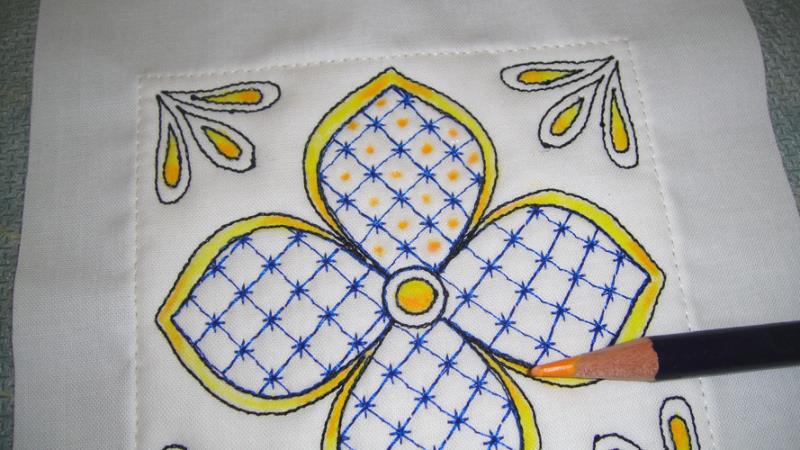
    Each area to be painted in these designs is outlined with the black embroidery except there was not a reasonable way to outline the yellow gold dots in the center of each of the designs that contain the blue embroidered pattern fill. Spread a little fabric medium at the center of each of the squares formed by the patterned fill. With a sharp golden yellow pencil make a little dot in the center of each of those squares.

    (Click Image to Enlarge)


    Step 11:
    (Click Image to Enlarge)
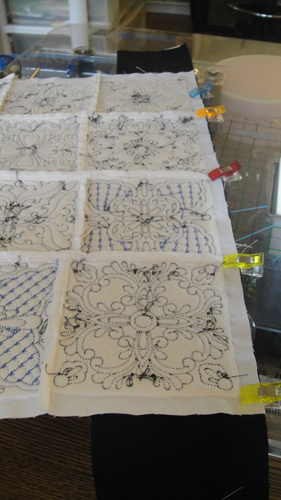
    When all of your tiles are painted the trim the fabric seam allowances to ½” from the original water-soluble tack down lines. You will later trim these seam allowances to ¼” but it is easier to work with the ½” seam allowance as you sew the blocks together.


    Step 12:
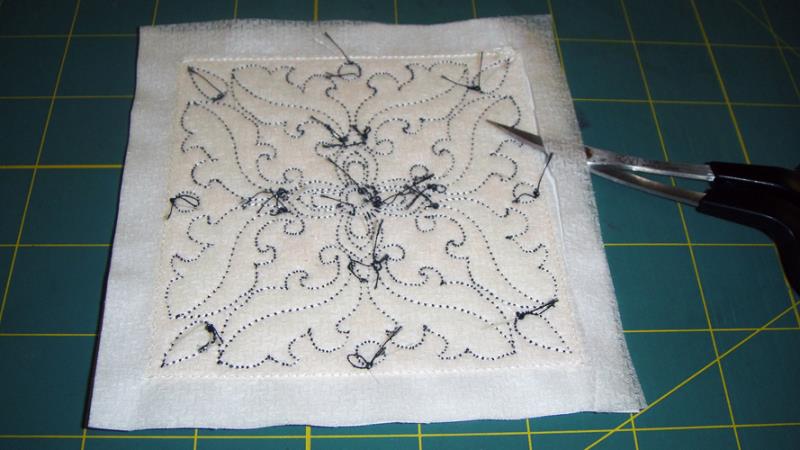
    To reduce bulk in the seam cut away the stabilizer with small scissors around each block.

    (Click Image to Enlarge)


    Step 13:
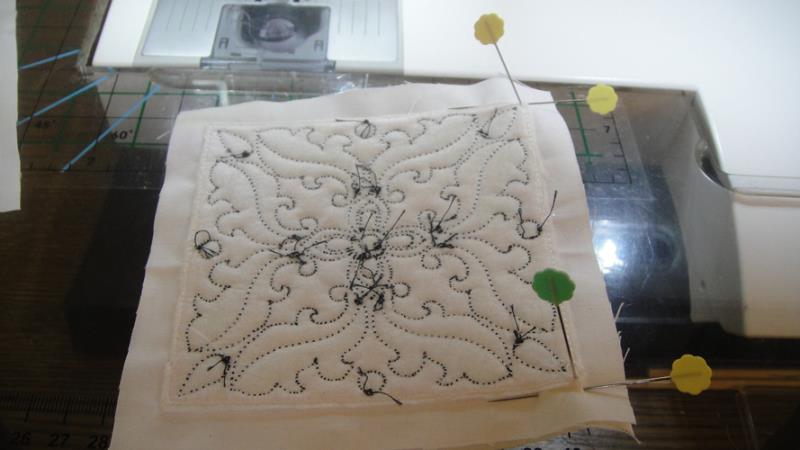
    Precision alignment of the tack down lines to seam the blocks together is critical to this project as in many cases the blocks are embroidered and painted right to the blocks edges. The double pinning method is used to ensure this alignment. To do this place two blocks right side together. Stick a pin vertically right through the corner stitch on the back side of one block. Stick the pin vertically through the second block right through the corner stitch. The place a horizontal pin close the vertical pin. Repeat for the second corner of the blocks. The horizontal pins were placed in the seam allowances of these blocks to avoid piercing through any painted areas of the blocks. Stitch the blocks together right over the water-soluble thread tack down 

    (Click Image to Enlarge)


    Step 14:
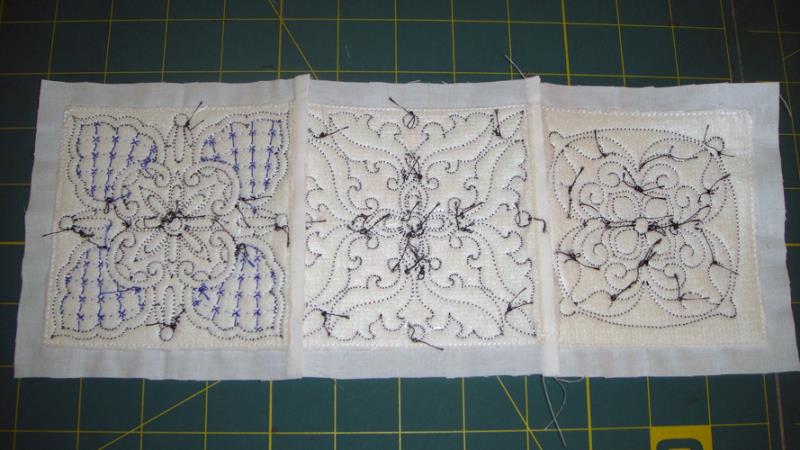
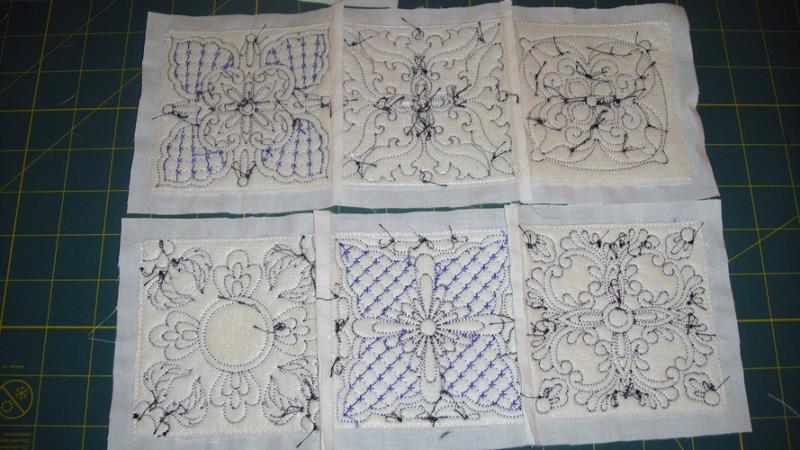
    Join the third block to the two blocks sewn together in the same manner. Trim the stitched seam allowances to ¼”. Make 4 rows of three blocks.

    (Click Image to Enlarge)


    Step 15:
    Press the seam allowances in alternating directions on each for. That is press all the seam allowances on the 1st and 3rd rows to the right and all seam allowances on the 2nd 4th rows to the left.

    (Click Image to Enlarge)


    Step 16:
    (Click Image to Enlarge)
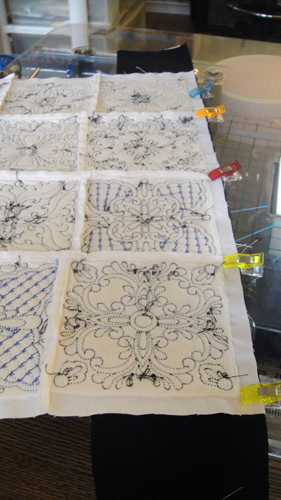
    Join the rows to each other using the same pinning techniques to ensure that all of the blocks line up. Trim the horizontal seams to ¼”.


    Step 17:
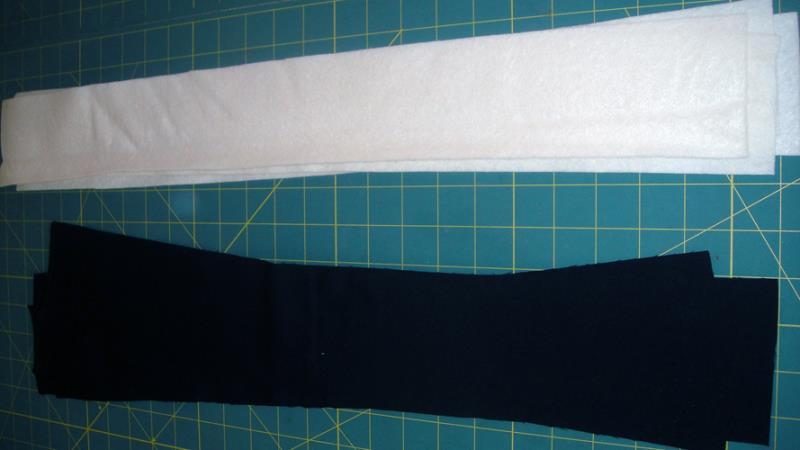
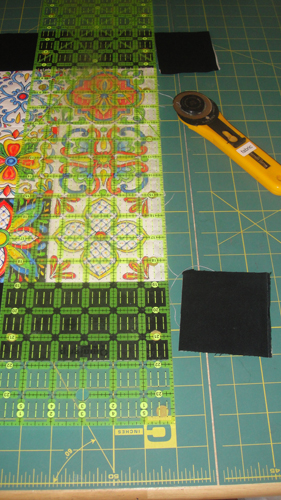
    For the borders cut 2 strips of black fabric 3 ½” wide the width of the material and then cut them in half horizontally to have 4 3 ½” strips about 22 long. Cut 4 Strips of batting 3” wide the width of the batting.

    (Click Image to Enlarge)


    Step 18:
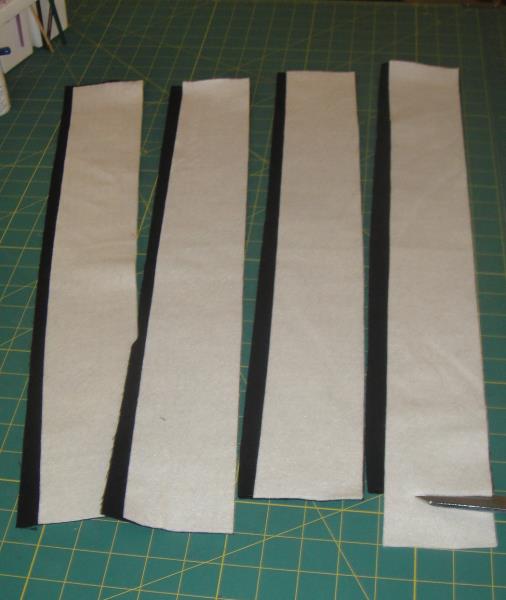
    Spray adhesive on the batting strips and align the right edges of each batting strip with the right edge of a border strip. This will leave you a ½” seam allowance along the left-hand side of each strip. Trim off any additional batting at the end of each strip.

    (Click Image to Enlarge)


    Step 19:
    (Click Image to Enlarge)
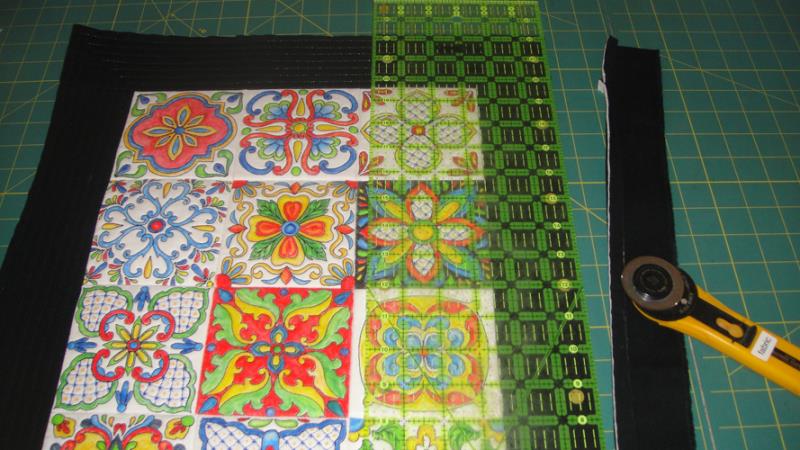
    Pin or clip the seam allowance of two strips to the sides of the center panel having several inches of excess border strip above and below the center panel. Stitch the strips along the water-soluble tack down lines of the center panel. Trim the seam allowances to ¼” and press these seams towards the border.


    Step 20:
    (Click Image to Enlarge)
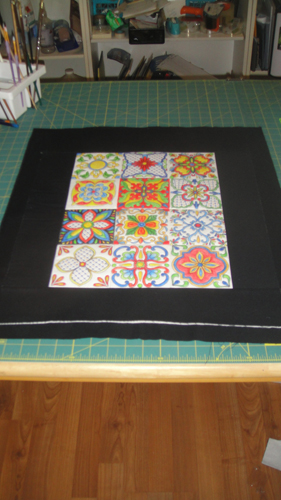
    Trim the excess border strips even with the top and bottom of the center panel. Repeat steps 19 and 20 to attach the border strips across the top and bottom of the center panel.


    Step 21:
    (Click Image to Enlarge)
    Cut a backing for the quilt 2” wider and 2” taller than the measurements of your wall hanging.


    Step 22:
    With invisible thread in the bobbin and top of your sewing machine stitch in the ditch on all seam lines of the center panel with a 3mm straight stitch.

    (Click Image to Enlarge)


    Step 23:
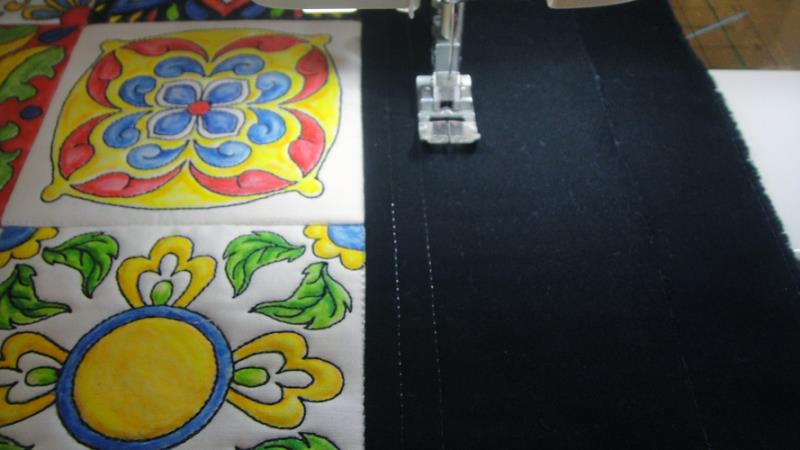
    If the desired echo stitch around the center panel with straight lines going around the whole rectangle using your presser foot as a guide.

    (Click Image to Enlarge)


    Step 24:
    Squaring up your wall hanging trim the border down to 2 ½” from the edges of the center block.

    (Click Image to Enlarge)


    Step 25:
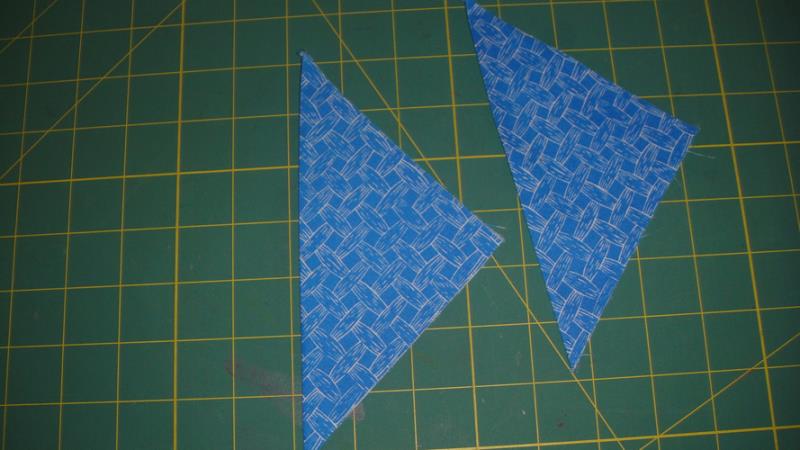
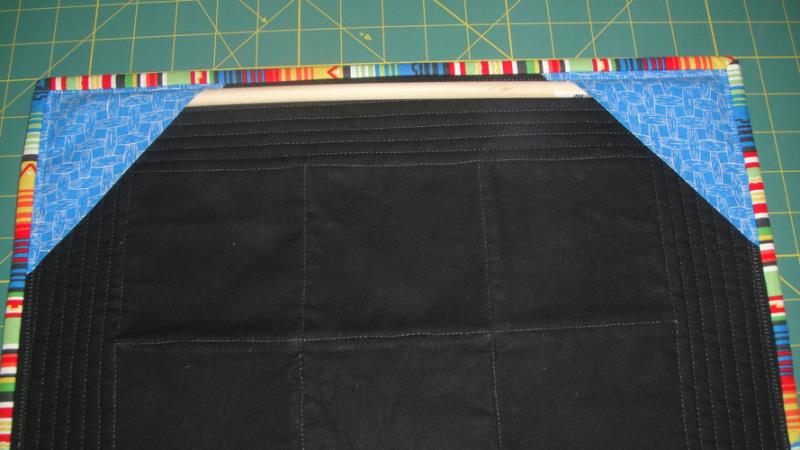
    Cut two 5” squares of any coordinating fabric to make simple hangers for the wall quilt. Fold them in half diagonally and press.  

    (Click Image to Enlarge)


    Step 26:
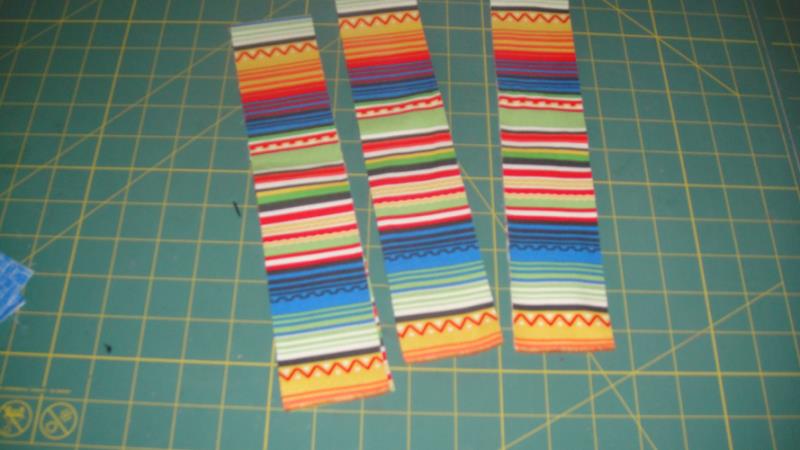
    Cut 3 2 ¼” strips of the Robert Kaufman South of the Border Stripes for the binding.

    (Click Image to Enlarge)


    Step 27:
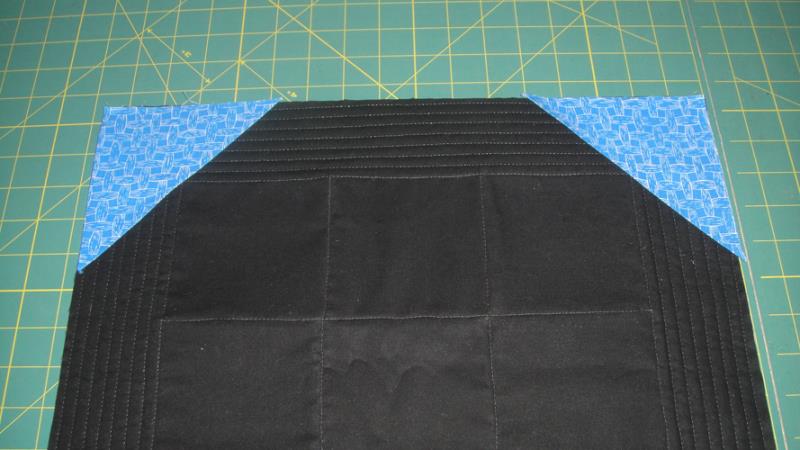
    Baste the two folded triangles onto the top corners of the quilt, raw edges even, with a 1/8” seam allowance.

    (Click Image to Enlarge)


    Step 28:
    Bind the quilt using your favorite method.


    Step 29:
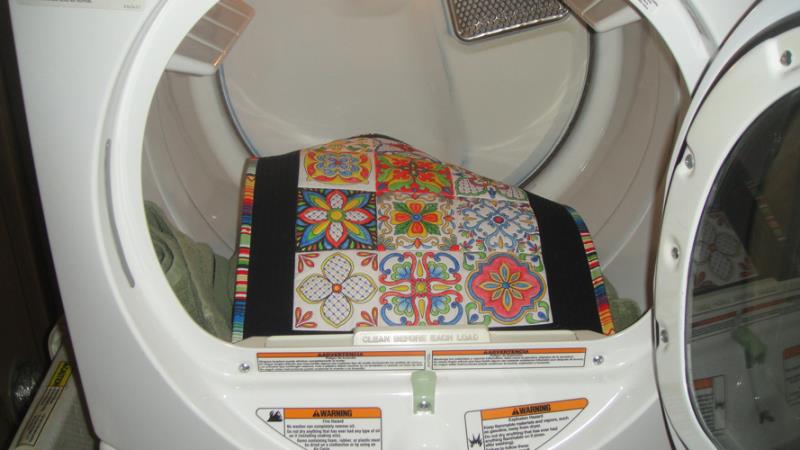
    Throw the wall hanging into the dryer set on high for 50 minutes to heat set the ink.

    (Click Image to Enlarge)


    Step 30:
    Cut a 14” length of a 3/8” wooden dowel and slip it under the triangular corners to hang your wall hanging.

    (Click Image to Enlarge)


    Step 31:
    Congratulations your hand painted Talavera Tiles Wall Hanging is complete!

    For the love of embroidery…
    Pat Williams
    Meet the Author: Pat Williams
    Pat Williams
    Award winning Digitizer, Embroidery Educator, Author and a Consultant to the Industry, Pat Williams has 30 years of experience in the embroidery industry. Pat has won multiple awards for her digitizing expertise including the 2007 Impressions Awards Grand Championship, Best of Show as well as the 1st and 2nd Place Awards. Pat’s love of digitizing has afforded her the opportunity to write numerous articles for Impressions magazine in the United States and Images Magazine in Europe. In 2001 Pat was named “Embroidery Educator of the Year.” For many years Pat taught digitizing seminars at the ISS Shows in Long Beach, CA and for Compucon software. She now resides in Tucson, AZ.
    More From This Author
    Link is Broken, Please check the URL
    Exclusive Embroidery Offers!
    Copyright © {{ currentDate | date:'yyyy'}} - EmbroideryDesigns.com
    GET 50% OFF! ×