| Preface: | | In this project an embroidered image is developed showing home fronts lining canals in Amsterdam. The project is dedicated
to the memory of my mother, Anna Geertruida Drop-van Wijk, who was born in
one of these homes, built in 1642. |
Digitizing the Images
|  (Click Image to Enlarge) The tiny picture shows the completed hand embroidery of an Amsterdam canal view including 14 home fronts. This picture, as jpg file, was used as my digitizing guide for machine embroidery. Below are detailed steps to achieve that goal. I originally had only this picture measuring 3 by 7 cm as shown. |
Step 1: | The png files incorporated below allow printout of the pattern, if desired the copier can placed on 150-200 % enlargement. Connect to the desktop pc, and enable scanning of the picture, save as *.jpg. Immediately below is shown a jpg file of the completed machine embroidery. Save the so obtained picture in an embroidery sub directory so that the jpg can be easily found and identified. |  (Click Image to Enlarge) |
Step 2: | | Open the Bernina embroidery software. Navigate to artwork canvas. |
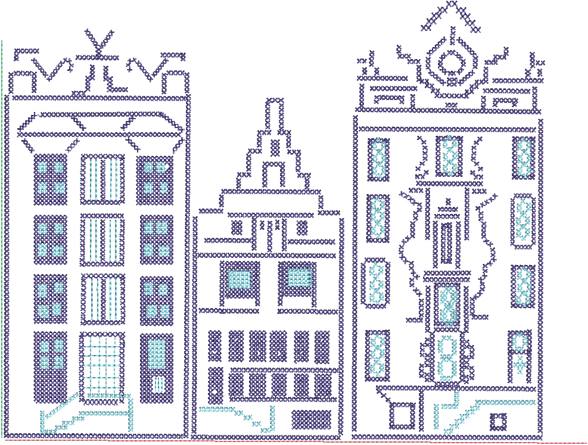
Step 3: | The entire row of canal front homes is shown in the
preceding image as displayed on the computer screen. Import
this *.jpg into the art work canvas. Select it and press ikon 'show
embroidery'. This command places the entire image in the embroidery
canvas, allowing digitizing by hand. Such digitizing is done by drawing
lines on top of the *. jpg. Hand digitizing is essential since
automated digitizing doesn't give desirable results here. Go back to the
art canvas and again press the ikon ‘show embroidery’, repeat this another
4 times. You will have 6 identical images, each one showing the entire row
of canal home fronts. This creation of 6 identical images allows for 6
hoopings of separate views, as explained below, where the individual views
maintain their proportionality. Turn on the jumbo hoop so that it
will project over the jpg. This is shown in the immediately following
image where home fronts 1, 2 and 3 are within the hoop projection.
Save and label the file ‘view01’. A part of the hoop is
shown in the illustration above, such that the 3 first home fronts
are wihthin the hoop. Save as view01. Then place the hoop projection on top of
the second file, such that home fronts 4, 5 and 6 are within the hoop
image. And save the file as ‘view 02’. Continue this way, so that home
fronts 7, 8 and 9 constitute view 03, home fronts 10 and 11 constitute view 04,
home fronts 12 and 13 constitute view 05 and home front 14 constitutes
view 06.
Much easier is to use each of the illustrations
labelled homefronts 123, homefronts 456 homefronts 789 and so on for
digitizing, as these illustrations are more detailed. Be certain to also
digitize red, blue and green straight lines for each illustration as
explained further in the text below. |  (Click Image to Enlarge) |
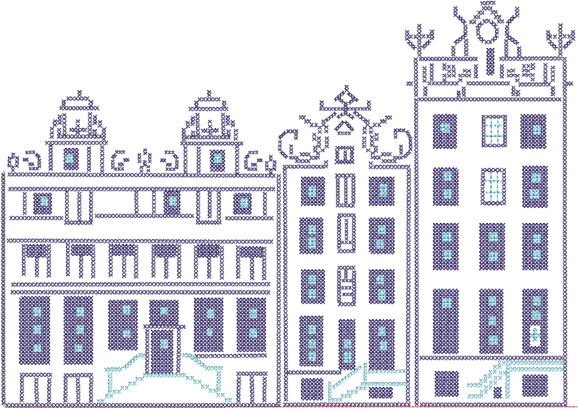
Step 4: | Below is the entire row of home fronts such that home fronts 4, 5 and 6 are within one hoop image. |  (Click Image to Enlarge) |
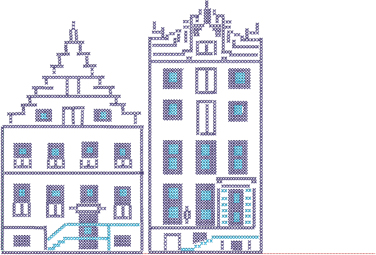
| Home fronts 123. | 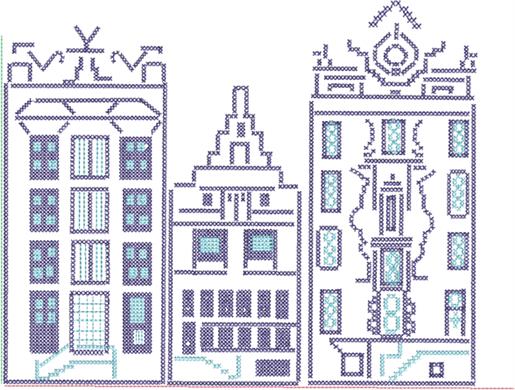 (Click Image to Enlarge) |
Step 5: | Save each view with a specific name, for example, view 1, view 2, view 3 ( through view 6 ) or, as I have done, name them home 123, home 456, home 789, home 1011, home 12, home 1314. There are 14 home fronts in total in the Amsterdam canal scape, and my experience is that the above division is best. Rehooping gives the shivers to any embroidery machine user, but I have designed a simple system of coordinates – a horizontal and two vertical straight lines – to enable multiple hoopings with very precise apposition of the 6 different views view01 to view06, and allowing for placement of all views on one and the same baseline on one and the same piece of fabric. |
Step 6: | Starting with view01 showing home front 123 and the hoop projection, first digitize a horizontal straight line, (straight stitch, not cross stitch) red in color, starting at the very left side of view 01 and also digitize a vertical line colored green, also starting at the leftmost point of view01. These are essential to placement of all home fronts on one and the same baseline. Then digitize cross-stitch each line, either using the open digitizing tool or the closed digitizing tool as appropriate (use square or rectangle, and select outline stitch), and select cross stitch, with 2-ply at 14 cross/inch. Curved lines of course cannot be drawn using cross stitches, so construct imitated curved lines with small straight lines instead. To eliminate long jump stitches be certain that the digitizing is done logically going from right to left, or from top to bottom and back. All digitizing is in one color so far, dark blue. Copy and paste commands can be used, but be certain there are no spots where 2 lines are on top of one another. If the intention is to copy and paste, be certain the copied line is indeed moved to the paste location. Digitize a vertical line at the right bottom of each set of home fronts and color it blue. View the color film to be certain the blue vertical line is placed last, which means it is visible at the bottom of the color film. |
Step 7: | | The window interiors are filled with light blue, and the square solid digitizing tool is used to advantage with a cross stitch fill. Go from left to right or top to bottom so that jump stitches are kept to a minimum. |
Step 8a: | | Using the color film, check to see that the position of the red, and green lines appear at the top, so that these are stitched out first at each hooping, and place the blue line very last, so that it is stitched out last. Be certain the stitch length is 6 mm for easy removal. Save again as view01. |
Step 8b: | | Repeat all digitizing exactly as described for view01, and create, this way, view 02, view 03 view 04 view 05 and view06. Be certain that there is a horizontal red line and a vertical green line at the top of each color film, and that there is a blue vertical straight line digitized at the bottom of each color film. |
Step 8c: | | Save each view separately as *.art70 (for Bernina7) or as *.art60 (for Bernina6). Also save each view as *.exp and transfer each *. Exp file to the sewing machine. Note: different sewing machines recognize different formats; a Bernina machine recognizes *.exp. |
| | To place the time and patience with digitizing into perspective, I have spent about 10 months at this digitizing process, but I only had a very tiny .jpg measuring 3 by 7 cm as a guide. The illustrations above are much more detailed and have larger dimensions. |
| Embroidery of Images - Steps for Embroidery | I have used Kaufman velveteen cream color, for the embroidery. Cut a rectangular piece larger than the final dimensions, about 150 by 50 cm.
|
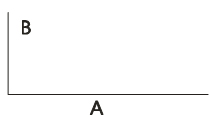
| 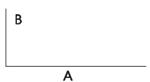 (Click Image to Enlarge) Image is showing long and short side A and B. The long side is A and the short side is B. Spray the entire surface with quilt-temporary adhesive, and be thorough here. Cut a piece of fusible pellon 150 by 50cm, and use a steam iron to achieve uniform adhesion. Pellon without adhesive spray doesn’t bond evenly, and the combination of pellon with spray does. The pellon is used to fortify the velveteen and to give it thickness. Next, spray the pellon with temporary adhesive and place heavy stabilizer. On this heavy stabilizer, draw a baseline about 15 cm from the bottom using an erasable pencil. To make the line horizontal, measure the distance from the bottom of the pellon-velveteen stabilizer sandwich at several places. Sew a straight stitch line, immediately on top of the drawn line, and make the stitch length 6 mm, so that the stitching may be easily removed later. This baseline will serve to place the 6 individual views with home fronts 123, 789, 10 11, 12, and 1314 on or close to one baseline. Draw a line parallel to the short side, which is 90 degrees to the horizontal, about 15 cm from the left, and stitch (6 mm stitch length). Turn the sandwich over. You now have nicely smooth velveteen in front of you, with two straight stitch lines as shown. These lines are essential guides for placement of the 6 separate views, each one in one hooping. Place the sandwich in the largest hoop 260/400 mm such that the axis A is aligned with the longitudinal axis of the hoop, and use the template to be certain that the guide lines on the template are parallel to the stitched guide lines on the fabric shown in the drawing. Use precision in determining that the guides on the template are parallel to the lines in figure 1. Place the hoop on the bed of the sewing machine. Remove the thread from the
needle and remove the bobbin. Turn off the sensors responsible for upper and
lower thread. Get view01 on the sewing machine screen and select the
horizontal red line. Use the foot control to stitch slowly (there are needle points visible
in the fabric but no thread) and to see if the needle points are on the
horizontal stitch line on the fabric. If not, turn position and angle controls on the sewing machine and stitch again, until
the actual needle points are on top of the horizontal line on the fabric. You
are now ready to embroider view01, with home fronts123. Turn the upper thread
and bobbin sensors on. Thread the needle (I have used 60 wt dark blue because of the
cross-stitch; 40 wt would make the cross stitch elements way too heavy ) and
place the bobbin. Practice the printout for each set of home
fronts at least in part, on a piece of the fabric you will use / fusible pellon/stabilizer
sandwich. This practice is needed to
eliminate unexpected effects, and allow for editing and corrections in the
file. |
Step 9: | | Place the fabric measuring 150 by 50 cm in the jumbo 260/400 hoop, aligning the long axis of the hoop with the long axis of the fabric. Stitch out view01/ home fronts 123. After home fronts 123 in view01 are completed, unhoop. Then, rehoop to start view02, placing the fabric orientation such that the long horizontal axis is again aligned with the long axis of the hoop. |
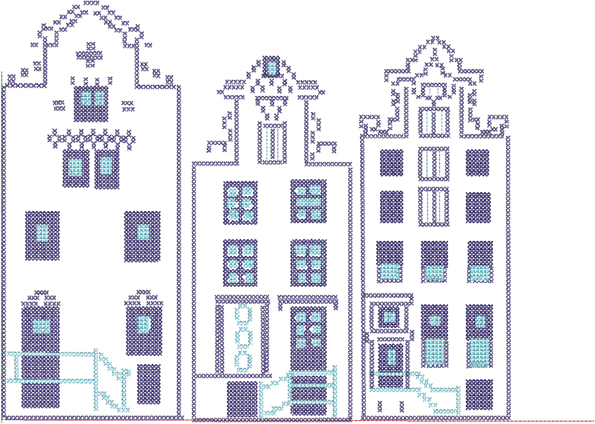
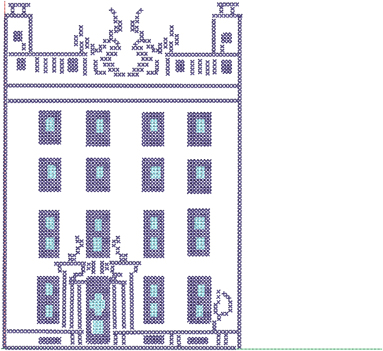
| View02 showing home fronts 456. Get view02 on the sewing machine screen. Remove top thread from the needle and remove the bobbin, and turn off the top thread and bobbin sensors. Because the red horizontal line you have digitized is at the top of the color film on the computer, it is the first item on the screen of the sewing machine. Use the foot control to run the sewing machine slowly, and stitch at least part of the red single line, aiming to stitch right on top of the horizontal stitch line that is on the fabric. If not, adjust the position and angle of the image on the sewing machine screen and run a few stitches again, until these stitches fall on top of the horizontal line on the fabric. Then position the green line of 456 on top of the blue line you have stitched as the last line of view 01/home fronts 123. Use the Bernina machine position and angle controls to achieve this positioning. | 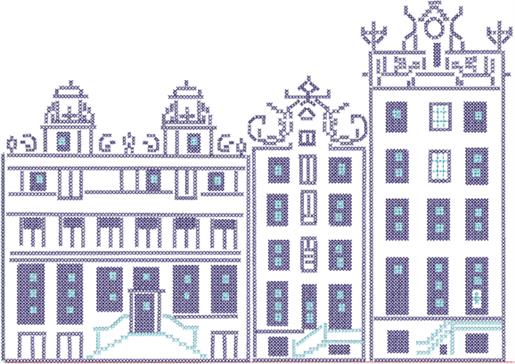 (Click Image to Enlarge) |
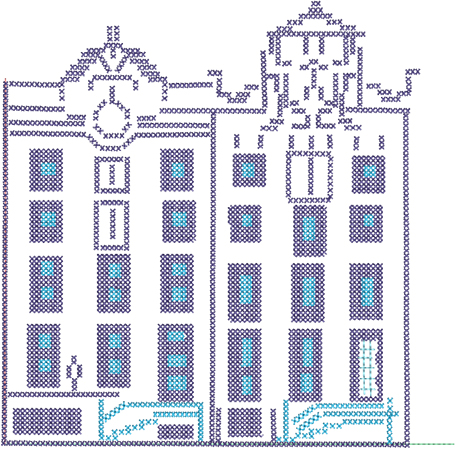
| View03, showing home fronts 789. Note the green vertical stippled line (straight stitch vertical line) and the red horizontal stippled line (straight stitch horizontal line). These instructions are repeated for views03, 04, 05 and 06 / home fronts 789, 1011, 12, and 1314. Be aware that the rehooping and positioning takes patience and time. | 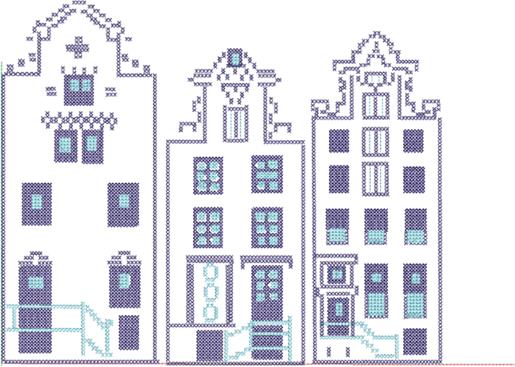 (Click Image to Enlarge) |
| 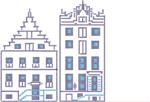 (Click Image to Enlarge) View04 home fronts 10, 11. |
| 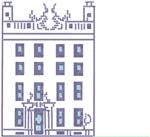 (Click Image to Enlarge) View05 showing home front 12. |
| View06 showing home ftronts 13, 14. | 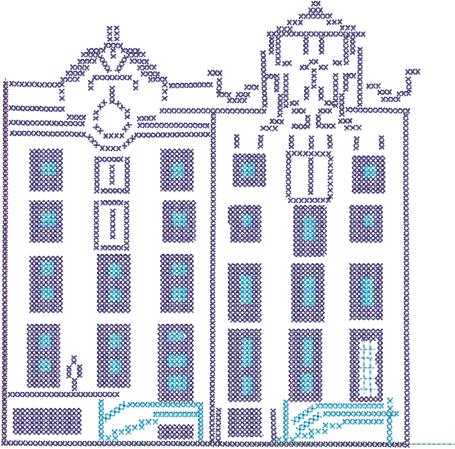 |
Step 11: | | There will be jump stitches to cut - use a special curved pair of scissors with the point away from the fabric. |
Step 12: | | One way to display this embroidered Amsterdam canal scape is to have it framed. A good alternative is to cut a piece of 150 by 50 cm sturdy canvas-like fabric. You can achieve a nice finish by placing a fine zipper in the middle of the backing. Then sew the backing to the embroidered velveteen right sides together with loops at the top, and turn inside out. Especially the sides and the corners are nicely finished this way. |
|