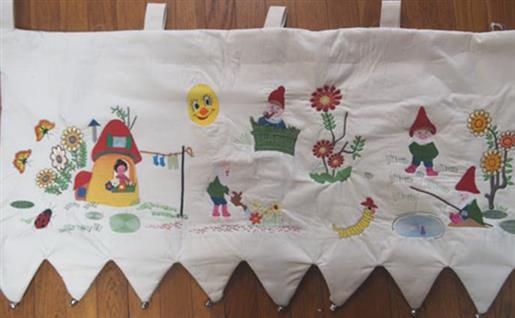
| Preface: | | The gnome landscape wall hanging is embroidered in 4 separate hoopings, numbered 01 to 04 from left to right. Although the idea of re-hooping creates some shivers in users of embroidery machines, I have devised and successfully used digitized straight lines to accomplish the embroidery of a wide area that far exceeds the surface of one hoop. The size of the wall hanging after completion is 130 by 32 cm, and all 4 hoopings must be on one and the same baseline. To that end straight stitched reference lines are digitized in each of 4 views of the wall hanging. |
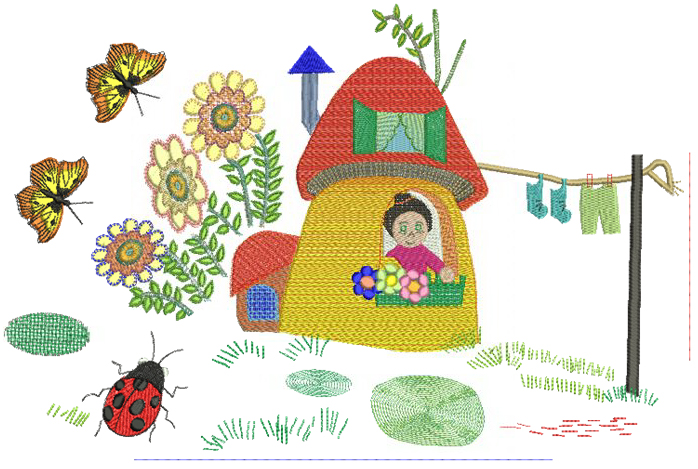
Steps for Digitizing | The following picture shows View 01, which is one of 4 views going from left to right. Digitizing of an image is achieved using specific embroidery software. I have used the Bernina7, with Win7 on the PC as the operating system.
View 01: going from left to right, well-established images are used, with a lady bug, butterflies and fantasy large flowers, stems and leaves. The large mushroom structures with other details are then newly created and added Butterflies and ladybugs are available from several sources, including EmbroideryDesigns.com, and they can be enlarged to show detail. They can also be colored according to your own taste. In a children’s room bright colors seem best suited. A black skeleton is then added to one butterfly, which is duplicated (CTRL-D) to create a second butterfly. Their positions can be rotated with a suitable angle. | 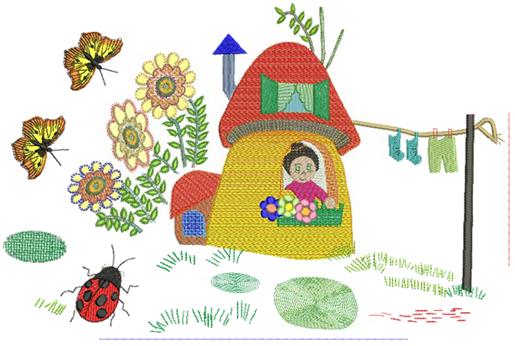 (Click Image to Enlarge) |
| Flowers are custom made or used from a commercial source. I created and digitized them within the embroidery software. The proportions and relative sizes of flowers vs. ladybug vs. butterflies are arbitrary and color and form are most important (rather than proportionality). The large fantasy flowers were created by first digitizing a circle, which was transformed with the reshape icon into a pear-shaped petal. The pear shape is first filled with a fill, and I have preferred this fill to be satin, with a stitch angle perpendicular to the longitudinal axis of the petal. The petal is then copied onto itself to form an outline, and the stitch for this outline is then selected to be blanket stitch.
The filled and outlined pear shape petals are first grouped (CTRL-G) and, using the wreath command with the number 12, the outer flower is created. The outer flower is then copied onto itself to form an inner flower; resize the copy you have just made to fit inside the outer flower, and different colors may be selected. The innermost part of the flower is then made by use of a solid circle. Flower stems in this wall hanging were made by using the closed shape digitizing tool, starting with a rectangle, which was then elongated and shaped with slight curves using the shape tool. I have used two-colors in the stems, by first using step fill>effects>gradient fill, first for olive green and a second time for bright green (r-a erin green). |
| The base of the mushroom house was created by first digitizing a solid circle, and, using the shape tool, the mushroom – stem shape was made. Step fill was selected, >effects>gradient fill. An ocher-yellow color was selected. After duplicating on itself and selecting the color light orange, step fill was again used, followed by effects>gradient fill. The 2-color combination of ocher-yellow and light orange is shown. The roof was then created, again by using a solid circle, made into the mushroom cap by the shaping tool. Two-color step fills each with effects>gradient were then used, mixing bright red into light brown. The inside of the roof was created using a solid circle first, which is then shaped using the shape tool, and a radiant fill selected.
The window was made by digitizing a rectangular shape, and the remove overlap applied to the window opening. Shutters were digitized by first using a rectangle, then shaping the sides to create perspective. The curtains were made by digitizing a triangle. A large window in the mushroom stem was made by first digitizing a rectangle followed by use of the shaping tool to create a rounded top. A white fill was applied and the remove overlap was applied. A person inside the window was created from solid circles; her hair from a solid circle, then shaped with the shape tool, and a window flower basket from an initial solid rectangle with a step fill. Simple flowers were added to the window flower basket. The final height of the mushroom was 16 cm, that of the shed-mushroom 5.4 cm. The adjacent shed was made in a similar fashion, also with 2-tone colors, reducing it properly in size. |
| | A clothes line was made by digitizing a single line, followed by the satin outline icon. The clothesline pole was made with a vertical line/satin outline. Socks and a pair of trousers were made from initial digitized rectangles, and appropriately shaped and filled. Small areas of grass were made with single lines, but each line was selected to be triple stitch. Two round areas of grass were made from a solid circles, shaped and filled with ripple fill. The last step for View 01 was a straight line, at 90 degrees from horizontal, placed 6 mm from the farthest point of the clothes line. This is a single stitch line, red in color, with 6 mm stitch length, which serves as an important reference line for Views 02, 03 and 04 where all views land on the same baseline. |
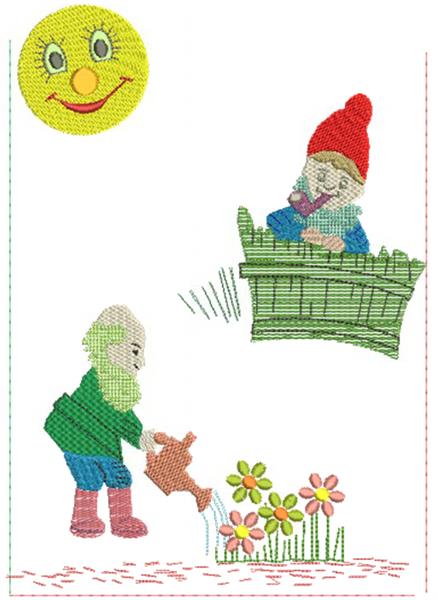
| View 02 has 4 images: a full moon with face, a gnome with red hat smoking a pipe behind a green wooden fence, a gnome without hat watering flowers and a flowerbed. The moon is digitized starting with a solid circle, with a canary-yellow step fill. An eye is created from an initial ellipse, then edited with the shaping tool to achieve a flat bottom, and filled with a white step fill. A smaller ellipse is digitized, with black fill and properly positioned. With CTRL D the entire eye is duplicated and the second eye is properly positioned. Remove overlaps is then used. Eye whiskers are made with single line black stitching. The nose is a solid circle, with a satin fill. The mouth is digitized with the closed digitizing tool starting with a solid red circle which is then edited using the shape tool and single stitch red mouth angles are added.
The green fence is initially made from a solid green rectangle, which is first filled with a step fill and edited using the shaping tool, and black single lines are added. For the gnome with hat the hat is created, then hair, beard, face, collar and body and hands, and each of these elements starts with a solid circle which is then edited using the shape tool. The fill for the hat is step #26, the fill for the face is step #1, the fill for the beard is cross stitch and the fill for the body is step#1. Grass is embroidered to the side of the fence using the open digitizing tool; select the triple stitch. | 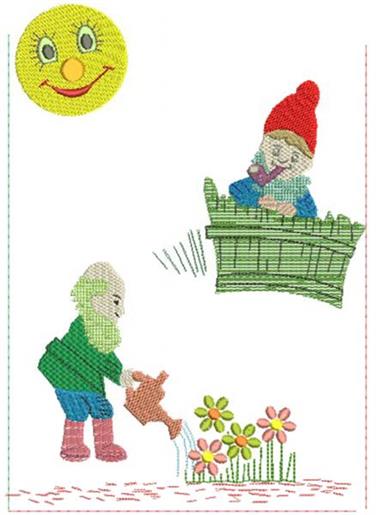 (Click Image to Enlarge) |
| The gnome without hat is similarly created, where each element starts with a solid fill, which is then appropriately edited using the shape tool. Black stripes are added to the trousers and to the green jacket. The beard is first created by a solid circle, then edited using the shape tool and filled with a cross-stitch. A watering can is created by first digitizing a solid filled circle followed by editing using the shape tool. The water stream is created by curved parallel single lines and colored blue. A flower bed is created the way flowers were created in View 01, but made smaller and with only 5 petals each. The wreath tool makes is possible to create petals properly spaced.
Finally, a horizontal line 6 mm stitch length is placed as in the drawing and two vertical lines also 6 mm stitch length about 2 mm from the left side of the moon and 3 mm to the right of the green wooden fence respectively. These lines are essential for placement of View 02 and View 03. |
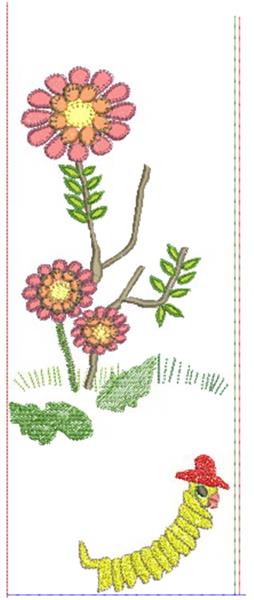
| 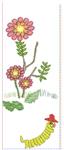 (Click Image to Enlarge) View 03 has large flowers, copied from View 01, grass, also copied from View 01 but reduced in size, and a yellow worm with a red hat. One segment of the worm is first created from an initial solid circle, then edited using the shape tool, the lips and the eye are then added. The first segment is then duplicated 12 times and properly positioned as in the picture. A horizontal and 2 vertical single stitch lines are then digitized using the open digitizing tool. These lines are essential for position of the View 03 to the right of View 02. |
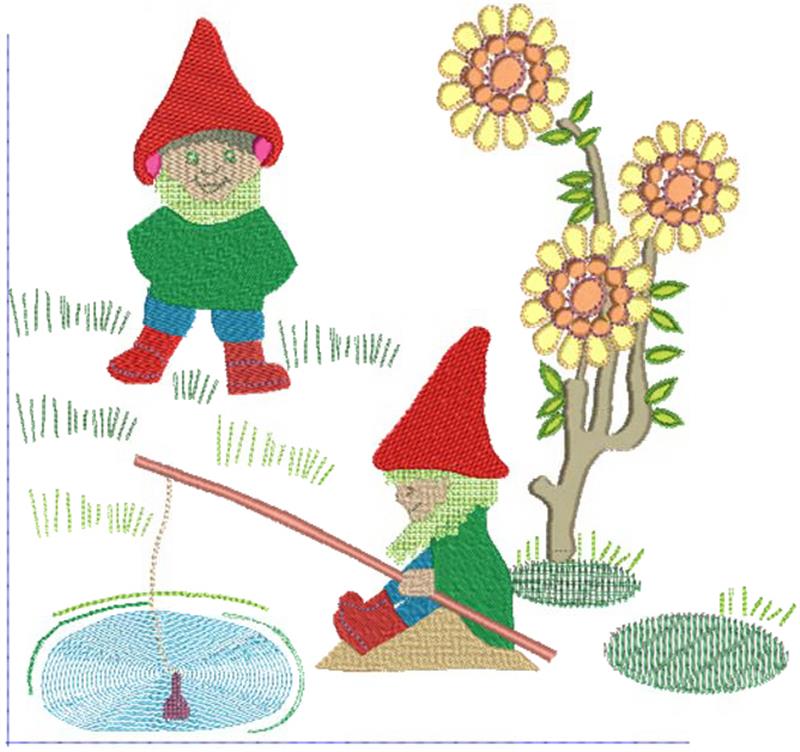
| View 04: important is the orientation of View 04, where the fabric is aligned with the longitudinal axis of the jumbo hoop. View 04 contains 2 gnomes, which are created as in View 02, a pond, created from an initial solid circle with a ripple fill and colored blue, some large flowers copied from View 01 or View 03, circular areas of grass copied from View 01 and a fishing rod created by using the open digitizing tool followed by satin outline. | 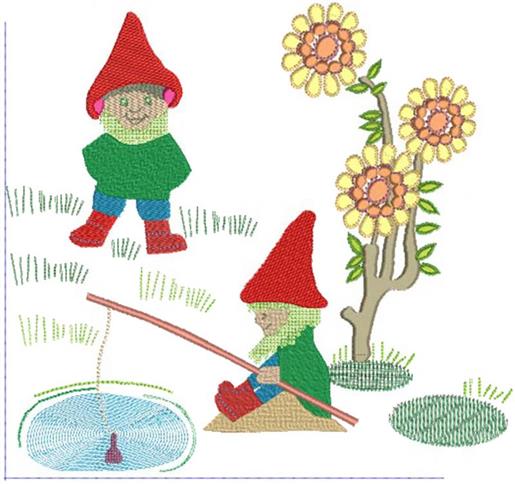 (Click Image to Enlarge) |
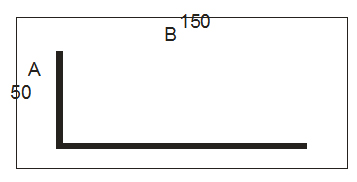
Steps for Embroidery | 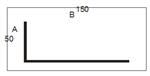 (Click Image to Enlarge) I have used Kaufman velveteen cream color, for the embroidery. Cut a rectangular piece larger than the final dimensions, 150 by 50 cm. The long side is B and the short side is A. Spray the entire surface with quilt-temporary adhesive, and be thorough here. Cut a piece of fusible pellon 150 by 50 cm, and use a steam iron to achieve uniform adhesion. Pellon without adhesive spray doesn’t bond evenly, and the combination of pellon with spray does. The pellon is used to fortify the velveteen and to give it thickness. Spray the pellon with temporary adhesive and place heavy stabilizer. On this heavy stabilizer, draw a baseline about 15 cm from the bottom using an erasable pencil. In these instructions a thick baseline is shown, to be perfectly visible in these step guides.
In practice the thickness can be much less, as it only serves a guide for a single-stitched line. To make the line horizontal, measure the distance from the bottom of the pellon-velveteen stabilizer sandwich at several places. Sew a straight stitch line, immediately on top of the drawn line, and make the stitch length 6 mm, so that the stitching may be easily removed later. This baseline will serve to place the 4 individual views; View 01, View 02, View 03 and View 04 on or close to one baseline. Draw a line parallel to the short side, which is 90 degrees to the horizontal, about 15 cm from the left, and stitch (6 mm stitch length). |
| Turn the sandwich over. You now have nicely smooth velveteen in front of you, with two straight stitch lines as shown. These lines are essential guides for placement of the 4 separate views, each one in one hooping. Place the sandwich in the largest hoop 260/400 mm, and use the template to be certain that the guide lines on the template are parallel to the stitched guide lines on the fabric shown in the drawing. Use precision in determining that the guides on the template are parallel to the lines in figure 1.
Place the hoop on the bed of the sewing machine. Remove the thread from the needle and remove the bobbin. Turn off the sensors responsible for upper and lower thread. Get View 01 on the sewing machine screen and select the horizontal line. Use the foot control to stitch slowly and to see if the needle is on the horizontal stitch line. If not, turn position and angle controls and stitch again, until the actual needle follows the horizontal line on the fabric. |
| Then select the vertical line on the screen, and slowly stitch, with adjustment of position and angle of the entire image such that the actual stitching is on top of the vertical stitch line ion the fabric. Now the fabric is ready to be embroidered with View 01, so turn the upper and lower thread alarm back on. Place the bobbin and thread the needle with the first color, and start embroidering; the machine will stop for every color change. After the View 04 has been completed, a sturdy back fabric is cut horizontally and a small zipper placed. The back is then sewn to the entire wall hanging, right sides together, and loops are placed at the top. The zipper allows the wall hanging to be turned inside out so that the embroidery shows at the front; and the back is neatly finished this way. Zig-zag cutting at the bottom with small bells attached are optional. | 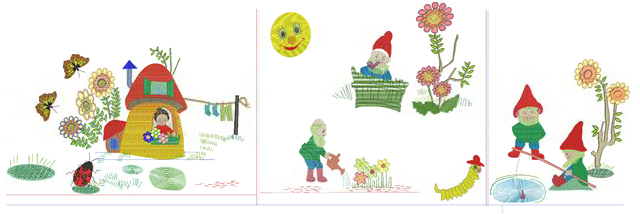 (Click Image to Enlarge) |
|