Border OptionsHugging border, circle, square, or rectangle — with a 3mm satin stitch.
Backing OptionsAvailable with iron-on, sew-on, or velcro backing.
Fast ShippingShipped quickly from the USA.
Free Online Tools
Powerful embroidery utilities that save time and prevent costly mistakes.
Stitch AssistantRECOMMENDED
Get the exact stabilizer, machine settings, needle, and thread color sequence for every embroidery design you purchase — based on that design's stitch density, dimensions, and color count.
The trickiest part is in the hooping; some will find Target Stickers helpful. The recommended measurements of fabric for the classic pattern can be adjusted to fit your project. You need only to remember the following: he length of the fabric determines the width of the table runner. The width of the fabric determines the length of the table runner. The fabric width of both panels must be exact. After the fabric has been washed and dried, double-check the width of each panel for shrinkage, and if necessary, trim to the same measurement.
Step 1:
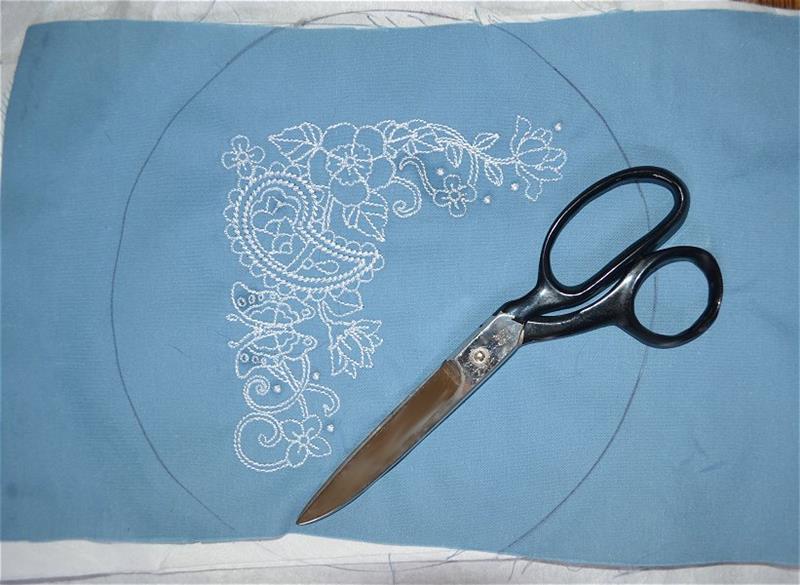
Create a sample on same or similar type of fabric prior to stitching on the final garment to be sure that you are using the best stabilization. I use two sheets of the lower cost tear-away for testing, which has proven to be sufficient when I plan to use one sheet of poly mesh cut-away on the final garment. Examine the sample and make any adjustments that the sample reveals is necessary, such as correct the tension, clean the bobbin case, change a dull needle or change to a different size needle more appropriate for the fabric and thread weight. As well, if there is an excess of oil from over oiling or it has built up while the machine was idle awhile, the excess will likely be eliminated while stitching the test-sample, and prevent the possibility of soiling the final item (note, my sample reveals a few spots of oil). After stitching the test-sample, mark a guideline around the inside edge of the hoop, and then remove from the hoop and cut out along the guideline.
(Click Image to Enlarge)
Step 2:
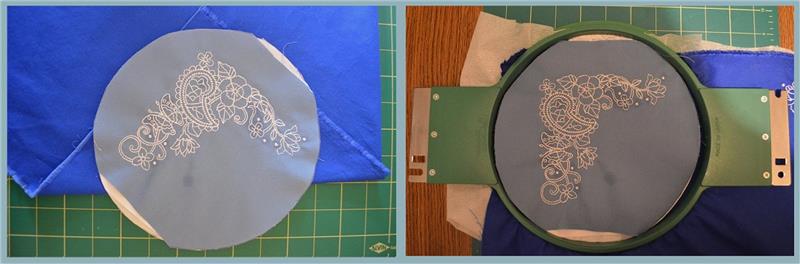
Use the sample to judge placement on the final sew-out. Fold the corners to match up at the inside edge at the center of the panel. Lay the sample on the folded corner with the design placed in the direction it will be stitched. Measure the margin between the fabric edges and the design edge to determine the same measurement you will use for placing the design on each corner. I determined my margins best at 2” between the design and the top of the pocket and 1.5” between the design and center seam. Mark the center of the design with chalk or use a Target Sticker. If you prefer, pin the sample in place to use as a guide when hooping.
(Click Image to Enlarge)
Step 3:
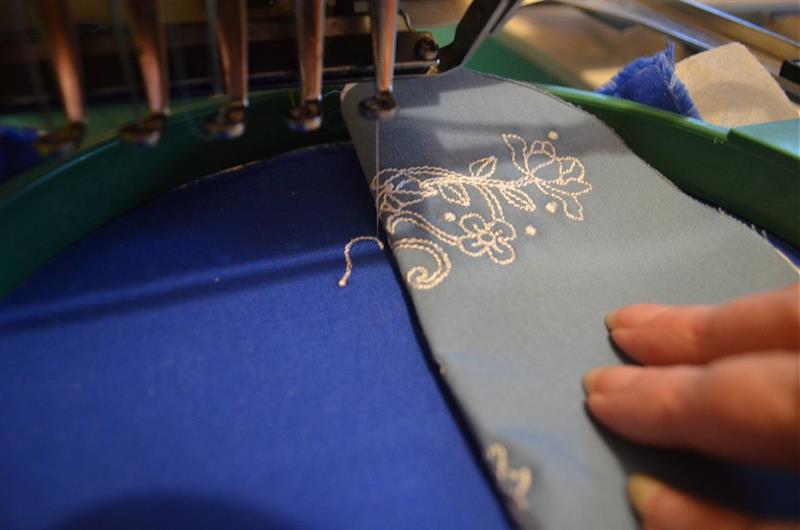
Double check placement after the first element has sewn. For the mirrored design, set the sample into the hoop with wrong side facing up. Fold back the sample until you can see that the matching element on the stitching in progress is mirrored as accurately as possible from the same point. Finish the run and remove from hoop.
(Click Image to Enlarge)
Step 4:
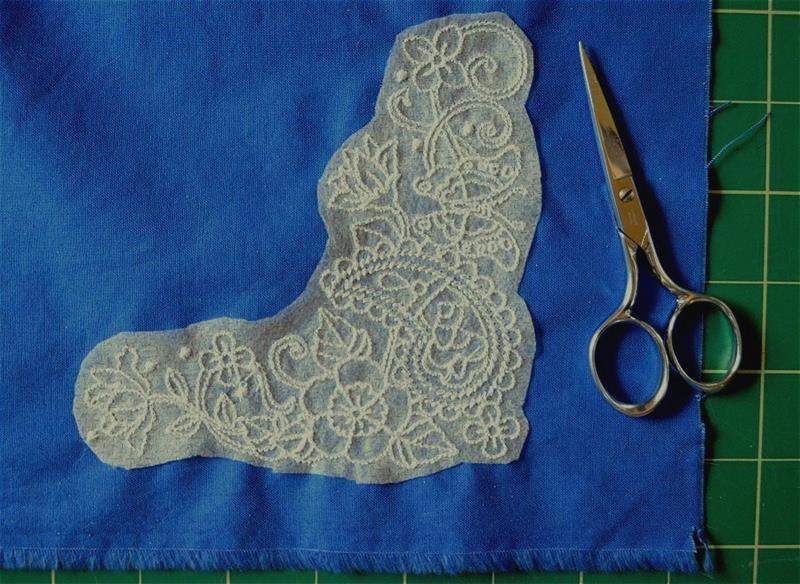
Trim away the poly mesh stabilizer near to the edge of the stitches at the outside edge of the design. One reason I choose to use poly mesh cut-away on light weight fabrics is because, unlike tear-away, there’s no chance of stitches or fabric distortion when it’s removed, and when a standard cut-away is used, the cut edges are often revealed on the topside of the embroidery. Poly mesh is strong, yet flexible, and thin enough to remain undetected.
(Click Image to Enlarge)
Step 5:
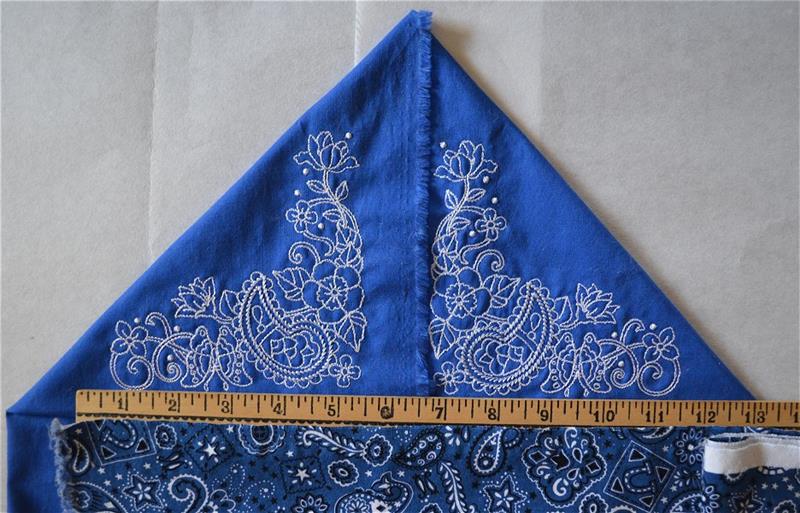
If you have chosen to use a different design that would result in a different size, you may need to re-calculate the yardage of fabric to cut for the top panel. To do so, fold the finished embroidered ends to meet at the center where it will be seamed. Measure the length of the completed embroidery. In this project it measures about 10.5” and I wanted the paisley pattern to exceed the boundaries of the design. As well, I planned a 1/2” seam along the sides, so instead of using the classic pattern’s recommendation of 1/3rd yard, I cut the top panel to measure 15”.
(Click Image to Enlarge)
Step 6:
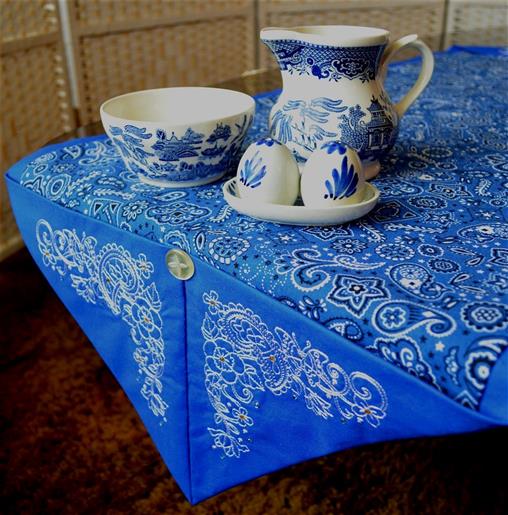
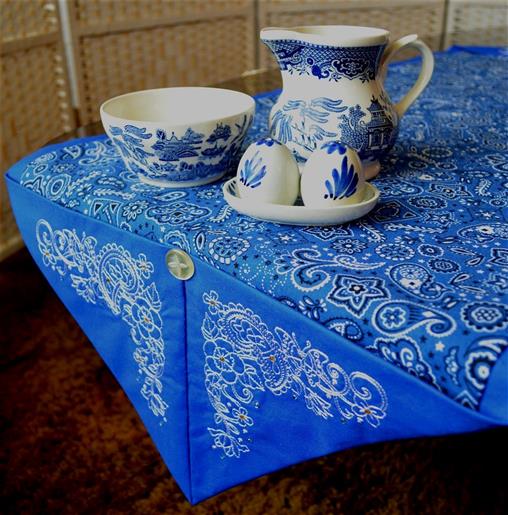
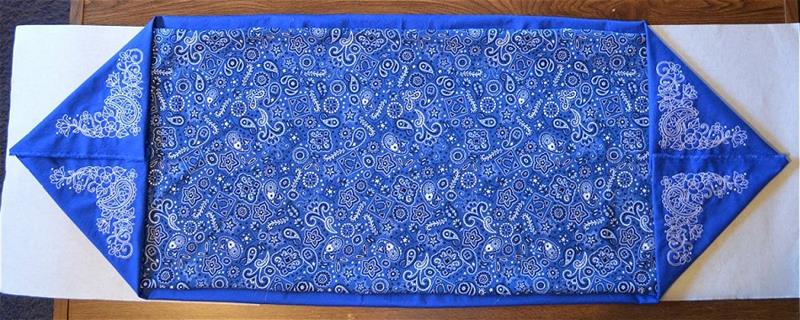
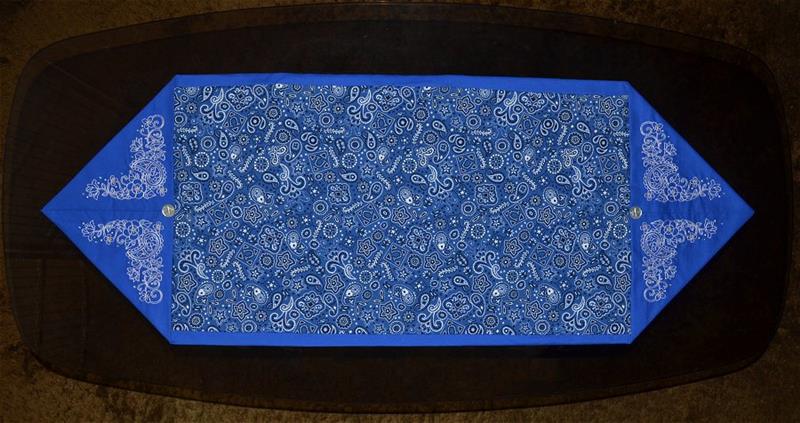
To make sure that the two panels will assemble properly with the embroidery balanced, lay it out and fold in the seams, finger pressing to create a guide while pinning and stitching. Then, follow the 10-minute pattern: with right sides together, pin if preferred, and stitch the length of both sides. Turn right side out and press. Fold lengthwise with the top panel to the inside and stitch a 1/4” seam at each end. Turn both closed ends by reaching to the inside and pulling out the corner where the end meets the sides to create the V-shaped pocket. If desired, top stitch down the center of the pocket to create two pockets or tack down near the top of the pocket by attaching a button to keep it in place when the pocket is draped over the edge of a table. Press the finished table runner.
(Click Image to Enlarge)
Step 7:
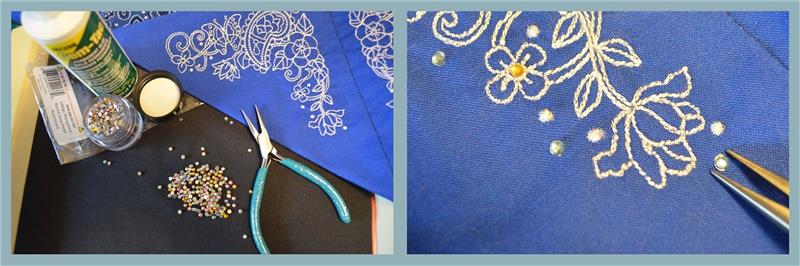
Attach the gems to the design where desired. I work over a tray lined with a dark piece of fabric that helps see the gems and keeps them from scattering. Use a small drop of glue and set the gem in place. Do not push on the gem, which will cause the glue to push out, leaving very little glue below the gem. If a small excess occurs as seen in this example, do not try to clean it away; if you use a quality adhesive like Gem-Tac, it will dry clear. Let dry 24 hours. Press with the embroidery side down for 30 seconds on a medium setting to heat-set the glue.
(Click Image to Enlarge)
Step 8:
This size table runner can be used to adorn the center of a dinner table or a coffee table, or drape over a smaller table with the pockets hanging at each side that can be used to tuck away items like a remote control or use the pockets to display dried flowers.
Bonnie Landsberger has been a crafter and hand embroiderer since childhood and a machine embroiderer and digitizer since 1986. She was the in-house head digitizer for a 50-head embroidery shop for 11 years and later offered custom digitizing services and stock design sales through her web site for Moonlight Design since 1993. She currently also holds a position as a customer service representative at EmbroideryDesigns.com.
Bonnie has won several awards for digitizing, including a gold medal in the 2002 Digitizing Olympics and grand prize in all categories & first place for Winter Holidays category in the Stitches Magazine Great Greeting Card Contest 2003.
Her embroidery and digitizing technical articles can be found in various trade magazines and she is currently a contributing writer and Editorial Advisory Board Member for Stitches Magazine. You can also find more of her articles online at EmbroideryDesigns.com and will continue to contribute articles to our Learning Center.