














































PROJECT INSTRUCTIONS


PROJECT INSTRUCTIONS

Colorful Moments Embroidery Project
By
Karen Webster
on
August 01, 2014
Description
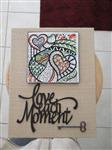
Machine Embroidered Blackwork design on cotton fabric. Added color with Derwent Inktense Watersoluble Ink Pencils. Heat set Colors with iron. Mounted on Black foam core board. Attached with glue to burlap canvas board.
Step
of
Materials
Project Preview Video

QUICK VIEW
Blackwork Rose Hummingbird
$12.00
$6.00
Circle Price: $5.85

QUICK VIEW
Bluework Flower Basket
$10.00
$5.00
Circle Price: $4.85

QUICK VIEW
Redwork Poppies Heart
$10.00
$5.00
Circle Price: $4.85

Decorative Quilt Block
$6.00
$3.49
Circle Price: $3.34

QUICK VIEW
Redwork Boy & Books
$6.00
$3.00
Circle Price: $2.85

Flower Basket
$4.94
$2.47
Circle Price: $2.32

Heart Knot
$4.24
$2.12
Circle Price: $1.97

Tea Pot Outline
$3.89
$1.95
Circle Price: $1.80

Redwork Rose
$3.89
$1.95
Circle Price: $1.80

Rose Alphabet E
$1.19
Circle Price: $0.89

Cut Away Stabilizer - 2.5 Oz wt.
$8.94
Circle Price: $8.05

Cut Away Stabilizer - 2 oz wt.
$8.52
Circle Price: $7.67





| Materials Black thread White textured cotton fabric Burlap covered canvas board (Michaels) Alene's White Tacky Glue Black Cardstock Embellishment of choice Black ribbon Very Small pins (silver or gold) |
| Designs used in this project |
| Final Product: What You Will Create |
 |
|
Projects You May Like
Meet the Author:
Karen Webster
I love to make pretty things. I have crafted most of my life. The last 5 years I have started machine embroidery. I absolutely love it. It opens up all kinds of creative avenues for me...
Feedback
Characters Remaining
Please Login to Submit a Feedback
Invalid Characters, Please enter a valid Comment
Please enter a valid Comment
Reviewed On
Link is Broken, Please check the URL