|
Preface:
| |
At EmbroideryDesigns.com, we have many appliqué designs created by digitizers
who use different techniques. You will find many different techniques used for machine
appliqué designs, because there has never been a standard technique used by
all digitizers or embroiderers. But once you understand the basics of each method,
it will help you recognize the correct steps to complete the sewing of any appliqué
design.
|
The Multiple File Method | |
The multiple file method is used most often by the commercial industry for high
volume production usually on multi-head machines. This method is used by many digitizers
for embroiderers who prefer placement lines separate from the main design so they
can be used as a guideline for the material they will cut from the appliqué
fabric and prepare them in advance. Most often, this is the same line of stitches
that is used as the placement stitches that sew in the design. The precut appliqué
fabric is then set down to cover the placement stitches using a little spray adhesive,
and then there is no need to trim away the fabric before the final stitches cover
the fabric edge. Some digitizers include the additional file for precut appliqué
pieces in their design downloads.
|
The One File Method | |
The one file method is the most popular method and is used by those who don’t
mind the additional time for trimming excess fabric. It requires that you lay a
square of fabric down that exceeds the boundaries of the placement line, overlapping
by about ½”; and then, after the tackdown is sewn, you must trim away
the excess fabric up to the stitched tackdown line. This method requires more handling
time to trim the fabric, but it assures that the fabric will cover the entire area
without leaving any fabric edge uncovered by stitches. After the fabric is trimmed
away, the machine is started again to finish the design.
|
Note The Color Stops | |
Always note the color stops in the color information. Color stops are digitized
in an appliqué design to stop the machine when it is time to work with the
appliqué fabric. All designs are accompanied by a text file of the color information
that often reveals whether a color stop is a placement, tackdown or thread color.
Sometimes this text file will include detailed steps and other times only the actual
sequence of colors gives you a clue as to how you should proceed with the appliqué.
Let’s take a look at the color information for a few of the appliqué
designs on our site, digitized by different vendors.
|
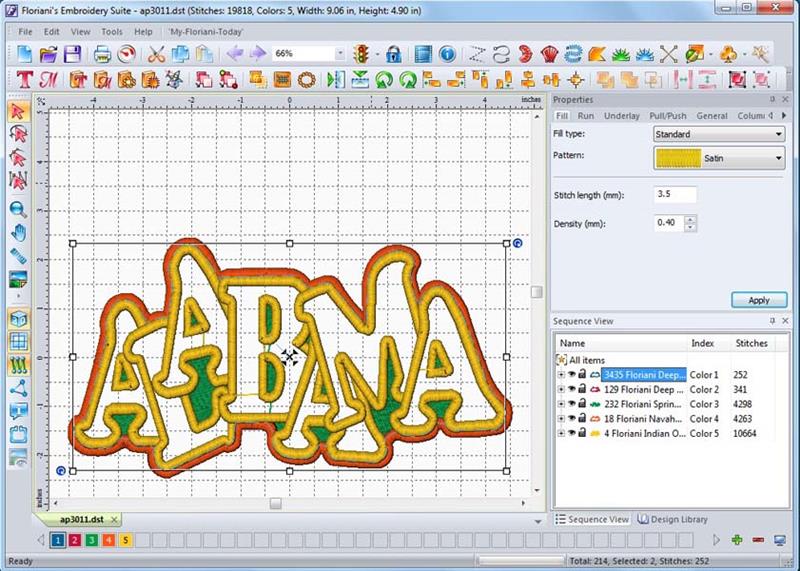
Example 1 | Alabama Applique OESD01-AP3011 by Oklahoma Embroidery
The color information that is included in the text file of this design does not
include any particular thread color numbers, which means that the thread colors
used are optional. Instead it states the following sequence to determine what object
will be sewn to help you with creating your appliqué:
1. Pattern/Placement
2. Tackdown
3. Fill
4. Border
5. Lettering | 
(Click Image to Enlarge) |
| | 
(Click Image to Enlarge) |
|
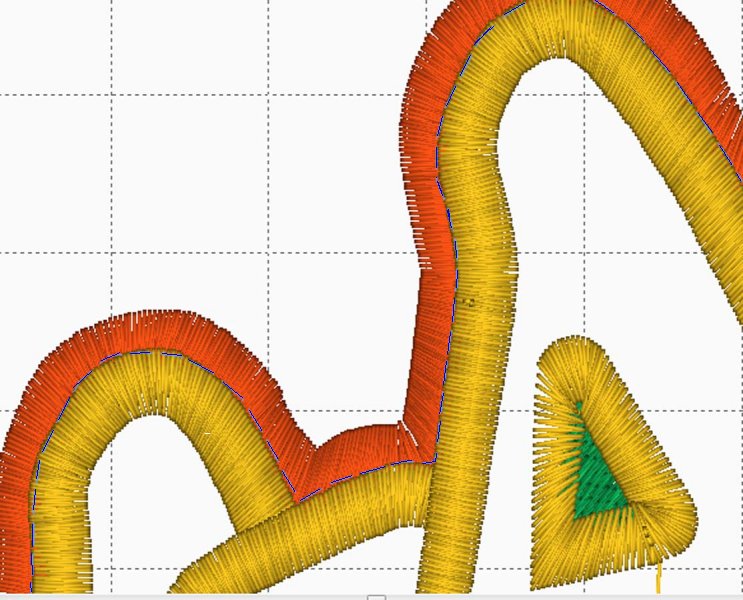
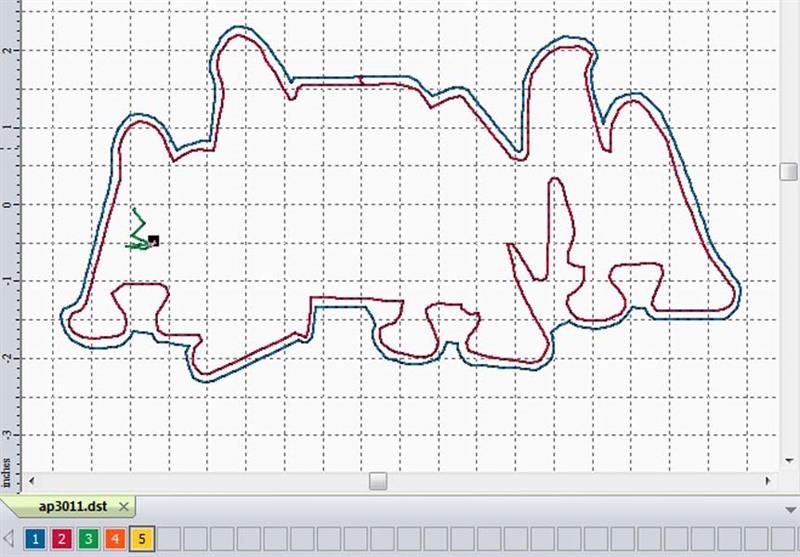
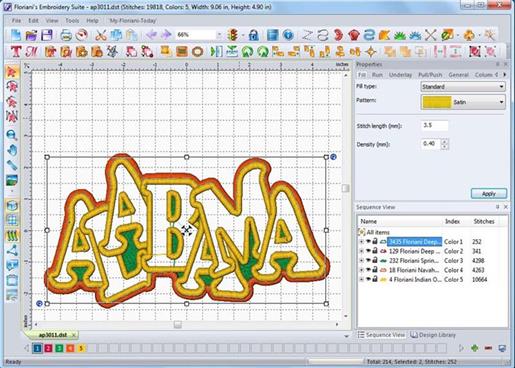
The software has assigned blue for the first color and this is the placement line
that runs along the edge of the satin stitch that eventually covers the edge of
the fabric. Any color can be used to sew this line, because it will be covered
later by a satin stitch, but I prefer to sew both the placement and tackdown in
the same color that I’ll eventually use for the satin stitch that covers the
fabric edge to avoid the possibility of a different color showing through the top
color. | 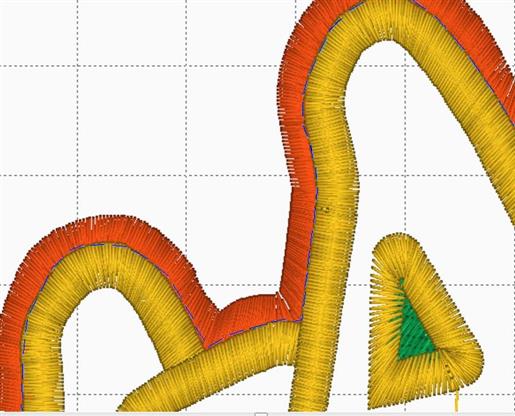
(Click Image to Enlarge) |
|
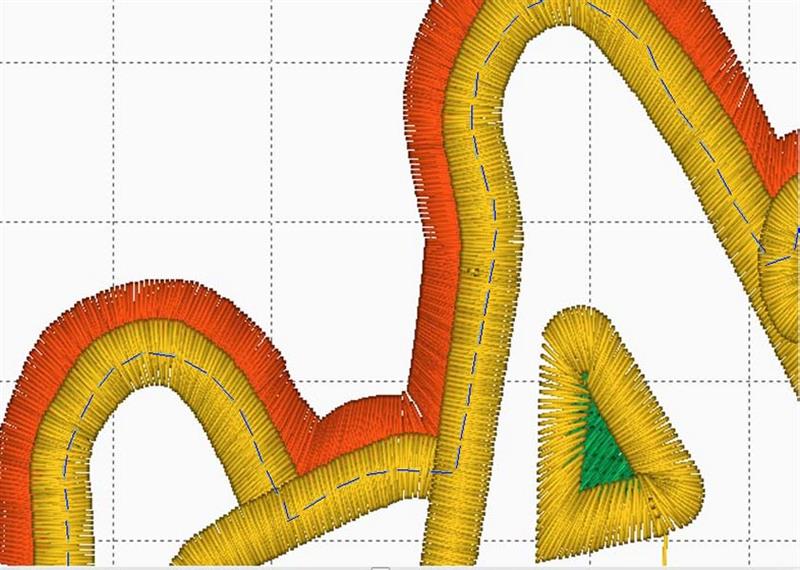
The second color to sew shows in my software as red and this is the tackdown line
that runs just to the inside of the edge of the covering satin stitch. I have selected
the second color and the stitches are designated by the blue dotted line. | 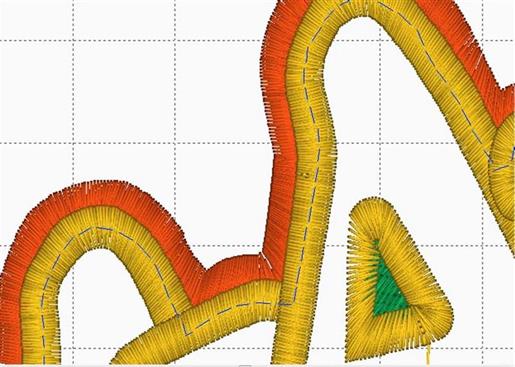
(Click Image to Enlarge) |
|
After the second color sews, the machine stops to allow hand trimming the excess
fabric away up to the tackdown line, but do so without cutting into the tackdown
stitches. As well, keep the fabric edge to the inside of the placement line to be
sure that the fabric does not push past the final satin stitch. After the excess
fabric is trimmed, start the machine and proceed with the third color, and then
the remaining colors to complete the design. | 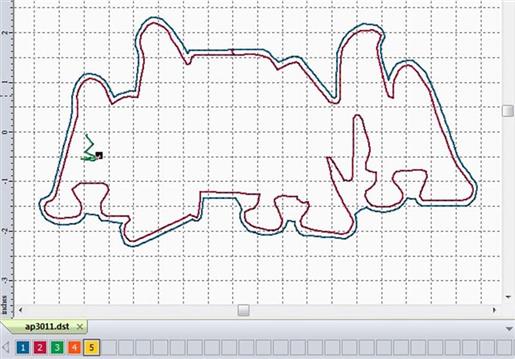
(Click Image to Enlarge) |
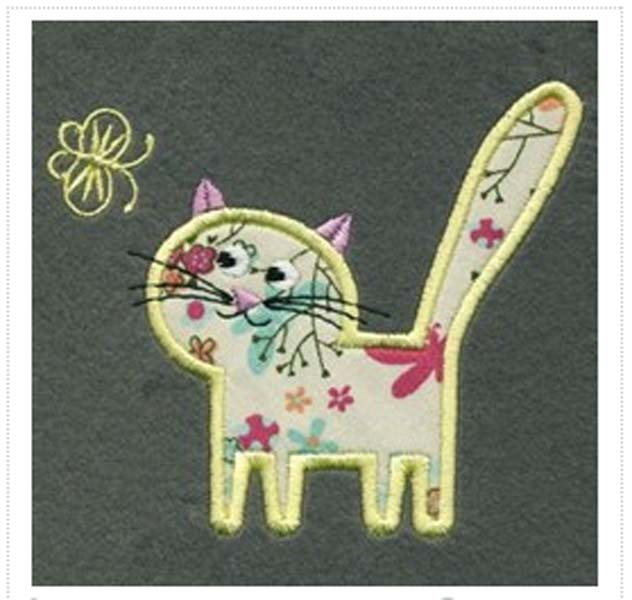
Example 2 | Appliqué Kitty & Butterfly by Premium Embroidery
The color information includes Madeira thread color numbers and does not designate
what object is being sewn:
1. Sunshine (1067)
2. Bright White (1002)
3. Medium Pink (1080)
4. Sunshine (1067)
5. Bright White (1002)
6. Black (1007)
7. Medium Pink (1080)
8. Sunshine (1067) | 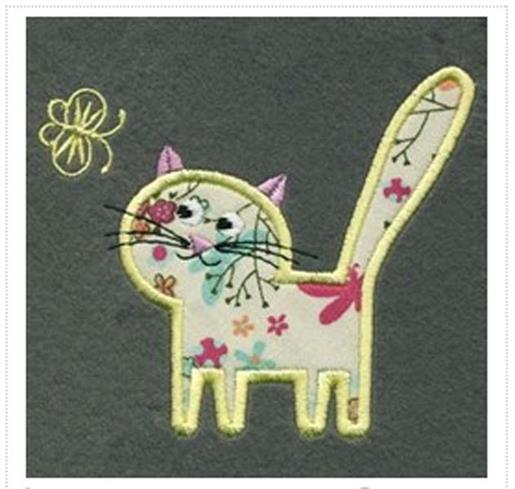
(Click Image to Enlarge) |
|
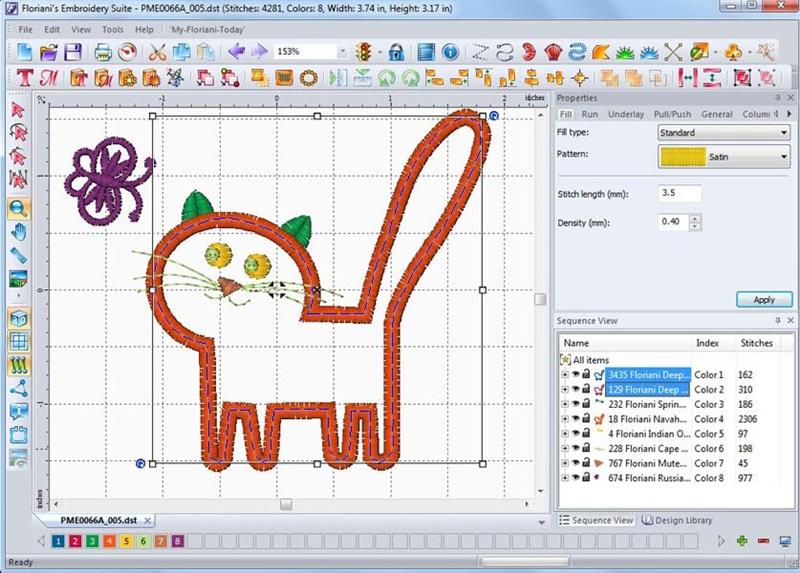
In this situation, you must examine the design closely in either your software or
your machine monitor to determine what object is being sewn. My software reveals
that the first color is the placement and the second color is the tackdown. Take
note of the fact that this digitizer prefers to use a placement line and tackdown
line that are set down in the same place, leaving no allowance between. When trimming
the fabric up to the tackdown line, you should use your best judgment as to how
close to cut to the tackdown and placement lines so that the fabric does not poke
past the final satin stitches that should cover the appliqué fabric edge. Depending
on the width of the satin column, I recommend leaving at least 1/8” or more
when possible. If there is not enough excess fabric, the fabric could pull
away from the stitching immediately or when laundered. Because there is no zigzag
tackdown digitized for this design, the fabric that you use for the appliqué
should be a sturdy fabric that will not fray easily. | 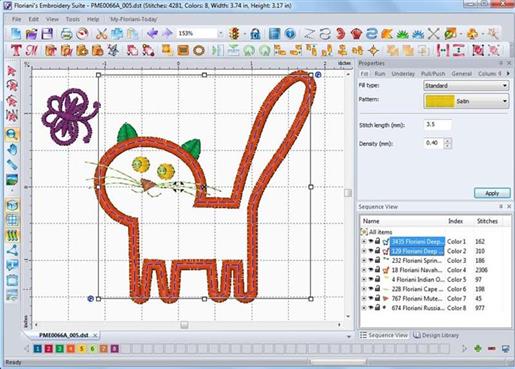
(Click Image to Enlarge) |
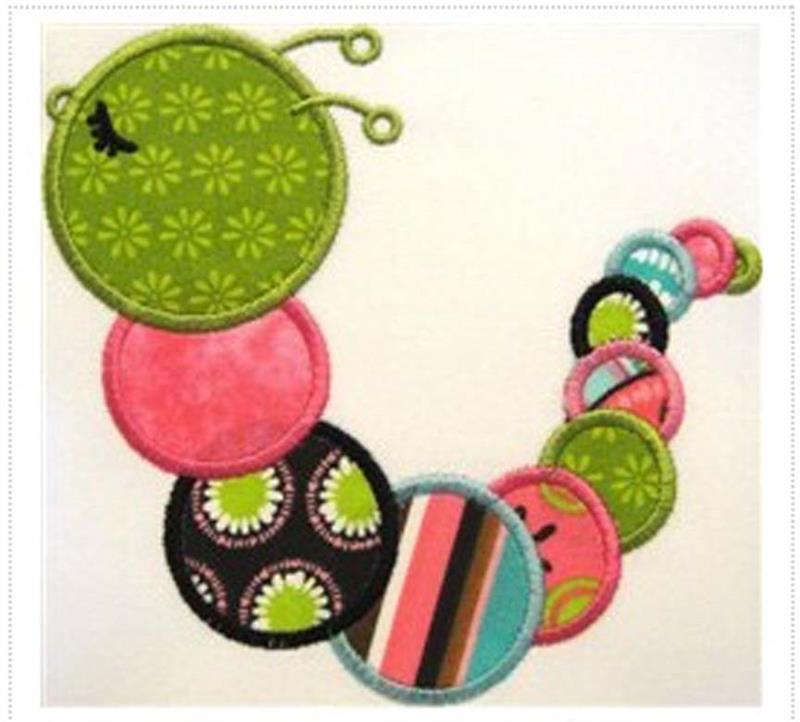
Example 3 | Appliqué Baby Worm by Pat Williams
Some appliqué designs are a bit more complicated with more than one piece of
appliqué fabric used, such as this cute worm design, requiring numerous color
stops. Digitizer Pat Williams has noted the placement line as an outline and she
has also noted whether the color change refers to the appliqué fabric or a
thread color number:
Apply appliqué fabric:
1. Outline
2. Tack down
3. and 4. Outline followed by Tack down as in 1. and 2. and repeated thru 22.
Final thread colors - tip of tail:
23. Olive (1169)
24. Fuchsia (1109)
25. Lt Turquoise (1088)
26. Black (1000)
27. Floral Pink (1309)
28. Olive (1169)
29. Fuchsia (1109)
30. Lt Turquoise (1088)
31. Black (1000)
32. Fuchsia (1109)
33. Olive (1169)
34. Black (1000) | 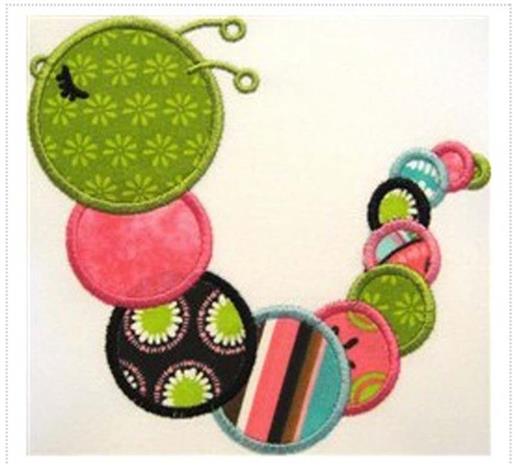
(Click Image to Enlarge) |
|
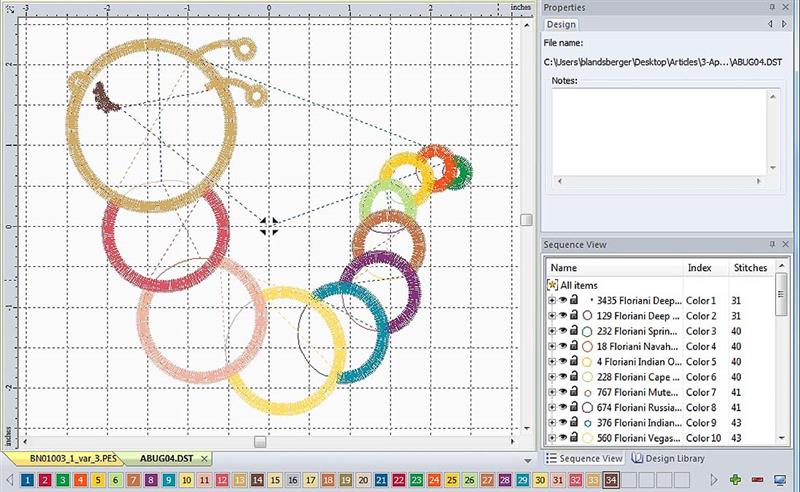
It’s important with this one to check the color sequence in your software
or on your machine monitor and note which section of the worm will sew first in
order for you to choose your preferred fabric for the appliqué in each section. First,
all of the sections of the appliqué are tacked down from the smallest to the
largest section. It then returns to the smallest section at the tip of the tail
to complete the covering satin stitches. The design ends by sewing the worm’s
eye. | 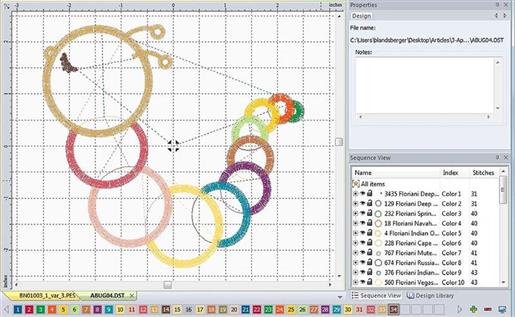
(Click Image to Enlarge) |
Example 4 | 
(Click Image to Enlarge) Butterflies by Morango Designs
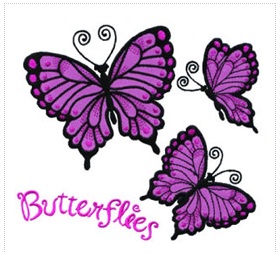
This design may appear a little confusing because the color black is repeated from
color 1 thru 9 to designate the color dark purple that is seen in the image of the
final sew-out. You should adjust the colors in your software or simply take note
that the black will be the main outline color of the butterflies:
1. Black (2296)
2. Black (2296)
3. Black (2296)
4. Black (2296)
5. Black (2296)
6. Black (2296)
7. Black (2296)
8. Black (2296)
9. Black (2296)
10. Hot Pink (2260)
11. Black (2296)
12. Hot Pink (2260)
13. Black (2296)
14. Hot Pink (2260)
15. Black (2296)
16. Hot Pink (2260) |
|
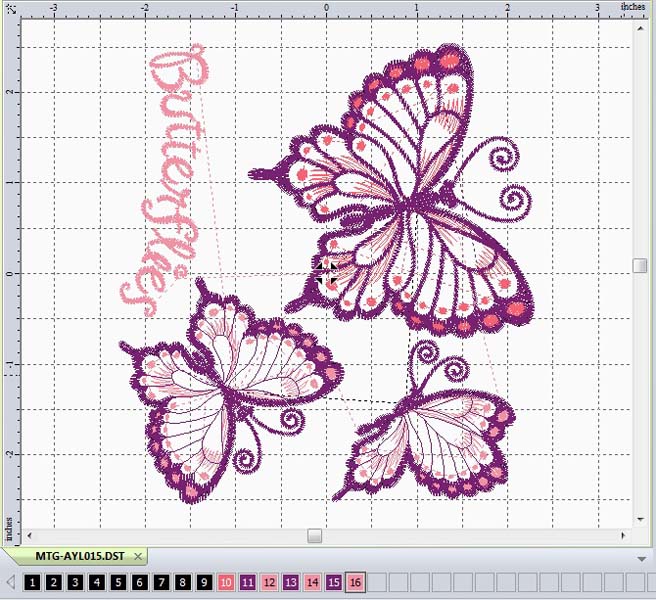
As seen in my software, the digitizer has chosen to rotate the design to be more
compatible with all machine types, because many machines are able to sew only within
a sewing field that is longer in height than width. Be sure to examine the
design in your software or on your machine monitor and if you find it has been rotated,
you can either rotate the design to your preference, or you should hoop your garment
accordingly. | 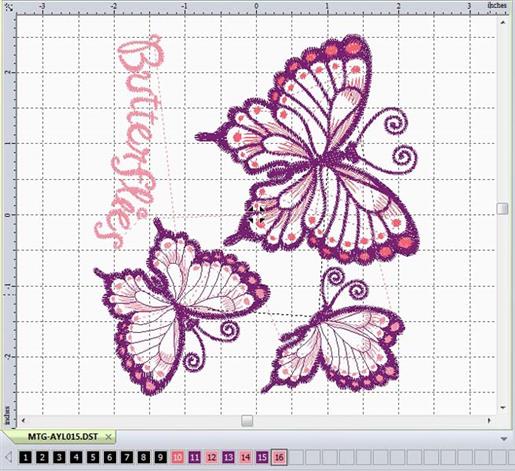
(Click Image to Enlarge) |
|
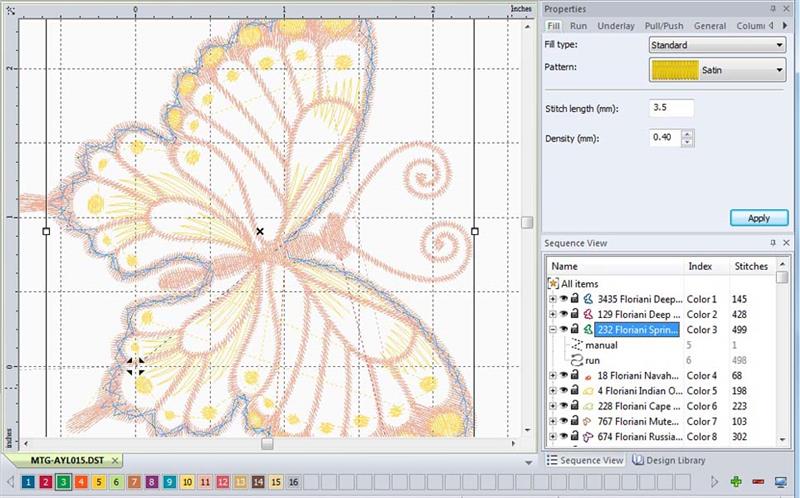
In the color information for this design, no explanation is given as to which color
number is the placement or tackdown. Most appliqué designs begin with placement
stitches, so it can be assumed that color #1 is a placement followed by #2 as the
tackdown. When viewing the design in software I found that this digitizer has also
chosen to add a double zigzag stitch in a third color which will secure the edges
of the fabric, keeping a sheer, vulnerable appliqué fabric from fraying when
laundered. And because there is a color stop, it allows for sewing this zigzag in
the color of your choice. | 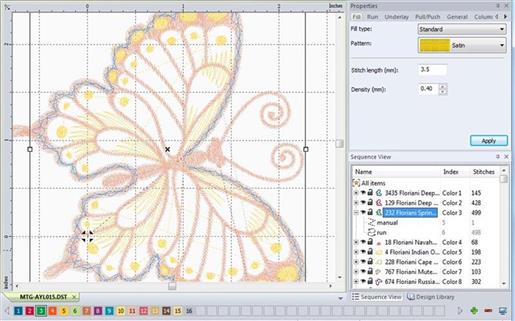
(Click Image to Enlarge) |
| |
So, the first three colors will complete placement, tackdown and zigzag for one
butterfly and move to the next butterfly, repeating the placement, tackdown and
zigzag stitches for color numbers 4, 5 and 6, and then it moves to the third butterfly
for color numbers 7, 8 and 9. After all of the appliqué fabric pieces have
been applied, the final satin stitches of the design are sewn, beginning with the
thread color #10.
|
|
We have close to 10,000 appliqué designs at our site and that number continues
to grow. As you have seen in just these four examples, each digitizer has their
own special way of accomplishing the technique. But, you need not let it confuse
you, because overall, the appliqué process is just a matter of sewing a placement
line, a tackdown line and sometimes a zigzag tackdown line. Examining the colors
of the design prior to stitching will help you understand how that particular design
is created.
If you are interested in trying an appliqué design, but you don’t know
where to start or what design can be used, you can check out all of our appliqué
designs at: https://www.embroiderydesigns.com/designsearchresults?SearchText=Applique.
And if you need further help understanding how to create your appliqué design,
do not hesitate to contact our customer service!
|
|