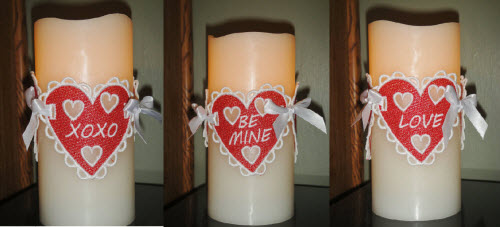
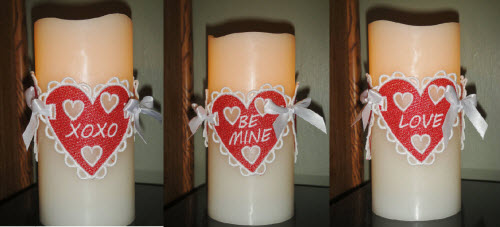
FSL Heart Candle Wrap for Valentine's Day

FSL Heart Candle Wrap for Valentine's Day Embroidery Project

By   Pat Williams   on   February 28, 2014
  • SKILL LEVELBeginner
  • TIME REQUIRED04:30
Description

Create a beautiful freestanding lace heart wrap to adorn your candles this Valentine's Day. This delicate accessory adds a romantic touch to your home decor or makes a thoughtful gift. Step-by-step instructions are included.

Step of

Materials

Project Preview Video

Materials
  • 1 yard fibrous water soluble stabilizer such as Floriani’s Wet and Gone or OESD Aqua Mesh
  • Red and white polyester thread
  • 2 yards of 3/8th inch white craft satin ribbon
  • 4” x 4” embroidery hoop
  • Flameless candle and batteries
  • Tweezers
  • Optional: water glasses
  • Optional: sew ribbon needles (in the paper craft section of your hobby store)

  • Designs used in this project

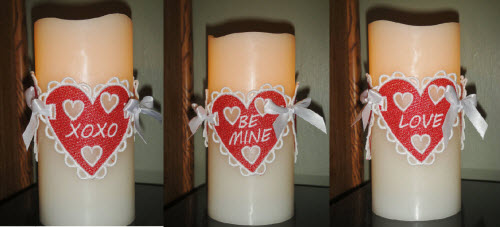
    Final Product: What You Will Create


    Step 1:
     
    Hoop two layers of fibrous water soluble stabilizer in your 4” x 4” hoop tautly.


    Step 2:
     
    Thread red polyester thread in the top of your machine. You can use white thread in the bobbin throughout this project as the back side of the hearts will be against the candle.


    Step 3:
     
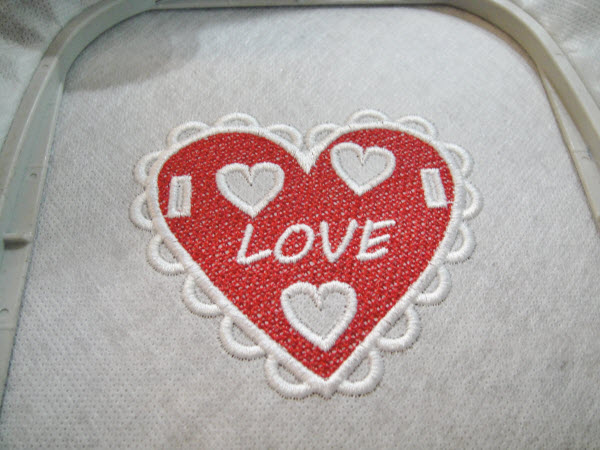
    Stitch the first color sequence with red thread.


    Step 4:
     
    Switch your top thread to white polyester.


    Step 5:
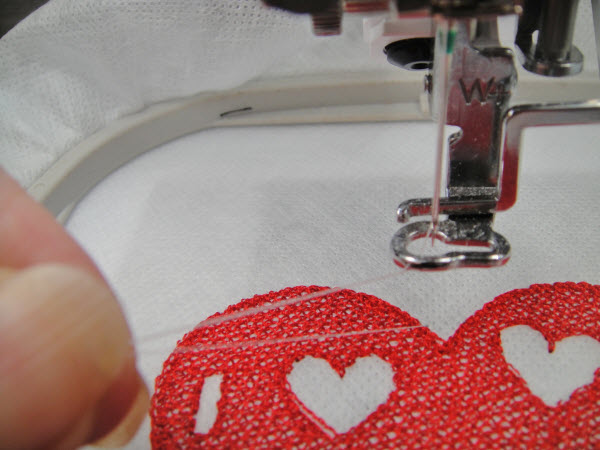
    Bring the bobbin thread to the top by threading the top thread through the presser foot. Depress the needle up button twice while pulling slightly on the top thread. This will bring the bobbin thread to the top of your work. With the tweezers pull the bobbin thread out to the length of the tail of your top thread.

    (Click Image to Enlarge)


    Step 6:
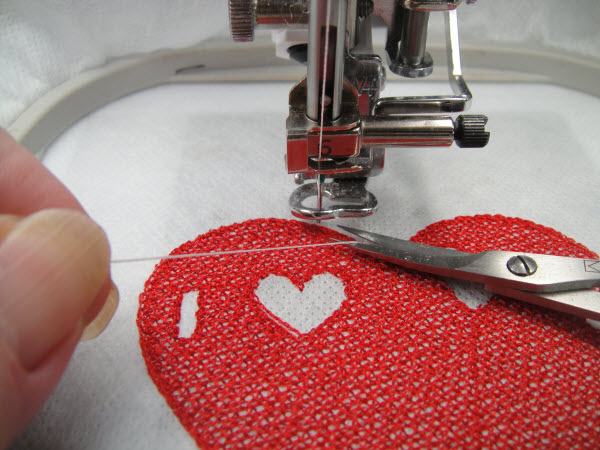
    Stitch a few stitches and stop the machine. Trim off the thread tails. Doing this will keep thread tails from being caught across the back of the work. Repeat this at each stop of the machine for all the inner white sections.

    (Click Image to Enlarge)


    Step 7:
    When the stitching is complete roughly cut the heart from the stabilizer and hold under warm running water to remove the stabilizer. Hold it under the water just long enough to remove the stabilizer from the holes in the work. Leaving some stabilizer in the heart will help it retain its stiffness.

    (Click Image to Enlarge)


    Step 8:
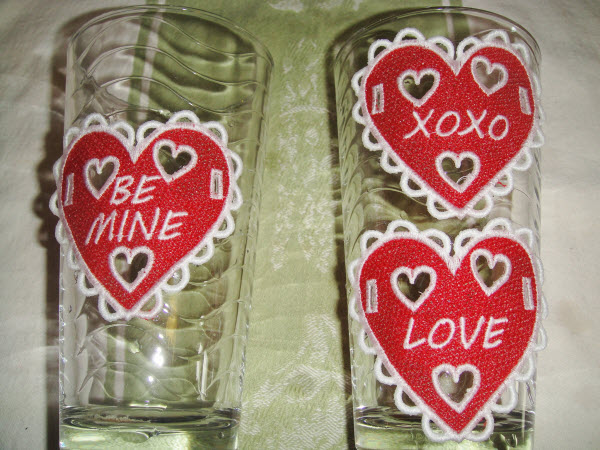
    You can lay the hearts flat on a cotton towel to dry, or as we did in this project, lay them on a water glass to dry so they get a slightly rounded shape. Leave them until they are fully dry in about 3 hours.

    (Click Image to Enlarge)


    Step 9:
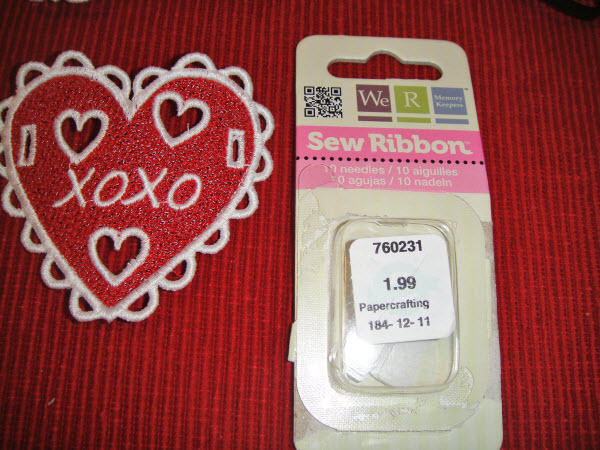
    The Sew Ribbon Needles are a new discovery found in the paper craft section of your hobby store. And though they are optional they make threading the ribbon through the button holes in the hearts a breeze.

    (Click Image to Enlarge)


    Step 10:
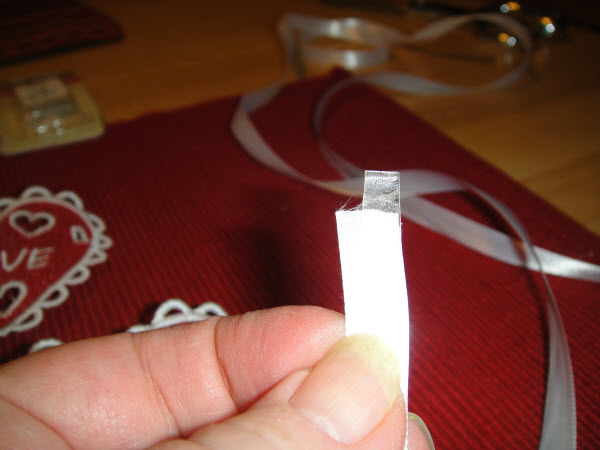
    The Sew Ribbon needle is just a little adhesive stiff piece of plastic that you stick to both sides of your ribbon.

    (Click Image to Enlarge)


    Step 11:
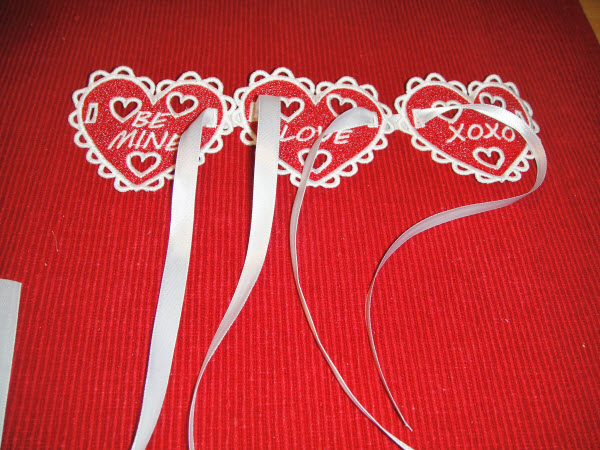
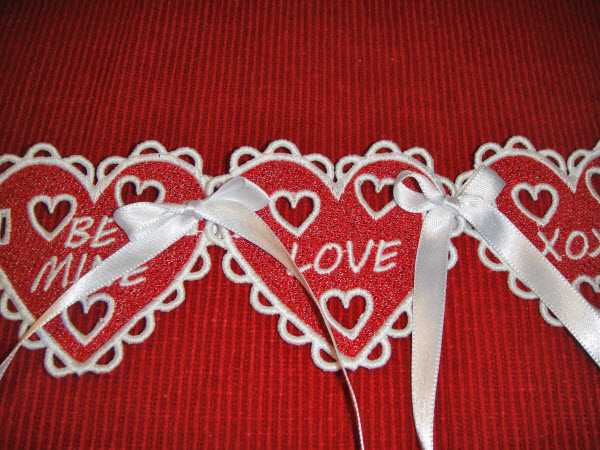
    As you can only use each adhesive needle one time, attach the sew needle to the whole two yard length of ribbon. Thread the ribbon from the top through the bottom of the first heart button hole. Thread the ribbon from the bottom through the top of the second heart. Cut the ribbon leaving about an 11” tail on each side. Repeat for adding the third heart to the chain.

    (Click Image to Enlarge)


    Step 12:
    Tie little bows with a square knot (right over left, left over right) between the two first hearts.

    (Click Image to Enlarge)


    Step 13:
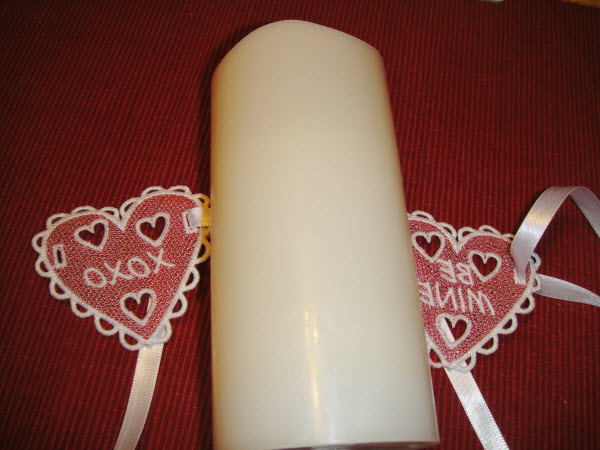
    Turn the heart chain face down and lay the candle on top. Thread the remaining ribbon through the hearts to complete the chain. Tie into a bow.

    (Click Image to Enlarge)


    Step 14:
    Trim the ribbon tails to an attractive length.
    Meet the Author: Pat Williams
    Pat Williams
    Award winning Digitizer, Embroidery Educator, Author and a Consultant to the Industry, Pat Williams has 30 years of experience in the embroidery industry. Pat has won multiple awards for her digitizing expertise including the 2007 Impressions Awards Grand Championship, Best of Show as well as the 1st and 2nd Place Awards. Pat’s love of digitizing has afforded her the opportunity to write numerous articles for Impressions magazine in the United States and Images Magazine in Europe. In 2001 Pat was named “Embroidery Educator of the Year.” For many years Pat taught digitizing seminars at the ISS Shows in Long Beach, CA and for Compucon software. She now resides in Tucson, AZ.
    More From This Author
    Link is Broken, Please check the URL
    Exclusive Embroidery Offers!
    Copyright © {{ currentDate | date:'yyyy'}} - EmbroideryDesigns.com
    GET 50% OFF! ×