














































PROJECT INSTRUCTIONS


PROJECT INSTRUCTIONS

Rooster Towel Topper Embroidery Project
By
Anonymous
on
April 17, 2014
Description
Read all instructions carefully before starting.
Step
of
Materials
Project Preview Video

QUICK VIEW
Redwork Whimsical Roosters Embroidery Bundle – Charming Rooster Characters & More (18 Designs)
$35.82
$21.49
Circle Price: $21.49

QUICK VIEW
Rooster Towel Holder
$3.89
$1.99
Circle Price: $1.84

QUICK VIEW
Towel Holder Rooster
$3.89
$1.99
Circle Price: $1.84

QUICK VIEW
Towel Top
$3.89
$1.99
Circle Price: $1.84

QUICK VIEW
Towel Rooster Topper
$3.89
$1.99
Circle Price: $1.84

QUICK VIEW
Towel Topper Rooster
$3.89
$1.99
Circle Price: $1.84

QUICK VIEW
Fancy Rooster Topper
$3.89
$1.99
Circle Price: $1.84

QUICK VIEW
Towel Top Rooster
$3.89
$1.99
Circle Price: $1.84

QUICK VIEW
Towel Rooster Outline
$3.89
$1.99
Circle Price: $1.84

Fancy Rooster
$3.89
$1.99
Circle Price: $1.84

QUICK VIEW
Towel Topper Back
$3.89
$1.99
Circle Price: $1.84

QUICK VIEW
Towel Top Rooster
$3.89
$1.99
Circle Price: $1.84

Fancy Rooster Outline
$3.89
$1.95
Circle Price: $1.80

Heirloom Rooster
$3.89
$1.95
Circle Price: $1.80

Swirl Rooster
$3.89
$1.95
Circle Price: $1.80

Fancy Rooster
$3.89
$1.95
Circle Price: $1.80

Curly Rooster
$3.89
$1.95
Circle Price: $1.80

Cockrel Outline
free
Circle Price: $0.00

Curly Rooster
free
Circle Price: $0.00

Cut Away Stabilizer - 2.5 Oz wt.
$8.94
Circle Price: $8.05

Cut Away Stabilizer - 2 oz wt.
$8.52
Circle Price: $7.67

| Materials Fabric for tops (cut a little larger than your hoop) Gross grain ribbon Embroidery thread Snap tape of soft sew in Velcro Dish towel or wash cloth Med weight tear-away or cut-away |
| Designs used in this project |
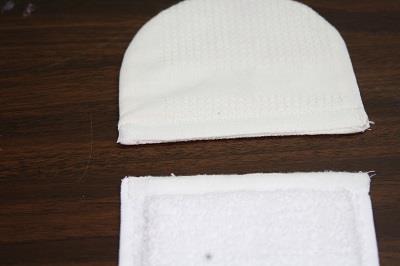
| Final Product: What You Will Create |
 |
|
Projects You May Like
Meet the Author:
Anonymous

Feedback
Characters Remaining
Please Login to Submit a Feedback
Invalid Characters, Please enter a valid Comment
Please enter a valid Comment
Reviewed On
Link is Broken, Please check the URL