














































PROJECT INSTRUCTIONS


PROJECT INSTRUCTIONS

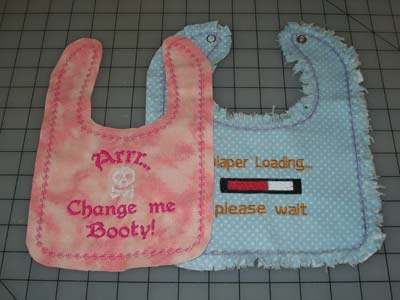
Baby Rag Bibs Embroidery Project
By
Bonnieta Tatro
on
March 12, 2014
Description
Please read the instructions.
Step
of
Materials
Project Preview Video

QUICK VIEW
Baby Rag Bibs
$33.20
$19.92
Circle Price: $19.92

Diaper Loading
$4.99
$1.99
Circle Price: $1.84

Baby Bib
$3.99
$1.99
Circle Price: $1.84

ragbib_005
$3.99
$1.99
Circle Price: $1.84

Groovy Baby
$4.99
$1.99
Circle Price: $1.84

Conseve Water Bib
$3.99
$1.99
Circle Price: $1.84

Call Granpa Bib
$3.99
$1.99
Circle Price: $1.84

McDreamy Bib
$3.89
$1.99
Circle Price: $1.84

Funny Baby BIb
$3.89
$1.99
Circle Price: $1.84

ragbib_003
$4.99
$1.99
Circle Price: $1.84

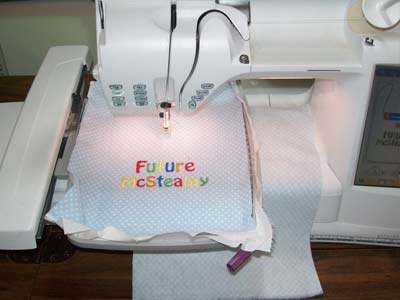
Future McSteamy
$3.89
$1.99
Circle Price: $1.84

Cut Away Stabilizer - 2.5 Oz wt.
$8.94
Circle Price: $8.05

Cut Away Stabilizer - 2 oz wt.
$8.52
Circle Price: $7.67

| Materials Flannel or cotton - cut to 8x10 for the 150x240mm (6x9) hoop & 10x12 for the 200x260mm (10x12) Thread of your choice Tear away stabilizer or starched muslin Air soluble marker |
Designs used in this project: |
| Final Product: What You Will Create |
 |
|
Projects You May Like
Meet the Author:
Bonnieta Tatro

Hi! I am Bonnie, I was born in West Virginia, but raised in Cleveland Ohio. Graphics digitizer, commercial embroiderer & business owner. After living from Maine to Alaska in the Navy, we have settled in the country, so I have space for my three rescued alpacas. I began sewing at the age of 7, never learned to use a pattern so nearly failed home economics in junior high! For over 22 years I designed and created porcelain dolls and their costumes, ranging from antique reproductions to modern style dolls. I also sculpted several of my own dolls and taught classes.
I have been married almost 26 years now! We have two sons. Both boys, Daniel 23 and Jason 21, were home schooled and are currently attending college. My husband and I are active in our church and mission programs as he currently chairs a partnership of churches working in West Africa. We have also trained and led young adult mission teams working in Peru the past seven years. My family is an active supporter of the local Boy Scout troops, having raised two Eagle scouts.
I occasionally travel out of the country with my husband while he goes to meet with other governments. While he works I get to see all the sites and museums :0) We have been to Germany, United Kingdom, Netherlands and Africa. I am looking forward to Sweden this spring.
My digitizing “career” actually began 7 years ago when I purchased a home embroidery machine and software package. I self learned the software as I found out after they had no one that really new anything about the software they were selling so I became proficient in a very short time and the local store asked me to teach classes. This went on for a few years while I expanded my knowledge of the industry and determined it was time to obtain a commercial machine and software package and in doing so I started my embroidery business. I do custom embroidery for local businesses and home embroiderer’s and digitize for Designsbysick.com. I enjoy working with Shawn and Linda as I am able to be more creative with my digitizing and expand on my ideas. My husband supported this “business” change, as I sold my doll business and “focused” on embroidery, but he does think sometimes that he has lost me to the computer!
Feedback
Characters Remaining
Please Login to Submit a Feedback
Invalid Characters, Please enter a valid Comment
Please enter a valid Comment
Reviewed On
Link is Broken, Please check the URL