Border OptionsHugging border, circle, square, or rectangle — with a 3mm satin stitch.
Backing OptionsAvailable with iron-on, sew-on, or velcro backing.
Fast ShippingShipped quickly from the USA.
Free Online Tools
Powerful embroidery utilities that save time and prevent costly mistakes.
Stitch AssistantRECOMMENDED
Get the exact stabilizer, machine settings, needle, and thread color sequence for every embroidery design you purchase — based on that design's stitch density, dimensions, and color count.
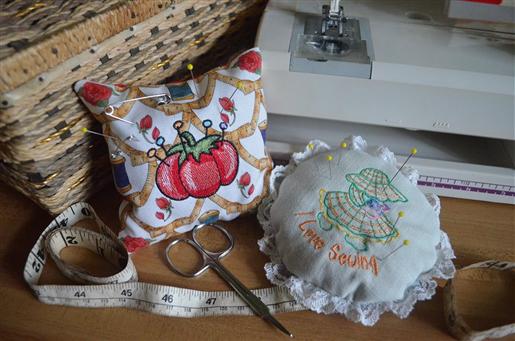
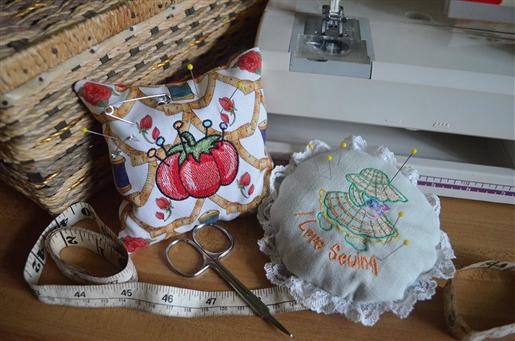
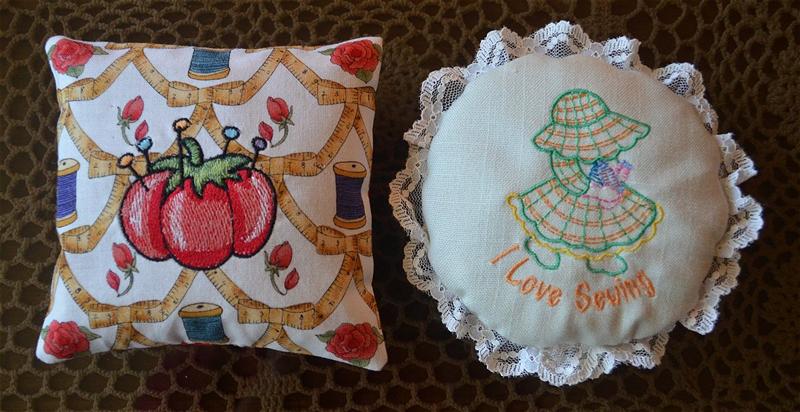
This charming pin cushion is designed in the shape of a small pillow, perfect for keeping your pins and needles organized. It features a vibrant tomato motif and can be filled with crushed walnut shells or other preferred fillers. Step-by-step instructions are included.
A pin cushion is a great way to use up those scraps of fabric left over from other projects and it can be stuffed with any type of filler such as fiber-fill, but a heavier fill helps hold the pin cushion in place as you pull out the pins. You can use a fine sand, rice or flax seed for a filler, or if you’re not allergic to nuts, you might want to try crushed walnuts that are commonly used for reptile bedding and found at pet stores, as well as craft stores.It’s a simple project and time involved should go quickly, depending on the sewing time of the design you choose and how elaborate you get with decorating.
Step 1:
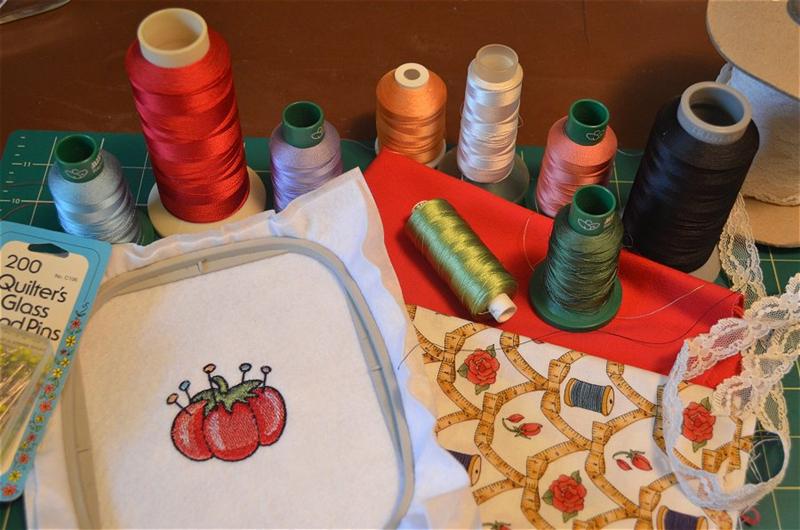
Sew a sample of the design planned for your pin cushion. Gather the materials and choose the thread colors by referring to the color information included with each design and use the closest tones you have in stock to what will look best on the fabric to be sewn.
(Click Image to Enlarge)
Step 2:
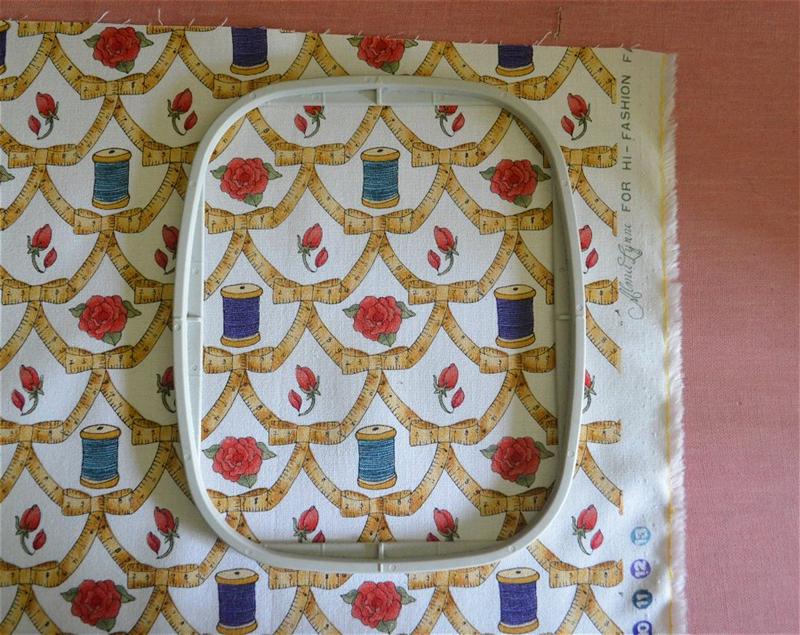
Hoop the fabric and sew. First, set the inner hoop over the fabric to decide where the design will look best, preferably balanced well at the center of other elements. For this print, I wanted the pin cushion to result with the roses placed at the four corners. Then, hoop the fabric with the stabilizer and embroider.
(Click Image to Enlarge)
Step 3:
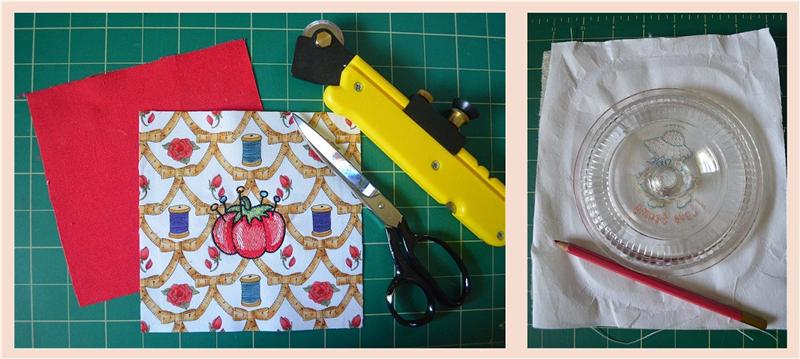
Cut out the panels for both sides. For the square pin cushion, I trimmed away excess fabric, keeping the design at center of a 6″ square, and I used the roses at each corner as a reference. I used a rotary cutter and ruler to cut the straight lines, but a scissors will also work well when it is marked first as I did for the round pin cushion. To keep the design at center of the round pin cushion, you can use a see-thru template or a cut-out circle made from shipping cardboard or do as I have by using a 6″ glass lid from a bowl.
(Click Image to Enlarge)
Step 4:
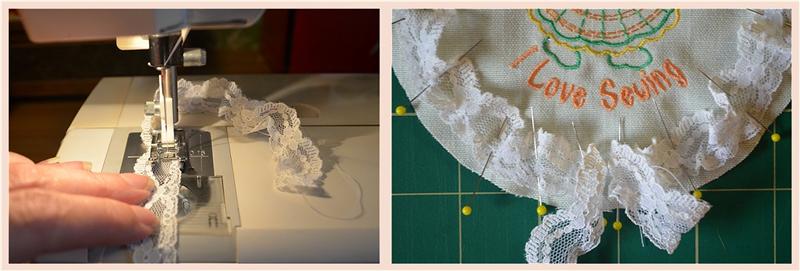
Attach a lace trim. To create a ruffle in lace trim, begin by calculating the length you will need to reach around the sides and include a few inches to the total. Then sew close to the edge with a long stitch length; this automatically causes the trim to ruffle. Pin the ruffled trim on one panel, with the stitched edge to the outside. Line up the stitches that made the ruffle with where you will be sewing the final seam (about ½” from the edge) and baste in place. Basting it to one panel will make it easier when stitching the seam.
(Click Image to Enlarge)
Step 5:
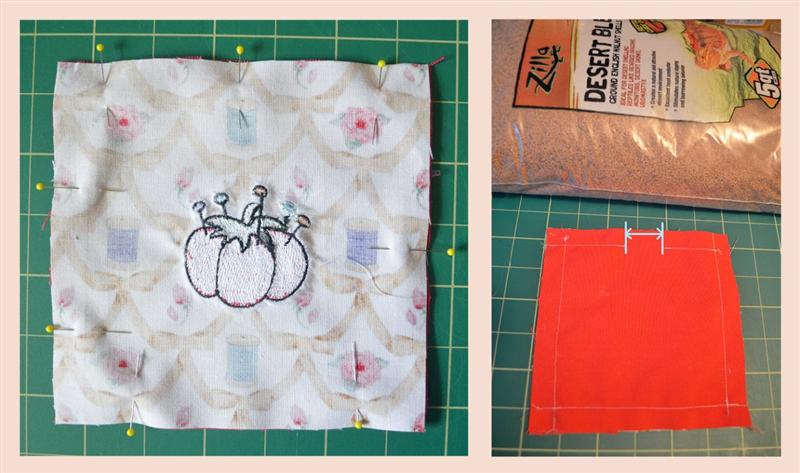
Pin the right sides together and stitch. Begin at the side that is below the bottom of the design. Leave a 1-1/2″ opening; the smaller the opening that you can manage will make the stuffing process easier, as well as result in less time to stitch closed. (This image reveals that I used a black bobbin thread for the outline. When sewing narrow columns, the machine I used sometimes has a tendency to pull the bobbin thread to the top, so I used a bobbin thread in the corresponding color.)
(Click Image to Enlarge)
Step 6:
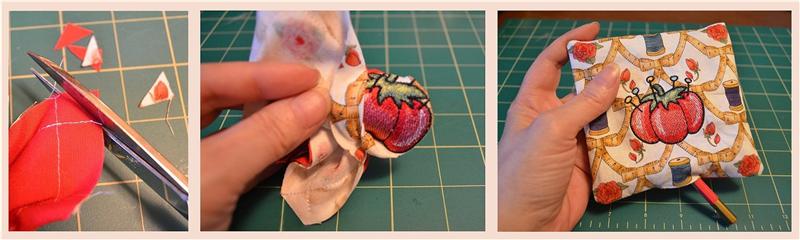
Trim corners and turn. Remove some of the bulk by trimming away the corners. Turn by gently working the embroidery through the opening first and the rest will follow. Use an eraser or rounded end of a marking pencil or similar object to push out the corners; do not use an object with a pointed end.
(Click Image to Enlarge)
Step 7:
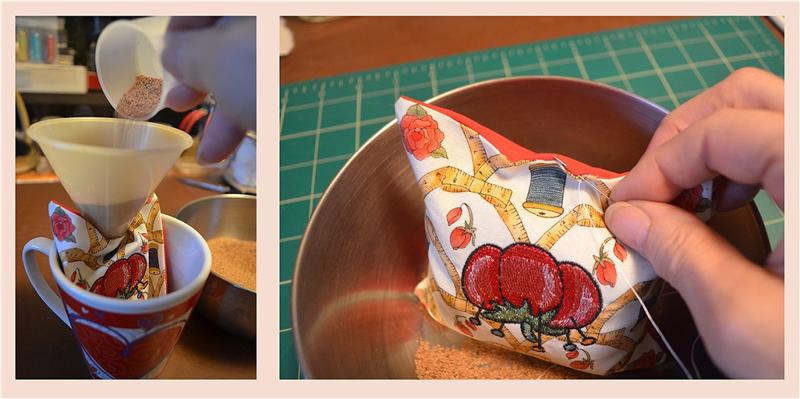
Stuff the pin cushion and stitch to close. Set the turned pin cushion in a cup or bowl to hold it steady while pouring in the crushed walnut shells slowly through a small funnel. Close with a blind stitch.
(Click Image to Enlarge)
Step 8:
After you have completed your pin cushion, you can add a few touches with beads or ribbon, or leave as is, because the embroidery is the only embellishment needed!
Bonnie Landsberger has been a crafter and hand embroiderer since childhood and a machine embroiderer and digitizer since 1986. She was the in-house head digitizer for a 50-head embroidery shop for 11 years and later offered custom digitizing services and stock design sales through her web site for Moonlight Design since 1993. She currently also holds a position as a customer service representative at EmbroideryDesigns.com.
Bonnie has won several awards for digitizing, including a gold medal in the 2002 Digitizing Olympics and grand prize in all categories & first place for Winter Holidays category in the Stitches Magazine Great Greeting Card Contest 2003.
Her embroidery and digitizing technical articles can be found in various trade magazines and she is currently a contributing writer and Editorial Advisory Board Member for Stitches Magazine. You can also find more of her articles online at EmbroideryDesigns.com and will continue to contribute articles to our Learning Center.