Applique Gingerbread House Decoration

Applique Gingerbread House Decoration Embroidery Project

By   Pat Williams   on   October 21, 2013
  • SKILL LEVELIntermediate
  • TIME REQUIRED07:00
Description

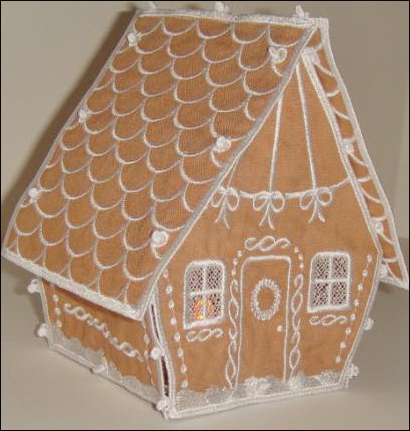
Create a charming applique gingerbread house that stands freely, perfect for holiday decor. This delightful project combines applique and lace techniques to bring festive cheer to any space. Step-by-step instructions are included.

Step of

Materials

Project Preview Video

Materials
  • Fat Quarter (18" x 22") Golden-tan cotton fabric
  • 3.5 yards of water soluble fibrous stabilizer
  • White polyester embroidery thread - sample is shown with Madeira polyneon 1802
  • Small, sharp tipped cuticle scissors
  • Tweezers, stiletto, hemostats and or tiny crochet hook
  • Temporary spray adhesive
  • Magic Sizing or Best Press spray sizing
  • Flameless tea light (optional)
  • 5" x 7" embroidery hoop
  • Embroidery designs

  • Designs used in this project

    Final Product: What You Will Create

    Preface:
    Time: 3 hours sewing time, 3 hours drying time, 1 hour assembly.

    General instructions:

    All embroidery on each piece is done in the same manner. Even though there are color changes listed in each of the designs, sew all colors with white polyester thread. Rayon thread is too soft for free standing lace articles. Before you start sewing, spray your fabric with Magic Sizing or Best Press and iron the fabric. Then do it again. You want your material to be almost crisp.

    Tip - if any of your sections are too limp due to washing out too much of the stabilizer - you can iron the back side of the piece with the Magic Sizing. You can also place some of the scraps you saved from the stabilizer in a shallow dish, add a little water and let them melt; wet the limp piece with this additional stiffener.


    Step 1:
    Hoop two layers of water soluble fibrous backing - such as Floriani Wet N' Gone.


    Step 2:
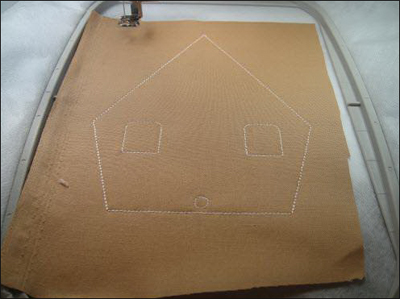
    Embroider the first color sequence - that is the placement line.


    Step 3:
    Cut a rectangle of fabric about an inch larger than the placement line you just sewed.


    Step 4:
    Spray the back side of the fabric lightly with spray adhesive and finger press over the placement lines.


    Step 5:
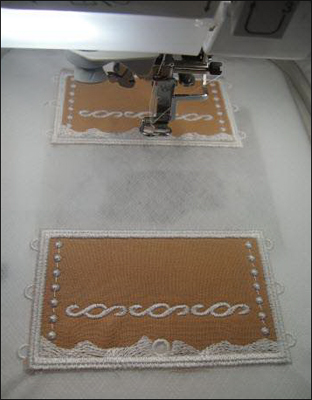
    Sew the second color sequence. These are the tack down lines. The stitches will outline the piece and may also include windows or eyelets in the fabric.


    Step 6:
    Remove the hoop from the machine - do not unhoop the piece. Place on a flat surface.


    Step 7:
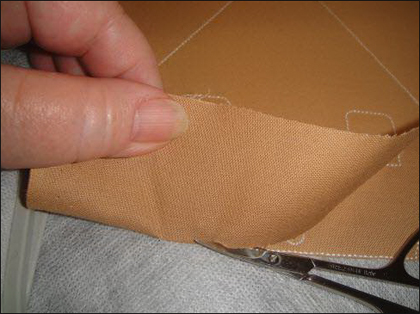
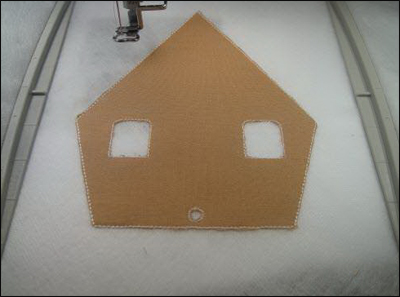
    With your sharp cuticle scissors trim the excess fabric from around the shape. Lift the excess fabric towards the shape and trim as close as possible to the tack down line.


    Step 8:
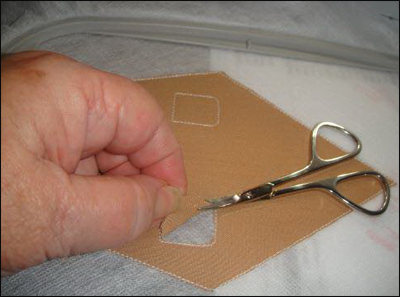
    In the pieces that contain windows or eyelets, slip the sharp tip of your scissors under the fabric and carefully trim around the shape. Do not cut away the stabilizer, just the fabric.


    Step 9:
    Return the hoop to the machine to complete the embroidery.

    Note: The two sides of the Gingerbread House are included in one file in order to save stabilizer.


    Step 10:
    Roughly cut out the design piece (save those scraps of stabilizer).


    Step 11:
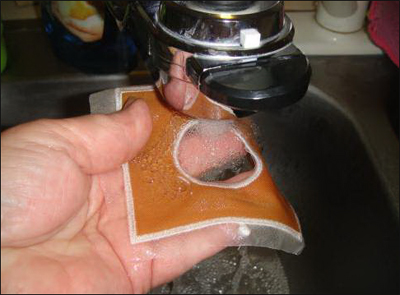
    Rinse away the stabilizer under warm running water. Just keep the piece under the water long enough to remove the stabilizer from the outside edges and any holes in the piece. We want to leave as much of the stabilizer in the fabric to insure stiffness.


    Step 12:
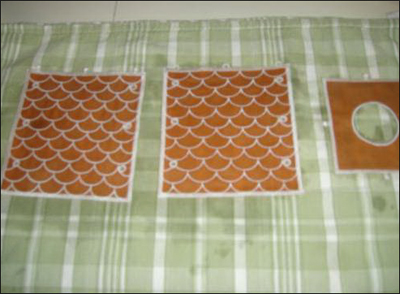
    Lay the wet pieces on a smooth cotton dish towel to dry.


    Step 13:
    Let the piece dry thoroughly.


    Step 14:
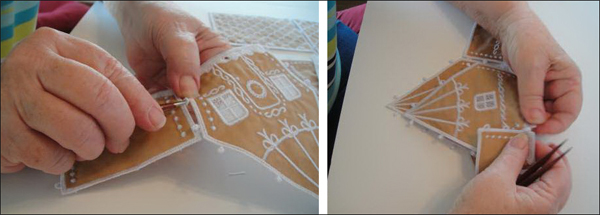
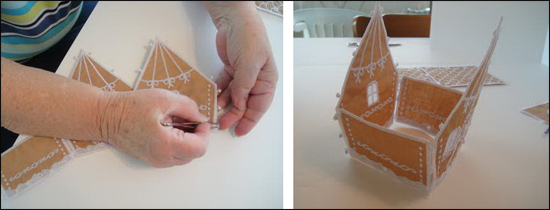
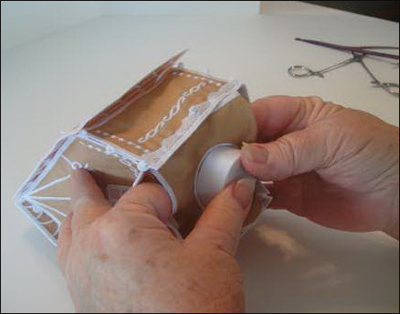
    Attach the two sides to the house front by inserting the tweezers tips through the loop, squeezing the corresponding button and pulling it back through the loop. Or use the stiletto to push the button through the loops as necessary.

    (Click Image to Enlarge)


    Step 15:
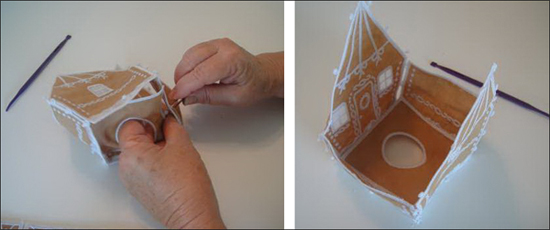
    Repeat step 1 to attach the back of the house to the sides.

    (Click Image to Enlarge)


    Step 16:
    Join the floor to the house by inserting the buttons through the eyelets on the front back and sides of the house.

    (Click Image to Enlarge)


    Step 17:
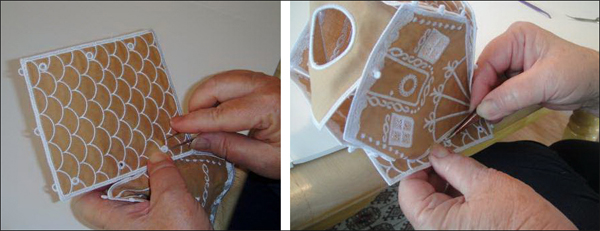
    Pull the buttons on the top and back of the house through the eyelets in the roof pieces.

    (Click Image to Enlarge)


    Step 18:
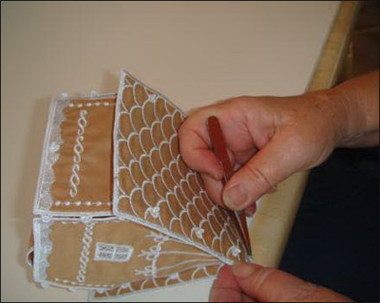
    (Click Image to Enlarge)
    Join the top of the two roof pieces.


    Step 19:
    Place over the flameless tea light to see the light shining through the windows.
    Meet the Author: Pat Williams
    Pat Williams
    Award winning Digitizer, Embroidery Educator, Author and a Consultant to the Industry, Pat Williams has 30 years of experience in the embroidery industry. Pat has won multiple awards for her digitizing expertise including the 2007 Impressions Awards Grand Championship, Best of Show as well as the 1st and 2nd Place Awards. Pat’s love of digitizing has afforded her the opportunity to write numerous articles for Impressions magazine in the United States and Images Magazine in Europe. In 2001 Pat was named “Embroidery Educator of the Year.” For many years Pat taught digitizing seminars at the ISS Shows in Long Beach, CA and for Compucon software. She now resides in Tucson, AZ.
    More From This Author
    Link is Broken, Please check the URL
    Exclusive Embroidery Offers!
    Copyright © {{ currentDate | date:'yyyy'}} - EmbroideryDesigns.com
    GET 50% OFF! ×