Border OptionsHugging border, circle, square, or rectangle — with a 3mm satin stitch.
Backing OptionsAvailable with iron-on, sew-on, or velcro backing.
Fast ShippingShipped quickly from the USA.
Free Online Tools
Powerful embroidery utilities that save time and prevent costly mistakes.
Stitch AssistantRECOMMENDED
Get the exact stabilizer, machine settings, needle, and thread color sequence for every embroidery design you purchase — based on that design's stitch density, dimensions, and color count.
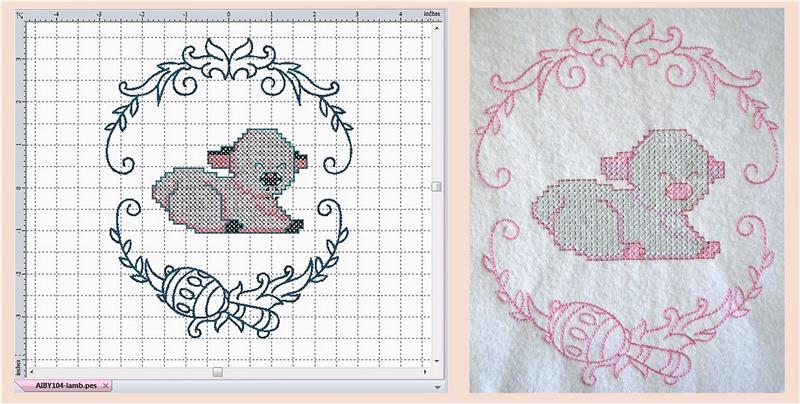
Combinedesigns and test sew. Merge the two
designs in your editing software, arrange the lamb inside the frame and
save as one design. Test sew the design on sample fabric such as felt.
If you are unsure of what colors you will use on the final garment this
is the time to experiment. For this sample, I used most of the colors
found in the color information that accompanies the design files just to
test the results. I also chose to use a silver for the "wool" in place
of the white so those stitches would be clearly seen against the white
felt.
(Click Image to Enlarge)
Step 2:
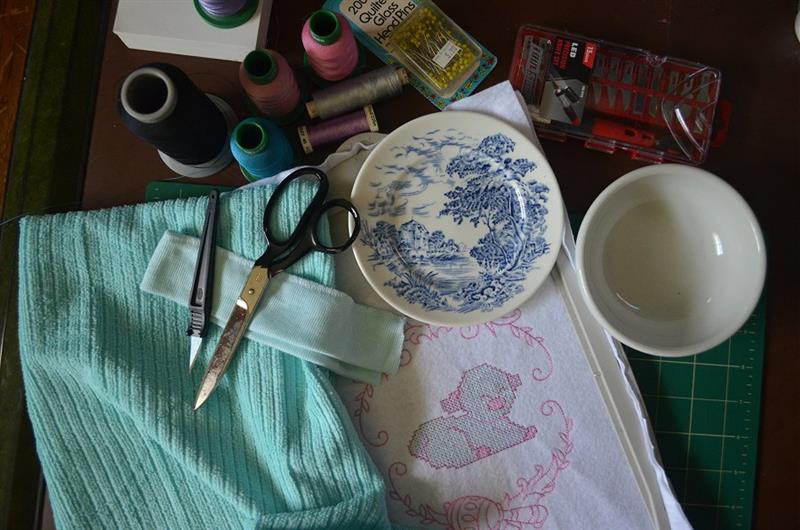
Gather your materials and supplies. If you don’t have a sewing or
artist’s template, you will also need something to use as a guide for
cutting the neck hole in the towel; a small 6” dish or bowl works well
for the average baby’s head. You can also measure the circumference of
your own child’s head for a tailored fit, and choose an appropriate size
dish or other item for a template. I had serged ribbing on hand, but if
you don’t, then you will need to fold a 3-3.5” wide strip of ribbing
along its 8” length and serge or zigzag stitch the open edge. Note, a
serged/zigzag edge isn’t actually necessary because ribbing doesn’t
fray, but it does help speed the sewing while pinning and stitching to
the neckline.
(Click Image to Enlarge)
Step 3:
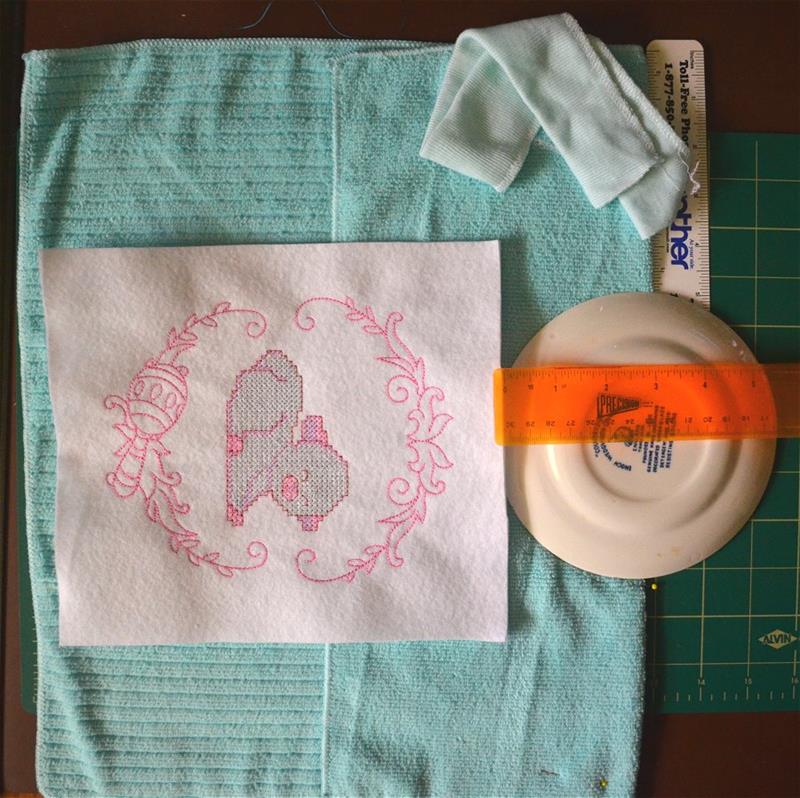
Fold one third of the top of the towel to the
inside with right sides together, lining up the side edges, and pin to
keep the fold in place. Lay the sewn sample in the approximate area
where it is planned to be sewn to insure there will be a large enough
sewing field. Set your template at the center of the fold, so that one
half of the template is on the towel. I used a ruler to determine the
half-way mark of the dish I used for a template. Also, be sure to
measure from each side of the towel to the edge of the template to be
sure the shoulders are of an equal length.
(Click Image to Enlarge)
Step 4:
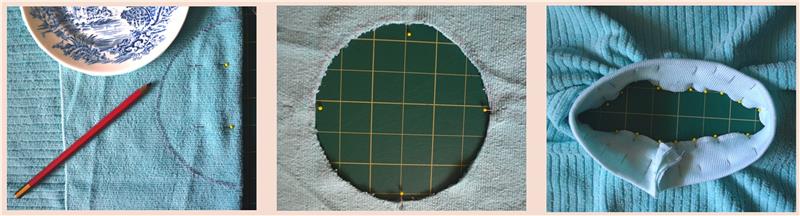
Mark the edge of the neckline around the plate
and cut along the mark. Unfold the towel and pin at four cross-points to
use as a guide for pinning the ribbing on evenly.
(Click Image to Enlarge)
Step 5:
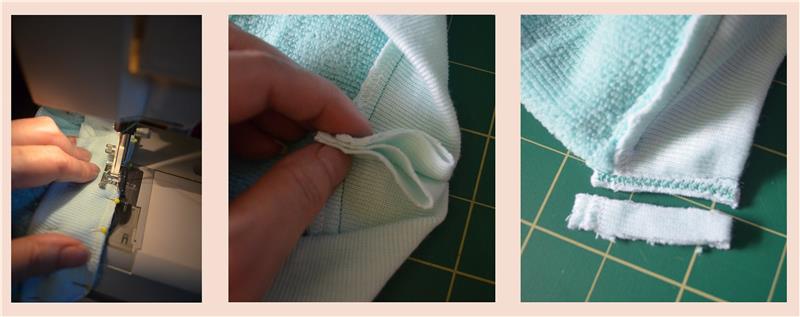
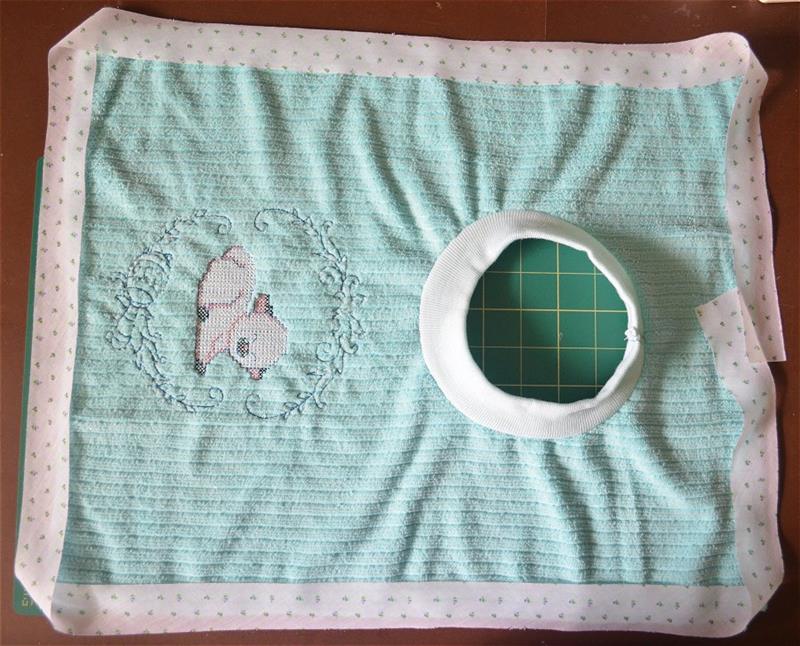
With right sides together, stitch a 1/4" narrow seam to attach
ribbing to the towel, starting and stopping about 1/2" away from the
tails of the ribbing. Match the ends of the ribbing so that the outside
folds meet evenly and serge or zigzag once or twice to close the ends
and trim away excess ribbing. Stitch to finish the seam between towel
and ribbing.
(Click Image to Enlarge)
Step 6:
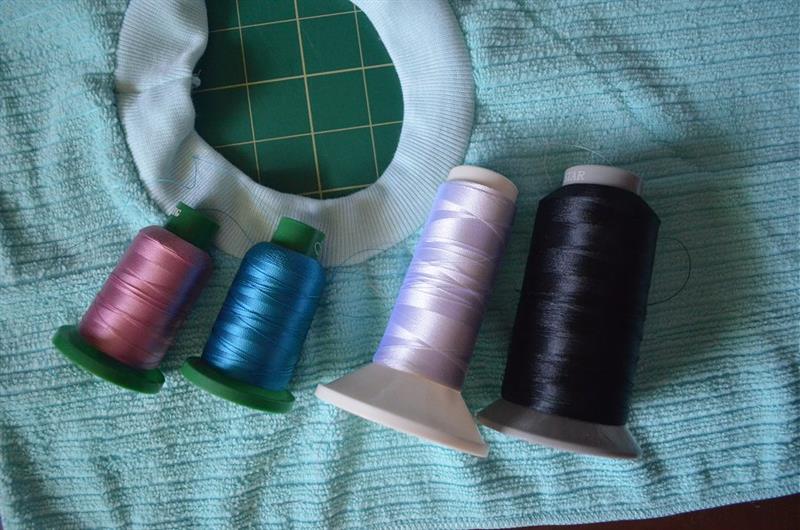
Choose the colors to use for the embroidery by laying them
together on the towel. Do this in a well-lighted area to determine
whether a particular shade will work well.
(Click Image to Enlarge)
Step 7:
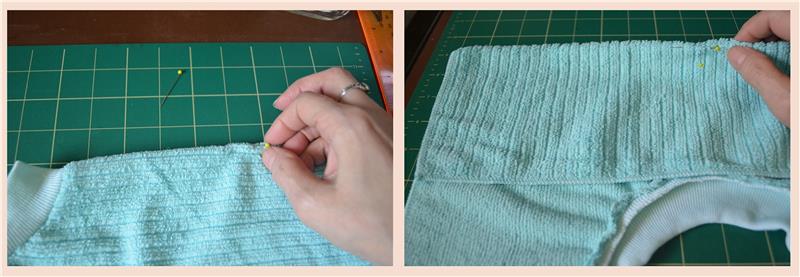
Determine the center of the embroidery by folding
the towel first along its length, measure to find the half-way mark and
pin, and then fold along its width, find the half-way mark and pin. The
center is at where the pins cross.
(Click Image to Enlarge)
Step 8:
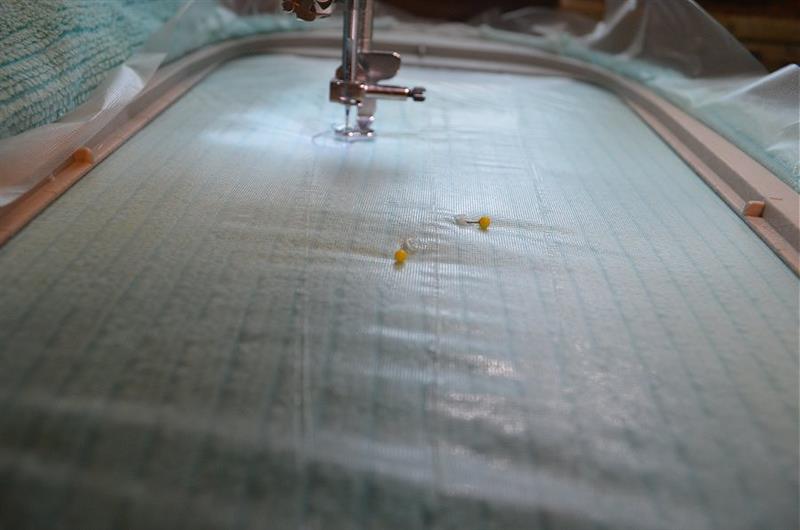
Hoop the bib with a poly mesh cut-away on the
back and a water soluble topping. Rip away a bit of the water soluble
stabilizer to expose the needle tops which will make quick removal
easier. My bib is too short to be completely hooped in the 6.2 x 10.2”
hoop, leaving about 1” of the bib un-hooped at the bottom, so I’ve made
sure that the sheets of stabilizers are large enough to be completely
hooped to help keep the bib taught and I pinned the edge of the towel to
the stabilizer to help keep it in place (not seen in this image). Place
the hoop in the machine and move the hoop until the needle is sitting
over the point where the needles cross. After sewing begins, stop the
machine, remove the pins, and proceed with sewing. If the design you
choose begins sewing at the center point, remove the pins before sewing
begins.
(Click Image to Enlarge)
Step 9:
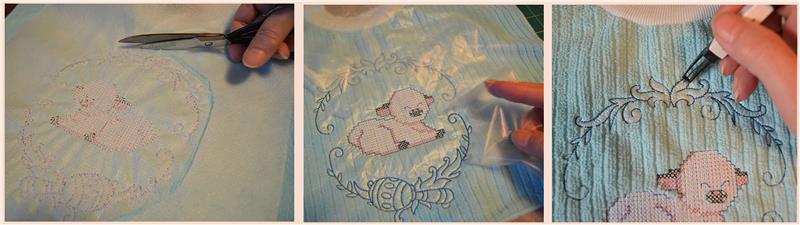
After sewing, remove from hoop. Cut away the backing up to the
outside stitches, leaving about a 1/4” allowance. There’s no need to
remove the backing at the inside of the design if you use a flexible
poly-mesh. On the front, rip away all of the excess topping. To remove
from small elements, use the tip of sewing scissors or a seam ripper to
get it started, and pick away the excess. Note, you can also wash away
the excess, but drying the bib would increase time before finishing.
Keep in mind any remaining topping will disappear the first time the bib
is laundered.
(Click Image to Enlarge)
Step 10:
Cut a strip of bias tape at a length that will
cover the edges of the bib to leave an approximate 2-3” overlap. I used a
16 x 19” towel that required almost 6 feet of bias tape. I also used
bias tape that is 1.5” wide which made it difficult to attach to the bib
after folding over the thick microfiber, so I recommend using bias tape
that is at least 2” wide or wider.
(Click Image to Enlarge)
Step 11:
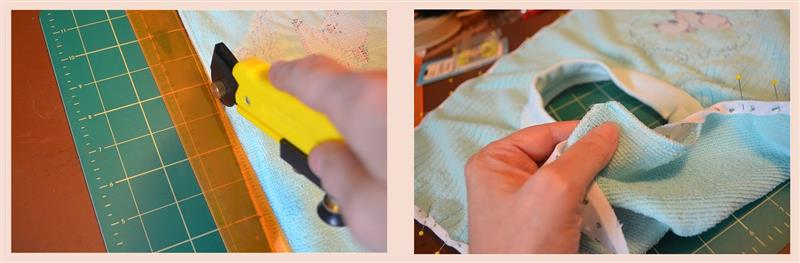
Trim the edges where necessary. More often than
not towels will have irregular edges, if only slight, but enough to
cause an uneven edge. To be sure edges come out evenly, examine and trim
by using a ruler for a guide and cut with rotary cutter or mark and cut
with scissors. Cut away the corners to enable pinning the bias tape
easily and to create a rounded corner.
(Click Image to Enlarge)
Step 12:
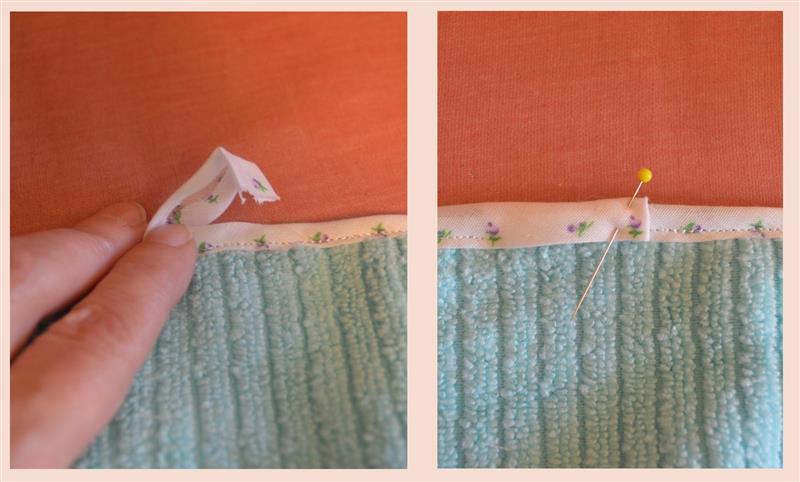
If you’re not lucky enough to have a bias tape
helper or bias-binder foot (as I don’t) you will have to do as early
seamstresses did. Fold the sides of the bias tape to almost meet at the
inside center, leaving a small gap to allow for the thickness of the
towel and press. Pin the bias tape over the edge of the bib, beginning
and stopping at the center back of the bib. Stitch near to the folded
edge of the bias tape slowly, making sure that you catch the tape on the
underside. (The wider the bias tape, the easier that process is.)
Overlap the end of the bias tape and tuck the end to the inside. Pin and
stitch the seam to close.
(Click Image to Enlarge)
Step 13:
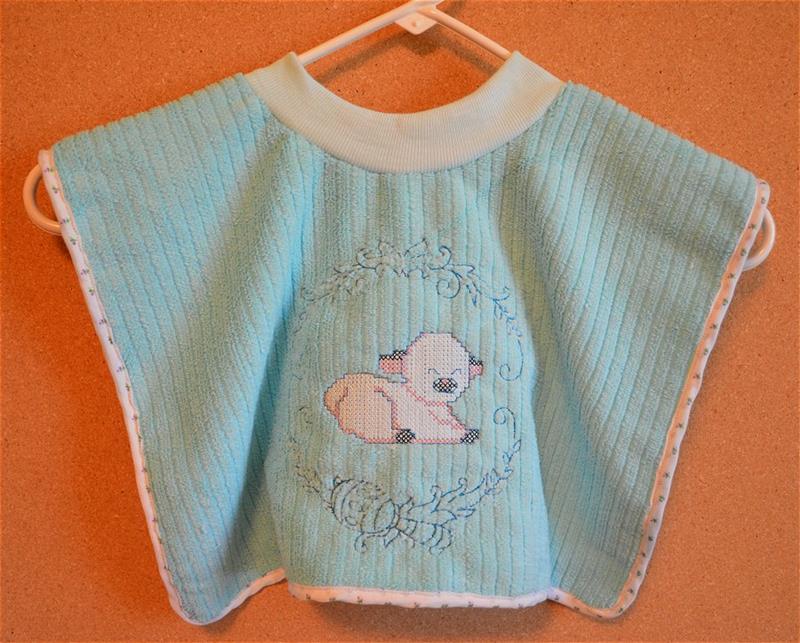
The bib is now completed and can be laundered to remove any excess water soluble topping.
Bonnie Landsberger has been a crafter and hand embroiderer since childhood and a machine embroiderer and digitizer since 1986. She was the in-house head digitizer for a 50-head embroidery shop for 11 years and later offered custom digitizing services and stock design sales through her web site for Moonlight Design since 1993. She currently also holds a position as a customer service representative at EmbroideryDesigns.com.
Bonnie has won several awards for digitizing, including a gold medal in the 2002 Digitizing Olympics and grand prize in all categories & first place for Winter Holidays category in the Stitches Magazine Great Greeting Card Contest 2003.
Her embroidery and digitizing technical articles can be found in various trade magazines and she is currently a contributing writer and Editorial Advisory Board Member for Stitches Magazine. You can also find more of her articles online at EmbroideryDesigns.com and will continue to contribute articles to our Learning Center.