Border OptionsHugging border, circle, square, or rectangle — with a 3mm satin stitch.
Backing OptionsAvailable with iron-on, sew-on, or velcro backing.
Fast ShippingShipped quickly from the USA.
Free Online Tools
Powerful embroidery utilities that save time and prevent costly mistakes.
Stitch AssistantRECOMMENDED
Get the exact stabilizer, machine settings, needle, and thread color sequence for every embroidery design you purchase — based on that design's stitch density, dimensions, and color count.
Enhance your dining experience with these elegant napkins featuring a musical theme. Perfect for music lovers, these napkins add charm and sophistication to any table setting. Step-by-step instructions are included.
Making Cloth Napkins Napkins
can be made any size you like. Standard sizes are 12, 14 and 16 inch
squares, but you don't have to be limited to that! Purchase 1 yard of
fabric for every four napkins.
Prewash the fabric and press it with an iron
Make a template or pattern for your napkins out of any stiff poster
board or cardboard. Your template should be square and should be 1/2
inch larger than your finished napkin size. For example, make a 16
1/2-inch-square template for a 16-inch-square napkin.
Place the template on the wrong side of your fabric and trace around the template with a fabric marking pen or fabric chalk.
Press each raw fabric edge under 1/4 inch.
Press that edge under once more.
Use a sewing machine to stitch the napkin hem. When you reach a
corner, lift the presser foot of the sewing machine and swivel the
fabric so that your stitching line remains straight. Keep the needle
inserted in the fabric as you reposition it. Continue stitching until
you have completed the hem all the way around.
You are now ready for embroidery.
Step 1:
Layer
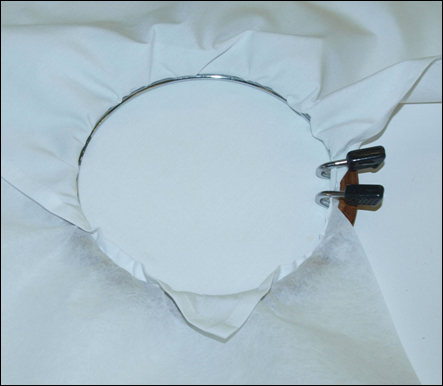
cut-away backing and the napkin in a six inch or four inch hoop. The
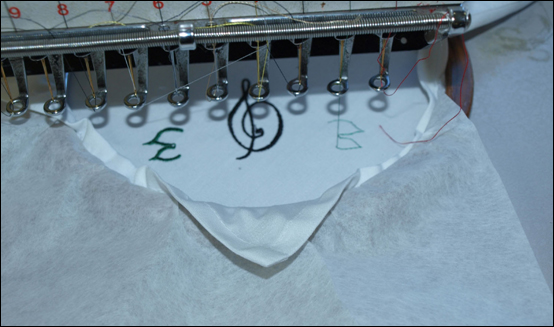
point of the napkin should be directly below the center of the hoop
machine attachment.
Step 2:
Attach
hoop to embroidery machine. Trace the design, moving the needle to
stitch as close as possible to the corner edges of the napkin. Embroider
the design. When the design is completed, remove the napkin from the
hoop and tear away the excess backing. Repeat steps 1 and 2 until all
napkins are embroidered.
You are now ready to set a beautiful table! And...you have just gone green with your napkins!
(Click Image to Enlarge)
Step 3:
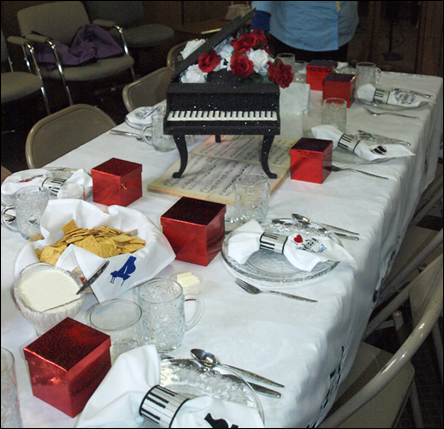
The Finished Product The
napkins are shown here in conjunction with the Keyboard Tablecloth and
Keyboard Napkin Rings for a Festival of Tables, where each hostess
decorated a table in an area of interest. Mine of course, was keyboard
music.
All of these projects could be revised to use any theme of
your choice. Coordinating each piece of the table setting creates
harmony (no pun intended), especially when combined with a centerpiece
that accentuates that idea. Mine...a grand piano vase sitting atop an
open antique Beethoven sonata book!
Note: This project is suitable for any theme. Simply choose embroidery designs that suit your taste!
Barbara Geer, Creative Director/Digitizer, Grand Slam Designs, an embroidery stock design and contract digitizing operation, has been in the decorated apparel industry since 1990. She is a popular speaker at commercial decorated apparel and home embroidery events. She also is a frequent contributor to commercial and home embroidery publications such as EMB, Stitches, and Printwear. You may reach Barbara at 218-222-3501; e-mail [email protected] or visit her Web site at www.grandslamdesigns.com.