Quilt Puppy Toes Lap Blanket

Quilt Puppy Toes Lap Blanket Embroidery Project

By   Jackie Woods   on   December 29, 2010
  • SKILL LEVELSome Experience
  • TIME REQUIRED02:00
Description

Create a charming lap quilt featuring adorable puppy designs, perfect for cozy moments. This quilt brings warmth and a playful touch to any room. Suitable for dog lovers and quilting enthusiasts alike. Step-by-step instructions are included.

Step of

Materials

Project Preview Video

Materials
  • Please note that all fabric used is cotton quilters fabric, 45" wide.
  • 3/4 yd solid blue fabric
  • 3/4 yd solid red fabric
  • 1/4 yd solid white fabric
  • 1/4 yd small print dog fabric
  • 1 5/8 yds large print puppy fabric
  • 1 1/2 yds fabric for backing
  • 1 1/2 yds batting
  • 2 pkgs double fold white bias tape

  • Designs used in this project

    Final Product: What You Will Create

    Preface:
    Note: you can do the embroidery before cutting the solid white squares or after the quilt is pieced together, which is the way the instructions are written. If doing embroidery before piecing together, purchase extra fabric as needed for hooping purposes.


    Step 1:
    (Click Image to Enlarge)
    Cut 2 blue and 2 red strips 3 1/4" wide by the width of the fabric, for the inner borders.


    Step 2:
    Cut 4 strips of large print puppy fabric 4 3/4 x 45". If using a one way design as we have, make sure to cut strips so that all puppies will be going in the same direction.


    Step 3:
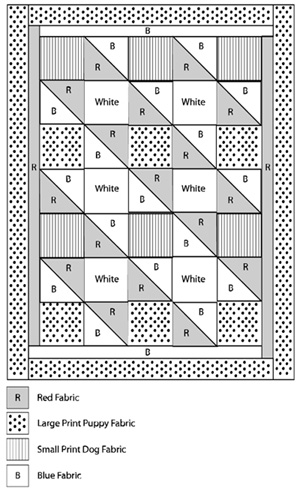
    Cut six 5 1/2" squares from small print dog fabric. Cut six 5 1/2" squares from large print puppy fabric. Cut six 5 1/2" squares from solid white fabric. Cut nine 6" squares from red fabric.


    Step 4:
    (Click Image to Enlarge)
    Cut red and blue squares in half diagonally. Stitch red and blue half squares together, using a 1/4" seam allowance with right sides together along diagonal edge. Continue until you have made 17 red/blue squares. Press all seams.


    Step 5:
    Sew the first row of squares together using 1/4" seam allowance. refer to diagram for square placement. Repeat with remaining rows. Once all squares have been sewn into rows, join all rows together following diagram.


    Step 6:
    Attach blue strip to the top edge of pieced quilt, lining up top at top left raw edge of quilt. Sew all the way across stopping 1" from the right edge of quilt. Trim thread but not fabric. Attach red strip along left edge of quilt, lining up at the top edge of blue border. Stitch all the way down even with the pieced edge of quilt. Trim fabric to the same length as pieced quilt.


    Step 7:
    Attach blue strip across the bottom in the same manner starting at the bottom left edge. Attach remaining red strip along the right edge starting at the bottom right corner and stopping even with the pieced adge of quilt. Finish attaching blue top inner border. Press seams.


    Step 8:
    Attach large print puppy strips along top and bottom of quilt, trimming to the exact width of quilt. Attach side borders, trimming to the length of quilt.


    Step 9:
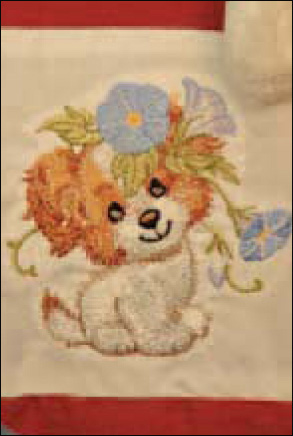
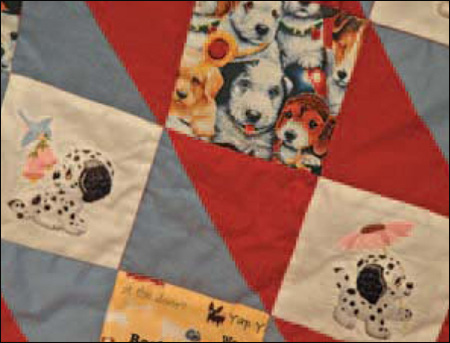
    Stitch embroidery designs in solid white squares as shown. From top left to right, we embroidered designs 26662, 26678, 26667, 26666, 26670 and 26683. Layer quilt top with batting and backing fabric and quilt in the seams.
    Trim, bind and enjoy!
    Meet the Author: Jackie Woods
    Jackie Woods
    Great Notions was started from our extensive history in digitizing custom designs for many years for customers all over the world. Our experience and expertise in digitizing allows us to make affordable patterns unlike what is currently available in the market place. We focus on producing more realistic designs with lots of dimension versus your standard clip art style of designs currently in the market.
    More From This Author
    Link is Broken, Please check the URL
    Exclusive Embroidery Offers!
    Copyright © {{ currentDate | date:'yyyy'}} - EmbroideryDesigns.com
    GET 50% OFF! ×