Border OptionsHugging border, circle, square, or rectangle — with a 3mm satin stitch.
Backing OptionsAvailable with iron-on, sew-on, or velcro backing.
Fast ShippingShipped quickly from the USA.
Free Online Tools
Powerful embroidery utilities that save time and prevent costly mistakes.
Stitch AssistantRECOMMENDED
Get the exact stabilizer, machine settings, needle, and thread color sequence for every embroidery design you purchase — based on that design's stitch density, dimensions, and color count.
This charming applique heart features a ragged edge for a unique texture, perfect for Valentine's Day crafts. Ideal for adding a special touch to clothing or home decor. Step-by-step instructions are included.
Step
of
Applique Rag Heart for Valentine's Day
By Barbara Geer
The rag look has become popular in the last year or so, and it makes
appliqué easier than ever! This design was digitized with a cutline, as a
separate design, for the fabric. Those who have cutters can import the
cutline into their cutting software and use it to cut the fabric before
the appliqué project is administered. Those who don’t have cutters can
embroider the cutline on the fabric, using it go get the exact shape for
the design.
Step 1:
(Click Image to Enlarge)
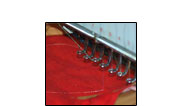
Hoop the appliqué fabric. For this design, you will want to choose a
fabric that will ravel. Do not apply iron-on adhesive to the fabric, as
that will prevent raveling, as well. Use no backing for this step.
Step 2:
(Click Image to Enlarge)
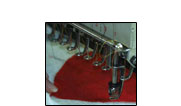
Send the cutline design to the embroidery machine and stitch.
Step 3:
(Click Image to Enlarge)
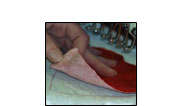
Remove the fabric from the hoop. Cut excess away, removing the stitching in the cutting process.
Step 4:
(Click Image to Enlarge)
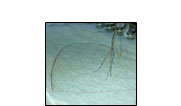
The appliqué design will have three parts. The first is the outline, which shows where the fabric or heart is to be placed.
Step 5:
(Click Image to Enlarge)
Place the fabric over the outline. Unlike traditional appliqué, the cut
heart will be larger than the outline. Using your best judgement, place
the fabric so it extends equally on all sides of the outline stitch.
Step 6:
(Click Image to Enlarge)
Once the fabric is in place, start the machine. The tackdown stitch will be embroidered next.
The final stitching is the border. Notice that the fabric extends beyond the border.
Step 7:
(Click Image to Enlarge)
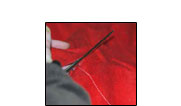
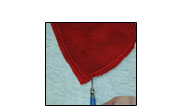
The final step is to snip the outer edges of the heart. Using very
sharp scissors, make cuts that extend as close as possible from the edge
of the fabric to the stitching. Ravel the edges by pulling the threads.
At this point, you will realize that it has been important to select a
fabric that ravels easily. The fabric chosen for this project is cotton
flannel.
This is a project that gets better looking with each
washing of the garment. Eventually the threads from the fabric around
the heart will ravel all the way to the stitching, and the remaining
threads will bunch up toward the stitching.
For Valentine's Day or any day, you can spread the love with this Rag Appliqué Heart.
Barbara Geer, Creative Director/Digitizer, Grand Slam Designs, an embroidery stock design and contract digitizing operation, has been in the decorated apparel industry since 1990. She is a popular speaker at commercial decorated apparel and home embroidery events. She also is a frequent contributor to commercial and home embroidery publications such as EMB, Stitches, and Printwear. You may reach Barbara at 218-222-3501; e-mail [email protected] or visit her Web site at www.grandslamdesigns.com.