

















































Applique Tips For Using Puffy Foam Embroidery Project
Take your embroidery to new heights when adding dimension with foam.
Materials
Project Preview Video

Foam

America's Pride

SNAIL (PUFFY FOAM)

LIVE! RIGHT (PUFFY FOAM)

Cut Away Stabilizer - 2.5 Oz wt.

Cut Away Stabilizer - 2 oz wt.


 | |
To begin, select a design that has enclosed areas. Look for enclosed satin shapes, such as circles, or shapes that taper to point. Be sure that the designs you select have satin stitch areas that are wide enough to accommodate the foam.
There are two ways to make foam become so perforated that it is very easy to remove, and also assure that the foam is encased under the satin stitches.
If you have the ability in your embroidery software to control your stitch density, increase the density of the underlay stitches so that they are closer together, and then place a heavy layer of satin stitches on top. The density on the top layer should be almost double the normal density.
If you don’t have the ability to adjust your density values, you will simply stitch the satin areas twice. In either case, follow this procedure.
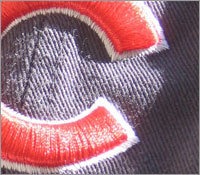 | |
Stitch the underlay, or the first layer of satin stitches. After it is complete, gently pull away the foam. Stitch again over the area with the final layer, which will encase the foam inside.
Tip: To remove any remaining hairy bits, place a pressing cloth over the area and press lightly with a hand iron. The small foam bits will shrink up and disappear.