














































PROJECT INSTRUCTIONS


PROJECT INSTRUCTIONS
Patch Children's Story Book Embroidery Project
By
Starbird Inc.
on
December 01, 2009
Description
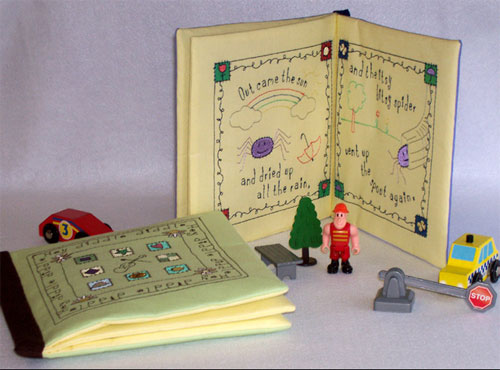
Create delightful children's story books using patch techniques. This project provides a unique way to combine storytelling with crafting, perfect for engaging young readers. Step-by-step instructions are included.
Step
of
Materials
Project Preview Video

QUICK VIEW
Star, Cow, Moon & Sun Embroidery Bundle – Fun Designs (82 Designs)
$85.00
$51.00
Circle Price: $51.00

QUICK VIEW
Dog & Cat Embroidery Bundle – Whimsical Stars and Moon (23 Designs)
$34.95
$20.97
Circle Price: $20.97

QUICK VIEW
Farm Animal Embroidery Designs Bundle – Old MacDonald with Pitchfork, Cow and Barn, Chicken Coop & More (20 Designs)
$32.95
$19.77
Circle Price: $19.77

QUICK VIEW
Redwork Mary Mary Quite Contrary Embroidery Designs Bundle – Garden Scene, Flower & Bird Square, & More (21 Designs)
$28.95
$17.37
Circle Price: $17.37

QUICK VIEW
Nursery Rhyme Embroidery Designs Bundle – Castle, Red Bow, Goldfish & More (20 Designs)
$28.95
$17.37
Circle Price: $17.37

QUICK VIEW
Garden Embroidery Designs Bundle – Flower Motif, Garden Teapot, Bird Silhouette & More (20 Designs)
$28.95
$17.37
Circle Price: $17.37

QUICK VIEW
Twinkle Twinkle Little Star Embroidery Designs Bundle – Little Star, Moon, Earth, Shooting Star & More (18 Designs)
$28.95
$17.37
Circle Price: $17.37

QUICK VIEW
Itsy Bitsy Spider Embroidery Designs Bundle – Itsy Bitsy Spider Block, Cloud Block, Raindrop Block & More (21 Designs)
$28.95
$17.37
Circle Price: $17.37

QUICK VIEW
Farm Animal Embroidery Designs Bundle – Baa Baa Black Sheep, Counting Sheep, Sheep Family & More (21 Designs)
$28.95
$17.37
Circle Price: $17.37

QUICK VIEW
Little Boy Blue Story Book
$28.95
$17.37
Circle Price: $17.37

QUICK VIEW
Redwork Little Miss Muffet Embroidery Designs Bundle – Little Miss Muffet, Spider, Bowl of Curds & More (25 Designs)
$28.95
$17.37
Circle Price: $17.37

QUICK VIEW
Redwork Baking and Cakes Embroidery Designs Bundle – Pot-a-Cake Border, Happy Birthday Banner, Cupcake with Cherry & More (22 Designs)
$28.95
$17.37
Circle Price: $17.37

QUICK VIEW
The Night Before Christmas Embroidery Designs Bundle – Santa Face, Christmas Tree, Sleigh with Presents & More (21 Designs)
$28.95
$17.37
Circle Price: $17.37

Cut Away Stabilizer - 2.5 Oz wt.
$8.94
Circle Price: $8.05

Cut Away Stabilizer - 2 oz wt.
$8.52
Circle Price: $7.67

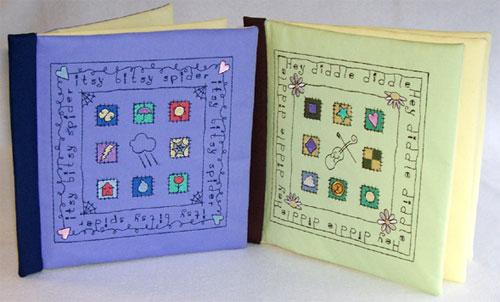
| Final Product: What You Will Create |
 |
|
Projects You May Like
Meet the Author:
Starbird Inc.

Starbird Inc. has been digitizing custom embroidery designs for over 25 years. They have seen so many wonderful and creative designs over the years that Starbird decided to create some of their own embroidery stock designs. Starbird Inc. is having a great time creating new and imaginative ideas and would like you to be able to enjoy them also.
Feedback
Characters Remaining
Please Login to Submit a Feedback
Invalid Characters, Please enter a valid Comment
Please enter a valid Comment
Reviewed On
Link is Broken, Please check the URL