















































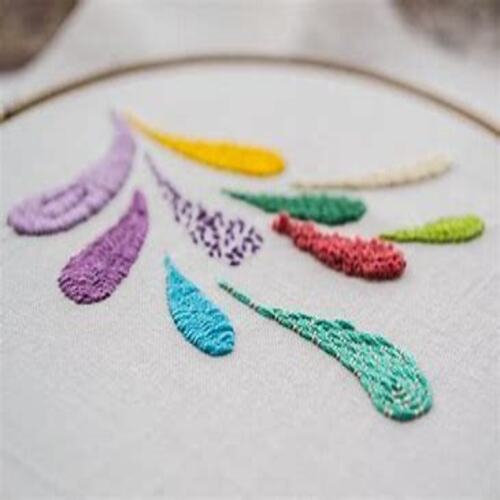


Achieving Embroidery Perfection Embroidery Project
There are three areas of the embroidery process that must be addressed on every job in order to achieve Embroidery Perfection. I refer to these as the 3 P’s
Materials
Project Preview Video

Cut Away Stabilizer - 2.5 Oz wt.

Cut Away Stabilizer - 2 oz wt.
There are three areas of the embroidery process that must be addressed on every job in order to achieve Embroidery Perfection. I refer to these as the 3 P’s.
Proper Punching
GarmentPreparation
MachinePerformance
Sewing quality issues can easily be caused by any one of the three, as well as a combination of the three. Sometimes it is the Digitizing, but not always. You have to do some troubleshooting to determine the real cause or causes. So, let’s take a look at each of these three areas to see how they affect embroidery quality.
The first area of influence for achieving embroidery perfection is, of course, digitizing. It should be noted that for purposes of this article, digitizing will include keyboard lettering and the use of stock designs.
Digitizing problems can be broken down into the following categories:
2. Wrong design parameters.
3. Applying the design to a different fabric than the one it was digitized for.
Typically, an incorrect setup means that the digitizer either didn’t know what they were doing, or didn’t pay attention to the job details. The most significant factor of the digitizing process is push-pull compensation. For each fabric that you sew on, there will be a certain degree of shifting due to the physical forces resulting from the sewing process. This is referred to as push and pull, as that is what is actually happening to the fabric. Digitizers must understand this phenomenon and compensate for it.
 To understand push-pull, you must be very familiar with the stitch formation process. When a stitch is formed, the bobbin thread “pulls” down on the upper thread. If the fabric is stiff, the amount of “pull” is very minimal. Soft, stretchy fabrics allow more upper thread to be pulled down, resulting in segments that are narrower than intended. Other factors include, type of stitch, size of segment area, amount and type of underlay, density, and thread tension.
1. Longer stitches tend to pull IN from the edges.
4. Thick fabrics cause more distortion than thin ones.
When digitizing, proper underlay is the key to reducing the effects of push-pull. A heavy, lattice type of underlay is ideal for circles and ovals. If pulling in at the edges still occurs, then it may be necessary to compensate for this by extending the top stitches where they pull-in. (During sewing, proper backing and hooping are key factors for controlling push-pull.)
Another digitizing situation that can lead to poor sewing, is when an Embroiderer takes a well-digitized design and then tries to resize it or change some of the parameters such as underlay, density, stitch length and pull compensation to suit their own needs. By altering the original design, the very features that ensure top quality sewing are changed, which can lead to adverse results.
The second area that must be addressed in the pursuit of embroidery perfection, is garment preparation. Most notably, garment preparation is all about hooping. But the proper selection of a backing and/or topping plays a key role also. No matter how well a design was digitized, if the garment is not prepared properly for sewing, you may end up with a poor quality finished product.
The first step with hooping is to choose the correct hoop. In general, choose the smallest hoop possible for the design. But don’t go too small. Be sure that there is ample room within the confines of the hoop to sew the design. The larger the hoop, the less support it offers for the fabric being sewn. With less support, you will encounter more flagging (bouncing up and down of the material while sewing) and more shifting of the fabric.
You must also ensure that the chosen hoop is firm enough to adequately support the garment. Thin, flimsy plastic hoops may not be the best choice for thick heavy materials, as they can bend and twist quite easily. With such garments, and for larger designs, double-height wooden hoops are usually a better choice.
On the subject of cap frames, if the cap doesn’t match the frame properly, you will definitely have quality issues to deal with. Ideally the horizontal curvature of the front of the cap crown will match the curvature of the frame. Also, the width of the cap should be the same as the diameter/width of the cap frame. If you have to fight the cap to hoop it, then it probably does not match the frame.
The next area of focus for the hooping process is to ensure proper tension of the hoop and the fabric. Ensure that the fabric is taut but not stretched. If it’s stretched beyond its normal settings while sewing, then it will snap back to its original setting when released from the hoop. This will cause distortion of the embroidery. On the other hand, if the fabric is too loose in the hoop, it will pucker while sewing, once again yielding poor quality sewing. When hooping the garment, it’s also important to ensure equal tension on all sides of the hoop. If not, the garment may be too tight or too loose in one direction.
Choosing the correct backing is also part of the hooping process. It’s rare that you won’t use backing, though there are some applications. The purpose of backing is to provide a stable surface that the garment can be attached to via sewing. If this doesn’t happen, then the fabric will be manipulated by the sewing process, which will lead to inferior stitching. If for example, you used one layer of tear-away backing with a typical sweatshirt, chances are it would not provide the necessary stability for the embroidery and the finished design would be of inferior quality. In order for this type of backing to easily “tear away” upon completion of the job, the needle should penetrate the material like a cookie cutter. While it works great for tearing off excess backing, it doesn’t always provide the needed stability. In fact, tear-away backing starts to pull apart during the sewing process, thus reducing its stabilizing characteristics to almost zero. Typically, you want to use cut-away backing for stretchy, unstable materials, not tear-away.
Backing can also play a big factor in creating balanced hoop tensions. It’s important that you use backing that is cut larger than the hoop to be used. Then ensure that it is contained within the hoop all the way around.
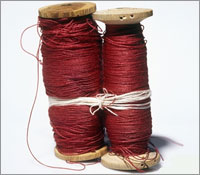 Sewing tensions are affected by a number of variables, such as the color of the thread, how tightly wound it is on the spool, and how much is left on the spool. Also, if dirt and lint build up along the thread path, it can affect the tension as well. And though you may have an ideal tension setting, you sometimes need to adjust it based on the item being sewn. The thickness of the fabric will affect the sewing as well. While you should attempt to compensate for this in the digitizing process, adjusting your thread tensions may improve the quality of the sewing when dealing with thicker fabrics.
Another machine issue that can cause poor quality sewing is an improperly mounted hoop. Each brand of machine is a little bit different, but with most it’s possible to mount a hoop without getting it latched in place tightly. In some cases the hoop stays firmly in place but it’s not straight, which causes the design to be crooked. In other cases the hoop develops a bit of “play” or bounce, which will lead to all kinds of creative problems. Always double-check that the hoop is installed securely and properly, by giving it a slight tug.
Along these same lines, different machines have different methods of installing mounting brackets which mate to the frames and hoops. For example, if you are converting from flats to caps, you may have to remove certain physical brackets and screws, and then replace them with different brackets and screws. Occasionally, you may forget a screw, not tighten a screw, or overlook a firm seating for the brackets being installed. Once again, sewing quality will be affected. The same thing applies to needle plates. The wrong needle plate or a loose one can cause quality problems as well as thread and needle breaks.
Another area to consider is physical obstructions that limit hoop and frame movement. Maybe a loose object has fallen into the path of the hoop travel, blocking it or limiting it. One common obstruction is the garment itself. Big, bulky items such as jackets and overalls, may have sleeves that flop over into the path of hoop travel.
Finally, needle selection can play a key role. Fine details sew better with a smaller needle such as a #9. Most woven fabrics respond better to sharp point needles, while stretchy material, such as knits, do better with a ballpoint style.
Digitizing is not always the culprit when it comes to poor quality embroidery, though it certainly can be a contributing factor or even the root cause. Machine problems, improper hooping, backing issues, lack of topping and fabric characteristics can all contribute to poor registration. It’s up to the Embroiderer to assess the situation completely and determine what the real cause (or causes) is for poor quality. Don’t shoot the Digitizer unless he/she really is the problem.
