















































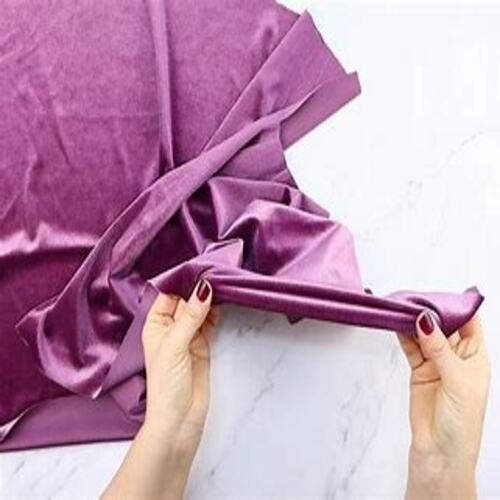


Stretching The Limits: Dealing With Stretchy Fabrics Embroidery Project
Knit fabrics are a staple of the Embroidery Industry, so the challenges must be overcome in order to be successful in this business.
Materials
Project Preview Video

Cut Away Stabilizer - 2.5 Oz wt.

Cut Away Stabilizer - 2 oz wt.
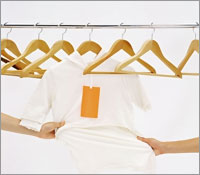 If you were given the choice of sewing on a denim shirt or a t-shirt, which would you choose? That’s a no-brainer! Most Embroiderers would choose the denim shirt, as it is typically easier to hoop and yields higher embroidery quality. Of course, that is no accident as denim is a very stable fabric, while a t-shirt is a knitted fabric, which generally is “stretchy” and flexible in nature, making it much more difficult to hoop and sew. But knit fabrics are a staple of the Embroidery Industry, so the challenges must be overcome in order to be successful in this business.
The characteristics that make sewing on knits so difficult are the same ones that make the material so popular with consumers. Knits are composed of interlocking looped stitches, which provide a fair degree of stretch and flex, making them the ideal choice for creating comfortable clothing. In addition, knits tend to shed wrinkles well and don’t unravel when embroidered.
However, knit fabrics are not all created equally and come in a variety of textures, weights and fiber contents. Here are some examples:
Firm Knits – These knits are not very stretchy and can almost be treated like wovens. Examples include double knits and Raschel knits.
Lightweight Single Knits – These have a moderate stretch. Examples include tricot and jersey knits.
Interlock Knits – These knits are heavier and thicker than single knits and have a fair amount of stretch. They are used in heavier grade polo shirts and t-shirts.
Textured Knits – These knits tend to be heavyweight with textured surfaces and have a moderate amount of stretch. Examples include knitted terry and velour, sweater knits and fleece.
Two-way Stretch Knits – These are unique in that they stretch both in length and width, whereas the other categories of knit have considerably more stretch in one direction than the other. Two way stretch knits tend to have a large amount of spandex fibers and are usually selected for activewear such as bathing suits and dancewear.
On a daily basis, most Embroiderers have close encounters with products that fall into the lightweight, interlock and/or textured knit categories. Though these fabrics are different in construction, the processes for dealing with them are the same. But before you can sew them, you need to know how they respond to embroidery.
During the sewing process there several physical forces that are applied to the fabric, three of which will be discussed here. The first is a downward pressure on the fabric, caused by the needle piercing the fabric. Each time that the needle encounters the fabric, it pushes it down towards the bobbin before breaking through. As the needle pushes goes through the fabric, it also pushes the fibers apart. This of course causes a tiny, almost imperceptible amount of distortion in the surface of the knit. But when you compound this by the thousands of needle penetrations that can occur when sewing a design, the distortion can be significant.
A second force is a downward pull caused by the stitch formation process. As the bobbin and upper threads are joined underneath the fabric, a small amount of force is placed on the fabric, such that it is pulled towards the hole in the needle plate. Once again, the possibility exists for a small amount of distortion in the fabric.
Finally, there is a force that is caused by the movement of the pantograph. After a stitch is formed, the needle rises up and away from the surface of the fabric trailing the upper thread, which is still joined to the bobbin thread by virtue of the last stitch that was formed. As the pantograph moves to the next position it has to pull against the upper thread and the bobbin thread, which causes the fabric to be pulled in the same direction as the pantograph movement. This places a significant amount of force on the fabric.
These forces cause the embroidery phenomenon known as “push” and “pull.
The “push” factor is present anytime you place rows of adjacent parallel stitches together, such that each new row is physically touching the previous row. Forces 1 and 2 combine resulting in pressure (on the fabric) extending outward in the direction of the embroidery. For example, if you were sewing a capital letter I in the block font using a satin stitch and the sewing direction was from top to bottom, there would be a “pushing” force in the direction of the bottom of the I. This pressure makes the fabric try to stretch in the same direction.
The “Pull” phenomenon is present when sewing stitches that go back and forth in a zig-zag motion. As the pantograph moves back and forth, force 3 pulls the fabric towards the center of the zig-zag area. Going back to the same example, as the needle lifts up from one side of the I and the pantograph moves to the other side, the fabric is pulled in the same direction by the trailing thread.
To some it up, “push” and “pull” is present in everything you sew. In the case of a stretchy fabric, such as a knit, the fabric is much more likely to be affected than a strong woven one like a denim. The end result is poor quality embroidery as evidenced by puckering, uneven stitches, and outlines that don’t line up. But once you understand the causes, the solutions are much easier to come by.
The key with stretchy, unstable fabrics is to stabilize the garment such that it doesn’t give in to the forces placed on it. There are two key methods to achieve this, hooping and digitizing.
Proper hooping is critical when it comes to knits. Every effort must be made to hoop the garment, such that the fabric is taut, but not stretched. If the fabric is stretched during the sewing process, then it will snap back to its natural position when the hoop is removed. This will cause the embroidery to be compressed, which will result in a wavy surface, which is not very desirable. On the other hand, if the fabric is not taut, then the forces of push and pull will move the fabric around while sewing which will lead to fabric puckering, uneven stitches and outlines that don’t line up. There is a very fine line between a taut fabric and a stretched one and it takes practice to master the hooping process.
Another part of the hooping process is to use a suitable backing. The purpose of the backing is to create a secure surface that the knit fabric will be attached to by the stitching process. This in turn anchors the fabric and minimizes any shifting during the sewing process. Cut-away is the best choice for knits. Tear-away usually does not have the stabilizing characteristics required for knits. (In addition, tear-away backing has a tendency to start tearing away before the embroidery is finished.) The backing must be larger than the hoop such that it is completely captured on all sides by the hoop, otherwise the backing itself could shift during sewing and stabilization of the fabric would not be achieved. For extremely stretchy fabrics, it may be necessary to use an adhesive backing. In this case, the backing should be adhered to the garment before hooping.
Digitizing is just as important as hooping. Even when properly stabilized, knit fabrics can still suffer from distortion during sewing. The first step for a Digitizer is to add the proper underlay stitches. The underlay stitches go down before the main stitches and are the joining points between the item being sewn and the backing material. The initial underlay stitches should cover as large of an area as possible, in order to provide the widest field of anchoring points. However, beware of zig-zag patterns in underlay stitches, as this may cause “pulling” of the fabric rather than stabilization. In addition to proper underlay, column widths should be increased and heavy densities should be avoided.
The key with stretchy, unstable fabrics is to stabilize the garment such that it doesn’t give in to the forces placed on it. There are two key methods to achieve this, hooping and digitizing.
Proper hooping is critical when it comes to knits. Every effort must be made to hoop the garment, such that the fabric is taut, but not stretched. If the fabric is stretched during the sewing process, then it will snap back to its natural position when the hoop is removed. This will cause the embroidery to be compressed, which will result in a wavy surface, which is not very desirable. On the other hand, if the fabric is not taut, then the forces of push and pull will move the fabric around while sewing which will lead to fabric puckering, uneven stitches and outlines that don’t line up. There is a very fine line between a taut fabric and a stretched one and it takes practice to master the hooping process.
Another part of the hooping process is to use a suitable backing. The purpose of the backing is to create a secure surface that the knit fabric will be attached to by the stitching process. This in turn anchors the fabric and minimizes any shifting during the sewing process. Cut-away is the best choice for knits. Tear-away usually does not have the stabilizing characteristics required for knits. (In addition, tear-away backing has a tendency to start tearing away before the embroidery is finished.) The backing must be larger than the hoop such that it is completely captured on all sides by the hoop, otherwise the backing itself could shift during sewing and stabilization of the fabric would not be achieved. For extremely stretchy fabrics, it may be necessary to use an adhesive backing. In this case, the backing should be adhered to the garment before hooping.
Choosing the correct backing is also an important part of the process when dealing with spandex or similar fabrics. It must provide the necessary amount of stabilization, but there is another important factor to consider as well. Because of the tight nature of the garment, the backside of the embroidery will be in direct contact with the wearer’s skin, so it has to be soft and supple. Thus, a soft medium cutaway is usually the best bet.
Knit fabrics will always be a challenge for Embroiderers, but they don’t have to be an obstacle that can’t be overcome. By understanding the characteristics of the fabric and how it responds to the sewing process, you will be able to master the process and generate high quality sewing with little if any distortion. The end result is a happy customer and increased profits.
