Border OptionsHugging border, circle, square, or rectangle — with a 3mm satin stitch.
Backing OptionsAvailable with iron-on, sew-on, or velcro backing.
Fast ShippingShipped quickly from the USA.
Free Online Tools
Powerful embroidery utilities that save time and prevent costly mistakes.
Stitch AssistantRECOMMENDED
Get the exact stabilizer, machine settings, needle, and thread color sequence for every embroidery design you purchase — based on that design's stitch density, dimensions, and color count.
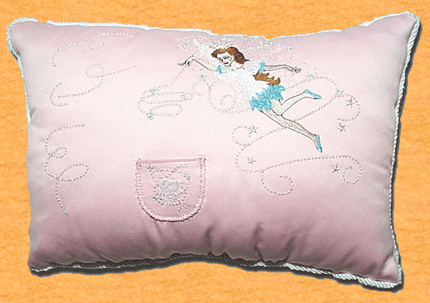
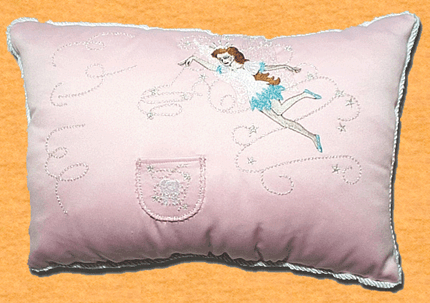
This charming quilted Tooth Fairy Pillow is perfect for preserving the magical tradition of the Tooth Fairy. Featuring a delightful design with a small pocket to hold a child's lost tooth, it adds a touch of enchantment to bedtime. Step-by-step instructions are included.
The Tooth Fairy Pillow is a great way to carry on the tradition of
the “Tooth Fairy”. The finished pillow has a little pocket in it where
you would have your child place the tooth they lost in it at bedtime.
Once the child is asleep you would remove the tooth and place some coins
in the pocket where the tooth was. When the child awakens imagine their
surprise at finding what their tooth has turned into overnight.
There are two designs which are needed to
complete this project: “The Tooth Fairy” and “The Tooth Fairy Tooth”
which is sewn on the pocket. Both designs need to be sewn on the
material before the pillow is constructed. The instructions for making
the pillow are listed below. The finished Pillow Size is 14.75 inches
wide by 10.5 inches high. Also please look at the picture of the
finished pillow to see how ours turned out.
Step 1:
(Seam allowance: 1/4 inch) Fold fabric in half lengthwise with selvages
together. Lay out pattern piece #1 (pillow) on double thickness of
fabric, pin and cut out.
Step 2:
Unfold fabric and layout pattern piece #2 (pocket) on single layer of fabric, pin and cut out.
Step 3:
To make the pocket:
Machine stitch (long stitches) 1/4 inch from
the unfinished edge around all four sides of the pocket piece to form a
guideline for folding the edges when finishing the pocket.
Fold top of pocket piece to the wrong side of the fabric at the 1/4 inch guideline. Sew a 1/4 inch hem at the top of the pocket.
Fold the top of the pocket to the right
side of the fabric at the fold-line and sew a 1/4 inch seam at each of
the two ends of the fold. Trim seams at the corners of the fold to
eliminate bulk. Turn top of pocket right side out.
Turn under sides and bottom edges of the pocket piece at the 1/4 inch guideline stitches.
Pin pocket to a single pillow piece
(pattern piece #1) following the placement markings on the pattern
piece. Sew pocket to the pillow piece stitching close to the folded edge
at the sides and bottom.
Step 4:
To finish the pillow:
On the right side of the fabric of a single
pillow piece, pin cording around all four edges of the pillow alining
the unfinished edge of the cording with the unfinished edge of the
pillow piece. Do not overlap the cording at pillow corners. Sew cording
to pillow piece 1/4 inch from edge of fabric.
Pin the two pillow pieces together
(right sides of fabric together) and sew around all four edges of pillow
at seam allowance (1/4 inch) leaving a 3 to 4 inch opening for stuffing
pillow.
Turn pillow right side out. Stuff pillow with fiber fill or filling of choice.
Fold in 1/4 inch seam allowance at opening and hand stitch (slip stitch) pillow closed.
Starbird Inc. has been digitizing custom embroidery designs for over 25 years. They have seen so many wonderful and creative designs over the years that Starbird decided to create some of their own embroidery stock designs. Starbird Inc. is having a great time creating new and imaginative ideas and would like you to be able to enjoy them also.