Border OptionsHugging border, circle, square, or rectangle — with a 3mm satin stitch.
Backing OptionsAvailable with iron-on, sew-on, or velcro backing.
Fast ShippingShipped quickly from the USA.
Free Online Tools
Powerful embroidery utilities that save time and prevent costly mistakes.
Stitch AssistantRECOMMENDED
Get the exact stabilizer, machine settings, needle, and thread color sequence for every embroidery design you purchase — based on that design's stitch density, dimensions, and color count.
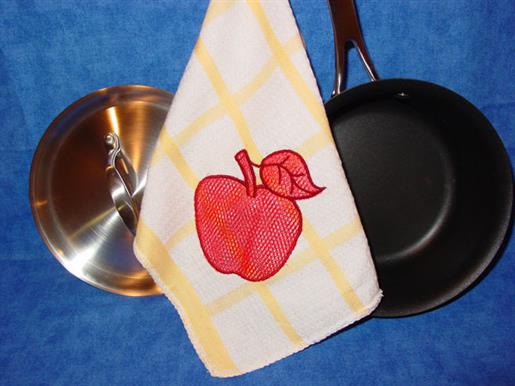
Dress up an ordinary dish towel by adding a motif made of nylon netting or tulle that can be used to scrape off stubborn food from dishes or silverware.
Step
of
Dishcloth with Built-In Dish Scrubber
By Deborah Sexton
Apple or other Fruit Embroidery Design – Design must have a satin outline stitch. **The apple design used in these photographs is from Dakota Collectibles #MI0276, 4.02”w x 4.06”h.
Floriani Stitch N Wash Fusible® Stabilizer – You will need one piece that is at least one inch larger than your hoop size.
Floriani Water Soluble Topping – Enough to cover the design completely.
Nylon Netting or Tulle – Purchase the coarse type with large holes. You will need eight squares that are at least one inch larger than the design size you are using.
Appliqué Scissors or small embroidery scissors for trimming closely.
You can choose from any number of appropriate embroidery designs to
match your kitchen’s décor or create something unique as a gift for a
friend or teacher. These decorative towels also make great craft fair
items or inexpensive Christmas gifts. Created by Mary Jane Witlin on behalf of RNK Distributing.
Step 1:
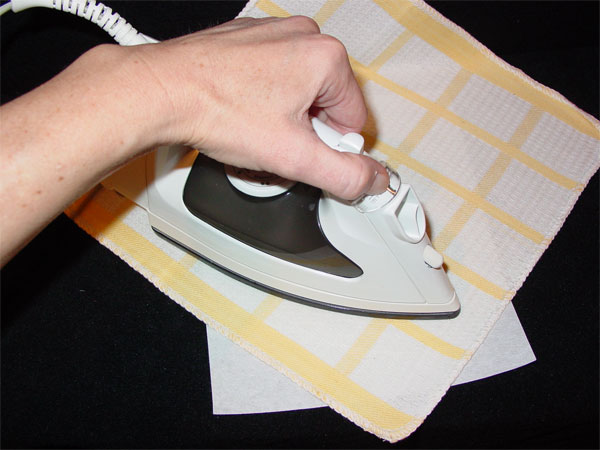
Fuse the Floriani Stitch ‘N’ Wash Fusible® to one corner of the
dishcloth or the area you prefer for the design to be stitched. Be sure
to use a piece at least one inch larger than your hoop size. If your
dishcloth has a front and back side, fuse the stabilizer to the
backside. The fusible coating on this stabilizer will prevent the
dishcloth from stretching during the hooping and stitching process.
(Click Image to Enlarge)
Step 2:
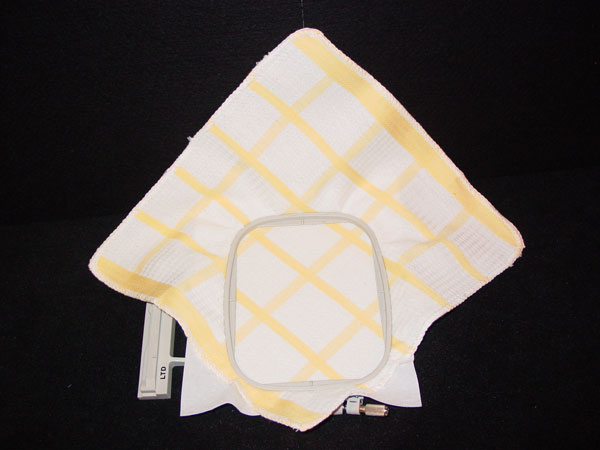
Place the stabilized Dishcloth in the embroidery hoop
(Click Image to Enlarge)
Step 3:
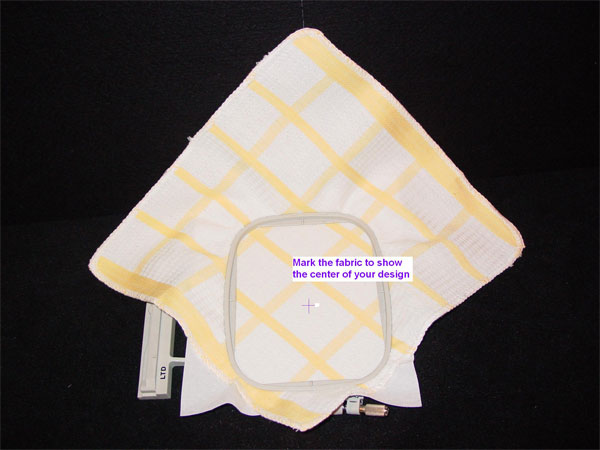
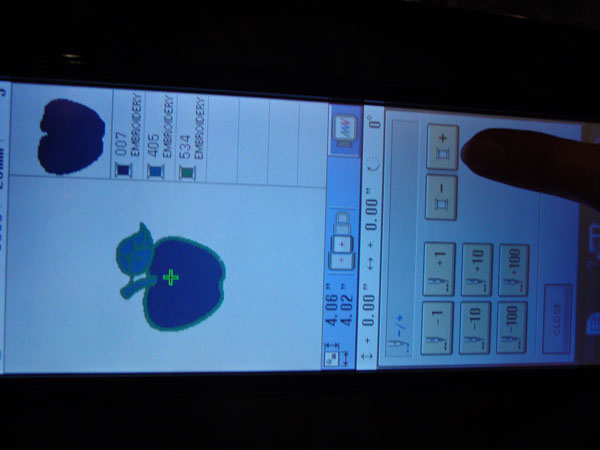
Place the embroidery hoop on the machine and center the embroidery
design. Mark the center of the design on the dishcloth with a water
soluble pen or chalk.
(Click Image to Enlarge)
Step 4:
Remove the hoop from the machine.
Step 5:
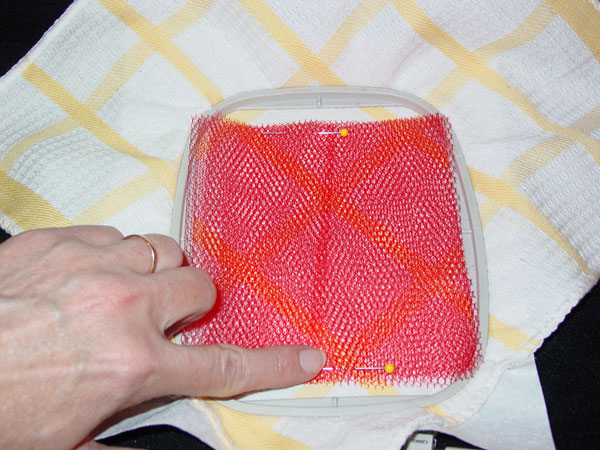
Place the eight squares of netting over your center mark and pin at the
edges to secure them. Make sure the pins are far enough away from the
stitching area so that your presser foot or needle will not strike them.
(Click Image to Enlarge)
Step 6:
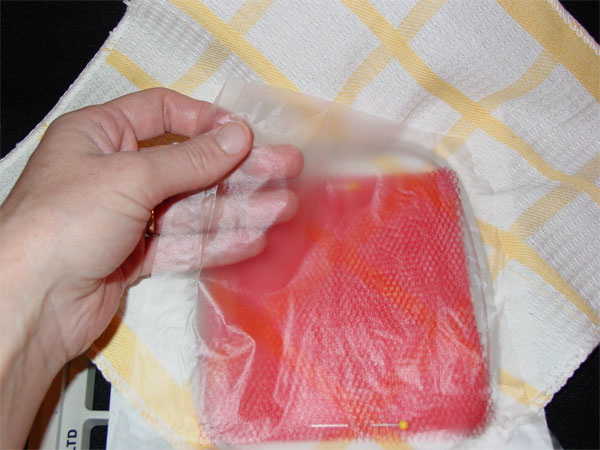
Place one layer of Floriani Water Soluble Topping over the netting. Tape
the corners down to the dishcloth to secure them. This will prevent the
machine’s presser foot from catching the edges.
(Click Image to Enlarge)
Step 7:
Place the hoop back on the embroidery machine.
Step 8:
The embroidery design you have chosen to use will determine how you go
about your next step! It is a good idea to stitch this design on a scrap
piece of material before stitching on your dishcloth. This will help
familiarize you with how the design will form.
Step 9:
If your design is a combination of fill stitches and an outline, you
will need to advance through the fill stitch colors until you get to the
outline stitch. **Note: If the design you have chosen only stitches a
zig zag outline, you will need to stitch it twice. Do this once to hold
down the netting and again to finish the appliqué.If your design is an
appliqué design, it has many parts or steps. You will need only two of
the steps: 1) the running stitch that shows you the outline of where to
place the appliqué on the base material and 2) the actual appliqué
stitch that completes the final outline of the design.
(Click Image to Enlarge)
Step 10:
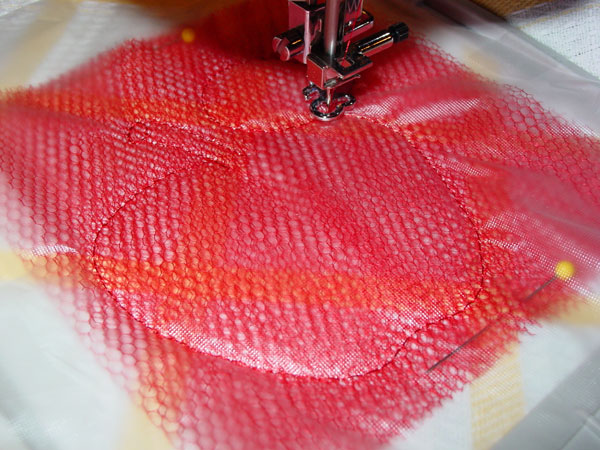
Press the start button on your machine and let it completely stitch
around the design one time with a straight stitch. Stop the machine
immediately after it completes the straight stitch. You will need to
watch the machine closely if the design you are using does not show the
straight stitch as a separate color stop.
(Click Image to Enlarge)
Step 11:
Carefully remove the hoop from the machine. Leave the dishcloth in the hoop!
Step 12:
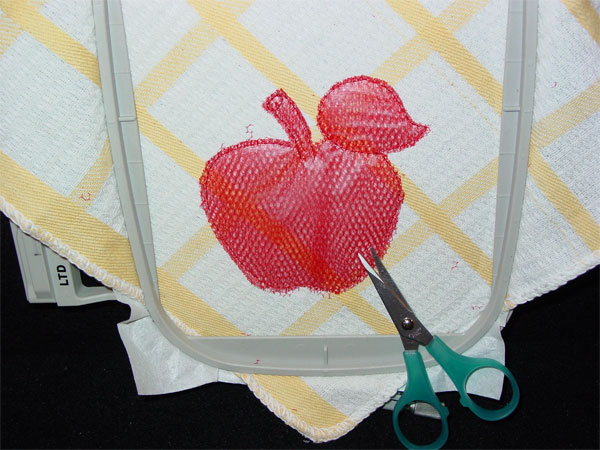
Trim away the topping and the netting from around the outside of the
straight stitch outline. This is a great time to get out those appliqué
scissors!
(Click Image to Enlarge)
Step 13:
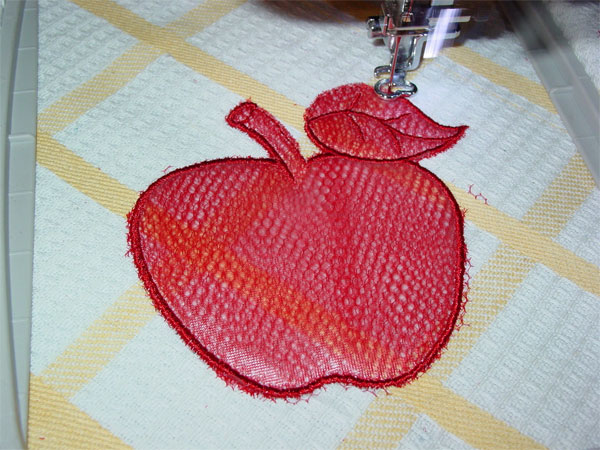
Place the hoop back on the machine and complete the satin stitch portion
of the design and any other colors or parts you would like to have.
(Click Image to Enlarge)
Step 14:
After the stitching is complete, remove the hoop from the machine.
Step 15:
Remove the Water Soluble Topping. It should tear away easily from the
stitching. If you find it resisting any, simply use a wet Q-Tip to
loosen it from the stitches.
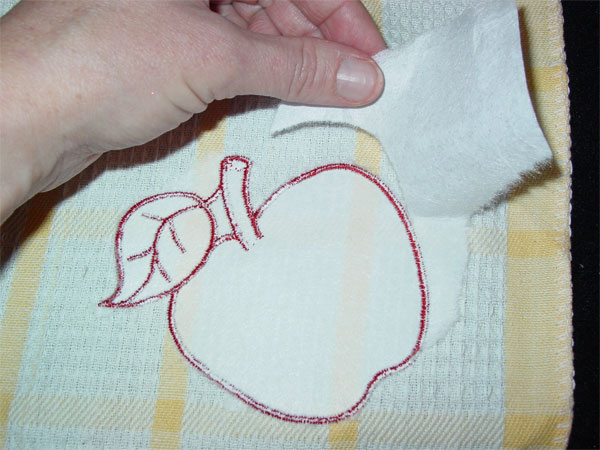
Step 16:
Remove the Stitch N Wash Tearaway from the back of the dishcloth. Again,
this should tear away easily from the stitching. If you find it not
pulling away, simply wet the stitching line slightly and it will release
from the embroidery without distorting stitches! (A great feature of
this product!)
(Click Image to Enlarge)
Step 17:
Trim any excess netting that may be poking out from under the satin stitching.
Step 18:
Now you are ready to scrub those pots and pans!! Enjoy!
Deborah Sexton, the former editor of IMPRESSIONS magazine, has been in the decorated apparel industry for 25 years. She currently does marketing and public relations for decorated apparel suppliers as well as freelance writing for numerous industry publications. You can reach her at [email protected].