

















































Screenprinting 101 Embroidery Project
A basic course on how screenprinting works.
Materials
Project Preview Video

Cut Away Stabilizer - 2.5 Oz wt.

Cut Away Stabilizer - 2 oz wt.
A basic course on how screenprinting works.
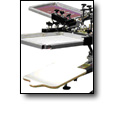
I happen to be an Embroidery Person, simple as that. I know embroidery pretty well and it’s what I do. But when it comes to screenprinting, I run for cover. Compared to embroidery, it’s a dirty, labor intensive, complex process that I don’t want to have anything to do with…or so I thought. Until recently, that was my opinion of screenprinting in general. I vaguely understood the basics of the process and had long ago made a decision that it was not for me. But then I had a long conversation with an experienced Screenprinting Professional at a Trade Show and everything changed. As it turns out, he had roughly the same attitude about Embroidery that I did about Screenprinting. To him, a multi-head embroidery machine was the equivalent of an alien spaceship from another galaxy that had just landed on earth. It was something different, complex, even scary and best avoided. But as we shared knowledge, we both became enlightened about each other’s worlds. Thus, I have decided to broaden your perspective, by giving you a basic course in how screenprinting works. The core element of the process is the SCREEN - a wooden or aluminum frame with a fine nylon MESH stretched over it. The mesh is composed of tiny holes that allow the ink to pass through when pressure is applied to the ink by means of a squeegee. By blocking some of the holes, while allowing others to remain open, a precise pattern of ink can be passed through the screen, allowing a detailed image to be created on whatever is below the screen – usually a garment. The process for setting up the MESH is referred to as “burning a screen” and is an integral step in the pre-production process. The MESH is first coated with a light- sensitive emulsion or film, which (when dry) will block the holes in the mesh. The image that needs to be printed is output to film either by camera or image-setter. This film positive and the mesh on the screen are sandwiched together and exposed to ultraviolet light. The screen (containing the MESH) is then sprayed with a jet of water which washes away all the light sensitive emulsion that has not been hardened by the ultraviolet light. Left behind is an open stencil which corresponds exactly to the image that was supplied on the film. The screen is then fitted on the press in such a way that it can be raised and lowered. The substrate to be printed is placed in position under the screen and ink is placed on the top side of the screen, (the frame of the screen also acts as a wall to contain the ink). A rubber blade gripped in a wooden or metal handle called a SQUEEGEE (not unlike those used to clean windows) is pulled across the top of the screen and pushes the ink through the mesh onto the surface of the item being printing. To repeat the process, the squeegee floods the screen with ink during the return stroke before printing the next impression. In the world of screenprinting production, you need a separate screen for each color in a design. In fact, screenprinting presses are categorized by color capability. For example, a four-color press allows a maximum of four screens to be mounted and used. You can print fewer colors but not more, as the physical limitations of the press only allow four screens to be mounted at one time. (More on how presses function later). Multi-color screenprinting jobs require more work in the Art Department. Each design must be broken down by color – referred to as “color separations”. Think of it in terms of printing each separate color of a design on an individual sheet of clear acetate material (like those used with overhead projectors). When they are all stacked together, the true image is seen. The same goes for the printing process – each color of the design is on a separate screen. Once all colors have been applied to the garment one layer at a time, the finished image appears. The color separation process is the equivalent of the digitizing process for embroidery, where in many instances you are also breaking down a design by its individual colors. For Screenprinters, art preparation is the most tedious and critical part of the process. Unlike embroidery, editing is much more tedious as you have to burn new screens each time you make a change in the artwork itself. Screenprinting presses come in two basic styles – manual and automatic. Again, this is one of those areas where my lack of knowledge led to an unrealistic perception of the differences between the two. Manual units looked friendly and inviting by virtue of their implied simplicity, whereas the Automatic presses seemed intimidating due to size and complexity. (Of course, I later learned that my initial impressions were incorrect.) The most basic manual presses are designed to be operated by one person. The screens are mounted on arms that rotate around a central pivot point. Think of the machine as a carousel. The operator loads the garment at a single workstation, rotates the first screen into position over the garment, and then lowers it down to where it is lying directly on top of the garment. Ink is applied to the top of the screen, then the operator pulls a squeegee across the screen (top to bottom) to force the ink through the screen and onto the garment. He/she then pushes the squeegee back across the screen to “flood” ink onto the screen for the next pass. |
The screen is then raised up off the garment and the operator rotates the carousel, so that the next screen is in position, and then repeats the application process. This process continues until all colors have been applied. The garment is removed and placed in a dryer, where the ink is permanently cured. Though its sounds very slow, the process is actually quite fast when done by an experienced Operator. Other variations on manual presses actually allow multiple Operators to work together on the same machine, thereby increasing the output significantly. It should be noted that the ink that is used is designed specifically for this type of application, such that it doesn’t run or smear. |  |
While it’s quite possible to put out a large number of multi-colored screenprinted garments per hour with a manual press, nothing compares to an automatic press. |  |
Obviously, production is much faster, which gives the impression that automatic machines are restricted to large volume shops. Plus, the complex appearance of the machine suggests that setup is a long tedious process. In reality, that’s not true. Automatic presses such as those made by MHM are actually quicker and easier to setup than most manual presses. Plus, they provide more accuracy and thus better quality designs due to the elimination of certain “human elements.” For example, novice screenprinters often overlook the importance of "squeegee pulling," that is, the act of pushing ink through the holes screen's mesh to produce the final product. A steeper angle (laying the squeegee down flat, handle facing the person inking) will naturally push more ink through the screen, whereas having the squeegee perfectly vertical will push a minimal amount of ink through the screen. Depending on the definition and quality of the item being printed, a variation between the two angles, as well as pressure, may be necessary. On a manual press, this is difficult to control consistently, whereas on an automatic press, the parameters are programmed in and controlled exactly on every cycle of the squeegee. In comparison, the automatic presses do a better job than manual presses in terms of output, control, and quality. Plus, the setup is quicker as well. The one thing that is the same between the two methods is the art preparation and screen making. But beyond that, everything is much simpler with the automatic press. If you decide to add screenprinting to your embroidery business, spend some time researching the process so that you have a full understanding where your costs really lie. Obviously, if you are doing a couple of 12-piece orders per week, it would be hard to justify the cost of an automatic, but on the other hand you don’t need 5000-piece jobs to justify the use of such a machine. Regardless of which direction you go, be sure to match the equipment purchased with the long term needs of your shop, rather than just going with the cheapest price tag. If you are serious about screenprinting, then you need to be serious about your investment, in order to achieve the profits that you desire. |
