

















































3D Embroidery Revisited Embroidery Project
This fad application is making a strong comeback. Thus, it's time to revisit the technique to see what's new.
Materials
Project Preview Video

Beach & Ocean Embroidery Designs Bundle – Sailboat, Palm Tree, Starfish, Coral Reef & More (30 Designs)

Patriotic 4th of July Embroidery Designs Bundle – American Flag, Eagle, Fireworks, Top Hat & More (10 Designs)


Letter A Embroidery Designs Bundle – Pack of 26 Designs (26 Designs)

Cut Away Stabilizer - 2.5 Oz wt.

Cut Away Stabilizer - 2 oz wt.


This fad application is making a strong comeback. Thus, it's time to revisit the technique to see what's new.
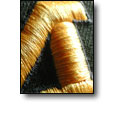
In our industry, trends come and go. One day something is hot, the next day it’s not. Timing is everything, as it’s much better to catch the wave when it’s rising than to be left behind in the receding trough. One way to do this is to keep current with various embroidery processes and techniques, even when they appear to be fads. History has a habit of repeating itself, especially in the apparel industry. And you might just find that the second time around can be much more exciting than the first. One such “fad” application is 3D embroidery. Dormant for several years, it’s making a strong comeback. It has various names including foam embroidery, puffy foam embroidery and 3D embroidery, but regardless of what you call it, the process and final product are the same. And the good news is that it’s relatively simple if you follow a few basic steps. But guess what? As 3D embroidery has evolved, so have the so-called “rules.” (I prefer the term guidelines). Thus, it’s time to revisit the technique to see what’s new. The process itself is still pretty much the same. A special piece of foam rubber, usually about 1/8” – ¼” thick is placed on top of the area where you wish to create the 3D effect. During sewing, the needle penetrates the foam rubber and forms stitches on top of it. In addition, the sewing action causes the foam to be perforated wherever the needle penetrates. Upon completion of sewing, the remainder of the foam can be pulled away, much like tear-away backing. The challenge of removing the excess foam easily and cleanly still persists – no change there. This is because the foam is not perforated on all sides of the sewn area. For example, you sew a satin capital letter “I” in a basic block font using this method. Visualize the sewing process. The needle is going back and forth from one side of the letter to the other. When the sewing is completed, there are two parallel rows of needle penetrations, so the foam tears away easily on either side. But since there are no needle penetrations across the bottom and top of the letter, you won’t be able to tear-off the foam along the top and bottom of the letter. Any effort to do so will result in pieces of foam sticking out from under the top and the bottom of the letter. Thus you are re-introduced to the first “guideline” for producing 3D embroidery (it hasn’t changed): Guideline #1
|


Guideline #3 Increase stitch density 50% - 100%. (No change here) If you mentally picture the sewing process using 3D foam, you should realize that the foam is being compressed by the stitch formation process. Thus, it exerts an upward pressure on the stitches that cover it. This upward push causes the stitches to separate somewhat, so they appear less dense than when sewn directly on a flat surface. Increasing the stitch density will resolve this situation. Guideline #4 Increase column widths 25% - 50%. (For satins only) 3D foam elements look neater when they are full and balanced, whereas very narrow foam elements usually look jagged and uneven. Therefore, it is desirable to go with wider column widths. Of course, you will need to experiment as different situations will require different settings. Guideline #4 Match the foam color and thread color. (Still applies) Every attempt should be made to match the foam color to that of the thread. Contrasting colors should be avoided, as they tend to “bleed-thru” the embroidery which leads to an inferior look. Even with the increased density as described in Guideline #3, it would be hard to completely cover white foam with black thread. (You may have already experienced this when applying black embroidery to a white shirt.) Because the spectrum of color available in foam is quite small, you should carefully design each foam project, rather than just arbitrarily adding foam elements to an existing logo. So, in revisiting the technique, new tricks can be learned that expand the range of use for 3D embroidery. As our industry continues to evolve, the need to tweak some processes while re-inventing others ensures a healthy growth in creativity, which in turn ensures continued profitability. Good Luck and have fun! |
