















































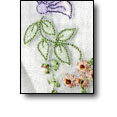


The Technique of Shadow Work Embroidery Project
Suzanne Hinshaw shares her patented technique for replicating beautiful shadow work embroidery using a single-needle home sewing machine.
Materials
Project Preview Video

Cut Away Stabilizer - 2.5 Oz wt.

Cut Away Stabilizer - 2 oz wt.
Suzanne Hinshaw shares her patented technique for replicating beautiful shadow work embroidery using a single-needle home sewing machine.
As originally developed, shadow work is a hand sewing technique that is intended for slightly opaque but somewhat sheer fabrics. Examples include cotton batiste, most linens, organdy, chiffon, fine lightweight wool, lightweight cotton muslins, voile, silk, and organza. To make a shadow design, let’s imagine you draw a small circle onto a piece of fabric. You thread a needle with a blue thread and bring your needle from behind the fabric and through it on a part of the outline of the circle. You’d take a tiny straight stitch bringing the needle back under the fabric, then underneath the fabric you would cross over to the opposite side of the circle and bring your needle back up through the fabric. You’d take a tiny straight stitch again bringing your needle beneath the fabric once more, cross over to where you first began your first stitch and come up through one of the holes of that tiny stitch and take another stitch, bring the needle back down and again cross over to take your next stitch, etc. Once you have gone all around that circle with the straight stitch, the blue threads will have crisscrossed behind the fabric thus creating a “field” of blue. This blue fill area when viewed from the top of the fabric creates a shadow effect of softly muted blue with an outline of straight stitches around it. Hence the name “shadow work.” After years of studying hand-done shadow work and techniques, Suzanne Hinshaw, a well-known educator and digitizer in the home embroidery market, came up with her own method of replicating the same look using her single-needle home embroidery machine. (This method also can be done with the multi-needle commercial machines as well.) Using specialized digitizing techniques that she developed, she was able to create a hand-sewn look for use on baby clothes, dresses, pillows, handkerchiefs, napkins, blouses, and much more. According to Hinshaw, using the machine instead of hand sewing actually expands the number of things that can be done with shadow work. “The hand needle can do only so much,” she says. “If I want a circle to be shadowed from the outside edges toward the center, I can’t do that with a hand needle. With machine shadow work, I can stitch a green leaf as the base and then put in a darker green on top of the lighter green. Then when I put my fabric down and it stitches the outline all the way around, it shadows through with shading. So machine shadow work can look like it’s hand painted.” In addition to layering colors, you also have more palettes of color to work with, notes Hinshaw. So you can get a more detailed version of shadow work than you could ever do by hand. “This is done by using a variety of threads and incorporating “shading” factors into the designs. This is what can give a flower a three-dimensional appearance,” she says. “This shading creates depth that filters through the fabric as well as roundness and softness,” she continues. “By changing out the colors of the shading, the same flower can almost appear as though it’s entirely different. Add a touch of metallic thread to that design and what was once stitched for a baby garment can become a design used for a festive holiday or cocktail dress.” Once Hinshaw fine tuned her shadow work machine techniques, she began digitizing design collections that she now offers for sale. There are five collections available and Hinshaw is constantly adding new designs throughout the year. Each design is digitized manually, and Hinshaw estimates that a single design takes approximately 40 hours to complete. “I put in every stitch by hand,” she says. “I do all my own artwork, digitizing, and sewouts and it takes a lot of time,” she says. |

How to Use the Designs The way you use the predigitized shadow work designs is easier than stitching regular embroidery, notes Hinshaw. Start by hooping a piece of stabilizer alone. You are not limited to which type to use. Her technique covers any type of stabilizer from using the fabric itself to tearaway, cutaway, heataway, water soluble, etc. She has even used netting. “The purpose of the stabilizer is to hold the threads in place that will be shading through the fabric,” she says. Her personal favorite is Floriani’s Wet ‘N’ Gone, which dissolves in water. It provides great support while sewing and then washes away leaving very little residue. After hooping the stabilizer, you sew the first colors onto this stabilizer. When you come to the segment in the stitch-out sequence that tells you to “place your fabric down now,” you put four pieces of double-stick tape around the design right onto the stabilizer. You can take the hoop off your machine at this time. Because you can somewhat see through the fabric, you know exactly where to place the design. Since you hoop only the stabilizer but never your fabric, you never need center points for placement and you can place it perfectly every time. Once you’ve laid your fabric over the design in the hoop, gently press it down onto the tape to hold it. Put your hoop back onto the machine and continue stitching your design following and completing the stitch-out sequence. There are some delicate “Fil Tire” stitches that require you to put in a large, round needle, and the instructions tell you exactly when to do this. When you have completed the design, you take it out of the hoop, clip your jump stitches, and remove the stabilizer. The outline stitches and embellishment stitches hold the woven fills to the back of the fabric. It is imperative that your stabilizer not move while stitching, so it’s important to hoop securely. Using a strip of felt on each side of the hoop helps secure the pieces of stabilizer that you are using in the first section of stitching. If your machine has difficulty catching these stitches or your stabilizer seems to slip, for that design use a sheer fabric like organdy, or voile or even sheer netting to hoop with your stabilizer. Then, stitch your design and when done, trim away the excess stabilizing fabric and stabilizer. Suzanne’s “Shadow Work by Machine” is like no other embroidery in the industry. All of the shadow work designs also can be used for redwork, as each design has complete outlines. Look at your stitch-out sequence and skip to just the outlines after your fabric has been placed down and you have an instant redwork design. Each design collection comes with an instruction booklet that include ideas, full-color pictures of each design stitched out, and the stitch-out sequence of each design complete with what you are stitching per each color number. To see the complete line of designs, visit https://www.allbrands.com/products/abc0833.html. Tip For Selecting Fabric A good test to determine if a fabric is appropriate for shadow work, according to Hinshaw, is to put your hand behind it. Can you see the shadow of your hand? If so, then you will be able to see colored threads. Another tip is to use brighter colors underneath less sheer, thicker fabrics. “You can use neon green,” Hinshaw says, “because the bright color will punch through the top and then outline with a soft muted green on top or the desired shade you would want.” Please see the next page for examples of Suzanne's shadow work technique. |
For embroiderers who want to try doing shadow work at home, Hinshaw offers predigitized collections of shadow work designs that come with instruction booklets. |

This antique teddy bear design, which is part of Hinshaw’s predigitized collections, shows the softly muted colors that shadow work creates. |

Suzanne Hinshaw was in the shower when she got the idea on how to create a shadow work effect with her home embroidery machine. She rushed downstairs and created this initial design to find that her idea worked! |

By changing out the colors of the shading or using different threads such as metallics, you can use the same design to come up with completely different looks. Here, Hinshaw has sewn her wreath design out with different colors and threads to demonstrate the dramatic difference this creates. |

One of the challenges Hinshaw set out to solve when she first started doing shadow work was how to use the technique on designs that had fine details like leaves, flower buds, and vines. She had been using colored fabrics to create the shadows but this technique wasn’t feasible for tiny leaves. She then came up with the idea of using embroidery fill stitches on stabilizer. |

Since developing her patented shadow work process, Hinshaw has used it to create countless home decorative items such as this gorgeous pillowcase, pillows, tablecloths, napkins, hand towels, and more. |

About Suzanne Hinshaw
Suzanne Hinshaw has been teaching about home embroidery for more than 20 years. Her work has graced the covers of magazines such as Martha Pullen’s Sew Beautiful and she has been a regular speaker at home embroidery and quilting trade shows. She has written countless articles on embroidery techniques and projects for home embroidery and sewing publications. After developing her patented shadow work technique, she launched her own line of embroidery designs incorporating this technique. |

