Border OptionsHugging border, circle, square, or rectangle — with a 3mm satin stitch.
Backing OptionsAvailable with iron-on, sew-on, or velcro backing.
Fast ShippingShipped quickly from the USA.
Free Online Tools
Powerful embroidery utilities that save time and prevent costly mistakes.
Stitch AssistantRECOMMENDED
Get the exact stabilizer, machine settings, needle, and thread color sequence for every embroidery design you purchase — based on that design's stitch density, dimensions, and color count.
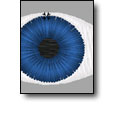
Depending upon the size of the design, the eyes can be digitized several different ways. In figure 1, the eye ball was created as a vertical fill pattern. Another fill pattern was created for the pupil, using horizontal stitches. Finally, the pupil was bordered with a satin segment. The result is a more detailed eye.
Figure 2
In the case of smaller designs, the eye features must be minimized because of space limitations. In this case, it is impractical to distinguish the pupil from the iris, so one satin segment is used to represent both areas. See Figure 2. One problem that can develop is thread breaks, since the stitch length tends to be too short at the top and bottom of the satin.
Figure 3
A better solution for situations where size is a limiting factor is to replace the traditional satin with a “star satin”, see figure 3. This can be accomplished by hand, though many advanced digitizing systems include this as a tool.
Figure 4
The key with a star stitch is that all of the stitches cross over the center from one side to the other, (see figure 4 for a close-up). This means that all of the stitch lengths are equal, thus thread breaks are eliminated.
Award-winning author and international speaker Jimmy Lamb has over 15 years of embroidery experience as well as 10 years of professional digitizing experience (as a business owner). Currently, he is the Director of Training and Education for Hirsch International Corp., where he has been instrumental in developing their educational seminars.