
















































Applique Puff – N - Stuff Embroidery Project
The 3D Foam process is easier than you think. Here are some hints.
Materials
Project Preview Video

Foam

Letter A Embroidery Designs Bundle – Pack of 26 Designs (26 Designs)

Eagle Head (Puff)

USA puffy flag

FIREWORKS (PUFFY FOAM)

Cut Away Stabilizer - 2.5 Oz wt.

Cut Away Stabilizer - 2 oz wt.


The 3D Foam process is easier than you think. Here are some hints.
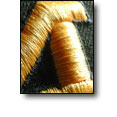
3D Foam, also known as puffy foam, adds a very unique effect to embroidery and is quite simple to use, yet it has a reputation of being very challenging to work with. The difficulty that most embroiderers encounter with this process is that the foam cannot be cleanly removed after sewing. This is because the foam is not perforated on all sides of the sewn area. For example, you sew a satin capital letter “I” in a basic block font using the puffy foam method. Visualize the sewing process. The needle is going back and forth from one side of the letter to the other. When the sewing is completed, there are two parallel rows of needle penetrations, so the foam tears away easily on either side. But since there are no needle penetrations across the bottom and top of the letter, you won’t be able to tear-off the foam along the top and bottom of the letter. Any effort to do so will result in pieces of foam sticking out from under the top and the bottom of the letter. So how do you sew the letter “I” just described? One simple method is to use an edgewalk underlay stitch which creates a running stitch that goes up one side across the top, back down the other side, then across the bottom, ending up where it started. In fact, go ahead and make two passes for even more perforation. Then you can sew the satin stitches. However, don’t let the term edge-walk underlay mislead you. This is used to describe a specific pattern of stitches; it does not imply that underlay is needed. Sometimes you may find that the edge-walk underlay still doesn’t create enough perforations of the foam to allow easy removal. Going back to the same letter “I” it might be necessary to create a very narrow satin column that extends across the top and bottom openings of the letter. These segments in combination with the edge-walk underlay will just about guarantee enough cutting action during sewing to solve the problem. As a final step, once the “cleaning” process is finished, use a paint gun (similar to a hair dryer but much hotter) to apply heat to the design. This will cause any stray pieces of foam to shrink back under the embroidery stitches. Be careful not to damage the embroidery with the intense heat. |
