















































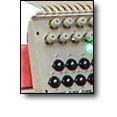


Thread Tensions Embroidery Project
Tension is a critical element of embroidery because it affects the controlled flow of thread through the machines thread path and into the hook and loop area. The precision of that thread flow affects stitch formation and how it ultimately lays on the ga
Materials
Project Preview Video

Cut Away Stabilizer - 2.5 Oz wt.

Cut Away Stabilizer - 2 oz wt.
Tension is a critical element of embroidery because it affects the controlled flow of thread through the machines thread path and into the hook and loop area. The precision of that thread flow affects stitch formation and how it ultimately lays on the garment.
Although you must adjust the upper thread tensions independently of the bobbin thread tensions, the two forces must work together in a delicate balance. Think of it as a tug-of-war game. If the upper thread tension is too great, it will pull the bobbin thread up through the garment, such that it is visible in the topstitching. On the other hand, if the bobbin tension is too tight, it will pull the upper thread down under the garment farther than normal, which will cause visible loops to form in the stitching. Both of these scenarios are undesirable. Setting Upper Thread Tension
Setting proper thread tension is an integral part of the production process. Most embroiderers use either a tension gauge (supplied by machine manufacturer) or a stitching process called the “thirds test”. Begin the test by sewing out the letters XOH at about 1.5 inches high on a piece of fabric similar to the garment that will be sewn on. This selection of letters will test every direction of the machine’s movement. Now turn the test swatch over and inspect the stitching on the underside. The backside of the letters should look as if it’s divided into three equal parts. The outside edges should be the top thread and the center should be the bobbin thread. In other words, two-thirds of the stitches should be the top thread, while the other one-third is the bobbin thread. If you see too much top thread, increase the top thread tension. If you see too much bobbin thread, reduce the upper thread tension. While this test is very useful, it should only be considered as a starting point. The real test of tension is a design that looks good and sews well. Too many embroiderers spend an inordinate amount focusing on the under stitches, while paying little attention to the top stitches. The reality is that high quality stitching can be achieved without meeting the criteria of the “thirds test”. In fact, there may be times when almost no bobbin thread is showing in comparison to the upper thread. That’s okay, as long as quality stitching has been achieved. The bottom-line is this: Always adjust tension with the sole purpose of controlling the quality of the top threads. There are several factors that affect thread tension, other than the tensioning knobs. These factors tend to vary the amount tension at different sewing speeds and may have to be compensated for by adjusting the tension to extremes. Setting Bobbin Tension To achieve proper bobbin tension, place the bobbin in the bobbin case but do not put the thread into the “pigtail”. Hold the end of the bobbin thread between two fingers and, with a slight jerk of the wrist, let the bobbin case drop. It should descend about three to four inches. If not, then the tension is too tight. Adjust the large screw on the tension finger slightly and test again. If the bobbin case drops more than three to four inches, then the tension is too loose. Once again, slightly adjust the tensioning screw and re-test. Just like with the upper thread tension, the bobbin “drop test” is an excellent means for setting the ideal tension. But in the real world, there will be situations where the tension has to be adjusted differently in order to achieve the desired stitch quality. |

