Border OptionsHugging border, circle, square, or rectangle — with a 3mm satin stitch.
Backing OptionsAvailable with iron-on, sew-on, or velcro backing.
Fast ShippingShipped quickly from the USA.
Free Online Tools
Powerful embroidery utilities that save time and prevent costly mistakes.
Stitch AssistantRECOMMENDED
Get the exact stabilizer, machine settings, needle, and thread color sequence for every embroidery design you purchase — based on that design's stitch density, dimensions, and color count.
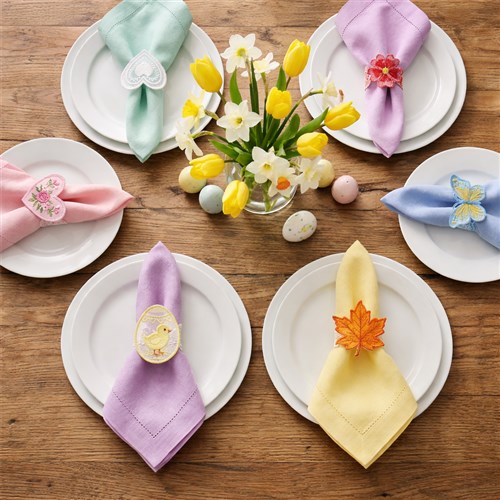
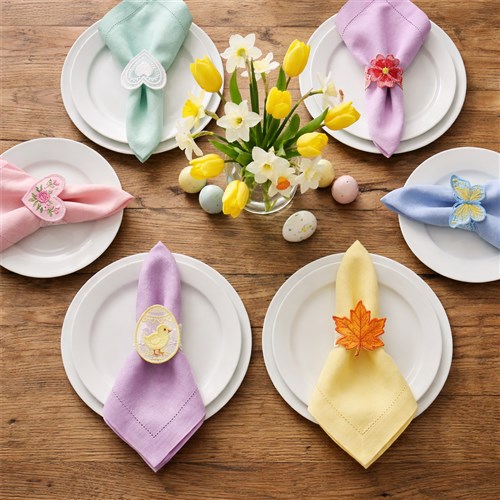
Add elegance to your Easter brunch with this set of freestanding lace napkin rings. Featuring 10 exquisite designs, these reusable rings bring a touch of sophistication to your table setting. Perfect for enhancing any Easter celebration. Step-by-step instructions are included.
• 10 FSL napkin ring designs (select your favorites!)
• Water-soluble stabilizer
• Embroidery thread (white or pastel colors recommended)
• 75/11 embroidery needle
Additional Supplies:
• Napkins (cloth recommended - white, pastel, or Easter-themed)
• Plate chargers or placemats
• Fresh flowers (tulips, daffodils, or lilies)
• Candles (taper or tea lights)
• Optional: Small Easter eggs or decorative bunnies for table accents
Final Product: What You Will Create
Step 1:
Prepare Your Stabilizer
Hoop one layer of water-soluble stabilizer tightly. Make sure it’s drum-tight with no wrinkles. This is crucial for clean FSL results.
Step 2:
Select Your Thread Colors
Choose thread colors that complement your Easter theme: - Classic: White or ivory - Pastel: Light pink, lavender, mint, or baby blue - Bold: Gold or silver metallic for glamour
Step 3:
Stitch the Design
Load your chosen napkin ring design. Stitch at medium speed (600-700 SPM) for best results. Let the machine complete all stitching - don’t trim jump stitches until finished.
Step 4:
Remove from Hoop
Carefully remove the stabilizer from the hoop. Trim any excess stabilizer around the design, leaving about 1/4” border.
Step 5:
Rinse and Shape
Hold the design under warm running water. Gently rub to dissolve the stabilizer completely. While still damp, shape the napkin ring into a cylinder. The design will be pliable when wet.
Step 6:
Dry and Stiffen
Place the shaped napkin ring over a cylinder form (toilet paper tube cut to size works perfectly). Let dry completely - about 2-4 hours. For extra stiffness, spray with fabric stiffener before drying.
Step 7:
Create Your Table Setting
Once all napkin rings are dry: - Fold napkins into rectangles or rolls - Slide through the FSL rings - Place on chargers with plates - Add flowers and candles for ambiance
Step 8:
Mix and Match
Create visual interest by using 2-3 different napkin ring designs around the table. The 10-design pack gives you plenty of variety!
Step 9:
Pro Tips
Tip #1: Batch Stitch for Efficiency
Stitch multiple napkin rings in one hooping session. Load 4-6 designs and let the machine run while you prepare other table elements.
Tip #2: Test Your Water Temperature
Too hot = designs may lose shape. Too cold = stabilizer doesn’t dissolve fully. Warm tap water is perfect.
Tip #3: Storage Solution
These napkin rings store flat! Gently flatten after use and store in a box. Reshape with a light mist of water when needed.
Tip #4: Gift-Ready Packaging
Make extra sets and package 4 napkin rings in a clear box with a ribbon. Perfect hostess gifts for Easter gatherings!