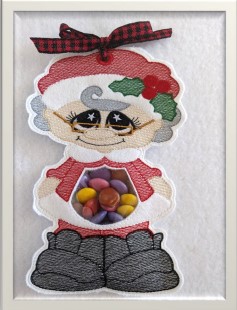
ITH Christmas Candy Holder Ornament

ITH Christmas Candy Holder Ornament Embroidery Project

By   Embroidery Diva   on   September 23, 2024
  • SKILL LEVELBeginner
  • TIME REQUIRED45:00
Description

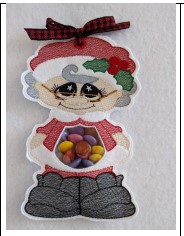
Create a delightful in-the-hoop Christmas candy holder ornament featuring a cheerful character with a see-through pocket for treats. Perfect for adding festive charm to your holiday decor while delighting loved ones with a sweet surprise. Step-by-step instructions are included.

Step of

Materials

Project Preview Video


Preface:

© Broderie Dzhiboux. All rights reserved.
This project is officially licensed to ITH Boutique. All images, digitizing rights, step-by-step instructions, and project visuals are the exclusive property of Broderie Dzhiboux. Unauthorized reproduction or distribution is prohibited.

Materials
  • Frame 10x10: 2 pieces of felt 11x11cm.
  • Frame 13x18cm: 2 pieces of felt of 13x19cm.
  • Small piece of vinyl for the belly.
  • Ribbon.


  • Step 1:

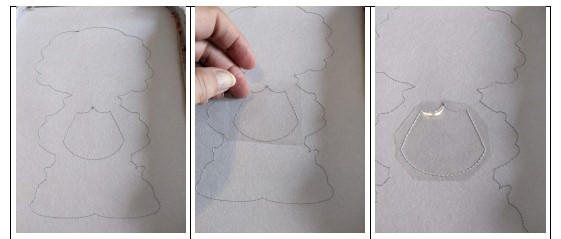
    STEP 1:

    • Make the first seam on your support to tell you the location of your vinyl and felt.
    • Pt your little piece of vinyl on the belly part.
    • This seam will hold your vinyl in place, cut the excess all the way around.

    (Click Image to Enlarge)


    Step 2:

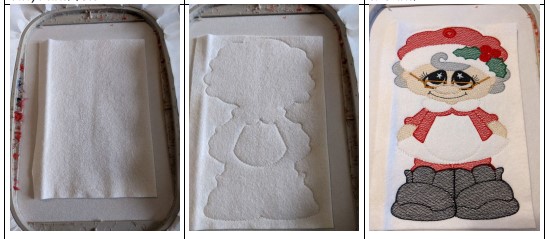
    STEP 2:

    • Put on your felt, taking care to hide all the seam.
    • This seam will hold your felt in place and tells you which part of felt to remove on the belly.
    • Make the embroidery stitches until the penultimate seam.

      (Click Image to Enlarge)


      Step 3:

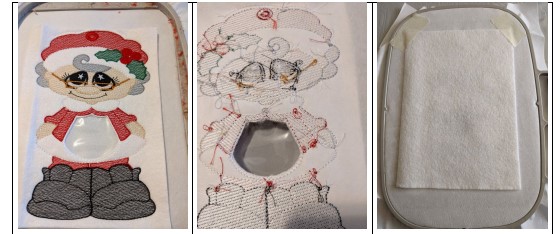
      STEP 3:

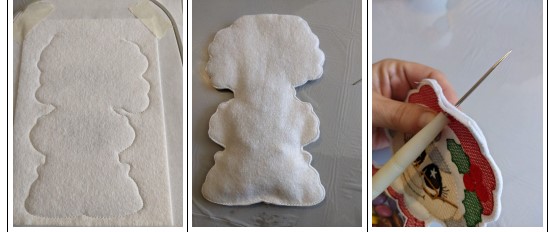
      • Remove the felt from your vinyl.
      • Then your work and on the reverse remove your support on the part that is on the vinyl.
      • Put your and piece of felt on the back of your frame taking care to hide all the seam, keep in place.

        (Click Image to Enlarge)


        Step 4:

        STEP 4:

        • Make the last seam that will join your 2 felts together.
        • Get out of the frame and cut off the excess felt all around. On the back you have to cut as for the front.
        • With a poincon make a hole in the center of the small circle in the top.

          (Click Image to Enlarge)


          Step 5:
          (Click Image to Enlarge)

          STEP 5:

          • Put the sweets or other and close with a ribbon.

          NOTE:

          • If you resize or modify this design in any way, I can't guarantee a quality point.
          Meet the Author: Embroidery Diva
          Embroidery Diva
          I am a passionate embroidery enthusiast who has been stitching since I was a young girl. I developed a love for embroidery from my grandmother, who taught me how to stitch basic designs. Over time, my love for embroidery grew and I began experimenting with more complex designs and techniques.
          More From This Author
          Link is Broken, Please check the URL
          Exclusive Embroidery Offers!
          Copyright © {{ currentDate | date:'yyyy'}} - EmbroideryDesigns.com
          GET 50% OFF! ×