Border OptionsHugging border, circle, square, or rectangle — with a 3mm satin stitch.
Backing OptionsAvailable with iron-on, sew-on, or velcro backing.
Fast ShippingShipped quickly from the USA.
Free Online Tools
Powerful embroidery utilities that save time and prevent costly mistakes.
Stitch AssistantRECOMMENDED
Get the exact stabilizer, machine settings, needle, and thread color sequence for every embroidery design you purchase — based on that design's stitch density, dimensions, and color count.
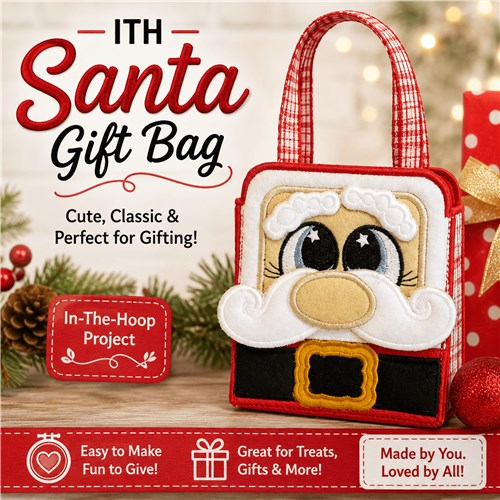
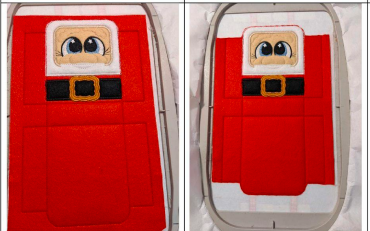
Create a festive ITH Santa Claus gift bag, perfect for holding treats or small surprises during the holiday season. Ideal for Christmas parties, stockings, and seasonal décor, this easy-to-make bag adds a cheerful touch to your celebrations. Step-by-step instructions are included.
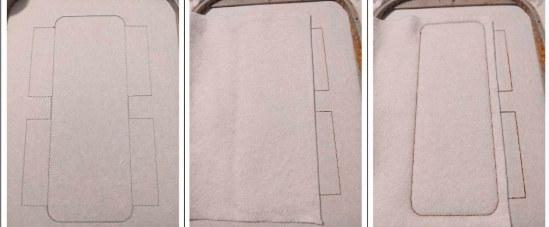
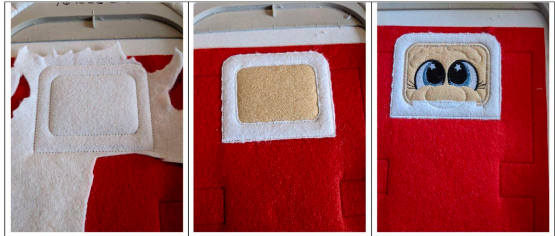
The first seam is done on your support to tell you the location of your fabric. Put your fleece on the center part only. This seam will hold your fleece on your support.
(Click Image to Enlarge)
Step 2:
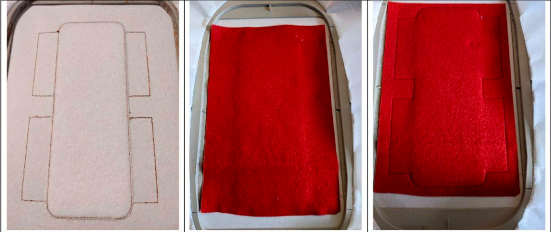
Remove excess fleece. Put your first piece of felt on the entire seam. This seam will hold your felt in place.
(Click Image to Enlarge)
Step 3:
This seam tells you the location of your felt. Put your felt on the seam. This seam will hold your felt in place.
(Click Image to Enlarge)
Step 4:
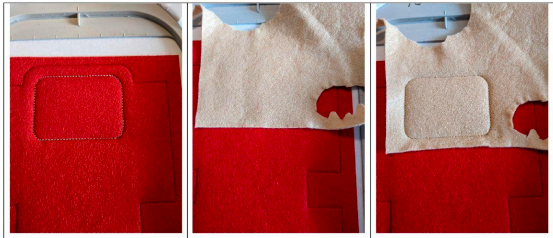
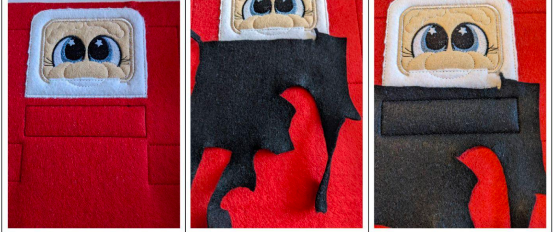
Remove excess tissue all around. This seam tells you the location of your felt. Put your felt on the seam.
Step 5:
This seam will hold your felt in place. Remove excess tissue all around. Make the embroidery and bumblebee stitches.
(Click Image to Enlarge)
Step 6:
This seam tells you the location of your felt. Put your felt on the seam. This seam will hold your felt in place.
(Click Image to Enlarge)
Step 7:
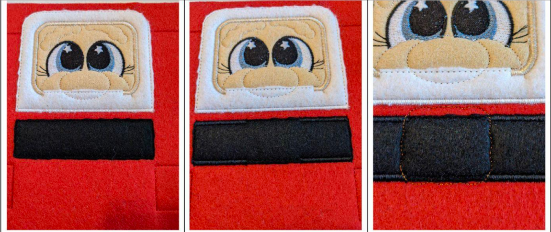
Remove excess tissue all around. Bumblebee point. This seam tells you the location of your felt.
(Click Image to Enlarge)
Step 8:
Put your felt on the seam. This seam will hold your felt in place. Cut off excess fabric all around and inside the loop.
(Click Image to Enlarge)
Step 9:
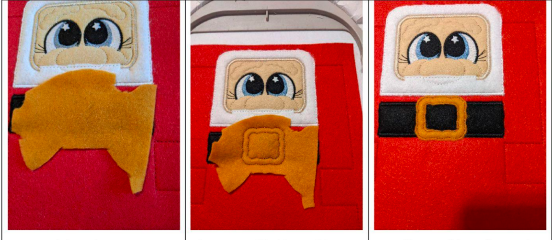
Making the bumblebee point. Set up your ribbons for handles, you need to put your ribbon on the back of your frame. Pay attention to the meaning of your ribbon. Put your 2nd piece of felt on the back. Keep it in place.
Step 10:Make the sewing that will join your 2 pieces together.
Cut the excess fabric on the top and bottom of the bag only on the front and back of the frame.Make the bumblebee point and get out of the frame.
(Click Image to Enlarge)
Step 11:
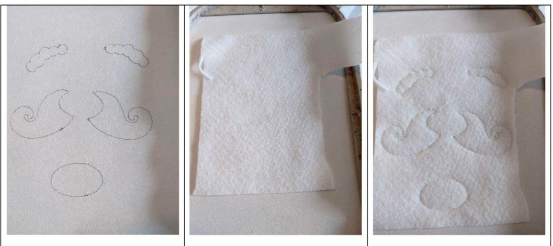
The first seam is done on your support to tell you the location of your fleece. Put your fleece on the seam.This seam will hold your fleece on your support.
(Click Image to Enlarge)
Step 12:
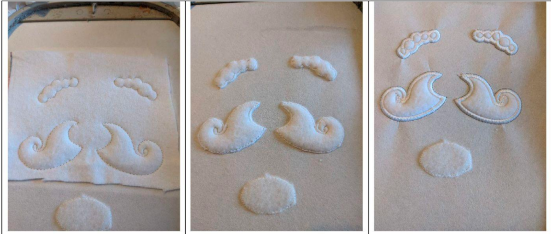
Cut off excess fleece all around. Put your white felt on the back of the frame, part of the eyebrows and whiskers, hold well in place. Put your piece of white felt on the front of your work, part of the eyebrows and whiskers.
Step 13:
This seam will join your 2 felts together.Remove excess felt all the way around on the front and back of your work.Bumblebee Points.
(Click Image to Enlarge)
Step 14:
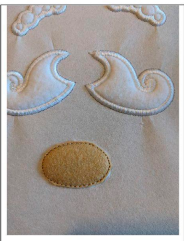
Put your fabric for the nose on the back of your frame taking care to maintain well.Put your fabric on the front of your work, on the nose only. Make the next seam that will bring together the 2 pieces in seam together.
Step 15:
(Click Image to Enlarge)
Cut off excess fabric all around. Make the bumblebee anointed. Getting out of the box.
Step 16:
With your hot glue rifle, stick the items on your bag, taking care not to stick to the sides of the bag.
On the face, you have the seam lines to tell you the location of your elements.
Glue the sides together, the front side of the bag sticks to the back side of the har for a nice finish.