Border OptionsHugging border, circle, square, or rectangle — with a 3mm satin stitch.
Backing OptionsAvailable with iron-on, sew-on, or velcro backing.
Fast ShippingShipped quickly from the USA.
Free Online Tools
Powerful embroidery utilities that save time and prevent costly mistakes.
Stitch AssistantRECOMMENDED
Get the exact stabilizer, machine settings, needle, and thread color sequence for every embroidery design you purchase — based on that design's stitch density, dimensions, and color count.
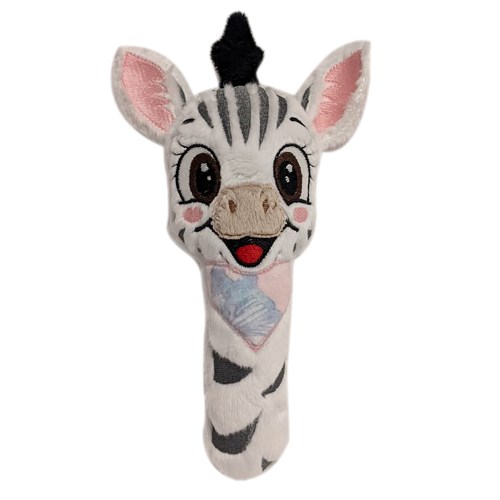
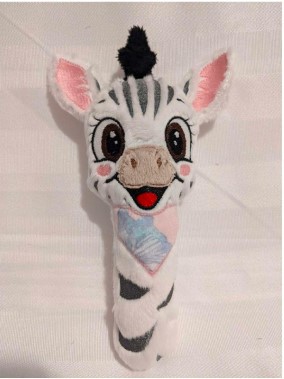
Delight your little one with this In-The-Hoop zebra rattle, designed for sensory play and early development. This charming accessory brings joy with every shake and is crafted for durability. Step-by-step instructions are included.
This is a collaboration between ITH Boutique and Broderie Dzhiboux.
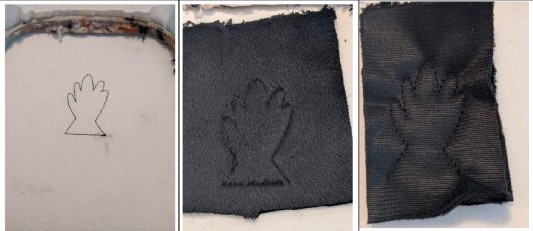
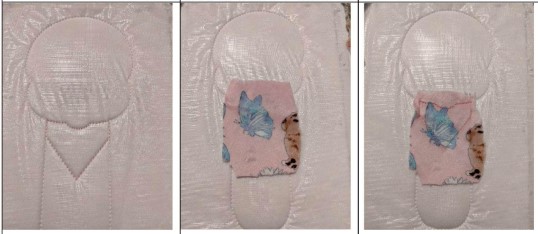
Step 1:
• The first seam is done on your tearable support. Once this sewing is done, take your first piece of fabric and put the upside down on your support.
• Make the 2nd seam, this seam will hold your fabric on your support. Then put your 2nd piece of fabric, place against place.
• Make the last seam to unite your 2 pieces.
(Click Image to Enlarge)
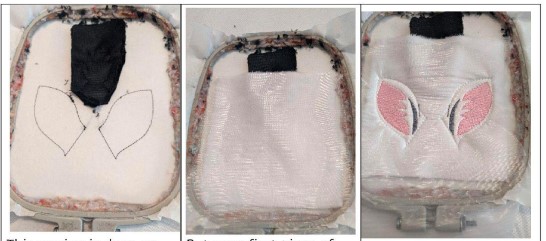
Step 2:
• This sewing is done on your support to indicate the location of your fabric.
• Put your first piece of fabric on the seam and water-soluble support taking care to hide the seam well.
• Make the seam that will hold your fabric on the support. Do the embroidery stitches Once these 2 steps are complete, put your 2nd piece of fabric, place against place.
• Make the last seam that will sew your 2 pieces of fabric together. Step out of frame, remove excess fabric, turn upright and set aside.
(Click Image to Enlarge)
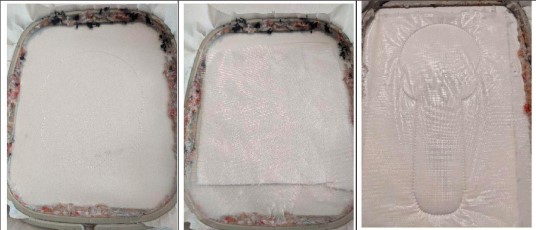
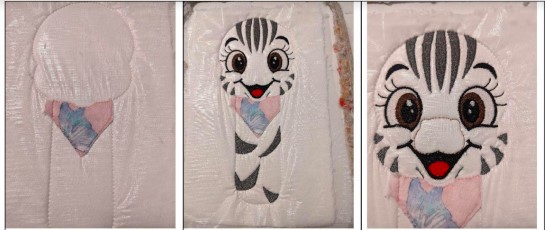
Step 3:
• Seam 1: Seam on your support to indicate the location of your fabric.
• Put your first piece of fabric and your water soluble support. Take care to hide the seam.
(Click Image to Enlarge)
Step 4:
• Seam 3: Seam to indicate the location of your bandana fabric.
• Put your fabric on the seam taking care to hide the entire seam.
• Seam 4: Seam to hold your fabric on the rattle.
(Click Image to Enlarge)
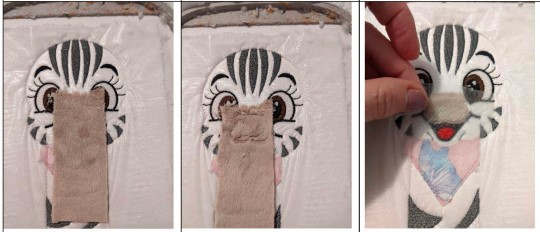
Step 5:
• Remove excess fabric from top and bottom of bandana.
• Stitching from 5 to 10: embroidery stitches.
• Seam 11: Seam to show you the location for your snout.
(Click Image to Enlarge)
Step 6:
• Put your small piece of cloth for the snout.
• Sewing 12: Sew and remove excess fabric.
• Put a small piece of water-soluble support.
(Click Image to Enlarge)
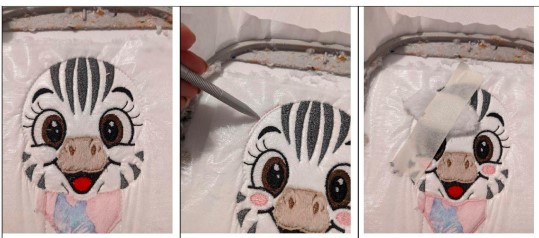
Step 7:
• Sewing from 13 to 15: embroidery stitches on the snout.
• Seam 16: This seam tells you the location of your first ear.
• Position your ear, place against place, on the seam line, hide the seam line well, hold in place.
(Click Image to Enlarge)
Step 8:
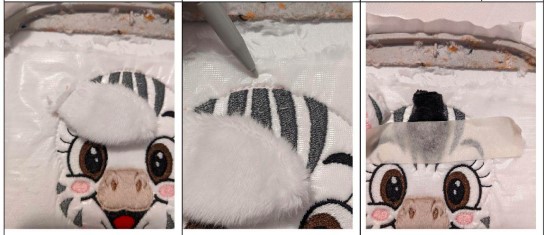
• Seam 17: This seam will keep your ear in place.
• Seam18: seam in the top of the head to indicate position.
• Put your mane, place against place and keep in place.
(Click Image to Enlarge)
Step 9:
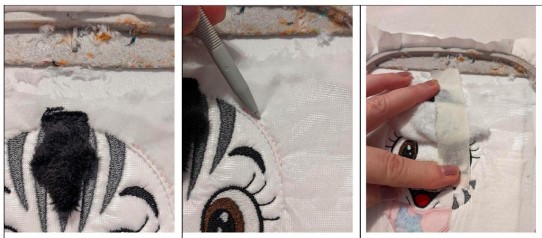
• Sewing 19: this sewing will keep your mane in place.
• Sewing 20: sewing to indicate the location of your 2nd ear.
• Make as for the first ear, hold firmly in place.
(Click Image to Enlarge)
Step 10:
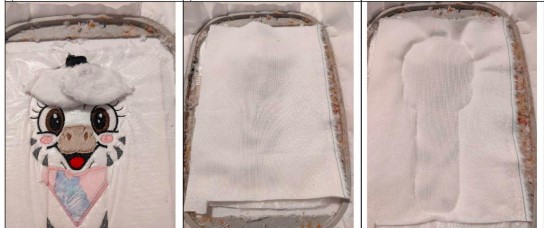
• Sewing 21: sewing to keep your ear in place.
• Put your piece of fabric for the back, place against place, on your work.
• Sewing 22: For this sewing, I put the minimum speed on my embroiderer and I follow the sewing to place my fabric correctly on the top of the head.
(Click Image to Enlarge)
Step 11:
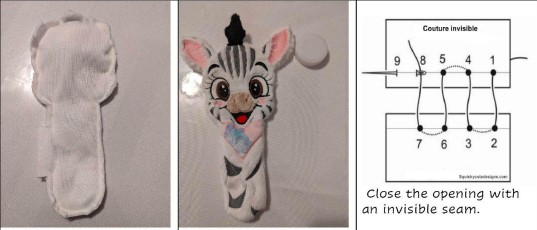
• Get out of frame, remove excess fabric, leave a little more fabric at the opening.