Border OptionsHugging border, circle, square, or rectangle — with a 3mm satin stitch.
Backing OptionsAvailable with iron-on, sew-on, or velcro backing.
Fast ShippingShipped quickly from the USA.
Free Online Tools
Powerful embroidery utilities that save time and prevent costly mistakes.
Stitch AssistantRECOMMENDED
Get the exact stabilizer, machine settings, needle, and thread color sequence for every embroidery design you purchase — based on that design's stitch density, dimensions, and color count.
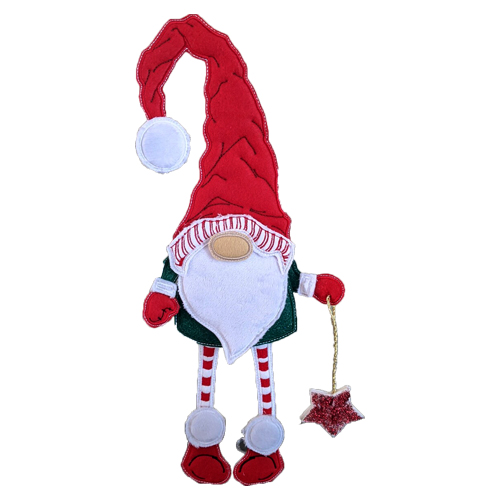
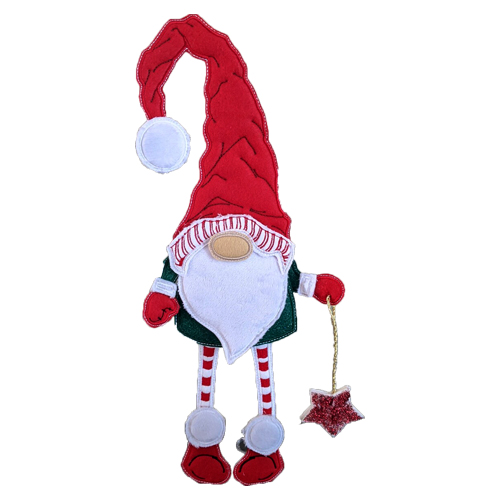
Create a charming holiday decoration with this In-The-Hoop project featuring an adorable elf holding a Christmas star. Perfect for adding a touch of festive cheer to your home, this design is both fun and easy to make. Step-by-step instructions are included.
Hat: 1 piece of 14x19cm in red felt and one in white felt for the back.
Coat and sleeve: 1 piece of 17x12cm in green and one in white felt for the
back.
Beard, sleeve lapels and tassel: 1 piece of 17x14cm of fur and one of white
felt for the back.
Reverse of the hat :2 pieces of 11x6cm of white felt.
Nose: 1 piece of 4x3em skin color and a white felt for the back.
Boots: 1 piece of 11x7cm red color and a piece of white felt for the back.
The legs: 2 pieces of 7x10cm of white felt.
The mittens : 1 piece of 7x4cm red color and 1 piece of white felt for the
back.
Batting (wadding) to put between your layers of felt.
Support d guilty, hot glue, here | put 2 sticks and small pot at the back to
make it stand upright, small chisel, rope and a decoration (here it is a star but you can put what
you want) (star not included).
Make ail the articles one by one, Once the items are made with the embroiderer,
see the assembly.
This is a collaboration between ITH Boutique and Dzhiboux.
Step 1:
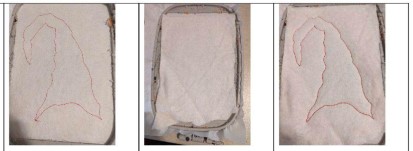
• The first seam is always done on your support to indicate the location of your fabric.
• Put your batting on your support taking care to hide the seam on your support.
• Make the next seam that will keep your batting on your support.
Step 2:
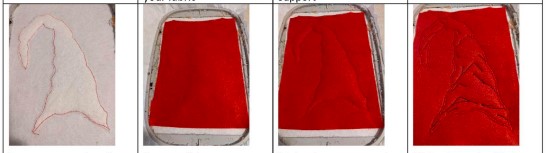
• Remove excess beating all round.
• Put your felt on your batting taking care to hide all the batting.
• Make the next seam that will hold your felt on your support.
• Make the embroidery stitches on your piece. Some pieces do not have an embroidery
stitch, you will only have to move on to the next Step.
The next step is to do the bumblebee point all the way.
(Click Image to Enlarge)
Step 3:
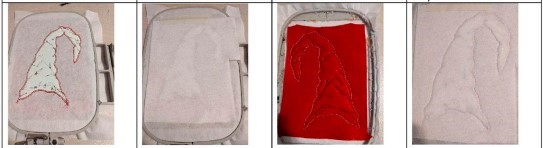
• Take your frame out of your machine, turn on fisieek of our frame.
• On the back of your frame (project) put your piece of feltwhite and hold well in place.
• Make the last seam that will sew your pieces of fabric on the place and on the back of your frame together.
• You should have this on the other side Remove from your frame, cut off excess fabric, taking care not to cut the fabric.
• For fur fabrics, put on the back to cut so that it is easier to see where the seam to cut well.
(Click Image to Enlarge)
Step 4:
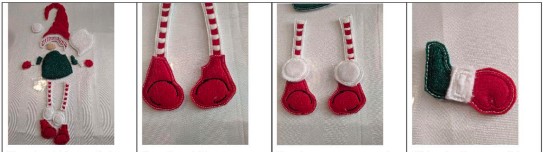
• You should have all these parts before youstart, your assembly. The assembly is done
with hot glue
• Start by sticking your legs under your shoes.
• Put the pompoms on the shoes and on the le the pompom will be a little more on the
shoe than on the legs.
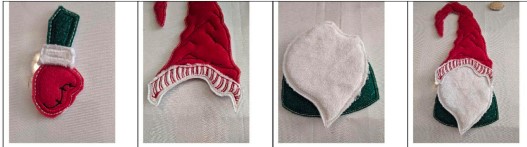
• Make the 2 arms, stick ‘the mitten on the beginning ofthe lapel (fur) then
take the coat sleeve and stick it aso on the lapel, you will have ‘the mitten
and the sleeve half half on the reverse.
(Click Image to Enlarge)
Step 5:
• Put the back of the hat on the hat.
• Stick the bard on the coat following the curve.
• stick your hat on the beard, always stick ust to the brim ofthe piece, do not encroach too much on the other piece.
(Click Image to Enlarge)
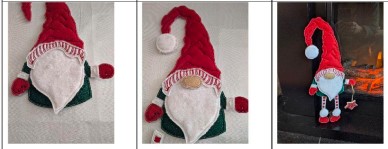
Step 6:
(Click Image to Enlarge)
• Sticking your arms under the coat.
• Stick your nose on the beard and legs under your coat.
Step 7:
• If you want it to stand Upright, stick 2 sticks on the back atthe level of the legs
and put small plastic pots stick on the 2 beats to keep It upright.