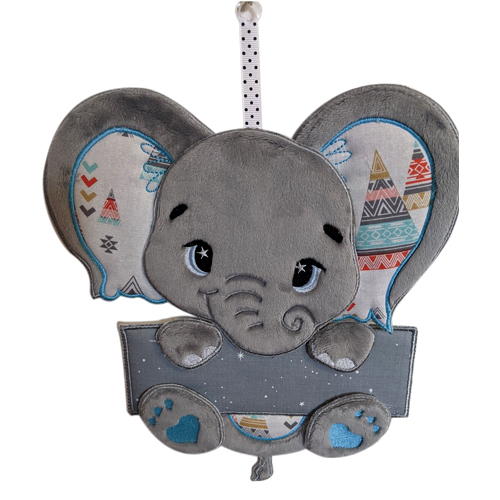
ITH Elephant Wall Hanging
Zoom Watch Video View Larger
View Project Instructions
ITH Elephant Wall Hanging Embroidery Project
Description
Create a charming ITH Elephant Wall Hanging that adds a playful touch to any room. This adorable design features a cute elephant with decorative ears, perfect for enhancing your home decor. Step-by-step instructions are included.
Jump to
ITH Elephant Wall Hanging
By Sew Chic
Materials
Print Materials
Preface: © Broderie Dzhiboux. All rights reserved.
Materials .
Designs used in this project
Final Product: What You Will Create
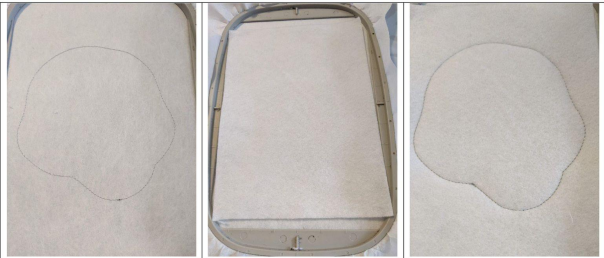
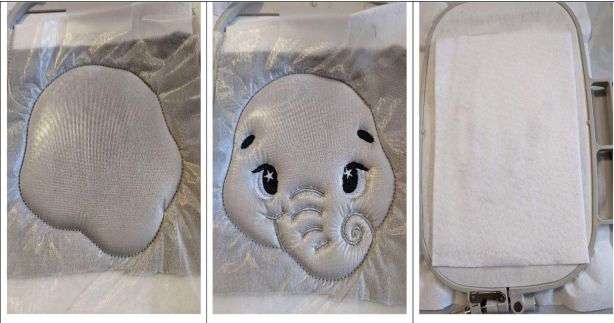
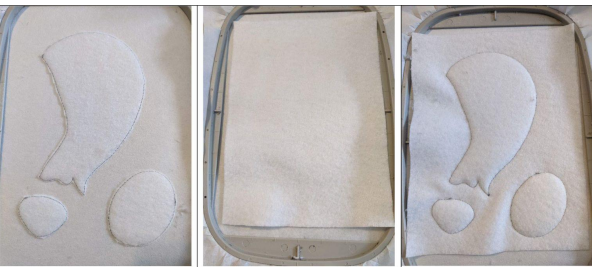
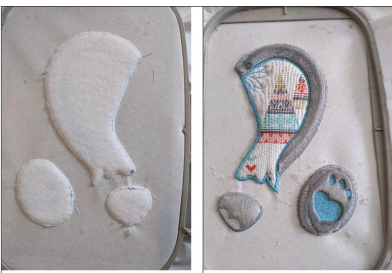
Step 1: Seam 1: The first seam is done on your stabilizer to tell you the location of your fleeca Put your fleeca to cover the entire seam Seam 2: This seam will hold your fleeca in place (Click Image to Enlarge)
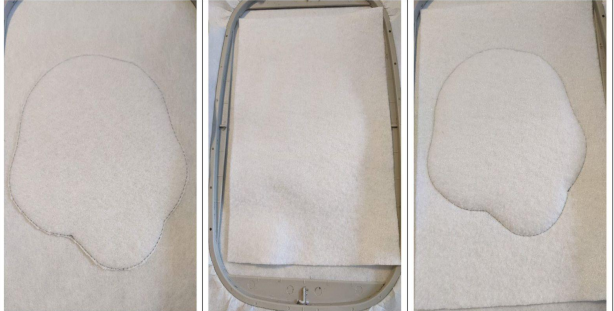
Step 2: Cut excess fleeca all the way around Put your piece of acrylic felt. You can skip this step (optional) Seamn 3: This seam will hold your felt in place If your dont put on felt skip that seam (Click Image to Enlarge)
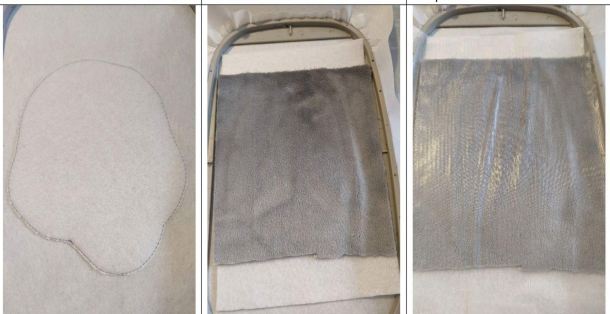
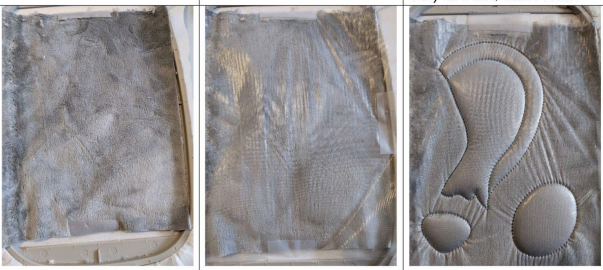
Step 3: Cut excess fleeca all the way around Put your minky on the seam so as to hide the whole seam Put your water-soluble stabilizer on your minky (Click Image to Enlarge)
Step 4: Seam 4: This seam will hold your minkhy and water-soluble stabilizer in place Sewing 5-6-7-8-9: embroidery stitches Put your 2nd piece of acrylice felt on the back of your frame sa as to cover all the seam (Click Image to Enlarge)
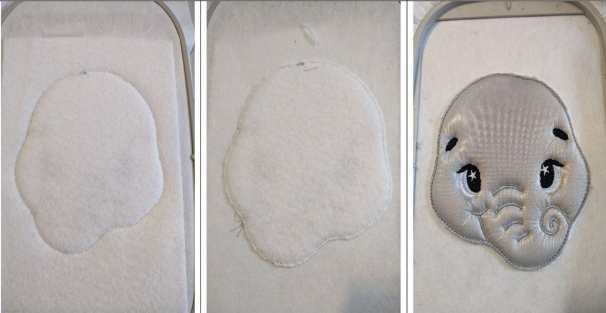
Step 5: Seam 10: This seam will hold your back felt in place Cut excess felt on the back of your project Turn off the minky and water-soluble stabillizer all around (Click Image to Enlarge)
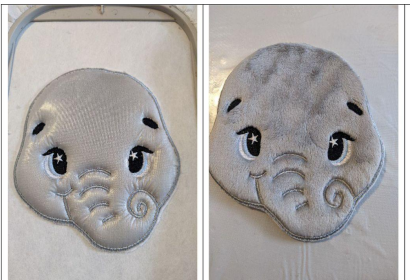
Step 6: Sewing 11: Embroidery stitches Get out of your frame and remove your tear nonwoman stabilizer and water-soluble stabilizer
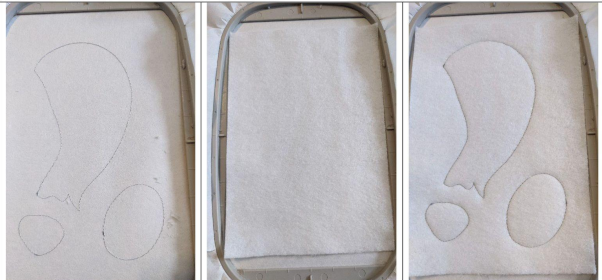
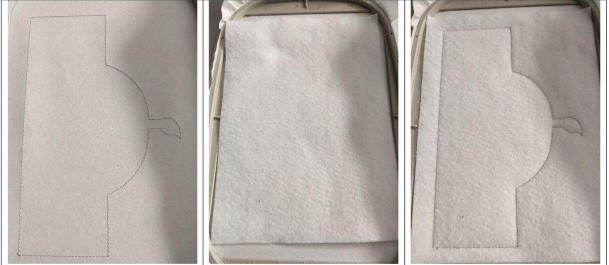
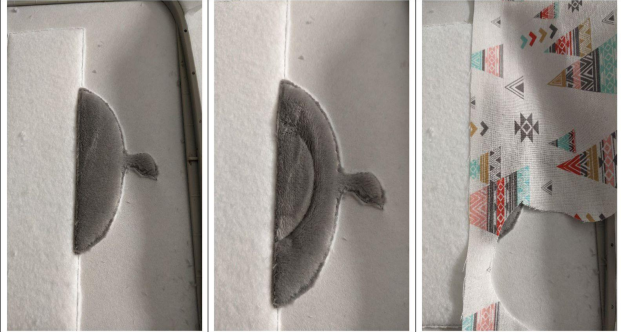
Step 7: Seam 1: The first seam is done on your stabilizer to tell you the location of your fleeca Put your fleeca to cover the entire seam Seam 2: This seam will hold your fleeca in place (Click Image to Enlarge)
Step 8: Cut excess fleeca all the way around Put your piece of acrylic felt. you can skip this step ( Optional) Seam 3: This seam will hold your felt in place If dont put on the felt skip this seam (Click Image to Enlarge)
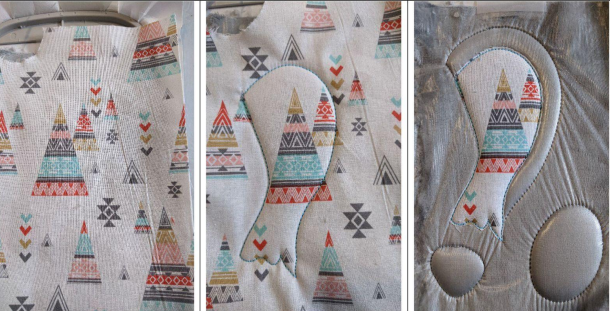
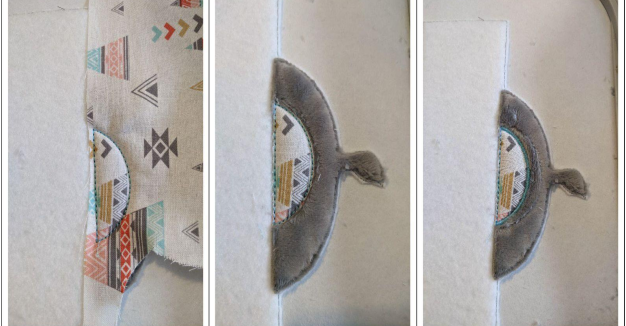
Step 9: Put your minky so as to cover all the seams Put your wather-soluble support Seam 4: This seam will hold your minky and stabilizer in place seam 5: This seam tells you the location of your cotton piece for the ears (Click Image to Enlarge)
Step 10: Put your cotton piece on the seam Seam 6: This seam will hold your fabric on the minky Cut excess fabric all around (Click Image to Enlarge)
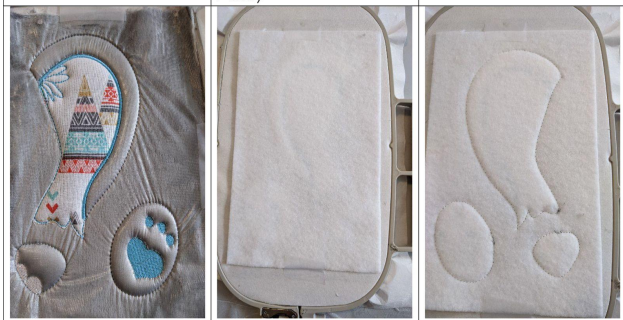
Step 11: Sewing 7 and 8: Ebroidery stitches Put your piece of acrylic flet on the back of your frame, taking care to hide all the seams Seam 9: This seam will hold your felt in place (Click Image to Enlarge)
Step 12: (Click Image to Enlarge)
Cut excess felt all around the elements Sewing 10-11: Embroidery stitches
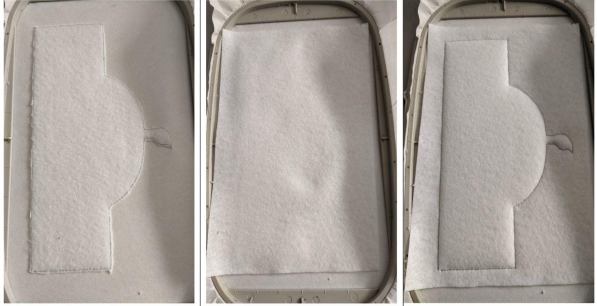
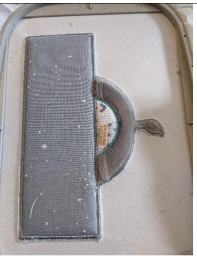
Step 13: Seam 1: The first seam is done on your stabilizer to tell you the location of your fleeca Put put your fleeca to cover the entire seam Seam 2: Thsi seam will hold your fleeca in place (Click Image to Enlarge)
Step 14: Cut excess fleeca all the way around Put your piece of acrylic felt. You can skip this step (Optional) Seam 3: This seam will hold your felt in place If you don't put on the felt skip this seam (Click Image to Enlarge)
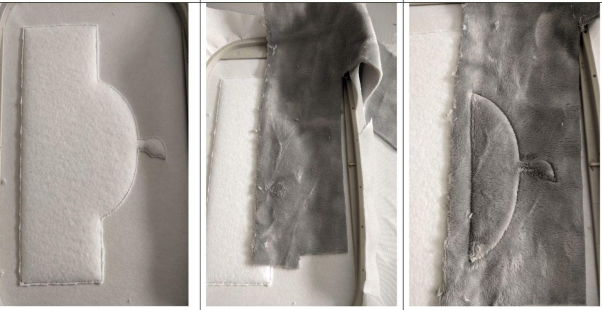
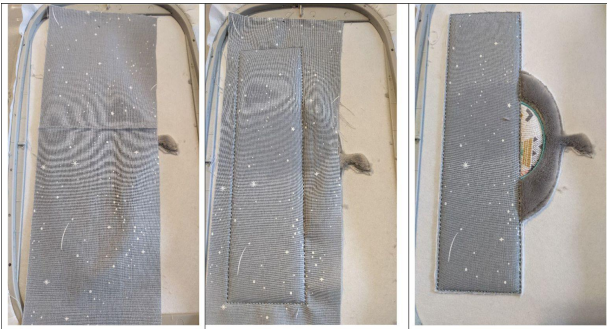
Step 15: Cut excess felt all the way around Put your minky on the bottom part of the elephant Seam 4: This seam will hold your minky in place (Click Image to Enlarge)
Step 16: Cut off excess minky all around Seam 5: This seam tells you the location of your cotton piece Put your cotton on the seam (Click Image to Enlarge)
Step 17: Seam 6: This seam will hold your cotton in place Cut off excess all around Sewing 7: Embroidery stitches (Click Image to Enlarge)
Step 18: Put your piece of cotton for the sign on the location of the sign Seam 6: This seam will hold your cotton in place Cut off excess all around (Click Image to Enlarge)
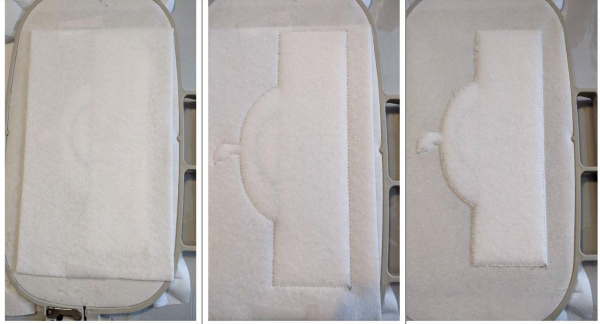
Step 19: Put your felt on the back of your frame,hold in place Seam 9: This seam will hold your felt in place on the back of your project Cut excess felt all the way around (Click Image to Enlarge)
Step 20: (Click Image to Enlarge)
Sewing 10 and 11: Embroidery stitches Thinking outside the box remove your non-wovan stabilizer to tear
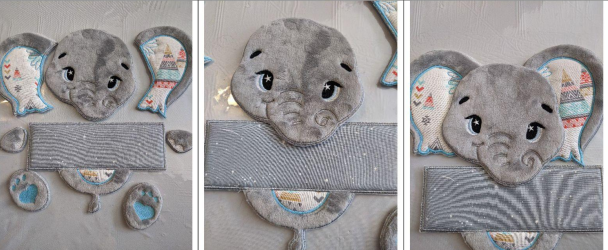
Step 21: You must have the items here on it With your hot glue gun,stick he head centered with the lower body Stick the ears on the back of the head (Click Image to Enlarge)
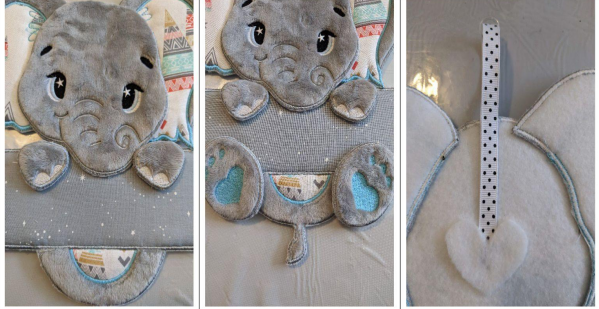
Step 22: Stick the top little paws on the sign be carefull if you have put a name not to hide the name Stick the paws on the bottom, stick on the sing and the lower body, putting them so as not to hide the name if you have put the name Take a small ring with a ribbon,stick on the back of your project, here i putt a small felt heart so that it is more aesthetic (Click Image to Enlarge)
Feedback
Please Login to Submit a Feedback
Invalid Characters, Please enter a valid Comment
Please enter a valid Comment
LOG IN
Submit
Link is Broken, Please check the URL