Border OptionsHugging border, circle, square, or rectangle — with a 3mm satin stitch.
Backing OptionsAvailable with iron-on, sew-on, or velcro backing.
Fast ShippingShipped quickly from the USA.
Free Online Tools
Powerful embroidery utilities that save time and prevent costly mistakes.
Stitch AssistantRECOMMENDED
Get the exact stabilizer, machine settings, needle, and thread color sequence for every embroidery design you purchase — based on that design's stitch density, dimensions, and color count.
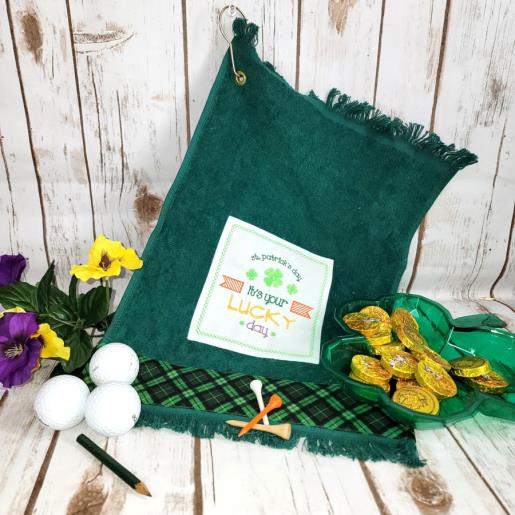
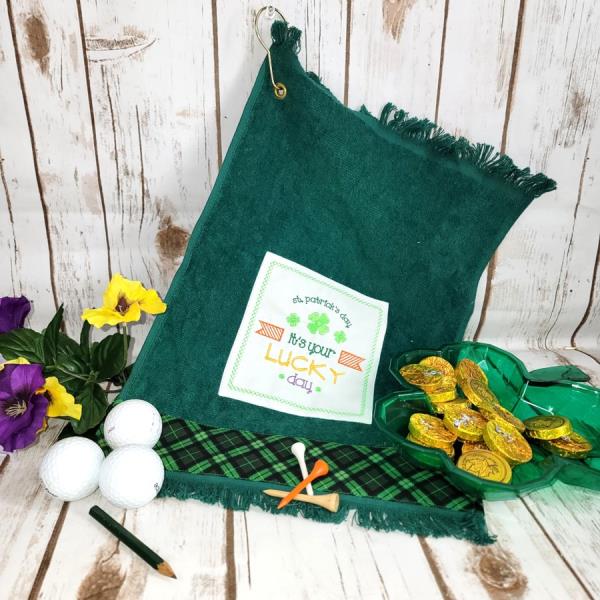
Celebrate St. Patrick's Day on the golf course with this themed towel. Featuring a festive design, it’s perfect for wishing your golfer good luck. Step-by-step instructions are included.
This is a perfect project to learn some of the tools in your embroidery editing software.
Colors are changed and words omitted before the design is ready to be stitched. Note: your software tools may differ than what is shown in this tutorial. Consult the software manual for the tools to use in your software.
Step 1:
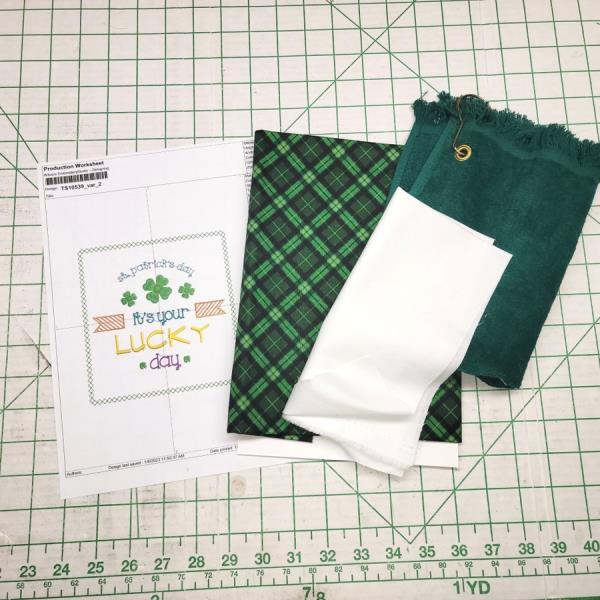
Read through the instructions thoroughly before beginning and assemble all the materials needed to complete the project. Coordinate the embroidery threads for the design with the towel and fabric chosen.
(Click Image to Enlarge)
Step 2:
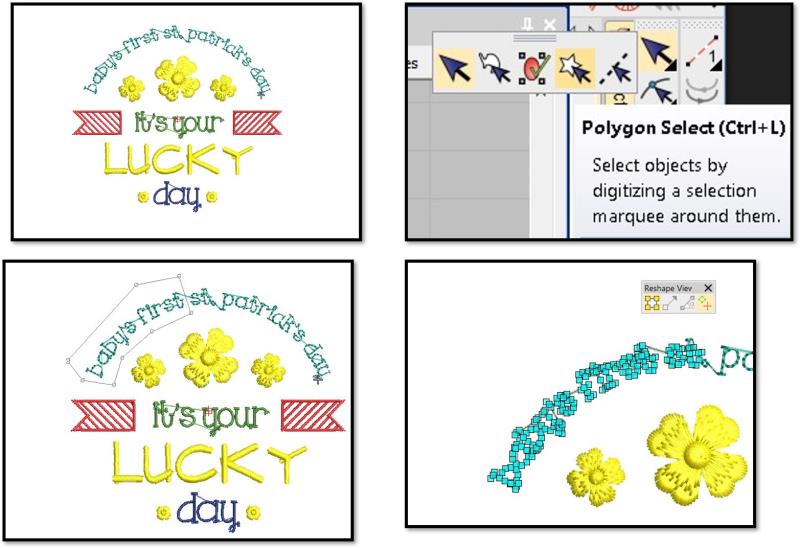
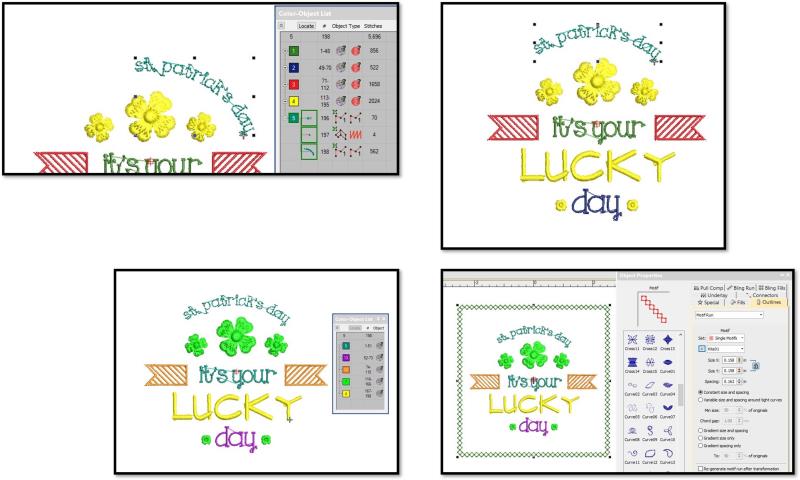
The first step is to prepare the design for stitching by omitting some words and changing the colors. Do a “Save As” to save the file with a different name, preserving the original design. The design has the words “baby’s first”, which need to be omitted. Choose the polygon select tool. Left click around the words and press enter. Because the design is not “native” to the software used, there will be several notes instead of digitizing nodes.
(Click Image to Enlarge)
Step 3:
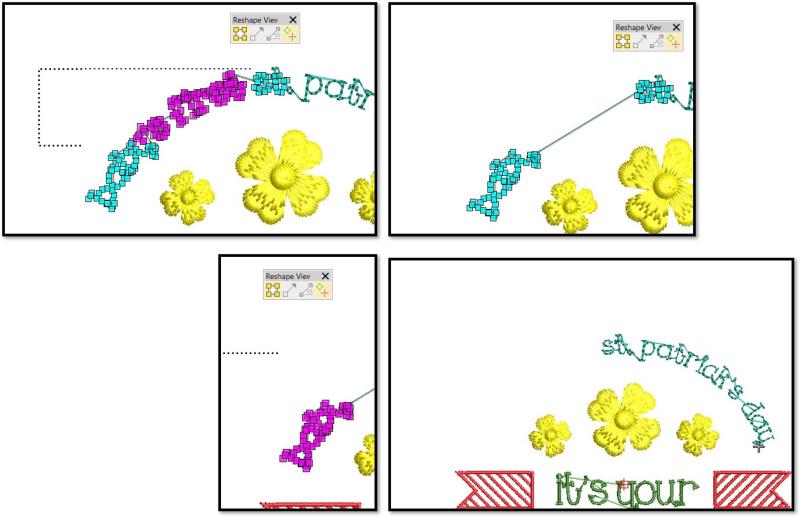
Chose the reshape tool, then select the nodes, press enter, and they’ll change color. Hit Delete on the keyboard to discard the nodes. Select the remaining nodes to be discarded and delete them. Now all that should remain is “st. patrick’s day”.
(Click Image to Enlarge)
Step 4:
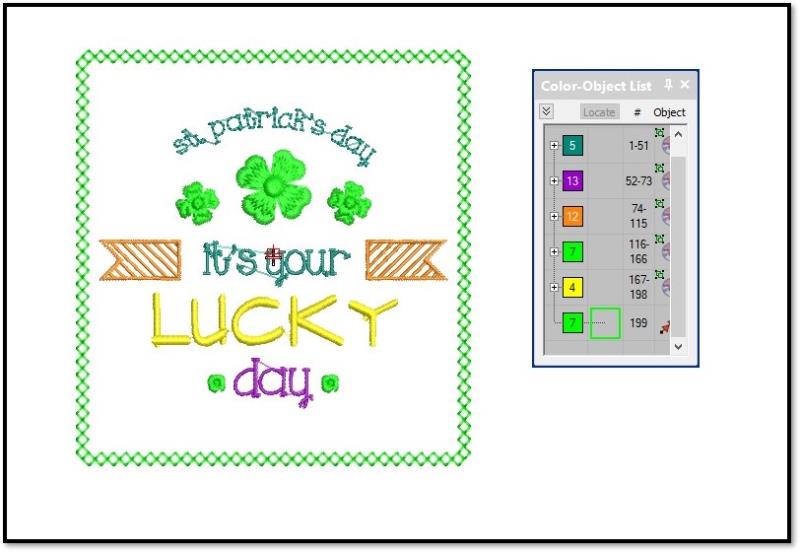
Select all the letters. Sometimes it is easiest to do this in the color list to be sure all the pieces are selected. Group them and then rotate and move them into position, centering them over the top center flower. Because, again this is not a native file, the colors may be different. In the color list, choose the colors you’d like for your design. The last step is to use the run tool to create a motif run around the outside of the design. Choose a color for the motif run and make sure it is centered around the design.
(Click Image to Enlarge)
Step 5:
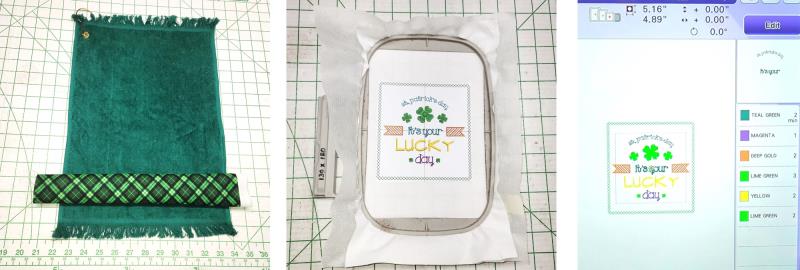
Double check everything to be sure it is as you’d like it, color sorting if applicable. Save the design and then export it in the needed file format for stitching.
(Click Image to Enlarge)
Step 6:
Prepare the towel by steaming it and then choose the fabric for the bottom border; it needs to be wider than the towel to allow the ends to be turned under and stitched to the back of the towel. Hoop the white Kona cotton fabric with poly mesh stabilizer. Load the design on the machine, and select the thread colors.
(Click Image to Enlarge)
Step 7:
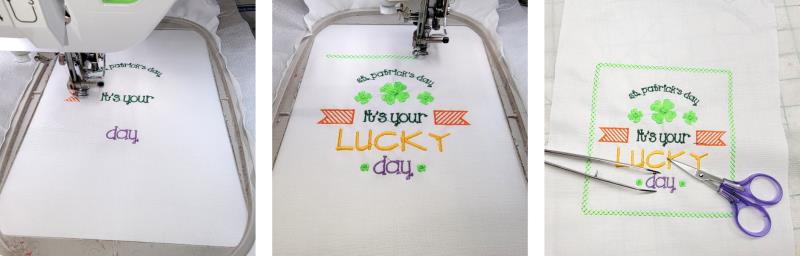
Stitch the design. Remove the design from the hoop and clip any jump threads.
(Click Image to Enlarge)
Step 8:
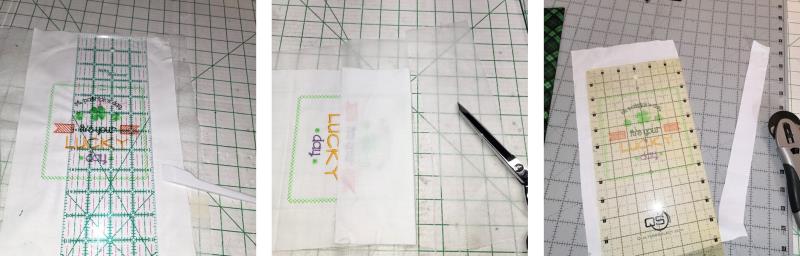
Using a ruler, mark outside the outer most stitching line about ¼”; a herra marker is used in the tutorial. It basically creases the fabric making the fabric easy to turn along that edge. Do this on all four sides. Turn back the fabric along the mark and trim away the excess stabilizer along all edges. Now cut away the excess fabric about ½” away from the marked line to create a seam allowance.
(Click Image to Enlarge)
Step 9:
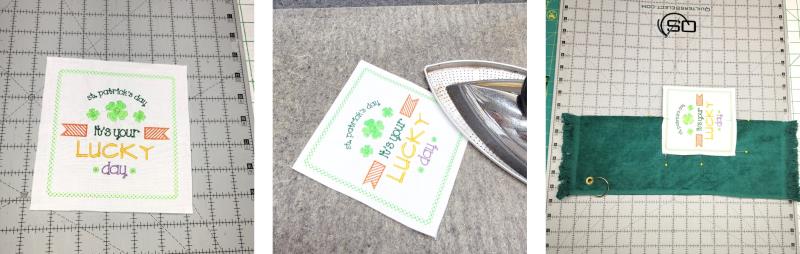
Turn the seam allowance back along all edges and press. Fold the towel in half lengthwise. Fold the white fabric in half and place pins at the top and bottom fold. Place the pins of the design fabric along the fold of the towel.
(Click Image to Enlarge)
Step 10:
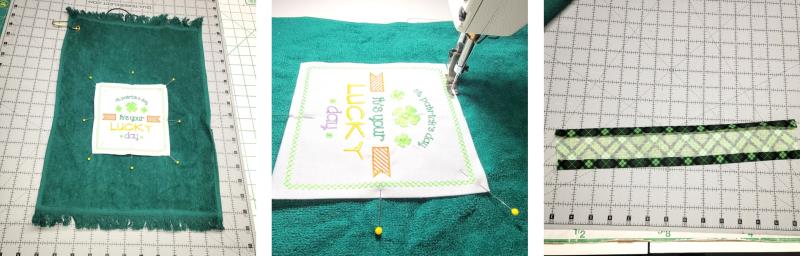
Open up the towel and pin the design in place around all the edges. Place the white thread on the machine and edge stitch the embroidered fabric in place. Cut the border fabric the width desired, plus seam allowances. Turn back the seam allowances and press.
(Click Image to Enlarge)
Step 11:
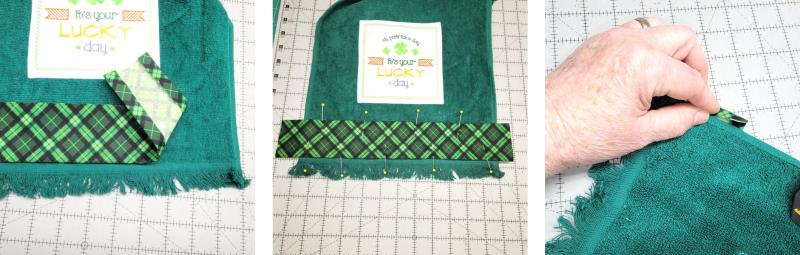
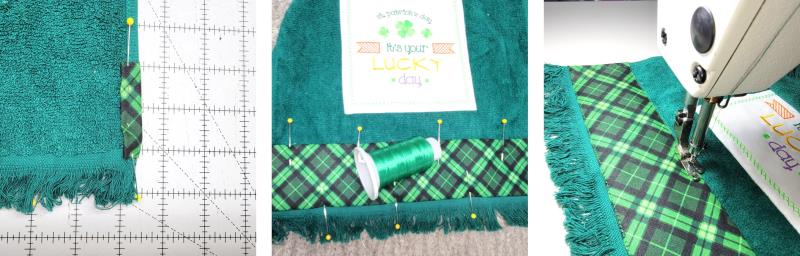
On this towel, the lower edge of the border was placed at the top of the towel band and the border fabric was pinned in place. The ends were cut about ¾” past the end of the towel and turned under twice.
(Click Image to Enlarge)
Step 12:
Pin the edges in place. Choose a thread color to coordinate with the fabric color. Stitch the band on the towel.
(Click Image to Enlarge)
Step 13:
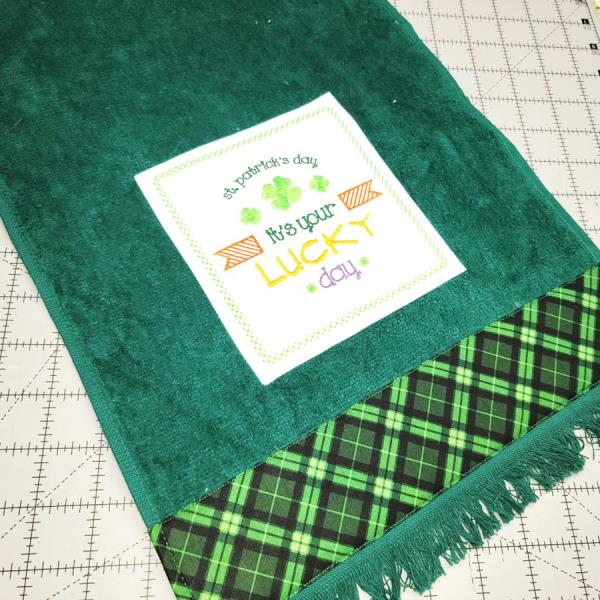
Congratulations! The towel is finished. Thank you for purchasing the embroidery design.
(Click Image to Enlarge)
Step 14:
Gift the towel to your favorite golfer and hopefully it will bring them luck on the course—of course a few lucky coins might not hurt, either.
Ramona Baird has been in the embroidery industry for over 23 years. She and her husband owned a commercial and retail embroidery store in Arizona for many years. She is an experienced digitizer having been mentored by award-winners Pat Williams and Lindee Goodall. Ramona is a contributor to “Creative Machine Embroidery” magazine having 5 covers to her credit. Ramona has worked for Wilcom America and served many years as Education Director for the American Sewing Guild. With a degree in fashion design, she is able to design and execute patterns which Pat Williams says are “out of the box” in creativity and application. Ramona likes to challenge the boundaries of embroidery and bring new and exciting designs, ideas, and projects to EmbroideryDesigns.com. She wants embroiderers of all levels to increase their skills and enjoyment in using their embroidery machine for gift-making and personal pleasure.