Border OptionsHugging border, circle, square, or rectangle — with a 3mm satin stitch.
Backing OptionsAvailable with iron-on, sew-on, or velcro backing.
Fast ShippingShipped quickly from the USA.
Free Online Tools
Powerful embroidery utilities that save time and prevent costly mistakes.
Stitch AssistantRECOMMENDED
Get the exact stabilizer, machine settings, needle, and thread color sequence for every embroidery design you purchase — based on that design's stitch density, dimensions, and color count.
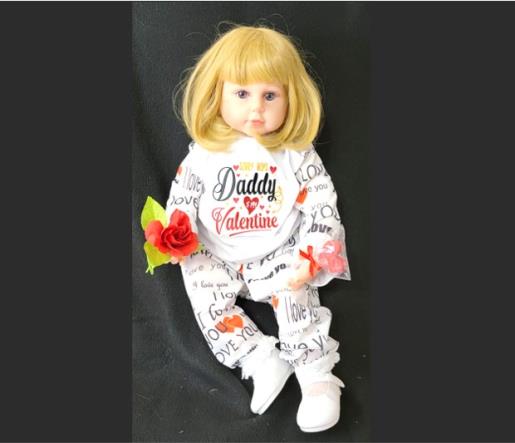
Create an adorable Valentine's Day-themed outfit for children with the 'Daddy Is My Valentine' design. This set includes a sweatshirt and jogger pants, perfect for a festive and charming look. Step-by-step instructions are included.
Step
of
Daddy Is My Valentine Outfit for Kids
By Ramona Baird
The best thing about using downloadable PDF sewing patterns is there are several sizes in one pattern, the patterns can be used over and over, the patterns are easy to sew, and adding an embroidery design can be done before or after the garment is sewn together.
Step 1:
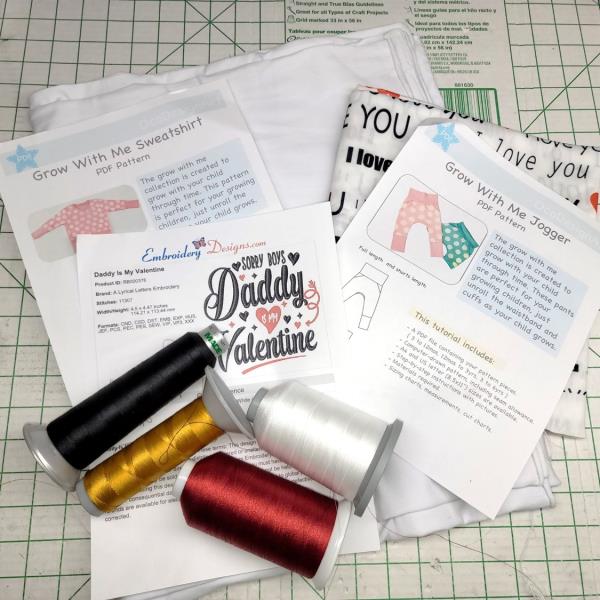
Read through the instructions thoroughly before beginning and assemble all the materials needed to complete the project. The instructions for the patterns are well written. This tutorial will show you how to add the embroidery and a few tips for sewing four-way knit fabrics. Once you know some tips, stitching goes smoothly and you’ll want to use the patterns over and over to create several outfits as your child grows, while using EmbroideryDesigns.com designs to add an embellishment appropriate for the occasion.
(Click Image to Enlarge)
Step 2:
The sweatshirt pattern states to use a four-way stretch knit. This means that it should stretch across the grain selvage to selvage and also the lengthwise grain of the fabric. For this project, a printed knit was chosen for the pants and sleeves of the shirt. It stated when ordered that it was a four-way stretch, but when it arrived it had minimal stretch. For that reason, I had to cut the fabric pieces a bit larger to accommodate the lack of stretch.
(Click Image to Enlarge)
Step 3:
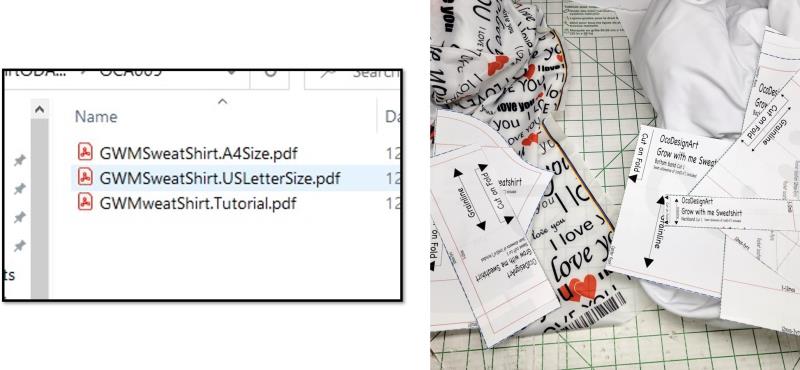
When printing the fabric, be sure to choose the appropriate paper size, print at actual size, and the tutorial can be printed or you can pull it up on your computer and follow along as you stitch to save on some paper and ink. Tape all the pieces as instructed. If using two different fabrics, sort the pattern pieces for each fabric.
(Click Image to Enlarge)
Step 4:
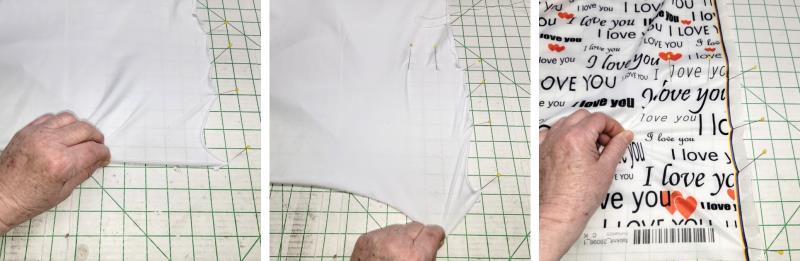
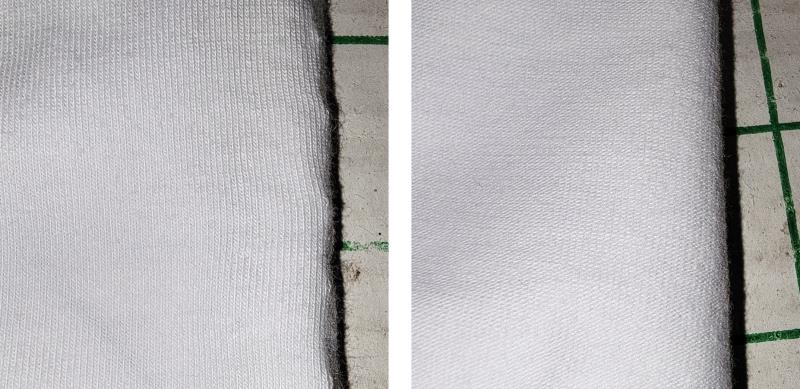
When cutting and stitching, be sure to keep the “right side” of the fabric in mind. This knit is pretty easily identified as to which was the right side (left photo showing ribs) and “wrong” side (right photo showing pearl stitching).
(Click Image to Enlarge)
Step 5:
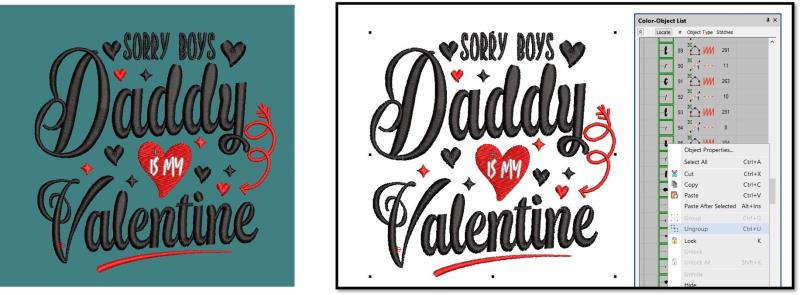
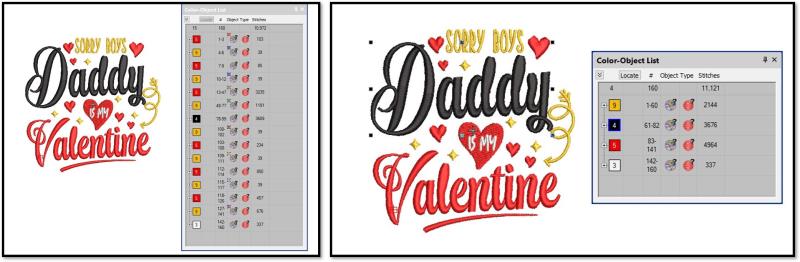
If you want to change colors, open the embroidery editing software if you have it. First do “Save As” and rename the file; this will keep the original file as is. Now you’ll be working with the new file. This design was “grouped”, so the first step was to “ungroup” it. This will separate all the objects in the design.
(Click Image to Enlarge)
Step 6:
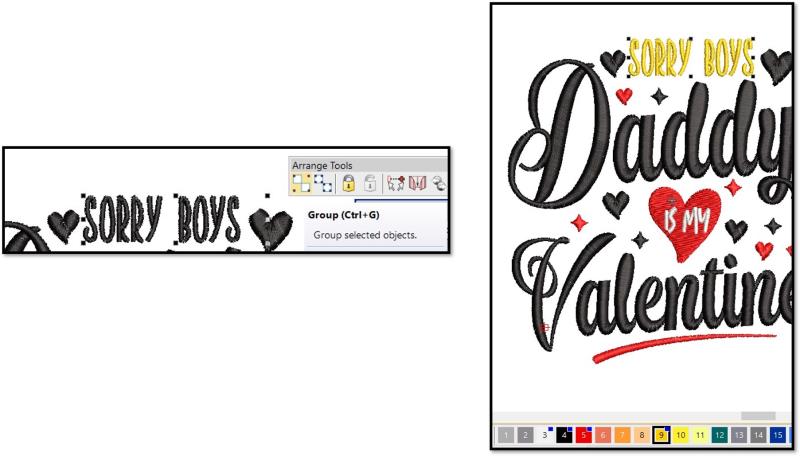
Now decide what colors each object should be. I decided to select “SORRY BOYS” and choose the Gold color chip.
(Click Image to Enlarge)
Step 7:
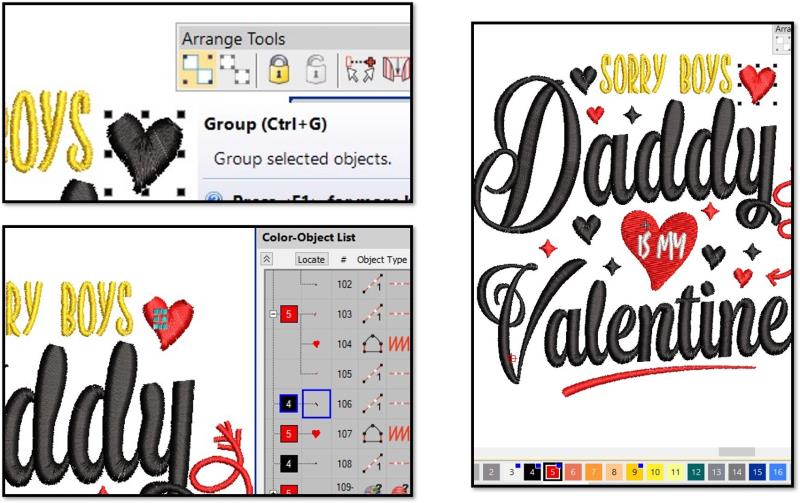
When selecting objects, look at the Color-Object List in the docker panel to be sure all the parts of each object are selected, then change the color.
(Click Image to Enlarge)
Step 8:
After all the object colors are selected as you’d like them, you’ll notice there are many more color changes. Sort the colors in the order needed for stitching. Be sure the “IS MY” text stitches last so that the heart behind it is stitched first.
(Click Image to Enlarge)
Step 9:
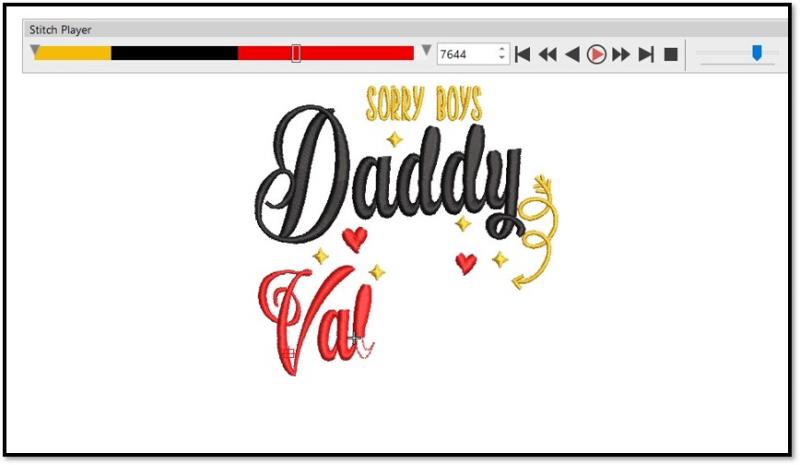
Use the stitch player to watch the design stitch out on the computer screen to make sure everything will stitch at the machine as it should. Save the file and then export it for stitching in the needed file format for the machine. Print a template of the design at actual size.
(Click Image to Enlarge)
Step 10:
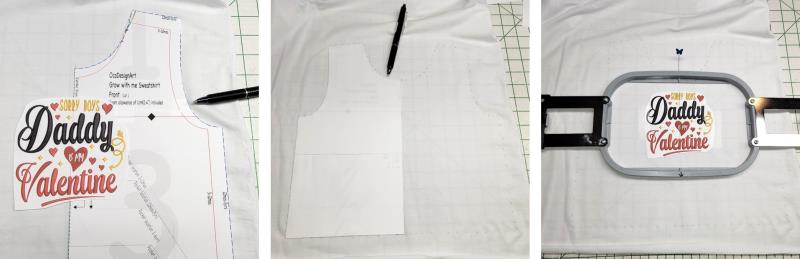
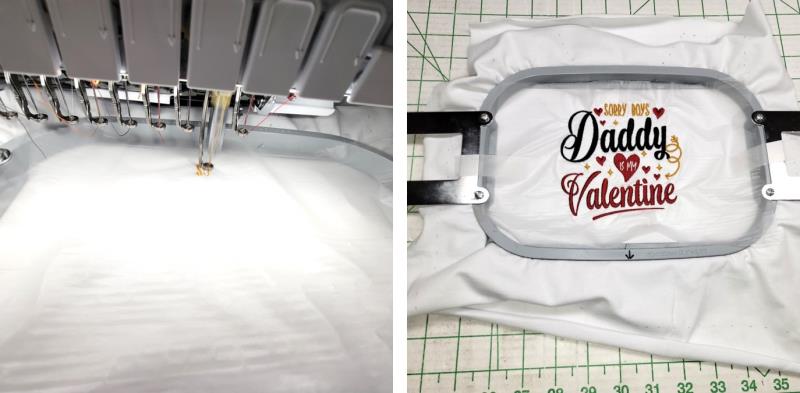
Cut around the design paper template. Decide on the placement for the top front. I decided to stitch on the fabric first and then construct the garment. To do this, I cut out the size needed for the top front. I placed a single layer of fabric on the cutting board and aligned the fold to the grainline of the fabric. With a marking pen, I marked around the outside of the fabric from the center front, all around, to the bottom center front. Then I flipped the pattern over, aligned it to the top and bottom marks at the center front, and traced around it. I placed the design template in place, and hooped the fabric with the stabilizer, centering it in the hoop.
(Click Image to Enlarge)
Step 11:
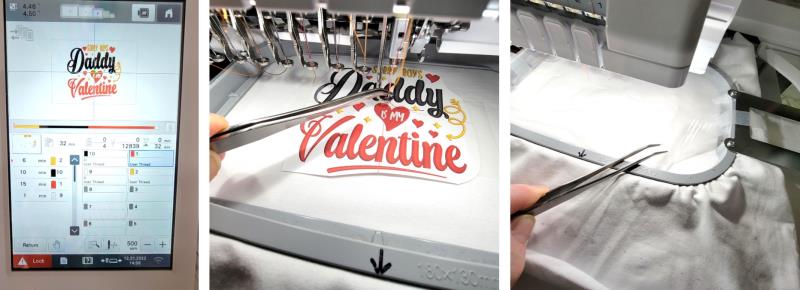
The design was loaded on the machine and threads chosen. The hoop was placed on the machine and the needle aligned to the center mark on the paper template. The template was removed and a piece of water-soluble topper placed down.
(Click Image to Enlarge)
Step 12:
The machine was started and the design stitched, and the excess water soluble topper removed.
(Click Image to Enlarge)
Step 13:
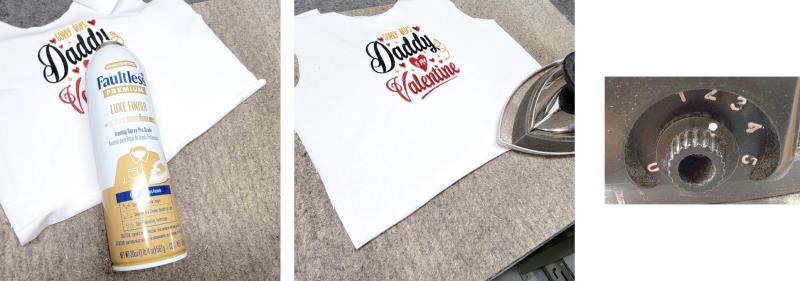
Here is where the tips start. You’ll find these tips usable not only for this project, but any time you work with knit fabrics. Knit fabrics curl at the cut edges. Lightly spray with spray sizing or spray starch, let it set a bit on the fabric, and then press with a warm iron. A lot of four-way stretch knits have 3-5% lycra. If the iron is too hot, the knit will melt, so start with a warm iron and you can always increase the heat if needed. Lift the iron from section to section, pressing the fabric—don’t iron a knit with a back-and-forth motion.
(Click Image to Enlarge)
Step 14:
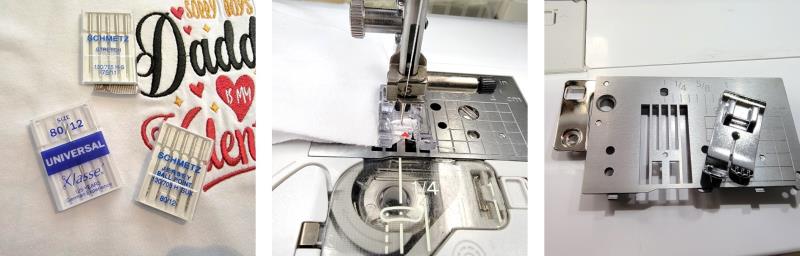
Tips on Needles and Stitching. Test your stitch on scraps of the fabric used for the project. You may find a Universal needle will do the job. A knit fabric needs a ball point needle so the needle penetrates between the fibers of the fabric. If you find you get skipped stitches, then stitch to a Jersey or Stretch needle. You may have to test both—sometimes one works better than the other. Don’t’ use a sharp needle on knit fabric because it breaks the fibers, leaving holes. While stitching with a slotted throat plate and foot you may notice the knit fabric slips down into the larger hole and bunches up at the beginning and end of the seam. To prevent this, switch to a single hole stitch plate and foot. You’ll be amazed at the difference!
(Click Image to Enlarge)
Step 15:
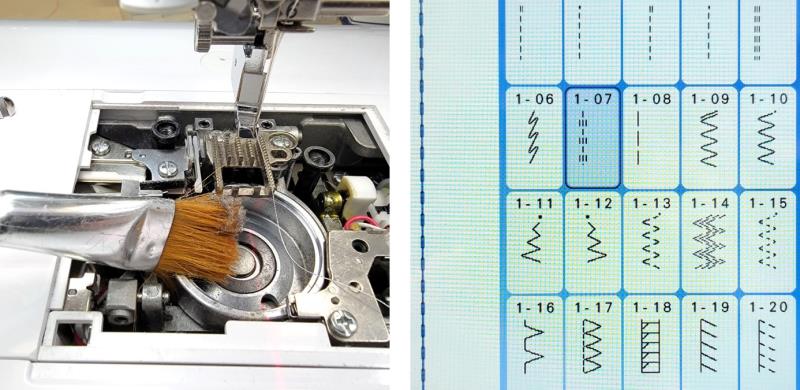
If you are changing out the plate, it’s a good time to clean out underneath the throat plate and bobbin area. Even a little bit of lint can cause problems in stitching. A stretch stitch is a good choice for stitching seams. If you have a serger, check the manual because most have four-thread seams perfect for seaming and clean finishing the edges all in one step.
(Click Image to Enlarge)
Step 16:
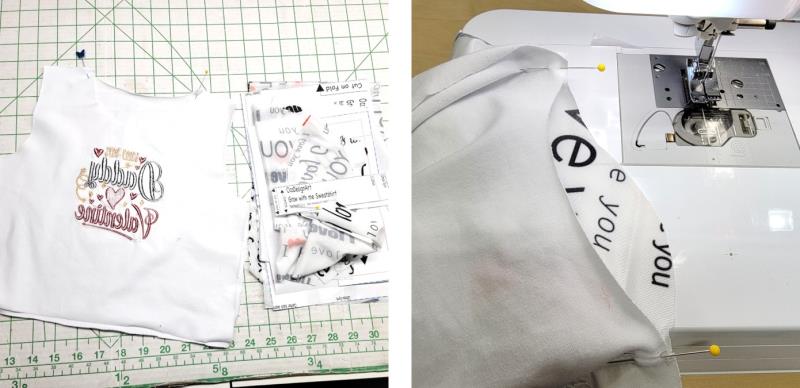
Follow the pattern instructions for putting together the top and pants. Here’s another tip: when one section like a sleeve needs to be eased into another section, place the longer (or section to be eased) toward the bed of the machine. The feed dogs help ease the fabric as it is being stitched virtually eliminating the need for pinning. Just be sure to keep the cut edges matched as you stitch.
(Click Image to Enlarge)
Step 17:
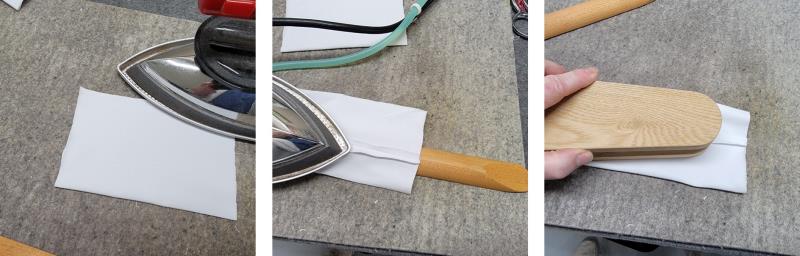
Treat knit fabric construction like woven fabric if it is called for in construction. For seams that will be open, press the stitching line flat to set the stitches and then use a pressing stick to press open the seam and a clapper to help further set the seam and keep it flat. These are useful sewing tools that add quality to the stitching you’ll do over the years. Purchase these as you can and you’ll have them for a lifetime of sewing.
(Click Image to Enlarge)
Step 18:
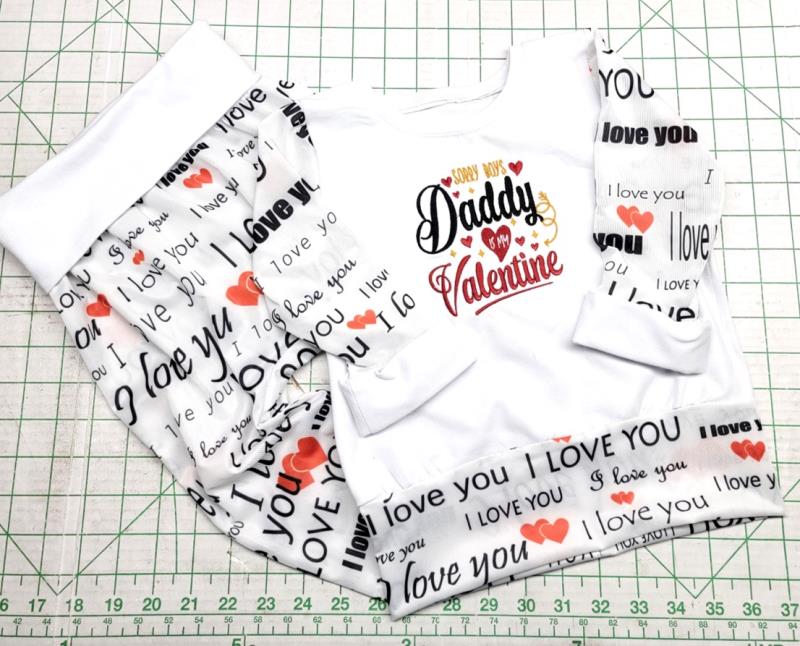
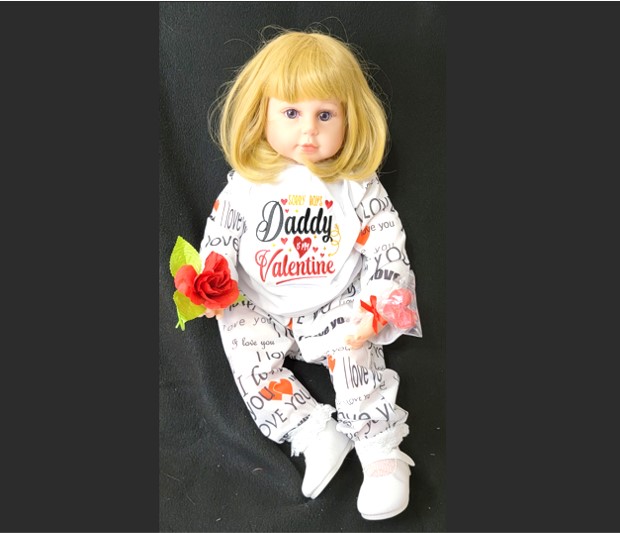
This outfit is so cute!!!! The colors of the embroidery were picked up from the printed fabric. The cuffs unfold so as the child grows the outfit still fits. Once you do one of these sets, you’ll want to do more and the sewing will go so much faster for each outfit you make.
(Click Image to Enlarge)
Step 19:
Thank you for purchasing the patterns and embroidery design. Your little toddler will love the new outfit!
Ramona Baird has been in the embroidery industry for over 23 years. She and her husband owned a commercial and retail embroidery store in Arizona for many years. She is an experienced digitizer having been mentored by award-winners Pat Williams and Lindee Goodall. Ramona is a contributor to “Creative Machine Embroidery” magazine having 5 covers to her credit. Ramona has worked for Wilcom America and served many years as Education Director for the American Sewing Guild. With a degree in fashion design, she is able to design and execute patterns which Pat Williams says are “out of the box” in creativity and application. Ramona likes to challenge the boundaries of embroidery and bring new and exciting designs, ideas, and projects to EmbroideryDesigns.com. She wants embroiderers of all levels to increase their skills and enjoyment in using their embroidery machine for gift-making and personal pleasure.