Border OptionsHugging border, circle, square, or rectangle — with a 3mm satin stitch.
Backing OptionsAvailable with iron-on, sew-on, or velcro backing.
Fast ShippingShipped quickly from the USA.
Free Online Tools
Powerful embroidery utilities that save time and prevent costly mistakes.
Stitch AssistantRECOMMENDED
Get the exact stabilizer, machine settings, needle, and thread color sequence for every embroidery design you purchase — based on that design's stitch density, dimensions, and color count.
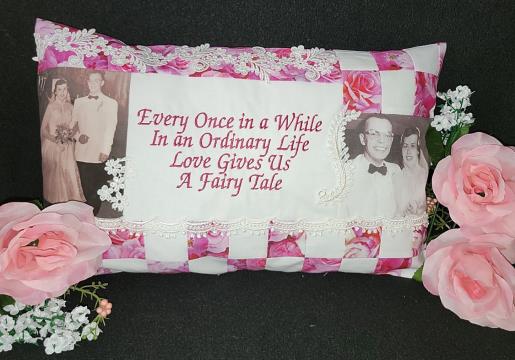
Craft a sentimental pillow using cherished photographs as a personal touch. Ideal for commemorating special moments, this pillow serves as a heartfelt addition to any room. Step-by-step instructions are included.
This project will use your imagination and skills. There is no set pattern. Creating a memory pillow will depend upon the size of your photos, the scraps of fabric, ribbon, lace and other items in your stash, and the finished size you wish to create your pillow. It’s all about using what you have and measuring, marking and cutting areas to fit to create the pillow front. Though there is a time stated, the time will vary because you will be designing and creating your own pillow.
Step 1:
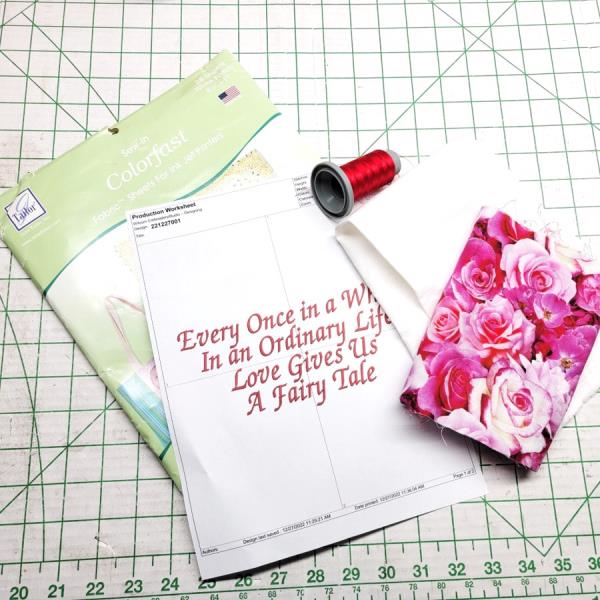
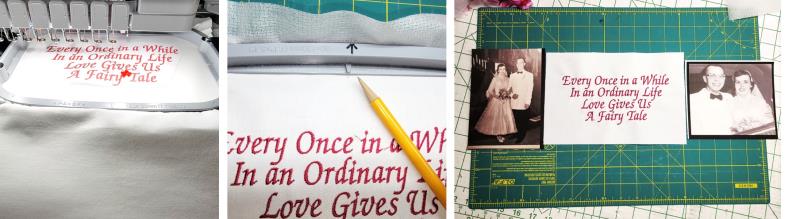
Read through the instructions thoroughly before beginning and assemble all the materials needed to complete the project. First decide on the photographs and then go into your stash and gather some fabrics, ribbons, charms, buttons, lace…whatever you’d like for your pillow front. Print out the embroidery design at actual size. It is very important while creating the pillow top and cutting the photos and fabrics, to add seam allowance to all measurements.
(Click Image to Enlarge)
Step 2:
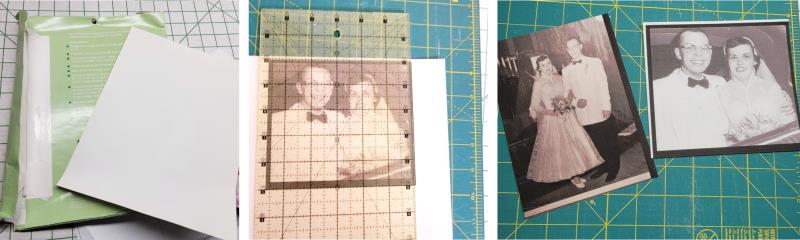
Begin with the photographs. Read the instructions on the product being used. Scan the photos, make any adjustments, and then print the photo on the fabric. Trim the photos leaving a seam allowance. Use as many photos as you’d like.
(Click Image to Enlarge)
Step 3:
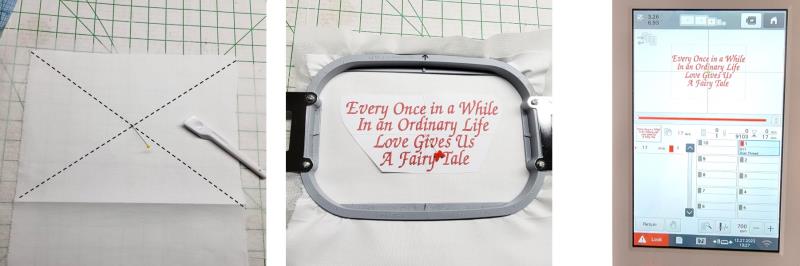
Prepare the fabric for embroidery. An easy way to find the center of a piece of fabric is to mark it from corner to corner. Where the lines intersect is the center. Cut around the printed embroidery design and align the center to the center pin. Hoop the fabric. Load the design on the machine. Load the chosen thread color.
(Click Image to Enlarge)
Step 4:
Align the needle to the center point of the paper embroidery design. Remove the paper and stitch the design. Before removing the embroidery from the hoop, lightly mark the hoop guides on the fabric; this will help to square up and cut the fabric to the desired size. No doubt, the photos and embroidered fabric will vary in size so here is where you get to design the pillow top by using what you have on hand.
(Click Image to Enlarge)
Step 5:
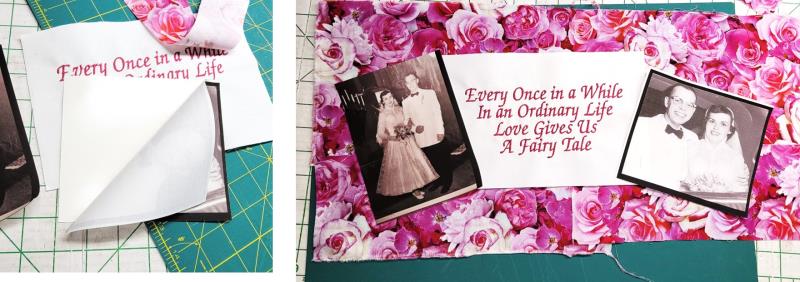
Peel the paper off the back of the photos. Measure the photos, measure the embroidered fabric, measure the fabric(s) you’ve chosen and let everything guide you in creating a pillow top. I found I just worked in small sections, measuring and marking, ripping a few stitches, recutting fabrics, and making everything work.
(Click Image to Enlarge)
Step 6:
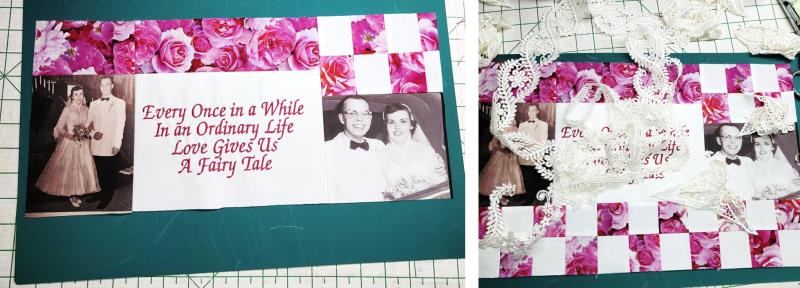
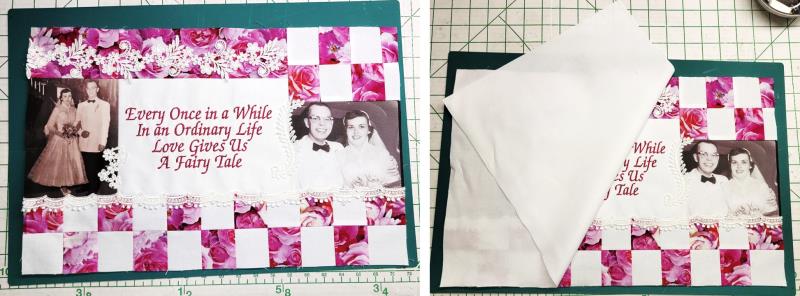
I found that trimming the photo on the left a bit more and sewing it to the left side of the embroidery was the start. Then I cut a strip of fabric 2.5” wide by the length of the piece just sewn, and sew it to the top. I cut off a little of the bottom of the photo on the right, made squares of alternating fabrics, sewed them into a checkerboard, sewed that to the top of the photo, and then sewed them to the right side of the embroidered section. To tie everything together, I created more checkerboards from the remaining fabric strips and attached to the bottom. I used to do custom wedding dresses so I have a lot of little lace scraps I could never bear to get rid of, so I pulled some out I thought would work with the fabrics and photos.
(Click Image to Enlarge)
Step 7:
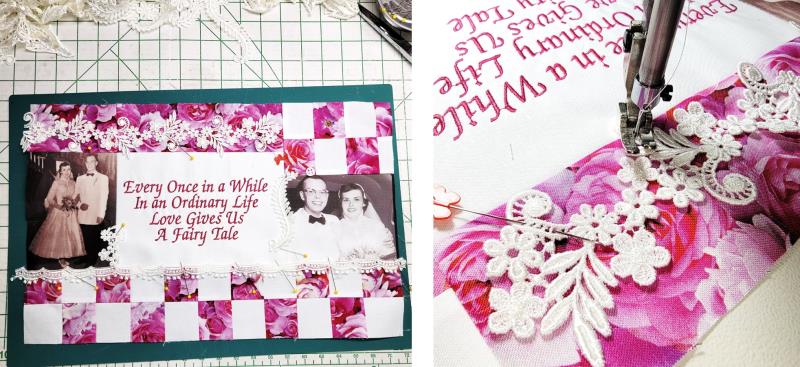
I just worked with the lace pieces measuring and trimming to fill in areas and frame the photos. I did use the machine to sew them on.
(Click Image to Enlarge)
Step 8:
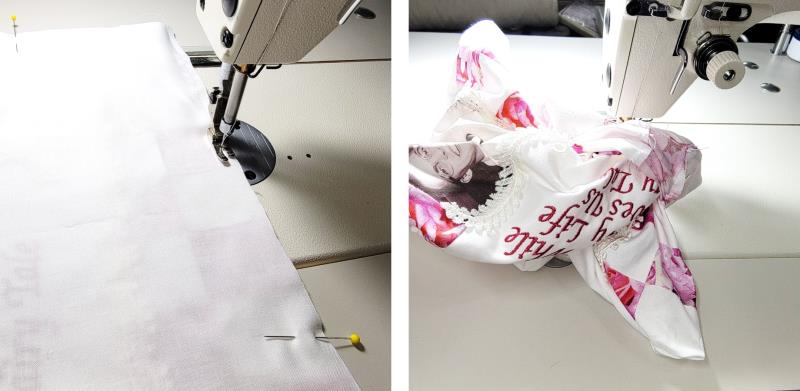
After I was pleased with the front, I cut a piece of fabric the same size as the pillow front, placing right sides together.
(Click Image to Enlarge)
Step 9:
All sides of the pillow were sewn, leaving an opening at the bottom. The pillow was turned right side out through the opening.
(Click Image to Enlarge)
Step 10:
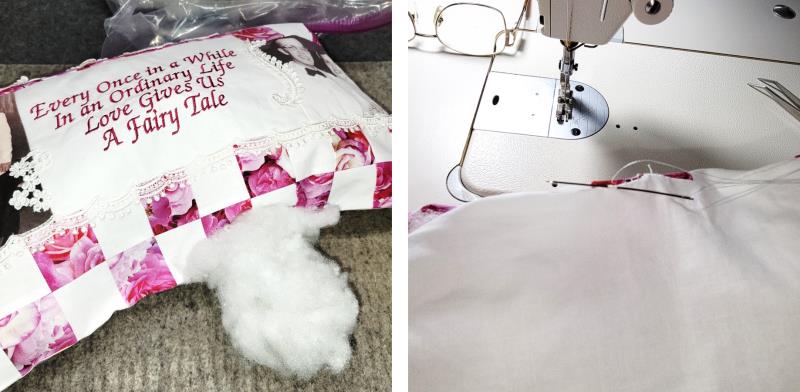
The pillow was moderately stuffed with fiber-fil, with the seam allowances at the bottom turned in and the opening hand sewn closed.
(Click Image to Enlarge)
Step 11:
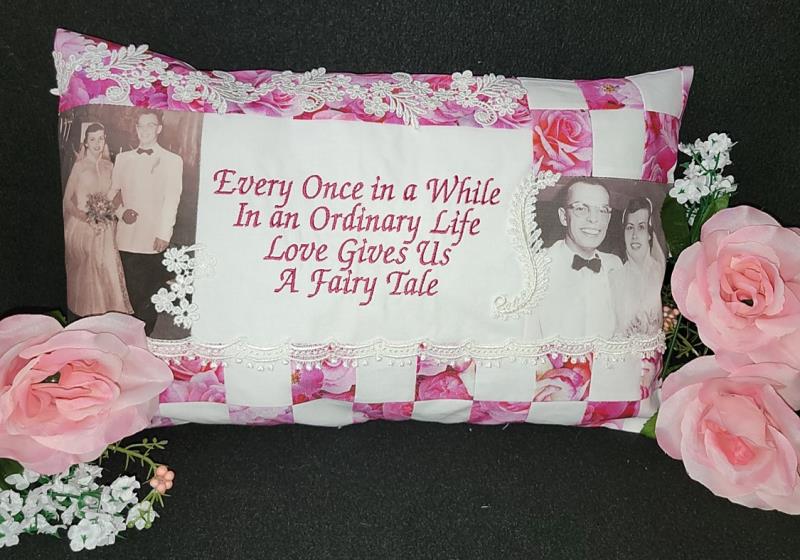
These are my husband’s parents who are no longer with us. They loved, were very blessed, and lived anything but an ordinary life. This pillow is a tribute to them. Please follow our EmbroideryDesigns Facebook page and post photos of the pillow you create. Thank you for purchasing this design.
Ramona Baird has been in the embroidery industry for over 23 years. She and her husband owned a commercial and retail embroidery store in Arizona for many years. She is an experienced digitizer having been mentored by award-winners Pat Williams and Lindee Goodall. Ramona is a contributor to “Creative Machine Embroidery” magazine having 5 covers to her credit. Ramona has worked for Wilcom America and served many years as Education Director for the American Sewing Guild. With a degree in fashion design, she is able to design and execute patterns which Pat Williams says are “out of the box” in creativity and application. Ramona likes to challenge the boundaries of embroidery and bring new and exciting designs, ideas, and projects to EmbroideryDesigns.com. She wants embroiderers of all levels to increase their skills and enjoyment in using their embroidery machine for gift-making and personal pleasure.