Border OptionsHugging border, circle, square, or rectangle — with a 3mm satin stitch.
Backing OptionsAvailable with iron-on, sew-on, or velcro backing.
Fast ShippingShipped quickly from the USA.
Free Online Tools
Powerful embroidery utilities that save time and prevent costly mistakes.
Stitch AssistantRECOMMENDED
Get the exact stabilizer, machine settings, needle, and thread color sequence for every embroidery design you purchase — based on that design's stitch density, dimensions, and color count.
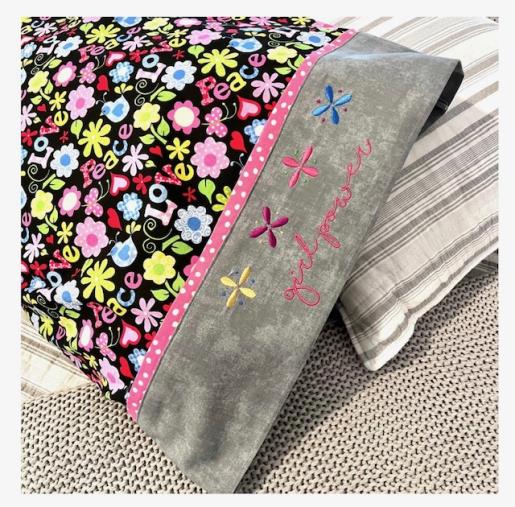
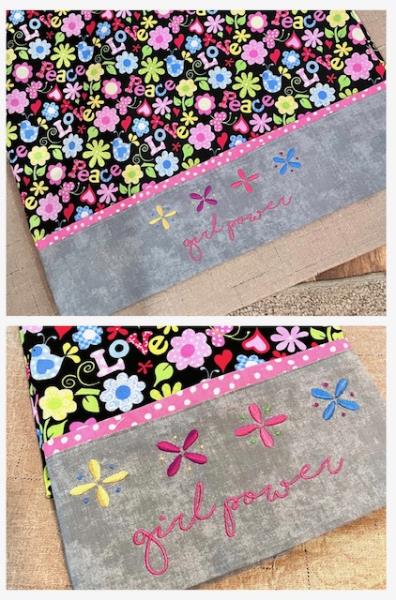
Brighten up any girl's room with this vibrant pillow case featuring colorful applique flowers and a bold 'girl power' message on the cuff. Perfect for adding a touch of empowerment and style to bedding decor. Step-by-step instructions are included.
A retro flower power fabric would go great for this project as it goes hand in hand with the embroidery design “ Girl Power” to add that vintage twist. This tutorial is based on a standard size bed pillow which is approximately 20” x 29”. French seams are sewn so there are no exposed seams on the inside which gives it a clean and crisp look. Girl Power Flower border design is from the Concorn Collections and size used in this tutorial 6.02" x 2.83". Embroidered on the cuff of the pillowcase.
Step 1:
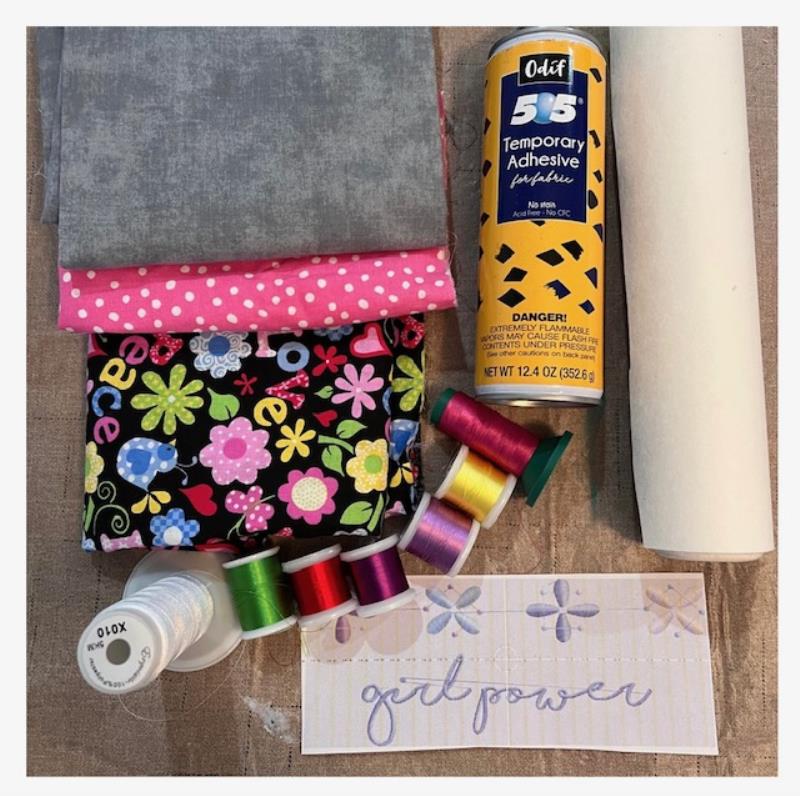
Gather all supplies and review instructions before beginning. Print out a paper template of the embroidery design file.
(Click Image to Enlarge)
Step 2:
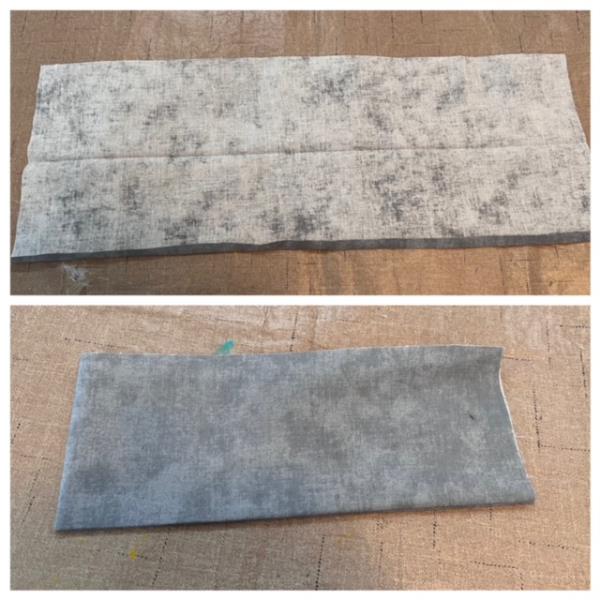
Cut your fabric pieces. Main fabric cut (1) 23” x 41” or width of the fabric. Only one main fabric cut as there is no bottom seam only side seams. For the cuff cut (2) 9” x 23”. Accent trim cut (2) 2” X 23” strips.
Step 3:
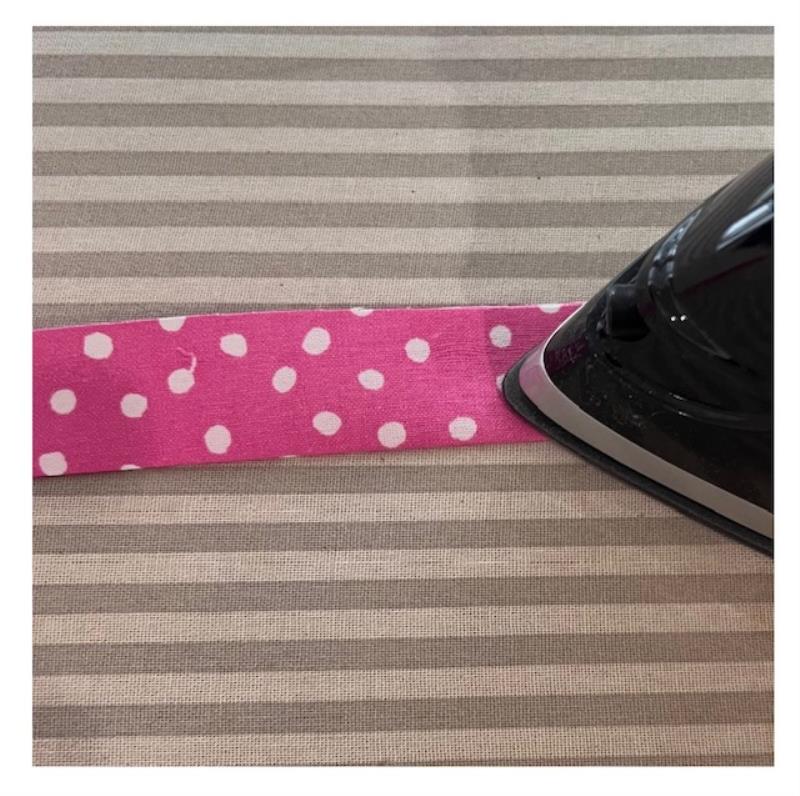
Fold your accent trim fabric in half lengthwise with wrong sides together. Iron press.
(Click Image to Enlarge)
Step 4:
(Click Image to Enlarge)
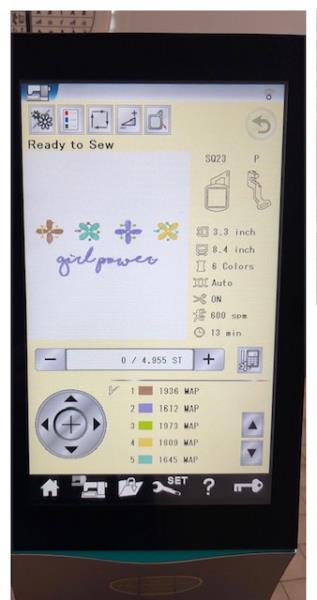
Load design file into your machine. Hoop stabilizer
Step 5:
Prepare cuff for embroidery
Fold cuff fabric in half horizontally and iron press. Fold one raw edge down ¼” Press, Fold in half to find center. Finger press or iron press.
(Click Image to Enlarge)
Step 6:
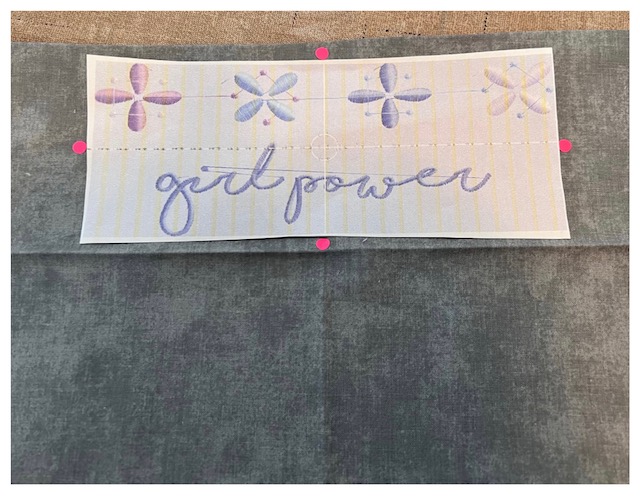
Center place paper design template in section above fold line. Mark axis points.
(Click Image to Enlarge)
Step 7:
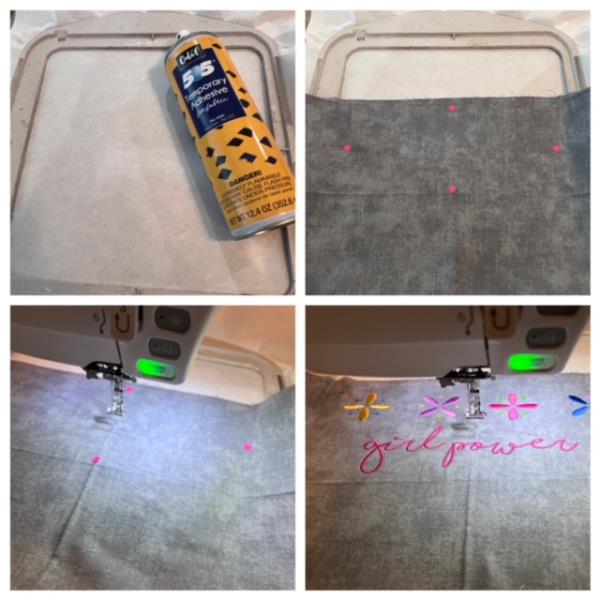
Spray temporary adhesive spray directly onto hooped stabilizer. Center place cuff matching axis points to built in axis markings on your hoop. Finger press to secure to stabilizer. Attach hoop to machine. Confirm center needle placement of design. Make any necessary adjustments to center. Begin stitch out. Refer to design file for thread colors. Stitch out complete. Cut and trim all jump stitches and loose thread ends. Repeat for other cuff.
(Click Image to Enlarge)
Step 8:
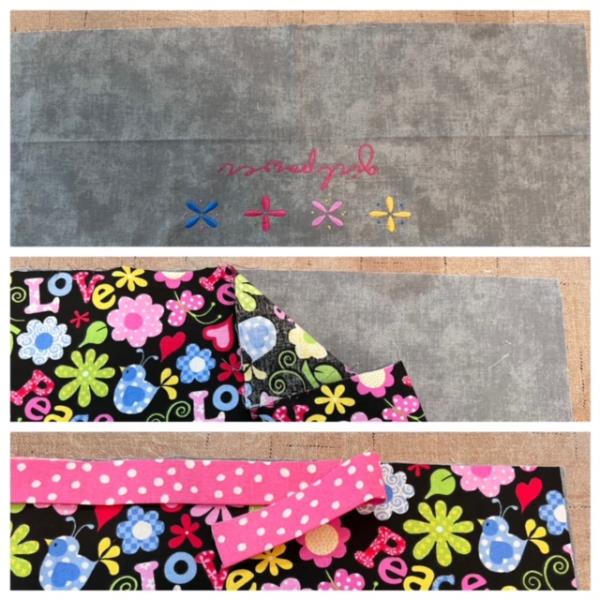
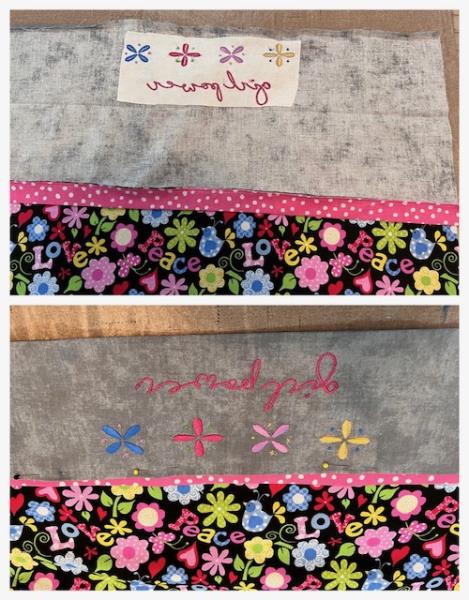
With the cut pieces : main fabric, accent trim and embroidered cuff. Open your embroidered cuff fabric and place face up. Ensure embroidered design is at bottom.
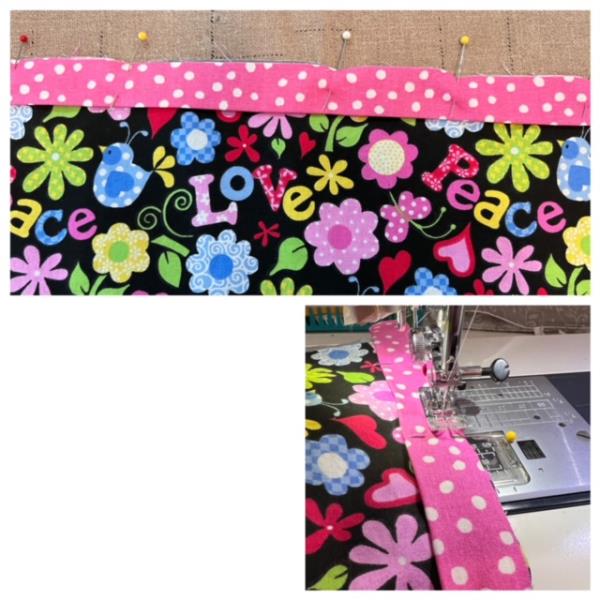
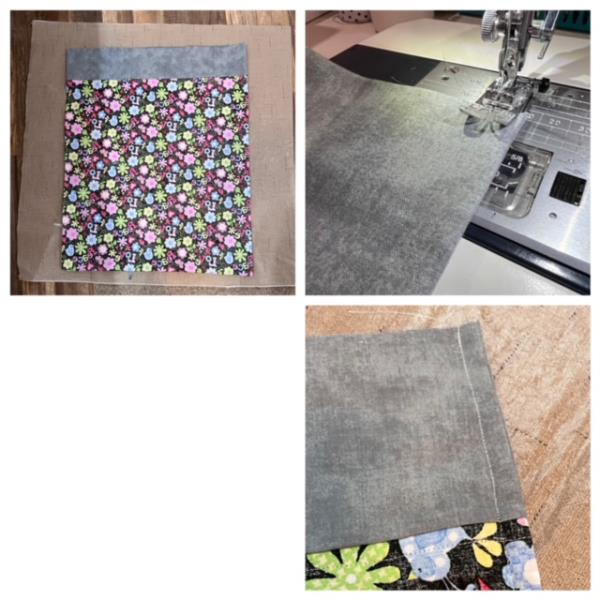
Next open your main fabric (this is the main body of the pillowcase) Right side up. Align the 23” edge on top of the cuff piece face up. Next align the raw edge of the trim.
(Click Image to Enlarge)
Step 9:
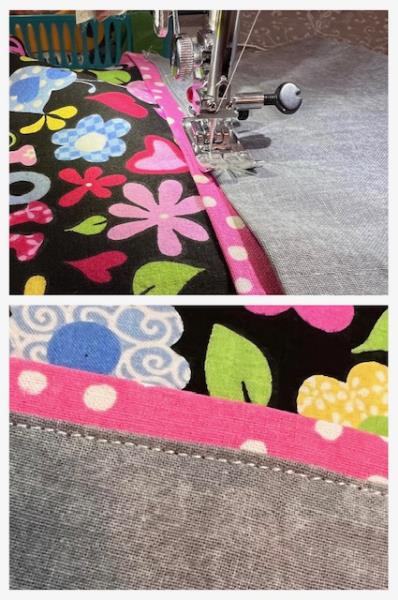
Pin in place all three layers. Stitch all three layers together using ¼” seam allowance.
(Click Image to Enlarge)
Step 10:
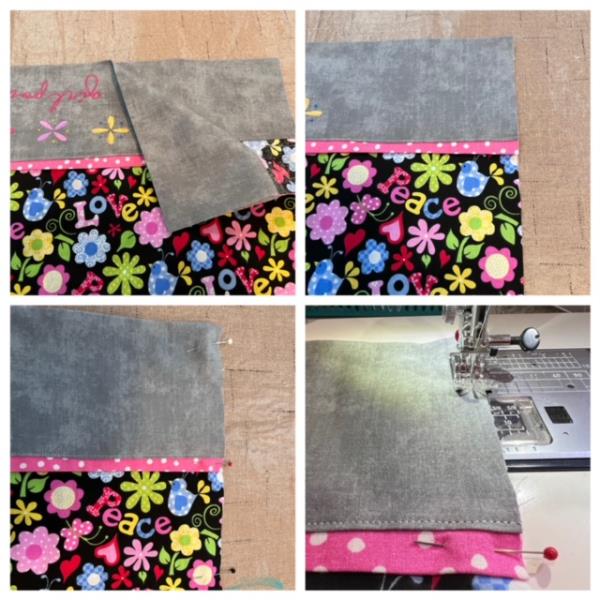
Lift up cuff fabric and the sewn three pieces should now look like this. Fold cuff down to meet seam of trim. Covering the stitch line. Leave ¼” of trim showing. Iron press.
(Click Image to Enlarge)
Step 11:
(Click Image to Enlarge)
Top stitch in place from folded edge. Repeat steps for other cuff.
Step 12:
French Seams
Fold pillow case in half matching top edges of cuff and sides. Wrong sides together. Pin in place. Stitch sides using ¼” seam allowance.
(Click Image to Enlarge)
Step 13:
Turn pillowcase inside out. Iron press both side seams. Right sides together stitch side seams using 3/8”seam allowance. Using this wider seam allowance will ensure that the sewn edges will not show.
(Click Image to Enlarge)
Step 14:
(Click Image to Enlarge)
Turn right side out…. Your Girl Power Pillowcase is complete!!! Great job!