Border OptionsHugging border, circle, square, or rectangle — with a 3mm satin stitch.
Backing OptionsAvailable with iron-on, sew-on, or velcro backing.
Fast ShippingShipped quickly from the USA.
Free Online Tools
Powerful embroidery utilities that save time and prevent costly mistakes.
Stitch AssistantRECOMMENDED
Get the exact stabilizer, machine settings, needle, and thread color sequence for every embroidery design you purchase — based on that design's stitch density, dimensions, and color count.
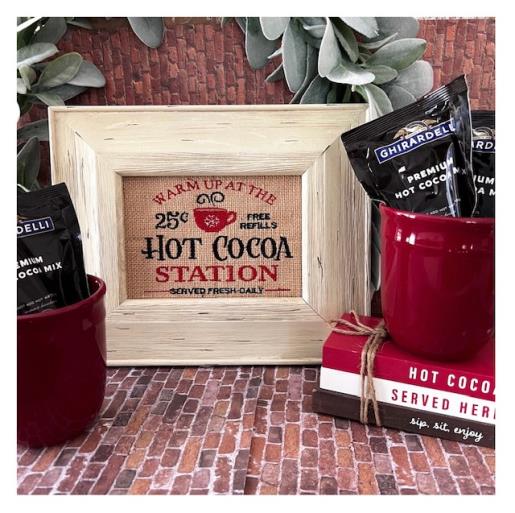
Create a charming hot cocoa station sign with this applique project, perfect for adding a festive touch to your holiday beverage setup. This design features a classic hot cocoa theme that enhances any kitchen or dining area. Step-by-step instructions are included.
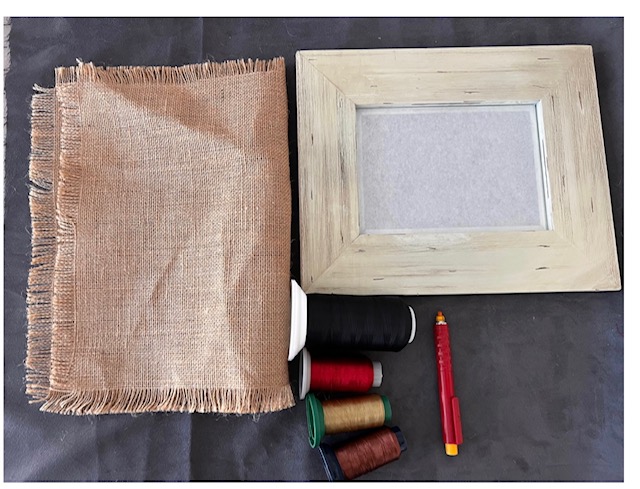
A wooden frame 10” x 12” with a window image display of 4.5” x 6.5” is used for this tutorial. If using a different size window image display you will need to adjust your design size to fit your display area. Embroidering on burlap will give a rustic chic look. Burlap is loosely woven so a stitch filled embroidery design will look best. A water soluble stabilizer is placed on top of burlap so that the design stitches do not disappear or sink into the burlap’s weave. The design used in this tutorial Hot Cocoa Station is from the Easy Embroidery Collection.
Step 1:
Gather all supplies and review instructions before beginning. Print a paper template of embroidery design file.
(Click Image to Enlarge)
Step 2:
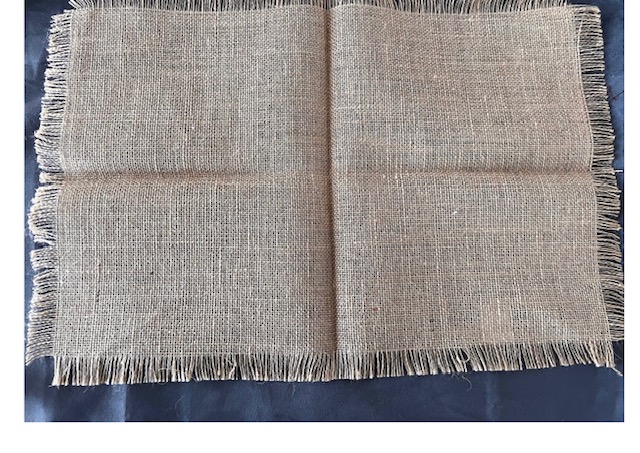
Iron press burlap piece or placemat. Find center of using your favorite method or quarter fold and iron press for a creased crosshair. Center your paper template atop and mark axis points or when hooping use your hoops built in axis markings.
(Click Image to Enlarge)
Step 3:
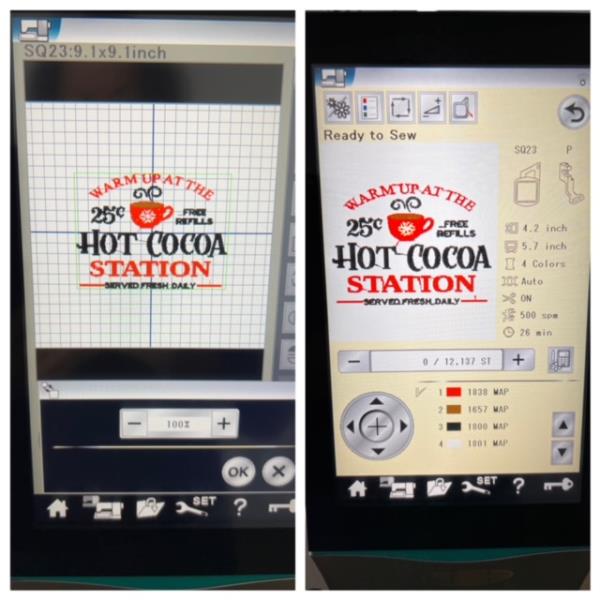
Load design file Hot Cocoa Station into your machine. Reduce size to fit embroidering area. Design size reduced to 5.7” x 4.2” for use in this tutorial based on the frame’s window display image. Refer to your machine’s instruction manual.
(Click Image to Enlarge)
Step 4:
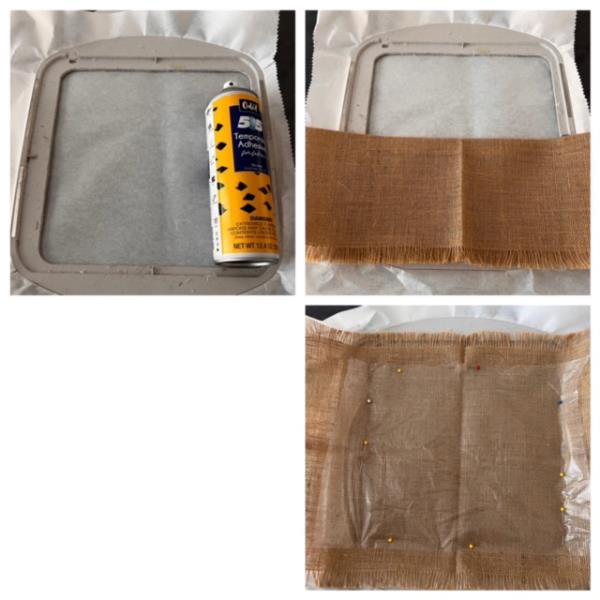
Hoop stabilizer using correct size hoop. Light spray TAS on top of stabilizer. Center burlap matching axis points to your hoop’s built in markings. Finger press to secure. Place a piece of water soluble stabilizer atop to burlap cover the embroidering area of design. Secure in place using tape or straight pins. Ensure that the pins/tape are out of the embroidering design area.
(Click Image to Enlarge)
Step 5:
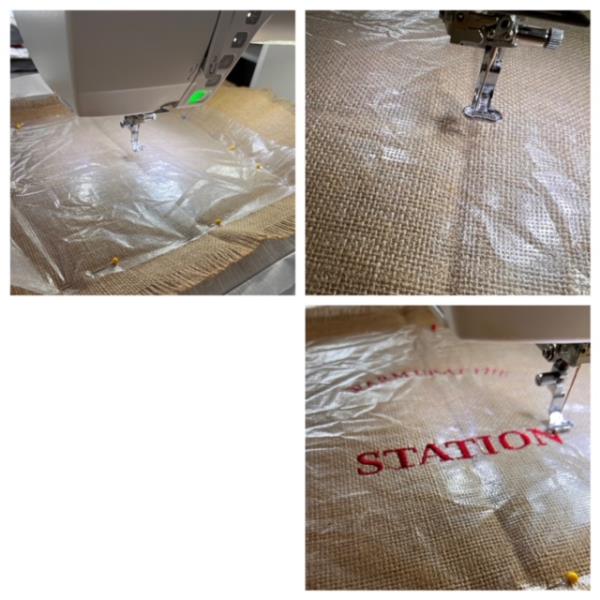
Attach hoop to machine. Confirm center needle placement to the center of creased crosshair . Refer to design file thread color chart or your choice of colors. Begin the design stitch out process.
(Click Image to Enlarge)
Step 6:
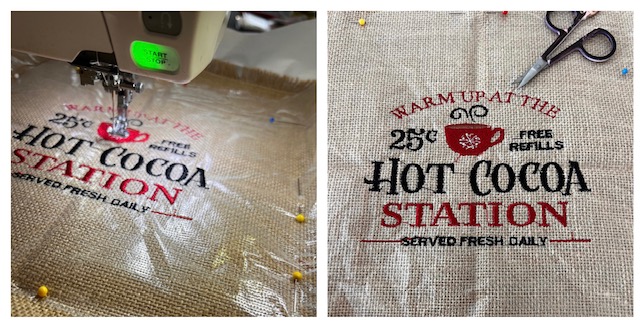
Embroidering process complete. Detach hoop. Cut/trim all jump stitches and loose thread ends. Remove pins/tape and water soluble stabilizer. Trim stabilizer on back. Iron press to remove creased crosshair.
(Click Image to Enlarge)
Step 7:
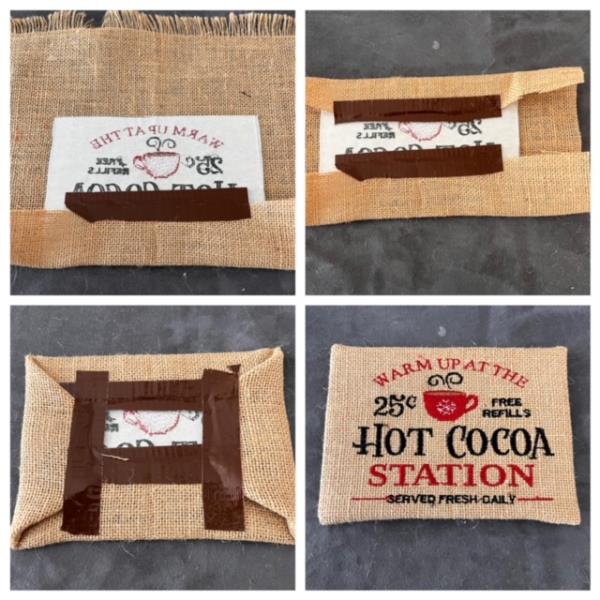
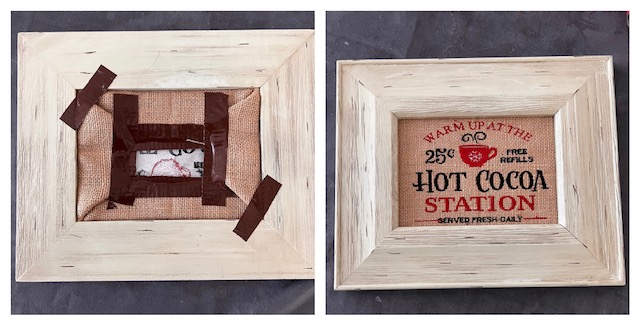
Using the glass from your picture frame center and place onto back of your burlap. Trim any excess burlap/stabilizer to reduce bulk when taping in place. Fold up bottom first. Tape in place. Fold down top. Tape in place. Fold in the two side and tape in place. Tip: Flip over to check if embroidered design is centered.
(Click Image to Enlarge)
Step 8:
Place into frame. Tape corners to hold in place if needed. Your Hot Chocolate Inspired Signage is now complete and now ready to display for that perfect Hot Chocolate station for the holidays!