Border OptionsHugging border, circle, square, or rectangle — with a 3mm satin stitch.
Backing OptionsAvailable with iron-on, sew-on, or velcro backing.
Fast ShippingShipped quickly from the USA.
Free Online Tools
Powerful embroidery utilities that save time and prevent costly mistakes.
Stitch AssistantRECOMMENDED
Get the exact stabilizer, machine settings, needle, and thread color sequence for every embroidery design you purchase — based on that design's stitch density, dimensions, and color count.
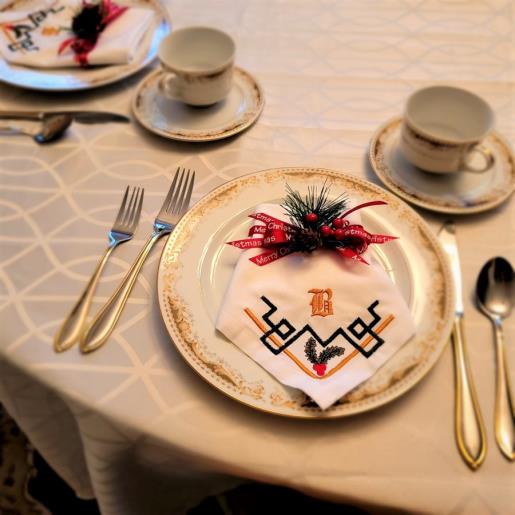
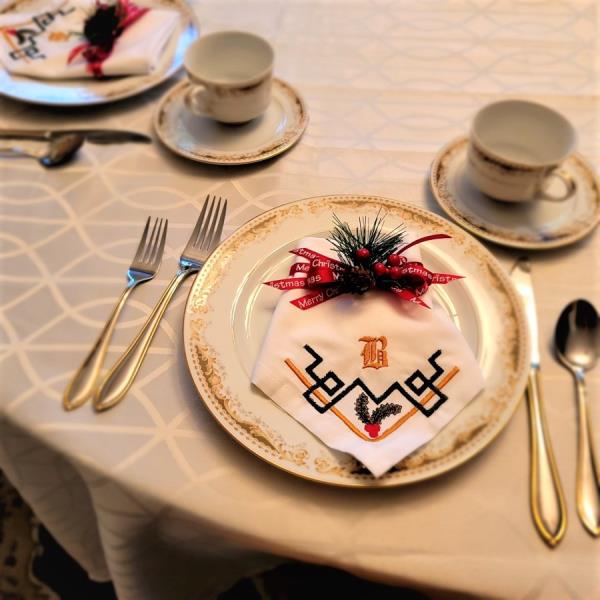
Enhance your holiday dining experience with monogrammed napkins featuring elegant holiday motifs. Perfect for adding a personalized touch to your festive table setting. Step-by-step instructions are included.
The design used in this project is by Kinship Kreations. The monogram letter may be added using embroidery software, or added at the machine using your choice of font. The placement line for the napkin was added in editing software. Your machine may have a function to do the same.
Step 1:
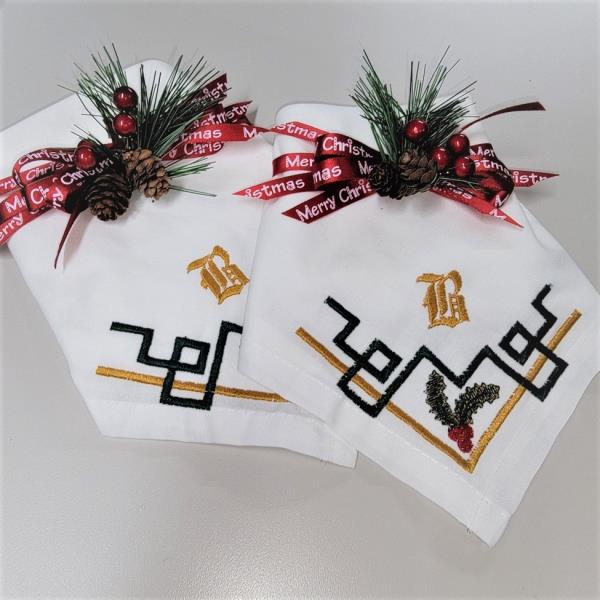
Read through the instructions thoroughly before beginning and assemble all the materials needed to complete the project. With the addition of a ribbon and floral pic, the napkins add a special touch to a table setting.
(Click Image to Enlarge)
Step 2:
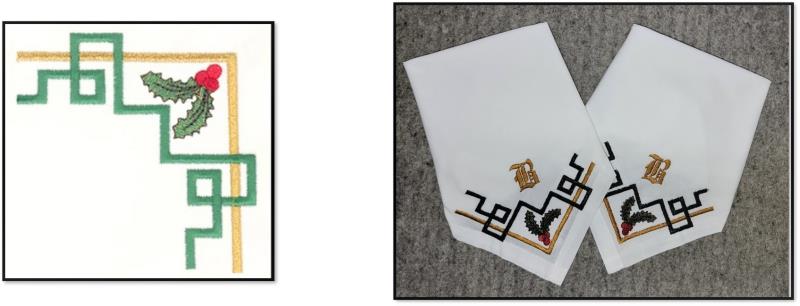
The Holly Design is by Kinship Kreations. The placement line and monogram were added in editing software as you will see. If you do not have editing software, check the machine manual to see if you can add a placement line at the machine and how to add a monogram as the last object to stitch.
(Click Image to Enlarge)
Step 3:
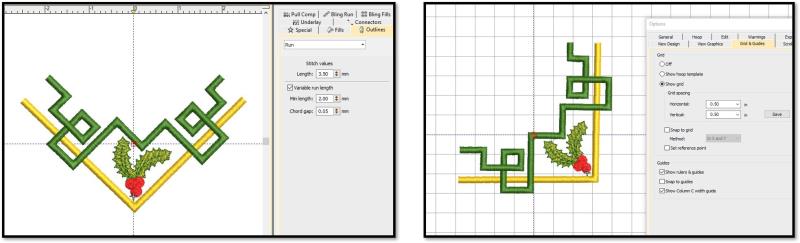
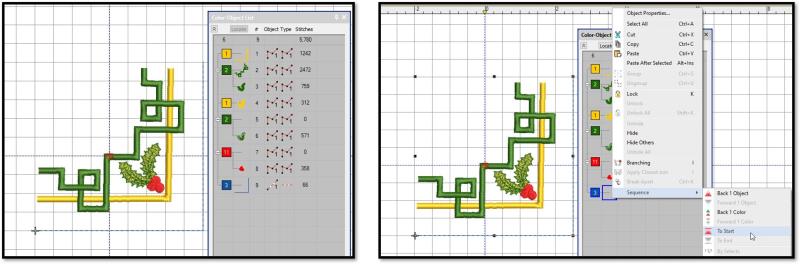
To add a placement line and monogram, open the embroidery editing software, and turn on a grids at .5”. Set the stitch length at 3.5mm. Turn the design so the outer edges align along grid lines as shown.
(Click Image to Enlarge)
Step 4:
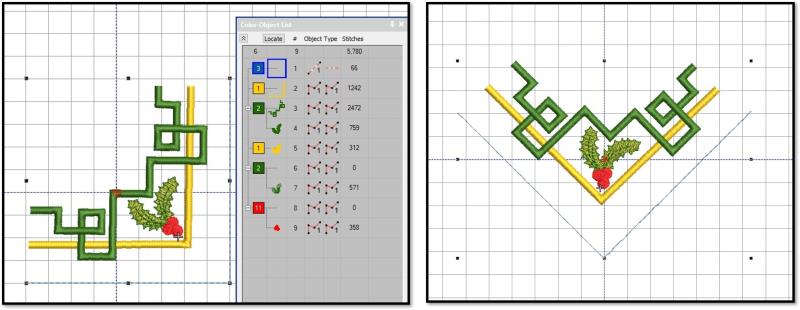
Using the grids as a guide, place a stitching line to the right and bottom of the design. Resequence the placement line to the start of the design.
(Click Image to Enlarge)
Step 5:
Select all the objects and rotate them on point.
(Click Image to Enlarge)
Step 6:
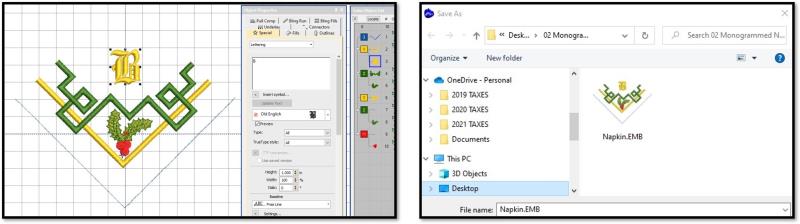
Using the lettering part of the software, choose a font and letter. The one used for this project was Old English font at 1”. Be sure to set the underlay for the letter. Center the letter as desired above the center of the design. Depending upon the color used, you may wish to sequence the letter to stitch after one of the other colors as was done here. Save the file as a new design which will preserve the original design file.
(Click Image to Enlarge)
Step 7:
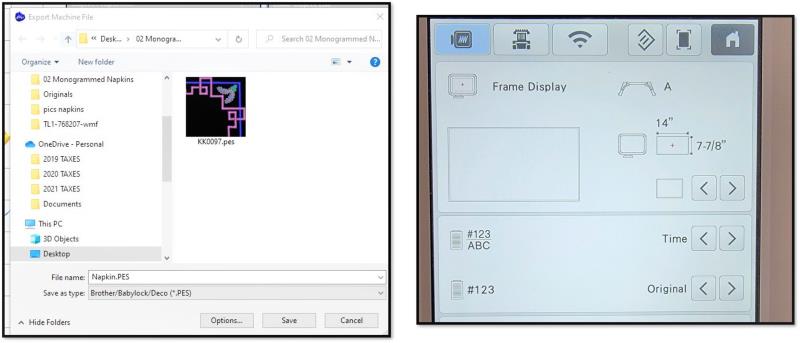
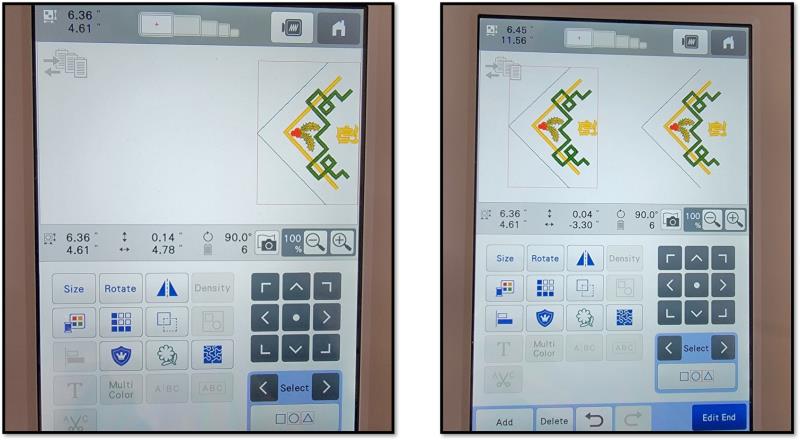
Save the file in the format needed for the machine. To stitch more than one napkin in the hoop here is an easy way to do it. Choose a large frame.
(Click Image to Enlarge)
Step 8:
Load the design on the machine and move it to the far right (or top if that is how the hoop is positioned on the machine). Add the design again and move it to the left (or below on a vertically positioned hoop). Depending on the size of the hoop, more repeats may be added in the same manner.
(Click Image to Enlarge)
Step 9:
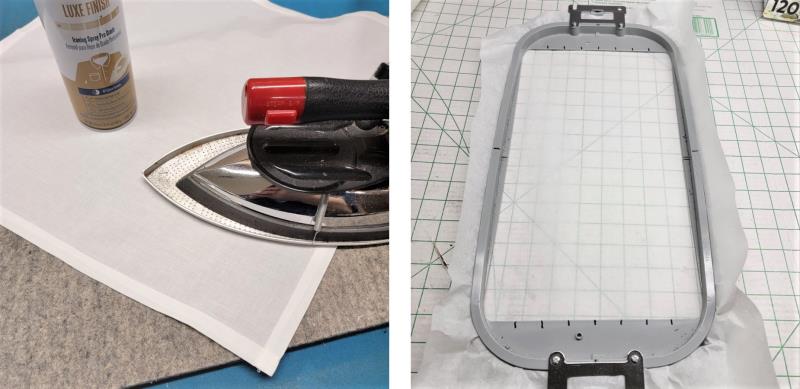
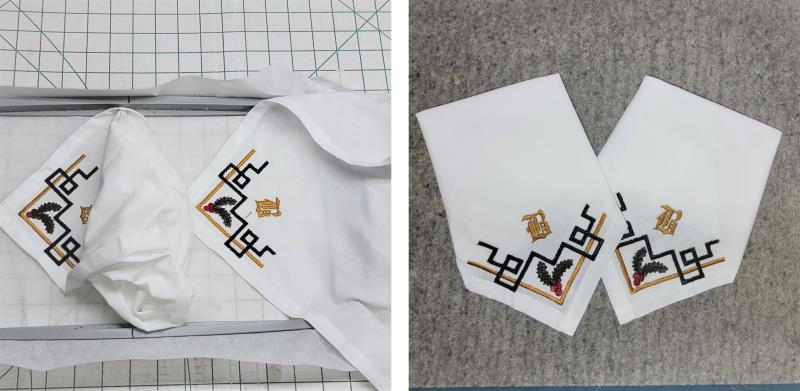
Press the napkins well using spray starch. Hoop a piece of tearaway stabilizer.
(Click Image to Enlarge)
Step 10:
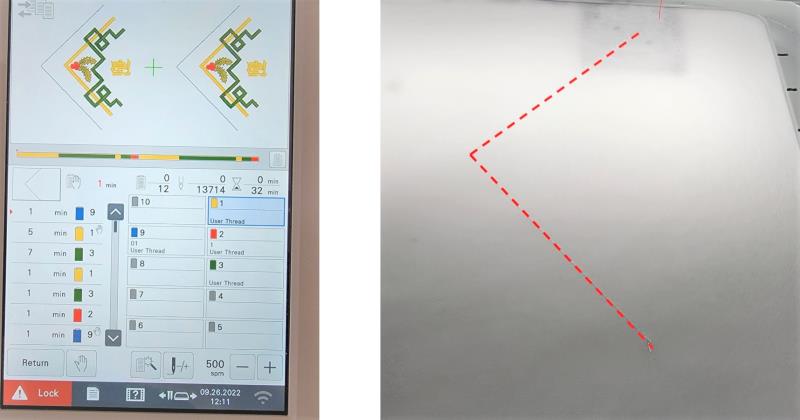
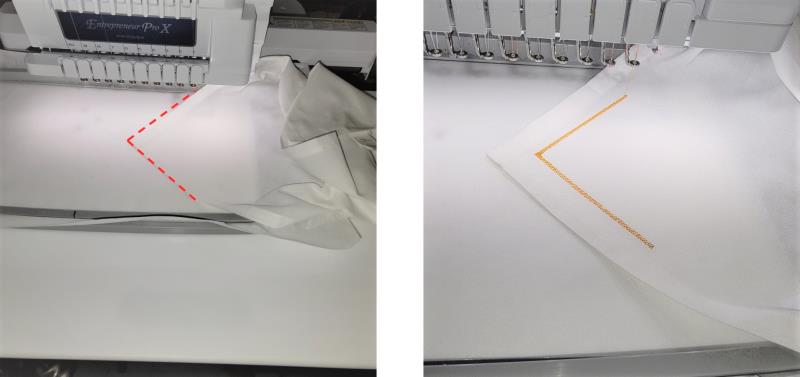
Set the colors, making sure there are stops after the placement line so the napkin may be added. Stitch Color 1, the placement line.
(Click Image to Enlarge)
Step 11:
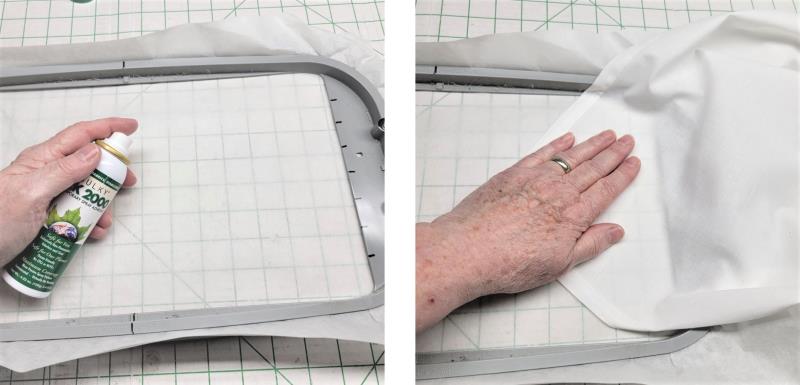
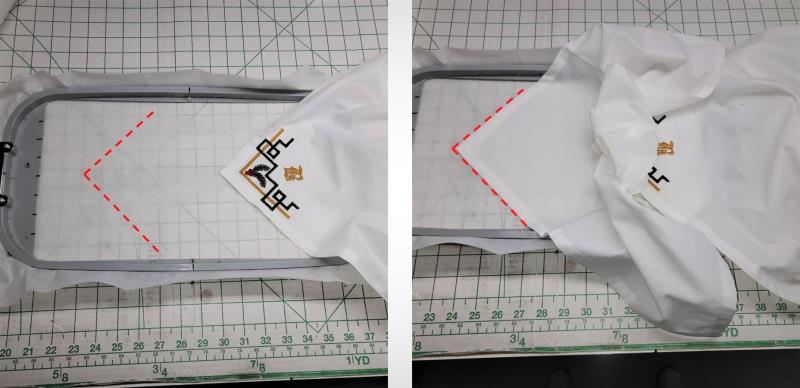
Remove the hoop from the machine. Use spray adhesive within the placement line to adhere the napkin corner inside the placement line.
(Click Image to Enlarge)
Step 12:
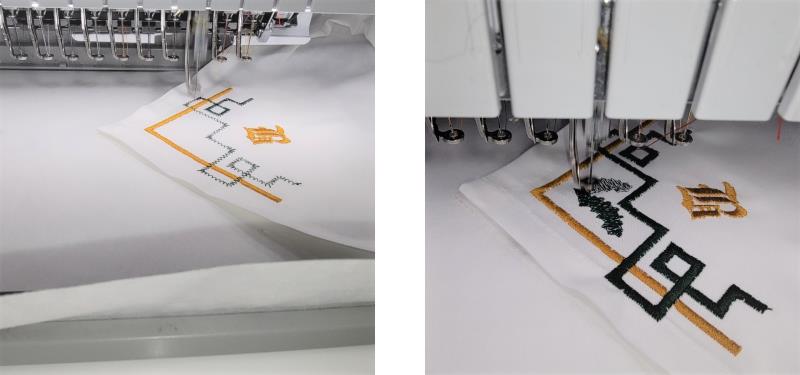
Place the hoop back on the machine. Stitch Color 2, the gold satin line.
(Click Image to Enlarge)
Step 13:
Continue stitching all the colors.
(Click Image to Enlarge)
Step 14:
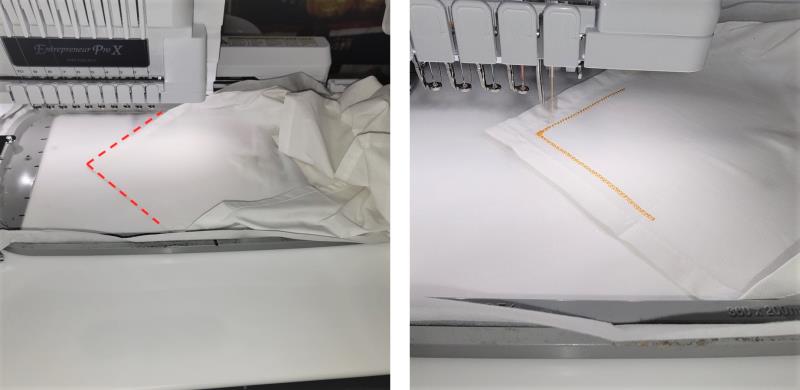
After the first design has finished, Stitch the placement line for the second napkin and then follow the same steps of aligning the napkin corner to the placement line.
(Click Image to Enlarge)
Step 15:
Stitch the colors again.
(Click Image to Enlarge)
Step 16:
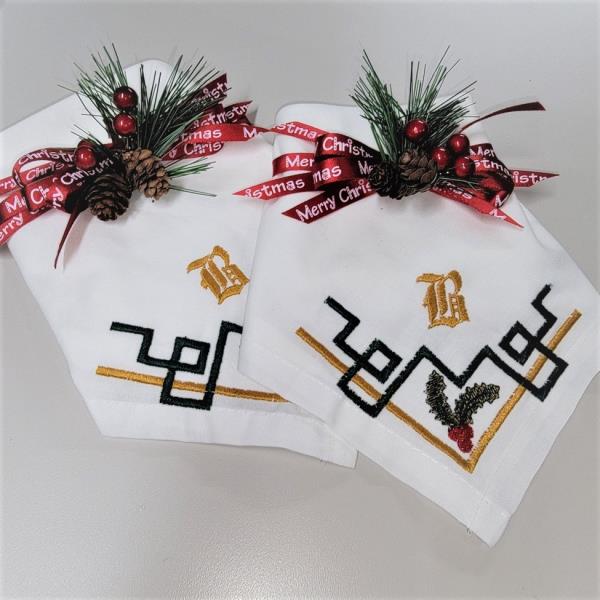
After the designs have stitched, remove the piece from the hoop and remove the excess stabilizer. Press the napkins and fold them for a pretty display for the table.
(Click Image to Enlarge)
Step 17:
Make bows from ¼” printed ribbon and tie it around the top of the napkin. Insert a pretty floral pick to complete the presentation.
(Click Image to Enlarge)
Step 18:
Monogrammed napkins help create an inviting setting for your holiday table.
Ramona Baird has been in the embroidery industry for over 23 years. She and her husband owned a commercial and retail embroidery store in Arizona for many years. She is an experienced digitizer having been mentored by award-winners Pat Williams and Lindee Goodall. Ramona is a contributor to “Creative Machine Embroidery” magazine having 5 covers to her credit. Ramona has worked for Wilcom America and served many years as Education Director for the American Sewing Guild. With a degree in fashion design, she is able to design and execute patterns which Pat Williams says are “out of the box” in creativity and application. Ramona likes to challenge the boundaries of embroidery and bring new and exciting designs, ideas, and projects to EmbroideryDesigns.com. She wants embroiderers of all levels to increase their skills and enjoyment in using their embroidery machine for gift-making and personal pleasure.