Border OptionsHugging border, circle, square, or rectangle — with a 3mm satin stitch.
Backing OptionsAvailable with iron-on, sew-on, or velcro backing.
Fast ShippingShipped quickly from the USA.
Free Online Tools
Powerful embroidery utilities that save time and prevent costly mistakes.
Stitch AssistantRECOMMENDED
Get the exact stabilizer, machine settings, needle, and thread color sequence for every embroidery design you purchase — based on that design's stitch density, dimensions, and color count.
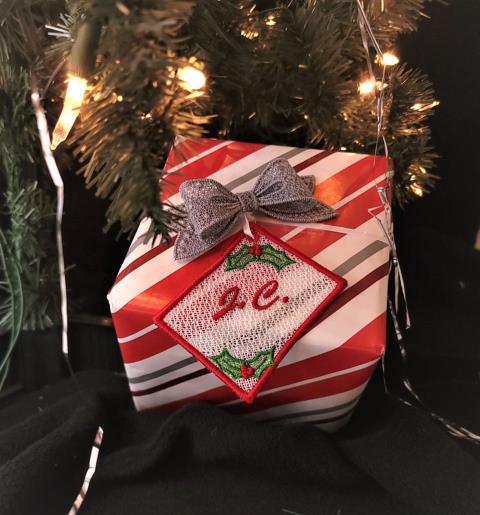
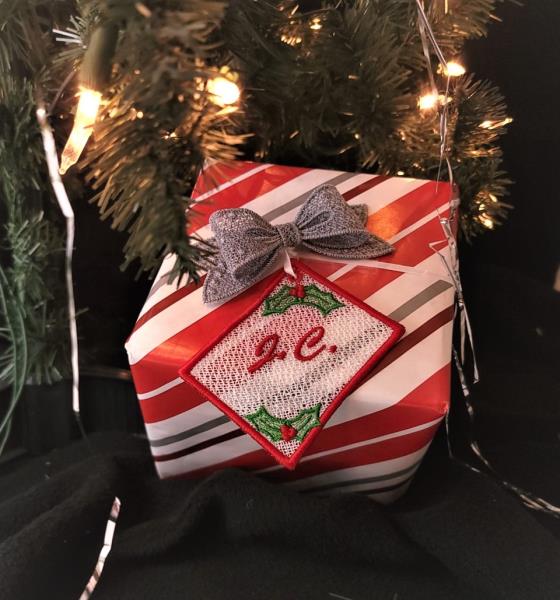
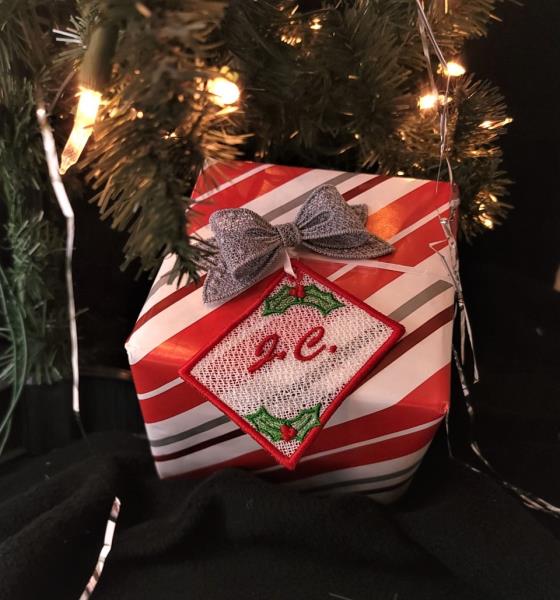
Create beautiful gift bows and personalized tags to enhance your holiday packages. This set features vibrant colors and customizable elements to match any wrapping theme. Step-by-step instructions are included.
Step
of
Gift Bows and Personalized Gift Tags
By Ramona Baird
The Bow Design is by FSL Boutique and the Gift Tags are by Kinship Kreations. All designs stitch beautifully and you’ll have items to use year after year if you wish. You’ll get a lot of use out the bow design because it can also be used for other gifts like birthdays, weddings, showers, etc.
Step 1:
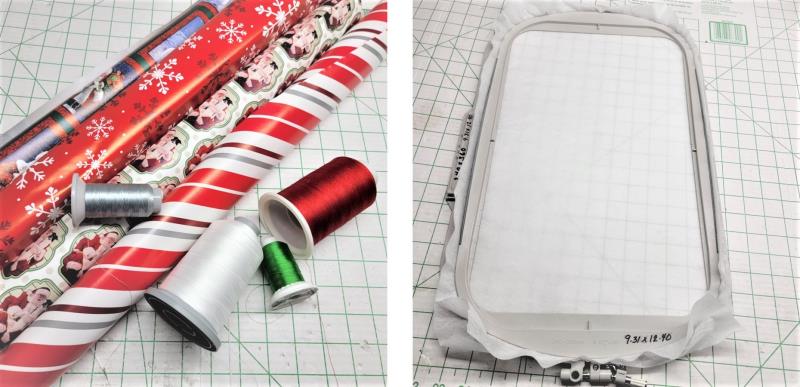
Read through the instructions thoroughly before beginning and assemble all the materials needed to complete the project. The software is optional, but an easy way to personalize the gift tags. If you don’t have software, just skip the text as designed on the tag when embroidering it, and then as a last step, choose lettering from the machine to personalize the tag. Use polyester embroidery thread for both designs, including the bobbin.
(Click Image to Enlarge)
Step 2:
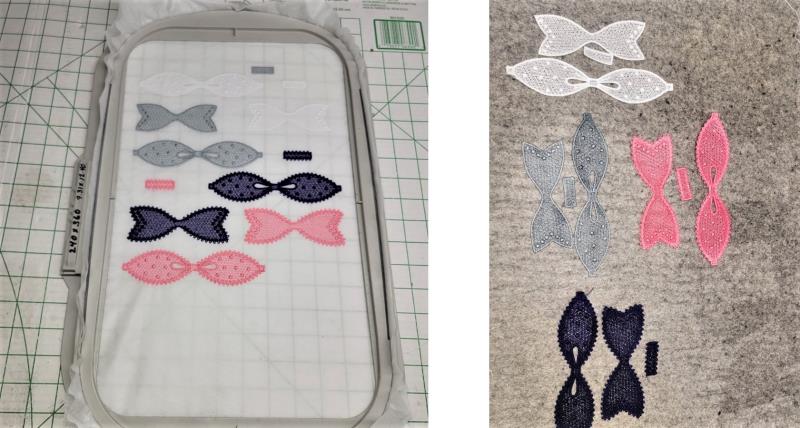
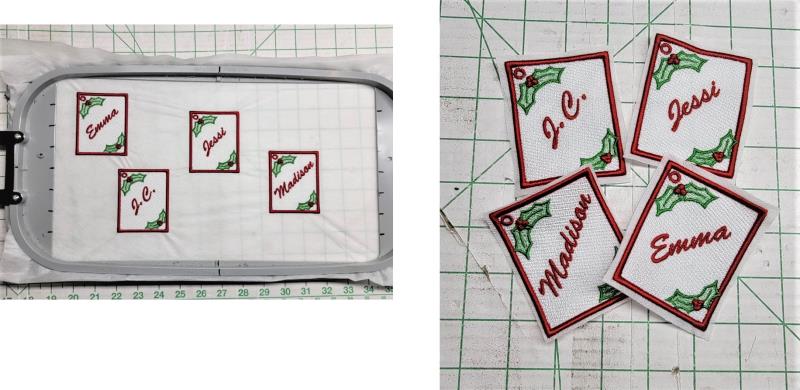
Choose the gift wrapping first and then coordinate the thread colors for the bows and tags. If you have a large hoop, gang up several (leaving at least ½” between designs), for both the tags and bows. Hoop two layers of water-soluble stabilizer.
(Click Image to Enlarge)
Step 3:
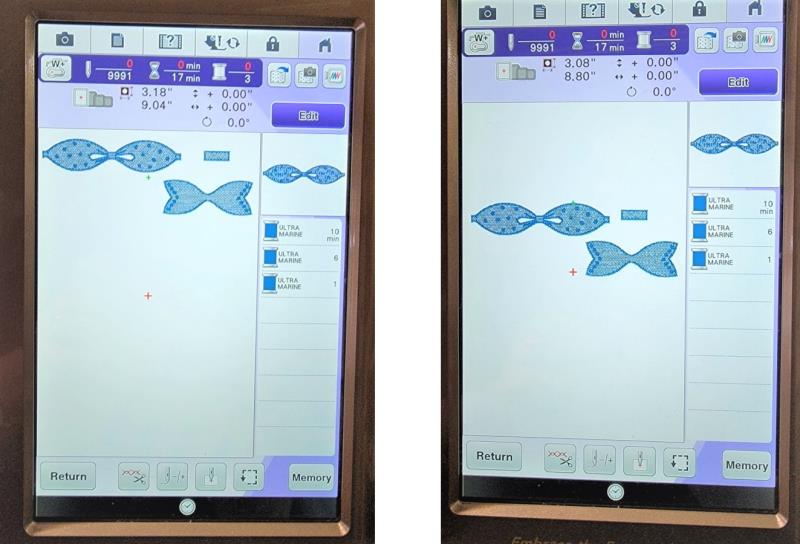
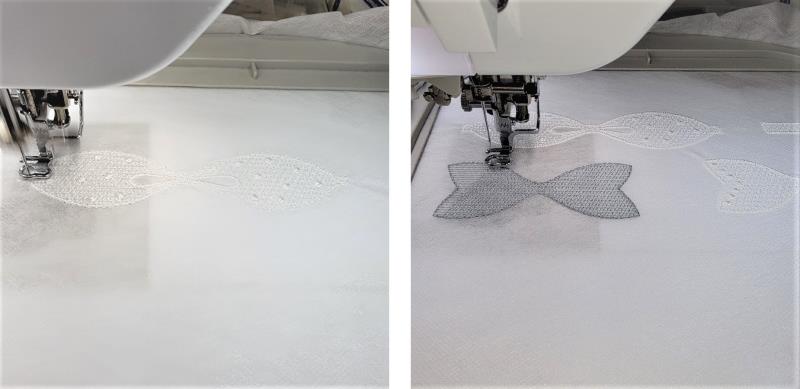
Beginning with the bows, load the design on the machine. You can add all the designs at once and then choose the colors you’d like on the machine.
(Click Image to Enlarge)
Step 4:
Stitch the design in the chosen color.
(Click Image to Enlarge)
Step 5:
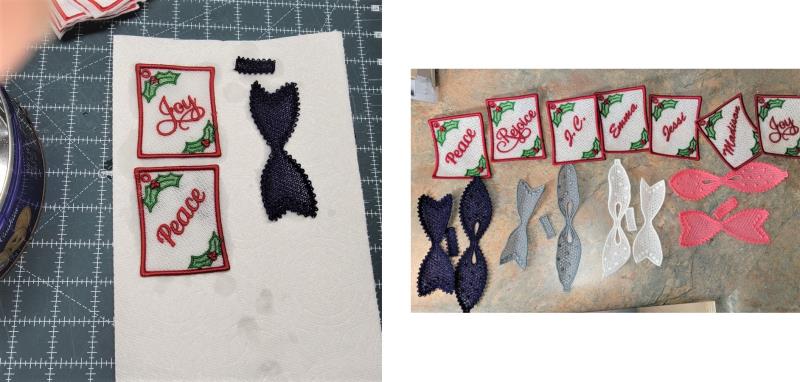
These do take a bit of time to stitch, but are fun to watch. When finished, remove the piece from the hoop and then generally cut out around the pieces. Follow the manufacturers’ directions for dissolving the excess stabilizer. Lay flat to dry.
(Click Image to Enlarge)
Step 6:
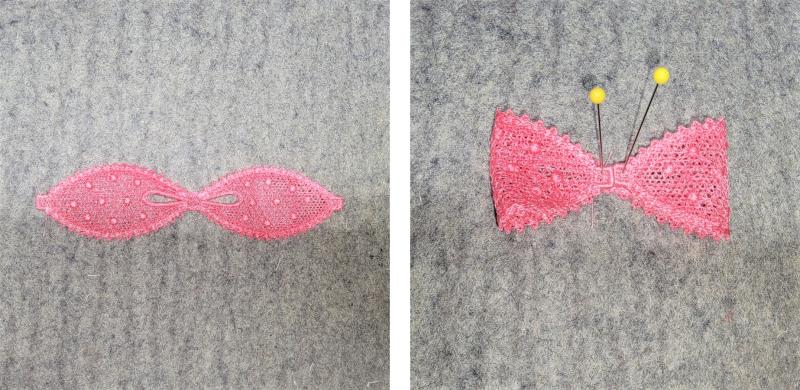
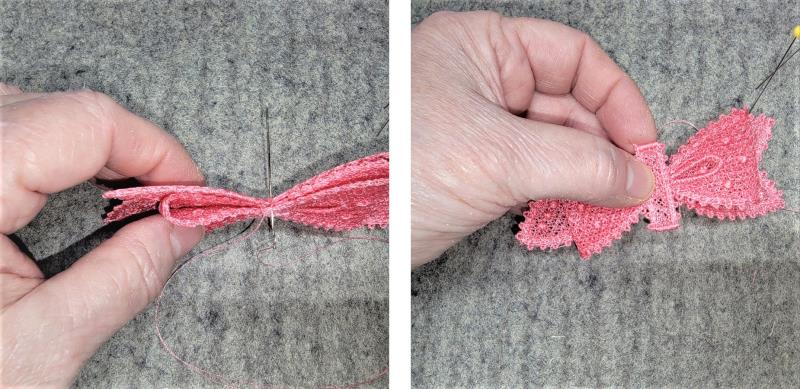
After the pieces are completely dry, assembly can begin. Begin with the bow portion. Bring the ends to the center.
(Click Image to Enlarge)
Step 7:
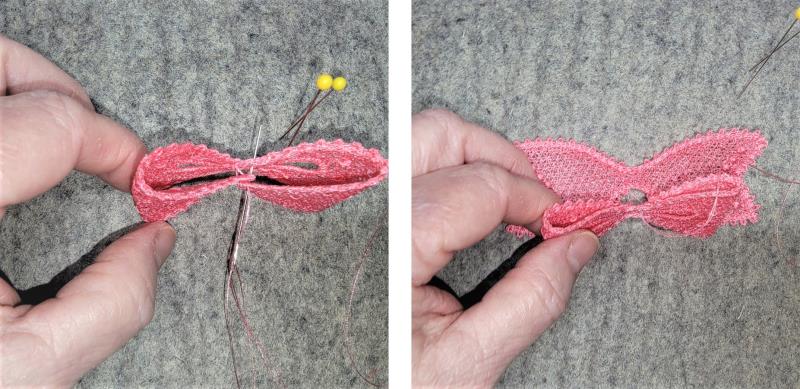
Thread a needle with the same thread used for stitching. Tack the ends to the front of the bow. Place the ribbon behind the bow.
(Click Image to Enlarge)
Step 8:
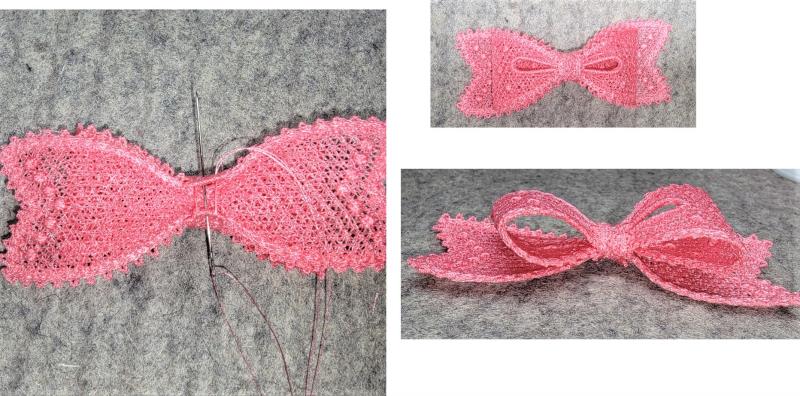
Tack the ribbon to the bow. Wrap the center piece from the front to the back.
(Click Image to Enlarge)
Step 9:
Take a few stitches to tack the center in place on the back. Form the bow.
(Click Image to Enlarge)
Step 10:
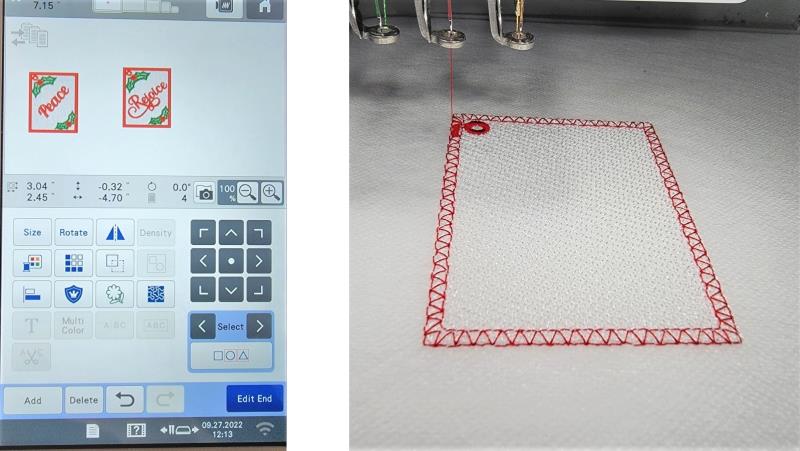
Load the designs on the machine. Stitch the designs in the color sequence.
(Click Image to Enlarge)
Step 11:
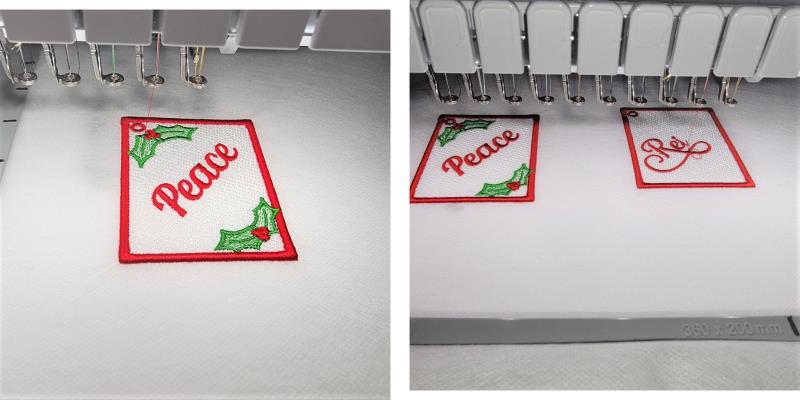
Again, several tags can be ganged up in a larger hoop—just be sure to leave space between the designs.
(Click Image to Enlarge)
Step 12:
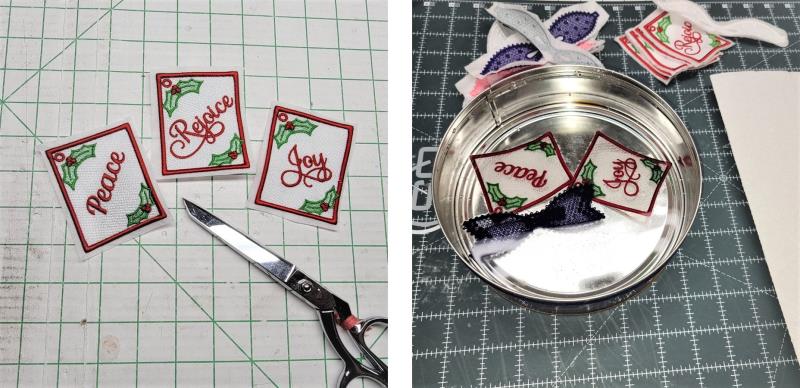
After the designs have finished stitching, remove them from the hoop and generally cut away the excess stabilizer from around each design. Follow the directions from the manufacturer for dissolving the excess stabilizer. Lay flat to dry.
(Click Image to Enlarge)
Step 13:
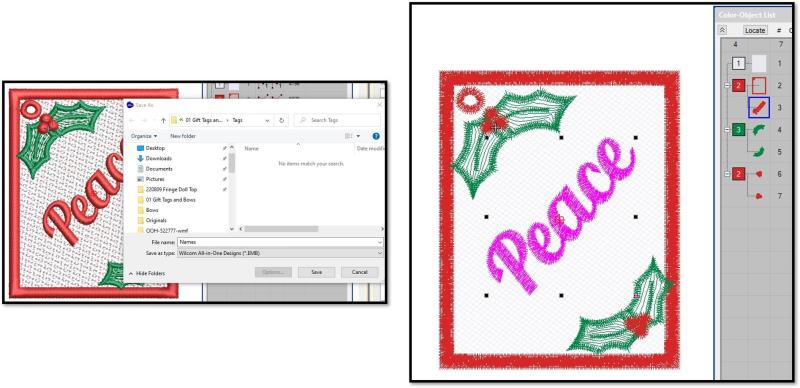
If you’d like to personalize the design, in software, save as a new design. Select and delete the text.
(Click Image to Enlarge)
Step 14:
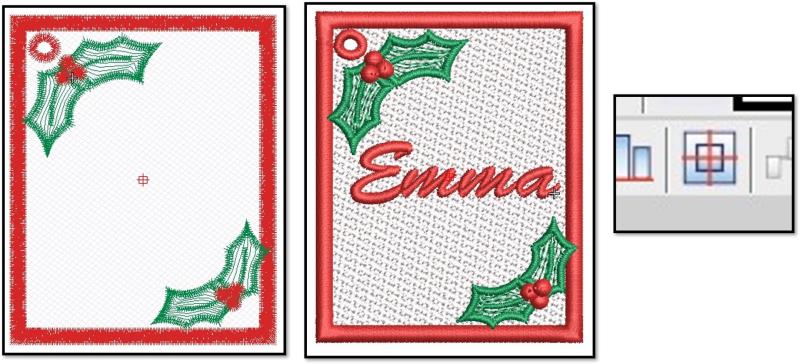
Enter the next text and center using the function in the software. Repeat the steps for the additional name tags needed.
(Click Image to Enlarge)
Step 15:
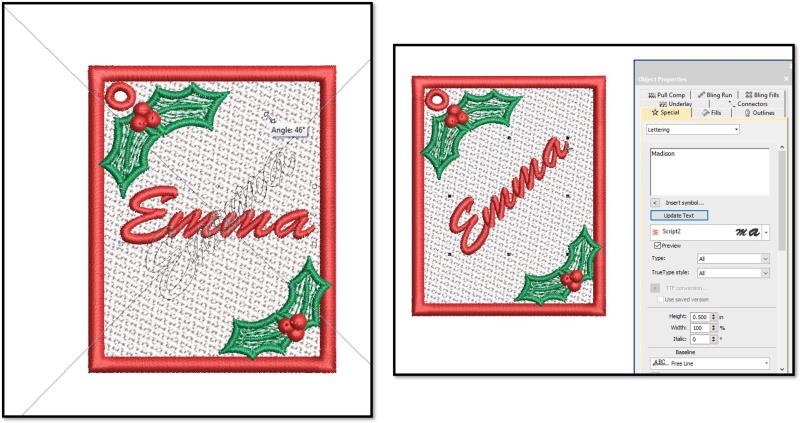
Select the text and rotate it as you’d like. Save the design and then export it in the format needed for stitching.
(Click Image to Enlarge)
Step 16:
Hoop two layers of water-soluble stabilizer. Load the designs on the machine and if you have a hoop large enough, gang up the designs, leaving plenty of room between each design. When the designs have finished stitching, remove them from the hoop and trim away the excess stabilizer.
(Click Image to Enlarge)
Step 17:
Rinse away the excess stabilizer and lay flat to dry.
(Click Image to Enlarge)
Step 18:
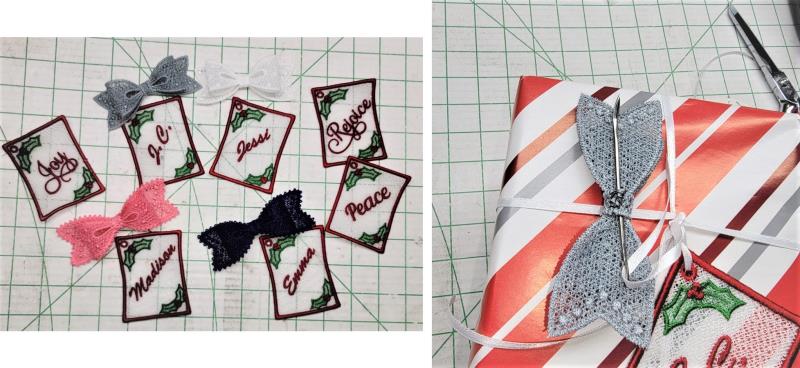
Match the colored bows to the gift tags. To attach the bow to the package, ribbon can be threaded through the back center section of the bow or double-sided tape can be used to adhere the bow to the package.
(Click Image to Enlarge)
Step 19:
Set aside a couple weekend afternoons to stitch up all the tags and bows needed so they are ready when it is time to wrap packages.
Ramona Baird has been in the embroidery industry for over 23 years. She and her husband owned a commercial and retail embroidery store in Arizona for many years. She is an experienced digitizer having been mentored by award-winners Pat Williams and Lindee Goodall. Ramona is a contributor to “Creative Machine Embroidery” magazine having 5 covers to her credit. Ramona has worked for Wilcom America and served many years as Education Director for the American Sewing Guild. With a degree in fashion design, she is able to design and execute patterns which Pat Williams says are “out of the box” in creativity and application. Ramona likes to challenge the boundaries of embroidery and bring new and exciting designs, ideas, and projects to EmbroideryDesigns.com. She wants embroiderers of all levels to increase their skills and enjoyment in using their embroidery machine for gift-making and personal pleasure.