Border OptionsHugging border, circle, square, or rectangle — with a 3mm satin stitch.
Backing OptionsAvailable with iron-on, sew-on, or velcro backing.
Fast ShippingShipped quickly from the USA.
Free Online Tools
Powerful embroidery utilities that save time and prevent costly mistakes.
Stitch AssistantRECOMMENDED
Get the exact stabilizer, machine settings, needle, and thread color sequence for every embroidery design you purchase — based on that design's stitch density, dimensions, and color count.
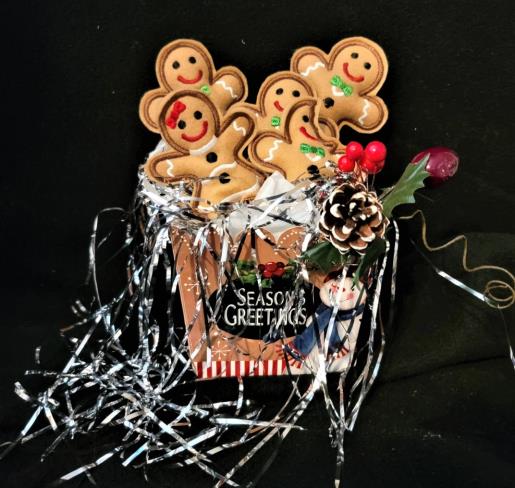
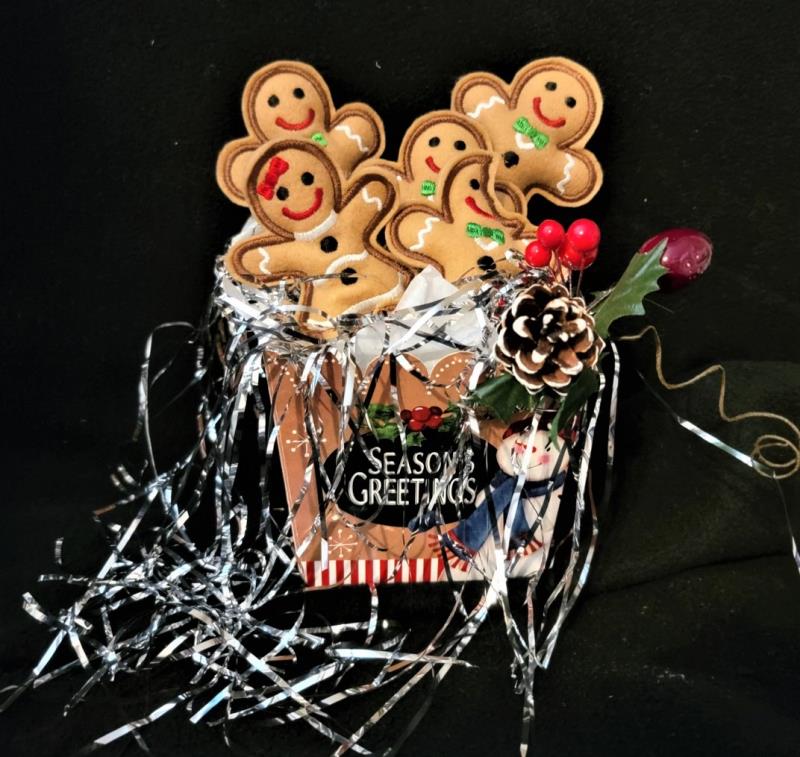
Create a delightful set of applique gingerbread decorations perfect for holiday baskets. These charming softies are ideal for adding a festive touch to your seasonal decor. Step-by-step instructions are included.
Step
of
Applique Gingerbread Basket Decorations
By Ramona Baird
The designs used in the project are the Lindee G Embroidery brand, which stitch beautifully. Use a good quality felt for the project—not the little craft squares. These are not meant to be a child’s toy—they are decorations. These designs are digitized as appliques, but with the addition of a step in software (or at the machine) they are made into 3D gingerbreads.The designs used in the project are the Lindee G Embroidery brand, which stitch beautifully. Use a good quality felt for the project—not the little craft squares. These are not meant to be a child’s toy—they are decorations. These designs are digitized as appliques, but with the addition of a step in software (or at the machine) they are made into 3D gingerbreads.
Step 1:
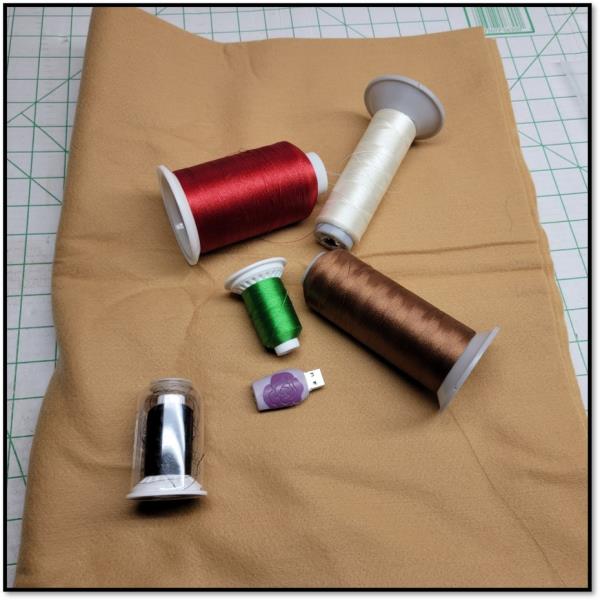
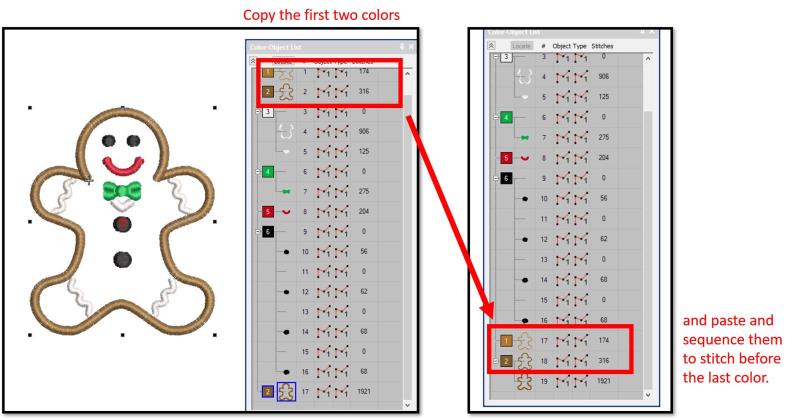
Read through the instructions thoroughly before beginning and assemble all the materials needed to complete the project. The designs used in this project are by Lindee G Embroidery. You’ll certainly enjoy watching them stitch out. The designs are actually applique designs. By copying the first two colors, copying them and resequencing them to the end, the design can now be used as cute tree ornament or a basket full of gingerbreads for a kitchen table as was done in this project. Use colors of thread that will show up well on the felt.
(Click Image to Enlarge)
Step 2:
Be sure to use a good quality felt, not the inexpensive craft store felt. When stuffed, the felt won’t hold up.
(Click Image to Enlarge)
Step 3:
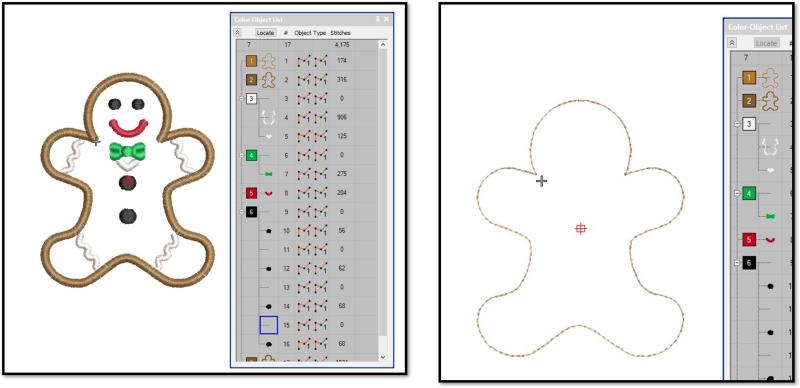
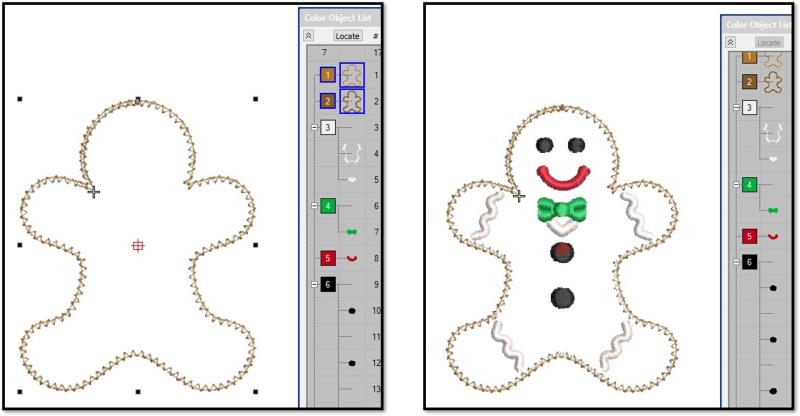
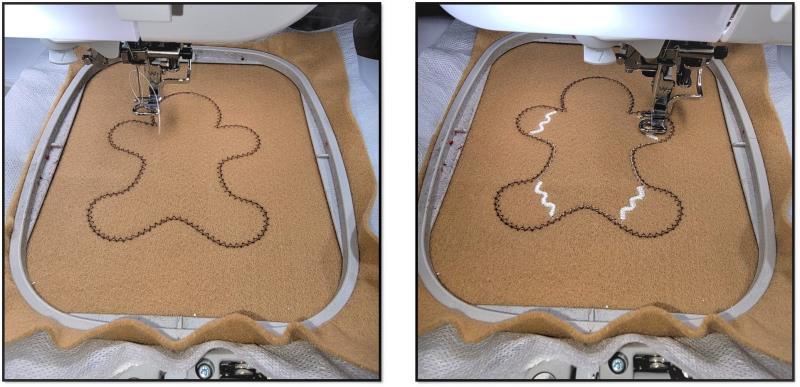
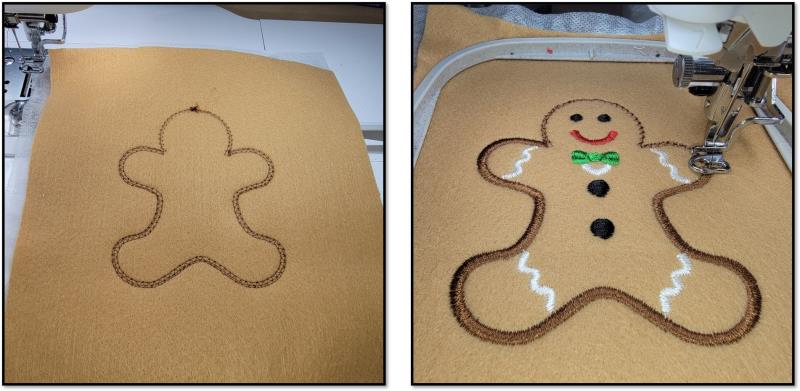
The design is easy to take from an applique to a 3-D object. The design setup is shown on the left. Color 1 is the outline as shown in the photo on the right.
(Click Image to Enlarge)
Step 4:
Color 2 is a zig-zag stitch around the outline. Colors 3-6 are the details. If you have embroidery editing software, use the following steps to easily adjust the design. If you do not have software, you’ll have to resew Colors 1 and 2 after the back felt is put in place, and then sew the last color which is the satin outline.
(Click Image to Enlarge)
Step 5:
Color 7 is the satin outline. Copy and paste Colors 1 and 2 and sequence them so they stitch before the last color which is the satin outline. This allows a stop at the machine so the second felt piece can be positioned on the back of the hoop before stitching the now last three colors as you will see. Save the design as a new design and then save it in the format needed for the machine.
(Click Image to Enlarge)
Step 6:
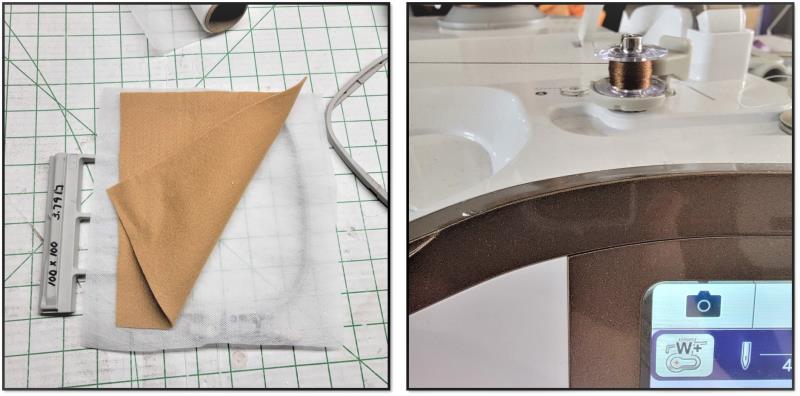
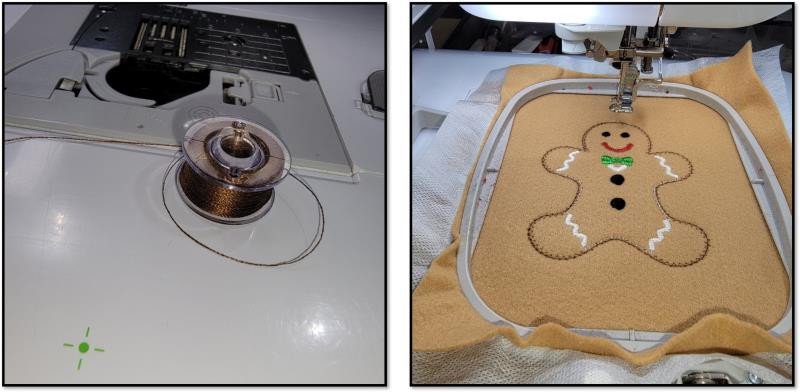
Hoop a piece of felt and a piece of fibrous water-soluble stabilizer. Also, wind a bobbin with the thread that will sew the satin stitch. The other colors may be sewn with white bobbin thread.
(Click Image to Enlarge)
Step 7:
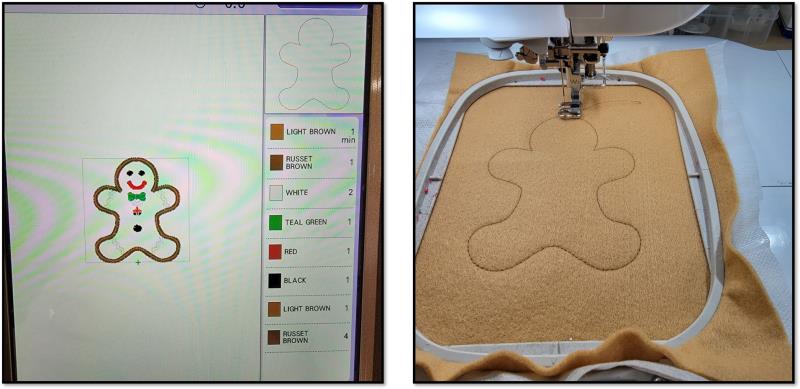
Load the design on the machine. Stitch Color 1, the outline.
(Click Image to Enlarge)
Step 8:
Stitch Color 2 the zig-zag. Stitch Color 3, the white decoration.
(Click Image to Enlarge)
Step 9:
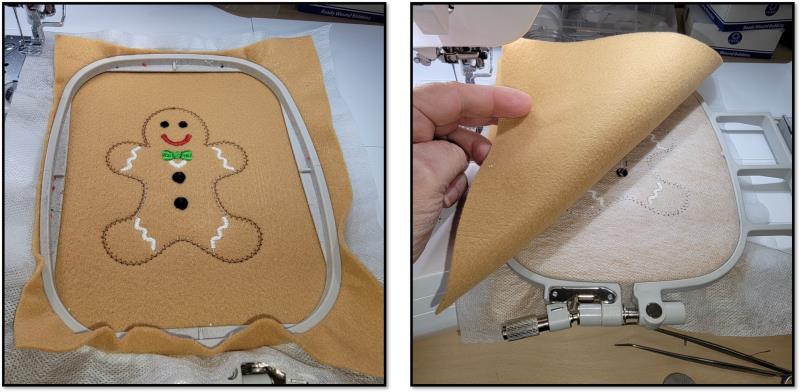
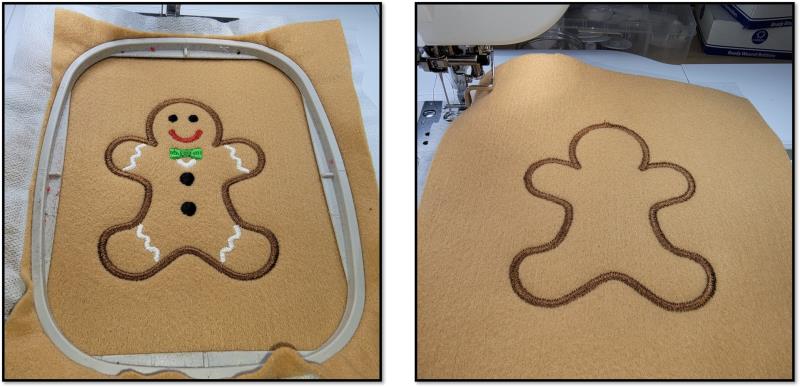
Stitch Colors 4-6 to finish the details. Remove the hoop from the machine. Turn the hoop over and position the second piece of felt on the back.
(Click Image to Enlarge)
Step 10:
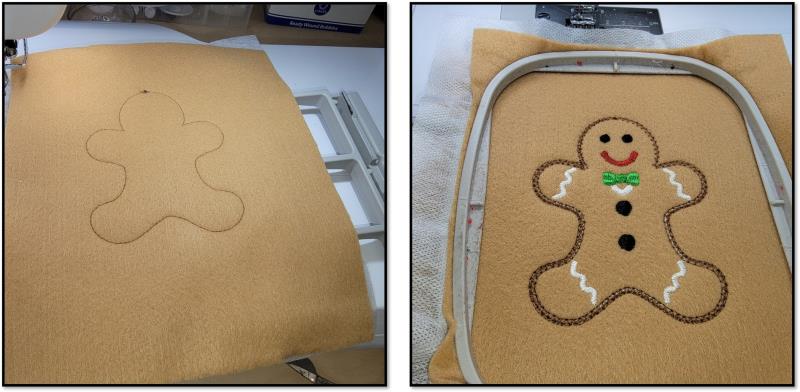
Place the matching bobbin in the machine. Place the hoop back on the machine—make sure the back piece of felt stays in position. Stitch the next color
(Click Image to Enlarge)
Step 11:
which is the outline which secures the piece of felt to the back. Stitch the zig zag stitch.
(Click Image to Enlarge)
Step 12:
Stitch the last color, which is the satin stitch.
(Click Image to Enlarge)
Step 13:
Remember, if you don’t have software to add the additional steps, for step 9 and 10, just go back to colors one and two and sew those after placing the felt on the back of the hoop. After those stitch, then advance forward through the colors to stitch the last color.
(Click Image to Enlarge)
Step 14:
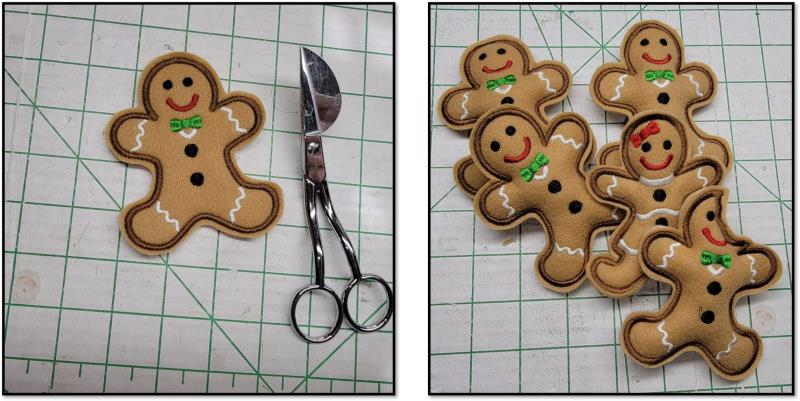
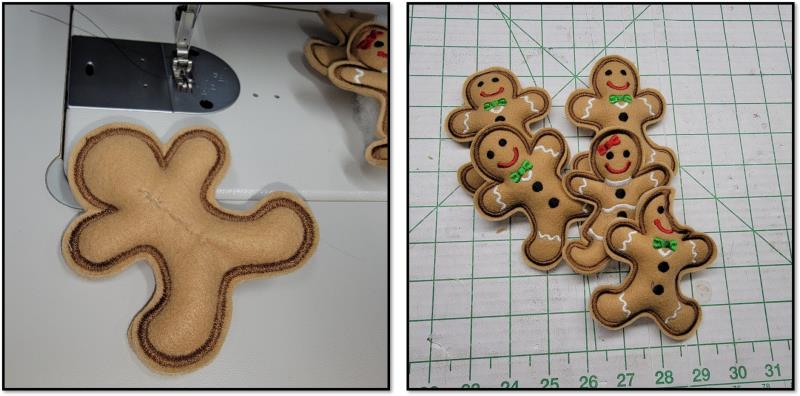
Remove the piece from the hoop. Repeat the steps to make five ginger boys, a girl, and one with a bite out of it.
(Click Image to Enlarge)
Step 15:
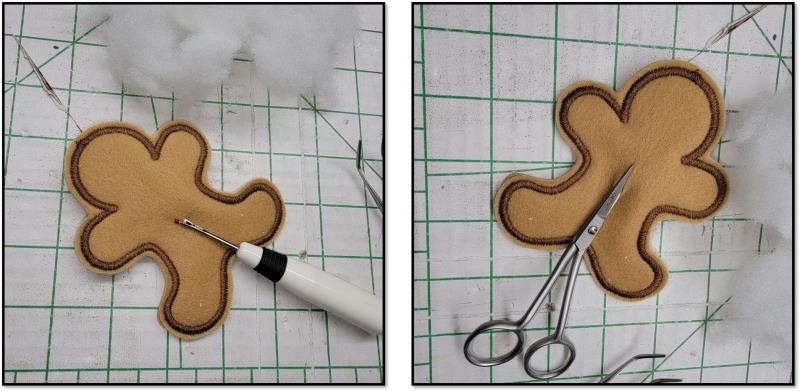
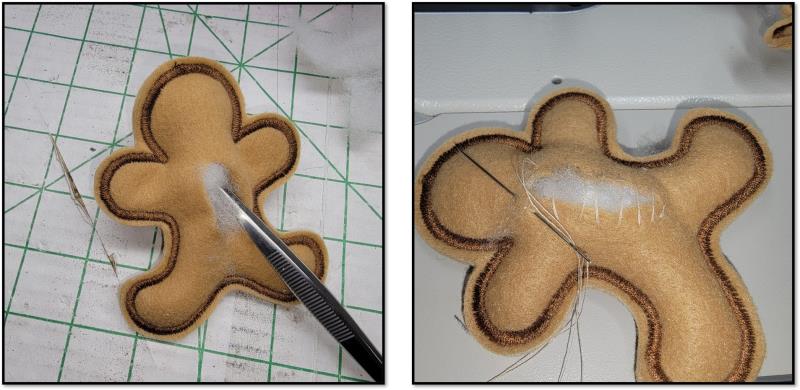
Using sharp scissors, trim each gingerbread about 2mm away from the outside of the stain stitching. Turn the piece over. Use a sharp seam ripper to poke a little hole at the center back, and then use the sharp scissors to cut the back with about a 1” opening.
(Click Image to Enlarge)
Step 16:
Begin stuffing the piece doing the legs first, then the head, and then the arms. Stuff lightly, but firmly. It is helpful to use tweezers to position the stuffing into the areas. Use a ladder stitch to close up the back.
(Click Image to Enlarge)
Step 17:
Repeat the steps for stuffing all the pieces.
(Click Image to Enlarge)
Step 18:
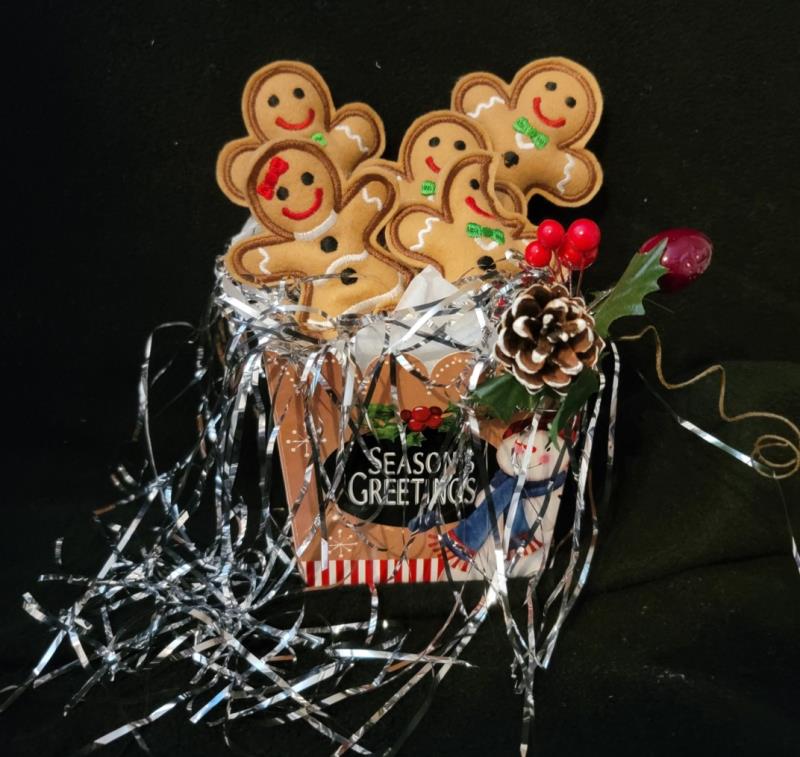
Make a whole basketful of these cute little designs. They’ll look adorable sitting in a basket on the kitchen table—they look almost good enough to eat!
Ramona Baird has been in the embroidery industry for over 23 years. She and her husband owned a commercial and retail embroidery store in Arizona for many years. She is an experienced digitizer having been mentored by award-winners Pat Williams and Lindee Goodall. Ramona is a contributor to “Creative Machine Embroidery” magazine having 5 covers to her credit. Ramona has worked for Wilcom America and served many years as Education Director for the American Sewing Guild. With a degree in fashion design, she is able to design and execute patterns which Pat Williams says are “out of the box” in creativity and application. Ramona likes to challenge the boundaries of embroidery and bring new and exciting designs, ideas, and projects to EmbroideryDesigns.com. She wants embroiderers of all levels to increase their skills and enjoyment in using their embroidery machine for gift-making and personal pleasure.