Border OptionsHugging border, circle, square, or rectangle — with a 3mm satin stitch.
Backing OptionsAvailable with iron-on, sew-on, or velcro backing.
Fast ShippingShipped quickly from the USA.
Free Online Tools
Powerful embroidery utilities that save time and prevent costly mistakes.
Stitch AssistantRECOMMENDED
Get the exact stabilizer, machine settings, needle, and thread color sequence for every embroidery design you purchase — based on that design's stitch density, dimensions, and color count.
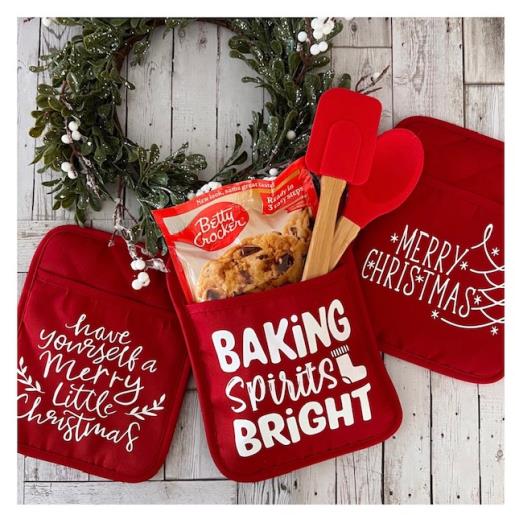
Create a festive Pot Holder Gift Set perfect for holiday gifting. Each holder features cheerful holiday messages, making them ideal for friends, family, and teachers. Step-by-step instructions are included.
Step
of
Festive Christmas Pot Holder Gift Set
By Linda Mills
This project is simple with easy to follow step by step instructions for those who have basic knowledge of a cutting machine, reversing images and how to weed design cut vinyl for a decal. Vinyl when cut and weeded will then be ironed onto pot holder application area for a personalized holiday greeting. Time stated of 1 hour is for completion of three pot holders.
Step 1:
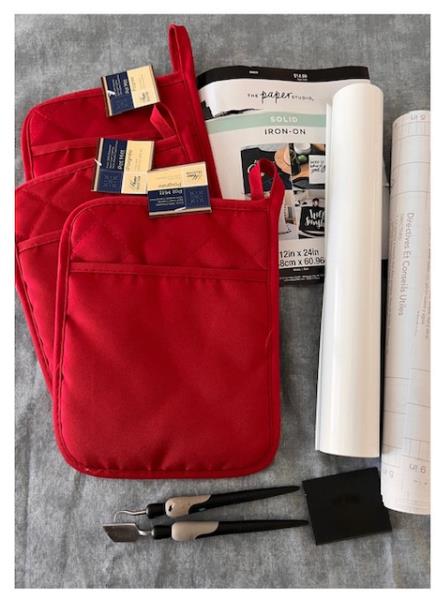
Gather all supplies and review instructions before beginning.
(Click Image to Enlarge)
Step 2:
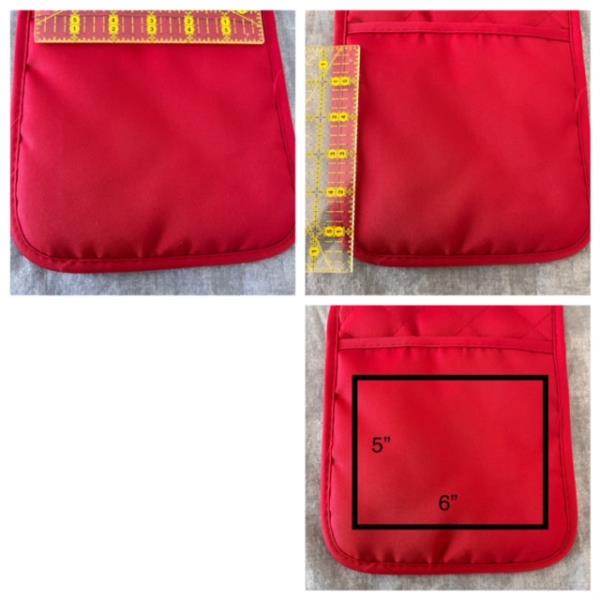
Measure your potholder’s pocket application area for decal. Potholder application area used in this tutorial measured 6” x 5”.
(Click Image to Enlarge)
Step 3:
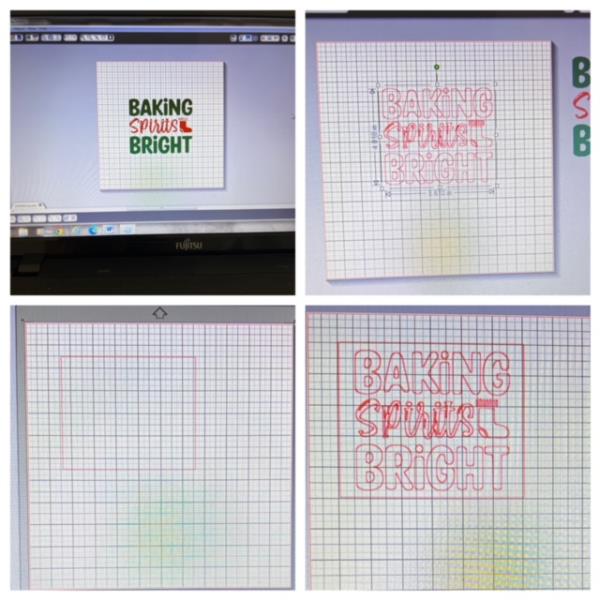
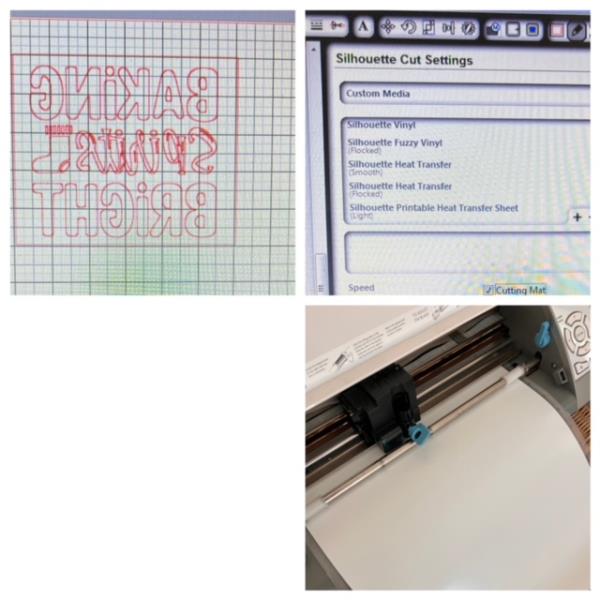
Bring into your cutting machine’s software design board SVG Baking Spirits. Cut. Create a rectangle on your design boards for reference of potholder application area when resizing. Resize design and use the rectangle to help you size correctly by placing design inside the rectangle. Design resized 4.5” x 5” to fit application area fit within the rectangle.
(Click Image to Enlarge)
Step 4:
Mirror Image. Adjust your cut settings for heat transfer vinyl or Iron on. Place your iron on/ heat transfer vinyl, shiny side down onto your mat. Insert mat. Test cut. If needed adjust the cut setting. Cut design onto vinyl.
(Click Image to Enlarge)
Step 5:
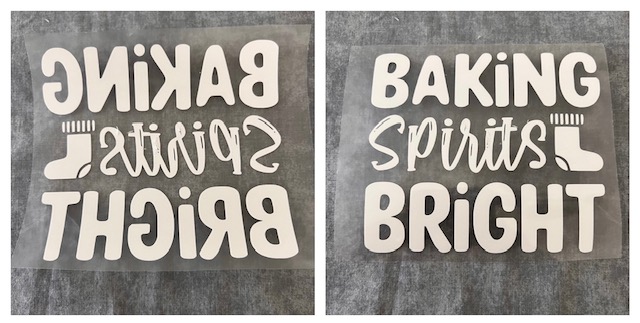
Cut finished. Remove mat and weed for a decal. Flip over your weeded design to ensure everything looks perfect and to see if you weeded correctly. Remove any excess iron-on material, leaving only cut images on the clear liner.
(Click Image to Enlarge)
Step 6:
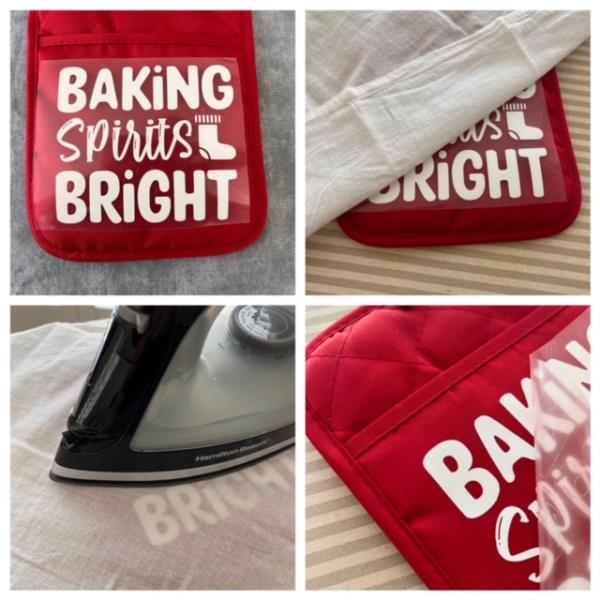
Center and position cut image decal shiny side up, atop application area of potholder pocket. Place your pressing cloth between the iron and the plastic liner. Iron on the decal. For this tutorial, an iron was used to apply and the iron setting was set at cotton/linen. Refer to your products instructions/recommendations for application. If using an Easy Press refer to your product’s instructions. Remove plastic liner from the adhered image. If any of the decal does not adhere, replace liner and press cloth over the image and re-iron. Firmly press for an additional 10 seconds.
(Click Image to Enlarge)
Step 7:
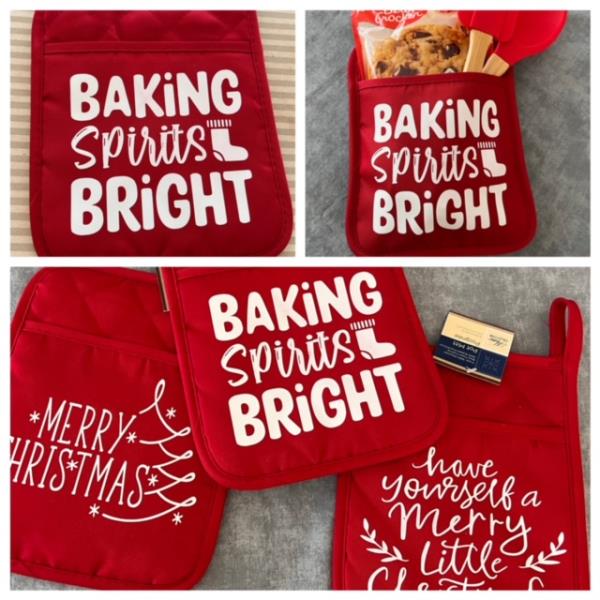
And you are done! Great job. Include a package of cookie mix with a baking utensil to complete your Holiday Potholder Gift Set. Make additional using the linked designs.