Border OptionsHugging border, circle, square, or rectangle — with a 3mm satin stitch.
Backing OptionsAvailable with iron-on, sew-on, or velcro backing.
Fast ShippingShipped quickly from the USA.
Free Online Tools
Powerful embroidery utilities that save time and prevent costly mistakes.
Stitch AssistantRECOMMENDED
Get the exact stabilizer, machine settings, needle, and thread color sequence for every embroidery design you purchase — based on that design's stitch density, dimensions, and color count.
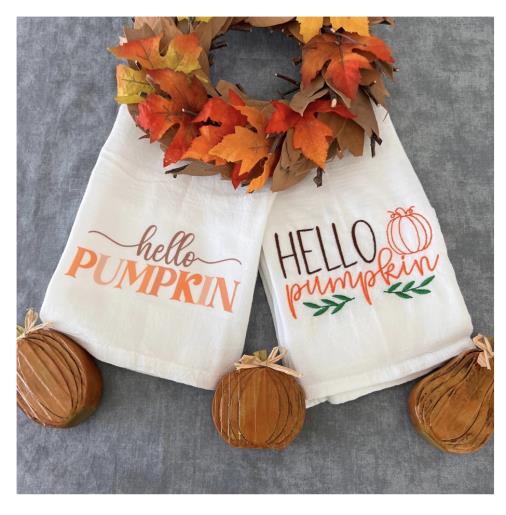
Welcome the autumn season with charming Hello Pumpkin tea towels, featuring applique embellishments. Perfect for adding a festive touch to your kitchen decor. Step-by-step instructions are included.
This tutorial is great for those with some experience of proficiency of machine embroidery and the basics of using a Word program to create a doc, reverse image and print onto an Iron On Transfer. Simple to follow step by step instructions that will give you two options of embellsihing store purchased blank flour sack tea towels. One with embroidery and the other using an Iron On Transfer. Embroidery design Hello Pumpkin size 4.13" x 6.81".
Step 1:
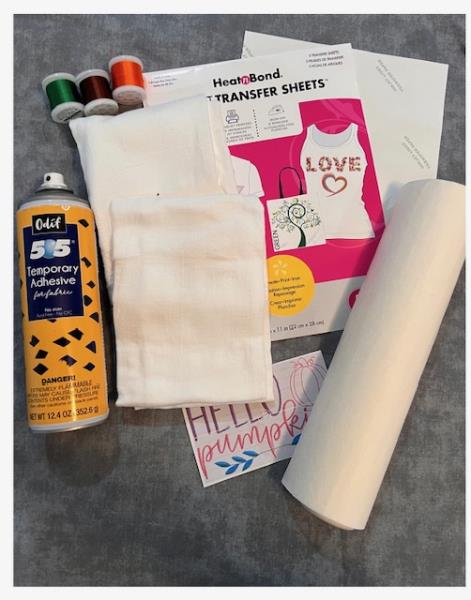
Gather all your supplies and review instructions before beginning. Print paper template of embroidery design. Iron press tea towels.
(Click Image to Enlarge)
Step 2:
Embroidery
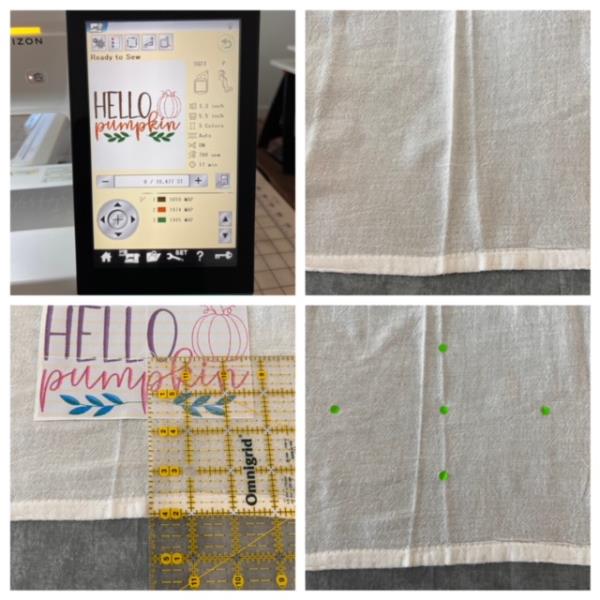
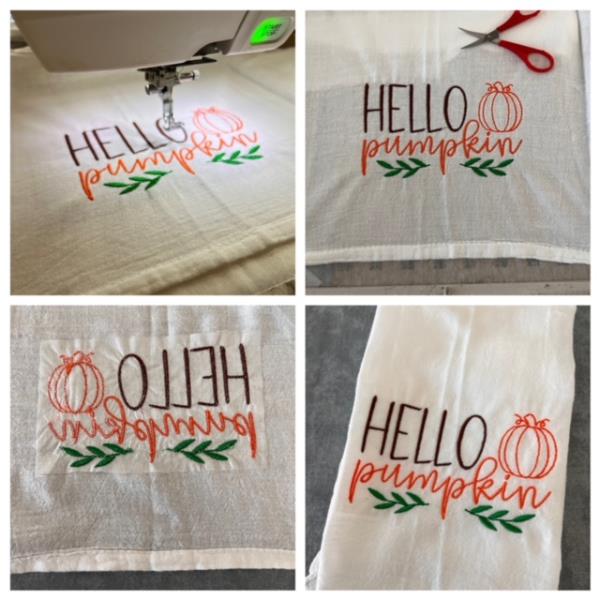
Load design into machine. Fold towel in half and iron press a creased center line. Center place paper design template 4“ up from bottom hem edge of towel to center of design. Mark axis and center points.
(Click Image to Enlarge)
Step 3:
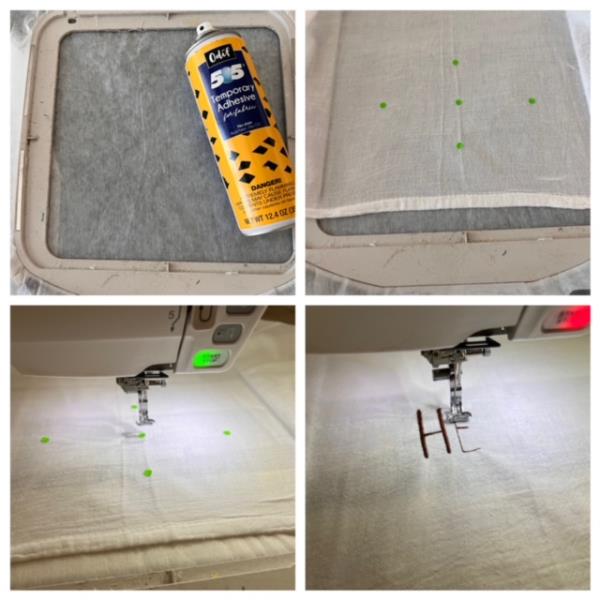
Cut a piece of stabilizer larger than your hoop. Hoop stabilizer. Spray temporary adhesive spray directly onto stabilizer. Center place tea towel matching marked axis points to your hoop’s built in axis markings. Finger press down to adhere and smooth out fabric. Attach hoop to machine. Confirm center needle placement to center of axis marking of design. If needed make any necessary adjustments. ( Refer to your machine’s instruction manual if needed.) Begin the embroidery stitch out process.
(Click Image to Enlarge)
Step 4:
Stitch out process complete. Detach hoop from machine. Cut and trim all jump stitches and loose thread ends. Remove towel from hoop. Cut away stabilizer 1/4” away from design. Woohoo! Embroidered towel is complete. Great job!
(Click Image to Enlarge)
Step 5:
Iron On Transfer
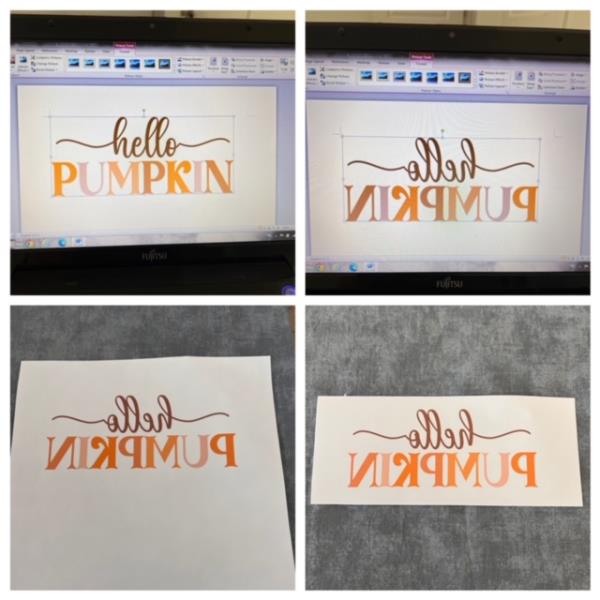
Open a blank word doc. Insert the Print Art. Resize to fit application area of your tea towel. Size for this tutorial 6" x 3". Reverse image and print onto iron on transfer sheet. Refer to your product’s instructions. To reverse image in a word doc 1) Right click the text/image box and choose Format Shape 20. Choose 3-D rotation in the left pane and Change the X setting to 180, Click ok and your image will flip and create a mirror image. Trim for easier placement onto towel.
(Click Image to Enlarge)
Step 6:
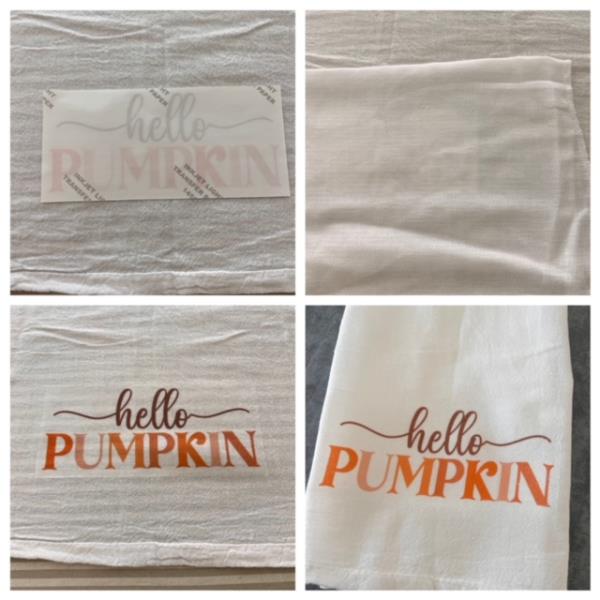
Center onto application area of towel. Refer to your product for iron on application instructions. *When ironing it is important to apply heavy and constant pressure along with ironing all areas of image to ensure a transfer. Lift and carefully remove transfer and you are done! Great job !
(Click Image to Enlarge)
Step 7:
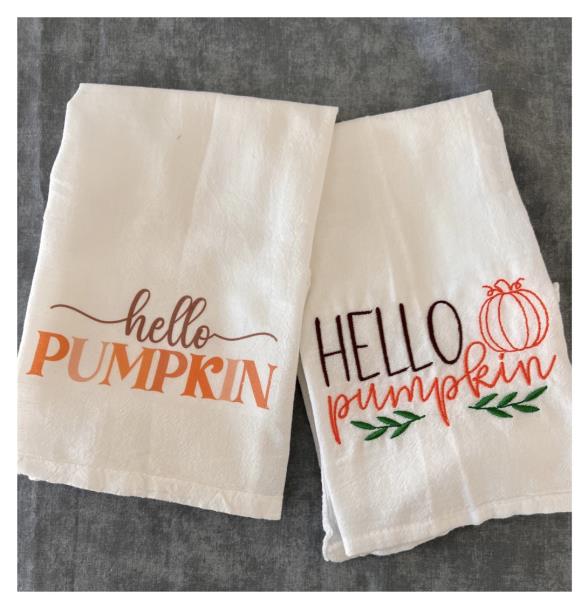
Your Hello Pumpkin Tea Towels are finished! Makes a great gift set of tea towels using of two different techniques.