Border OptionsHugging border, circle, square, or rectangle — with a 3mm satin stitch.
Backing OptionsAvailable with iron-on, sew-on, or velcro backing.
Fast ShippingShipped quickly from the USA.
Free Online Tools
Powerful embroidery utilities that save time and prevent costly mistakes.
Stitch AssistantRECOMMENDED
Get the exact stabilizer, machine settings, needle, and thread color sequence for every embroidery design you purchase — based on that design's stitch density, dimensions, and color count.
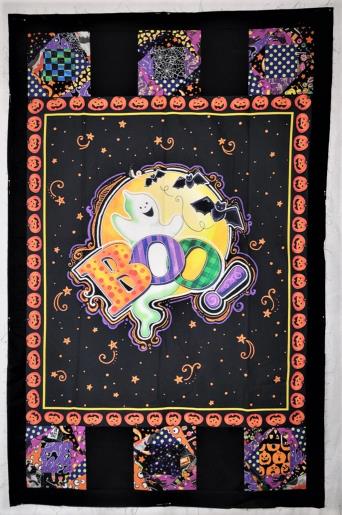
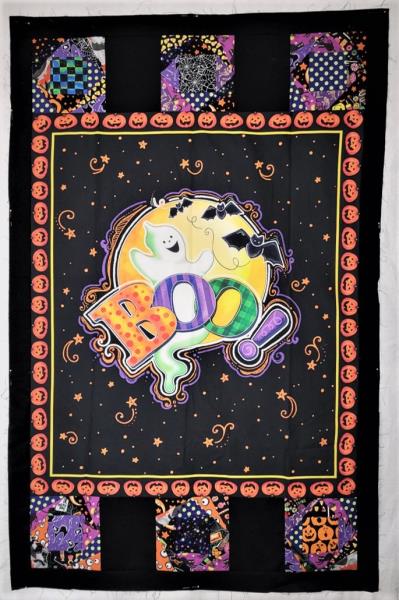
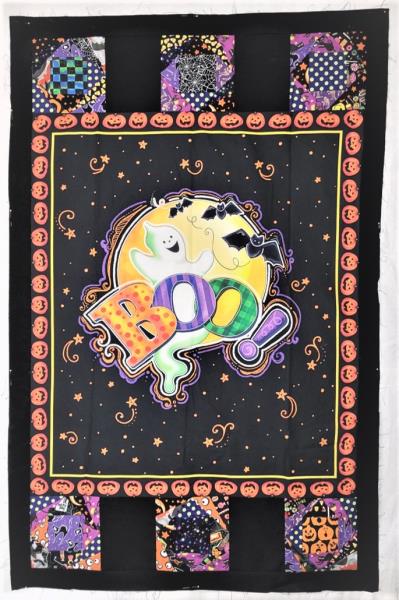
Create a vibrant Halloween quilt with these ITH Twister blocks, featuring spooky motifs and colorful patterns. Perfect for adding a festive touch to your seasonal decor. Step-by-step instructions are included.
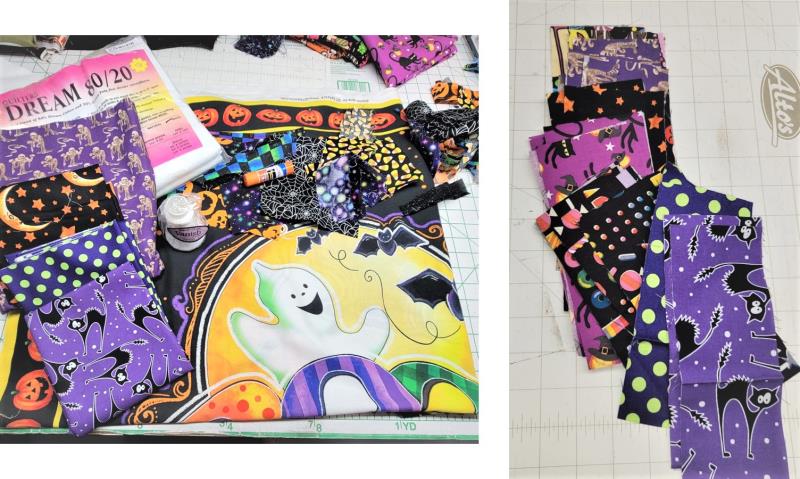
12- 3.5” x 6” scraps of various prints to coordinate with the rest of the project
1- Fibrous water-soluble stabilizer to fit hoop
Embroidery thread to coordinate with fabrics
Fabric glue stick
Small iron that can be used in the hoop
Also, depending upon the project for which you are using the block, chose all the rest of the materials like sewing thread, batting, a printed panel, etc.
The ITH Twister Block can be used with any scrap fabrics, just theme the fabrics to coordinate with the quilt you are making.
Step 1:
(Click Image to Enlarge)
Read through the instructions thoroughly before beginning and assemble all the materials needed to complete the project. Use the block as a stand-alone in a project, for a pocket on a tote bag, as a part of a pillow, or whatever you like. You’ll be using this block over and over! If a quilt like this project, purchase the batting, a printed panel, backing and border fabrics, etc. These instructions show how to complete the ITH Twister Block, and just generally go over the steps I used to attach the blocks to the printed panel. There are so many wonderful printed panels in quilt shops, so choose what you like. Blocks can be used to add more length and width to a child’s lap quilt such as this one, and borders can also be added to further enlarge a quilt. Blocks like these are a wonderful way to use up some of the smaller pieces of fabric in your stash.
Step 2:
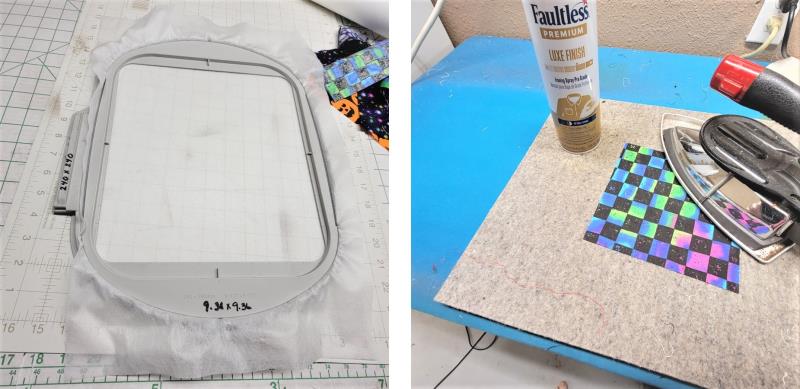
Choose scrap fabrics or purchase fat quarters or fabric yardage that compliments the printed panel. Starch the fabrics and press them well. Cut the number of fabrics needed for each block. The fabrics are cut larger than needed so they are easier to handle and give good coverage.
(Click Image to Enlarge)
Step 3:
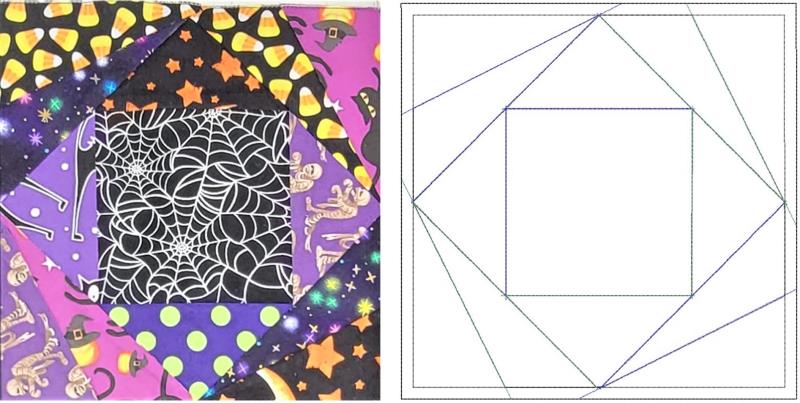
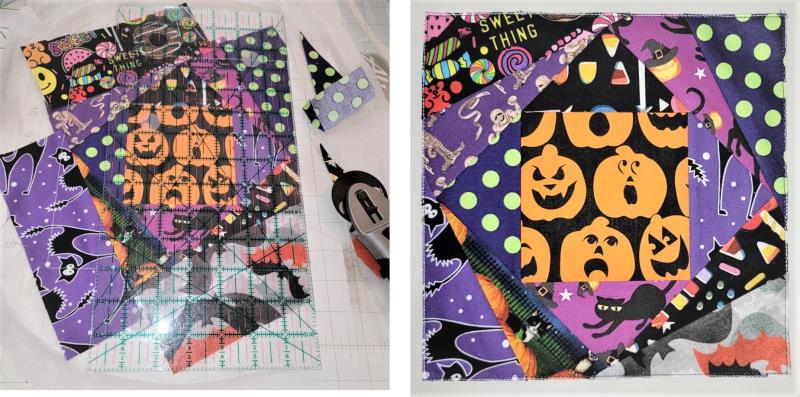
The photo on the left is how the finished block will look. The photo on the right is what the design looks like.
(Click Image to Enlarge)
Step 4:
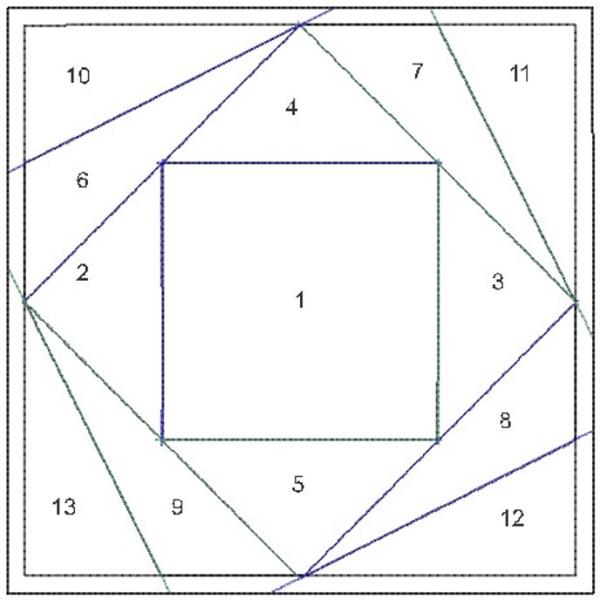
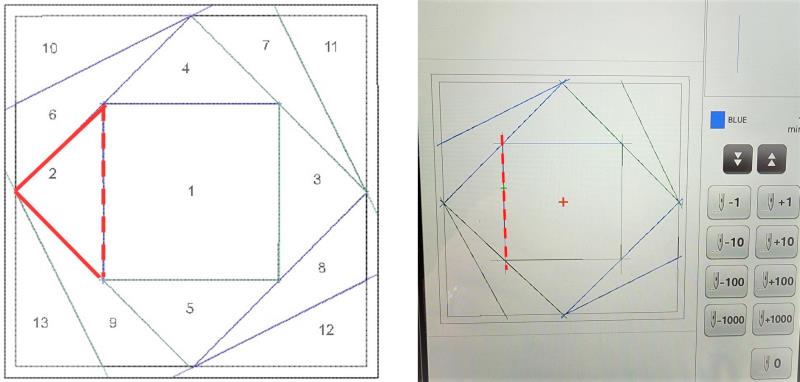
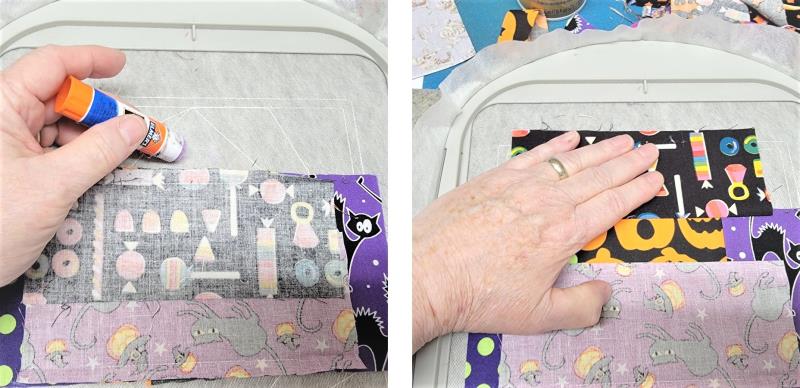
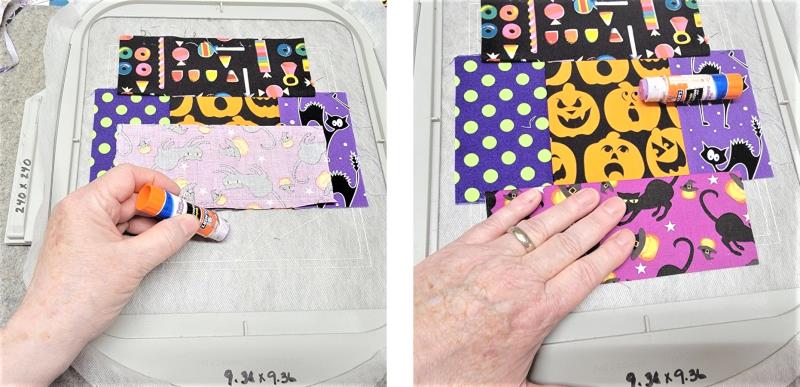
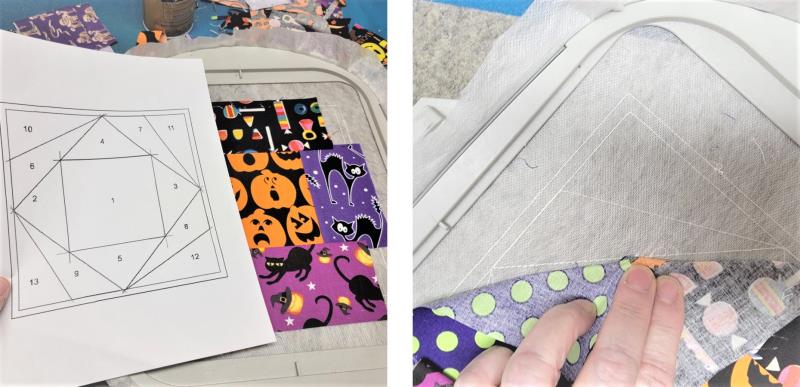
Print out this picture so you can follow the diagram. The numbers show the order in which the fabrics will be placed. The first block is the only block that starts right side up. The rest of the pieces 2-13 will be placed right side down, the seam is sewn, and then the fabric is flipped right side up, pressed, and temporarily glued in place. The lines shown are the seam lines.
(Click Image to Enlarge)
Step 5:
Hoop a piece of fibrous water-soluble stabilizer. Be sure all the pieces are starched and pressed well.
(Click Image to Enlarge)
Step 6:
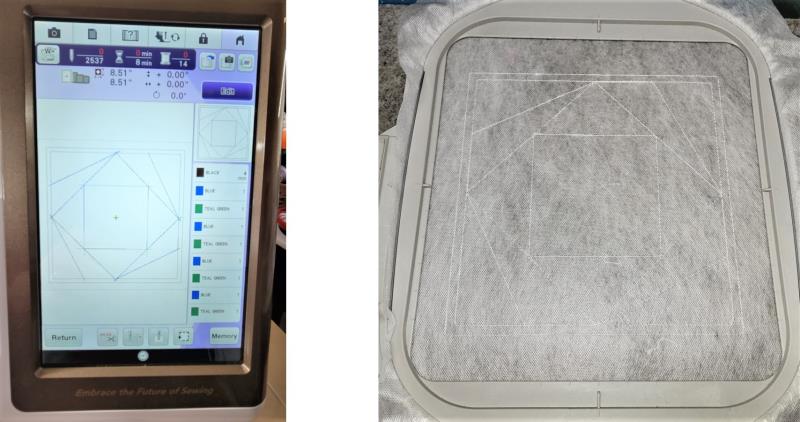
Load the design on the machine. Place the hoop on the machine and stitch Color 1, which is the outline of the block.
(Click Image to Enlarge)
Step 7:
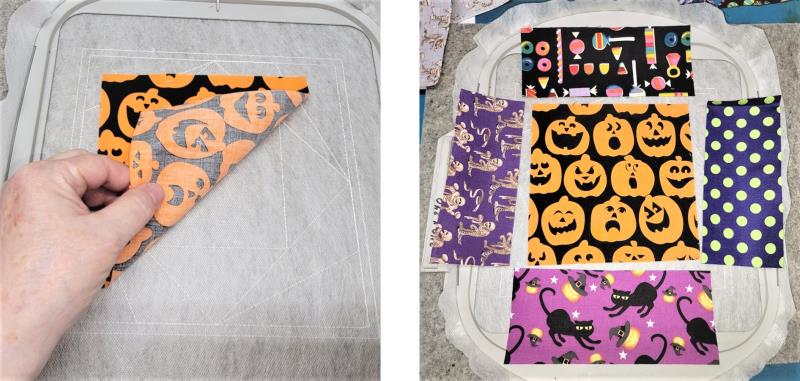
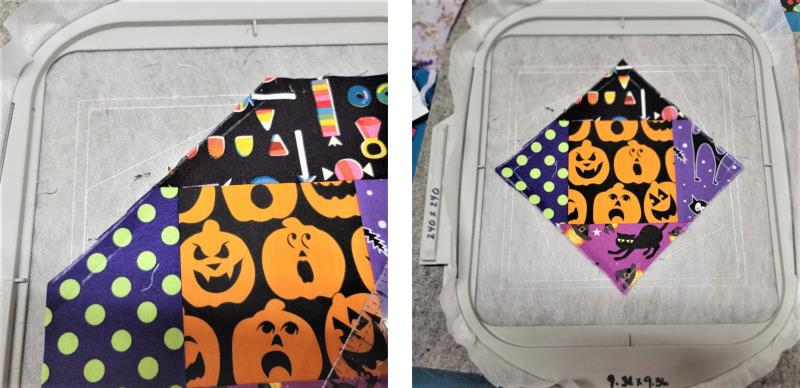
Remove the hoop from the machine. Place the center 6” x 6” piece of fabric right side up over the center square. Use a little of the fabric glue stick to hold it in place. Now choose the next four fabrics to go around the center block.
(Click Image to Enlarge)
Step 8:
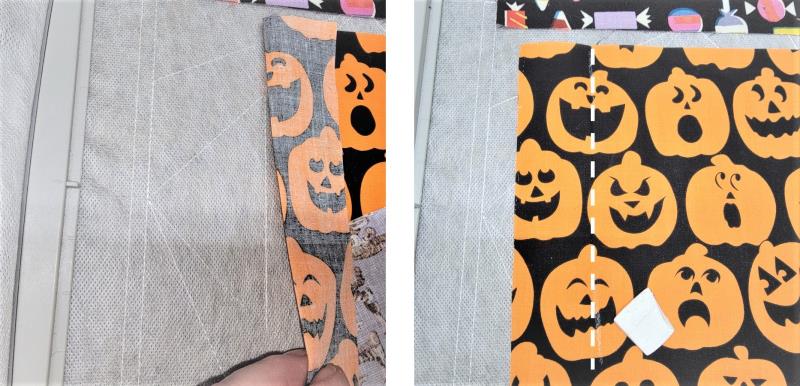
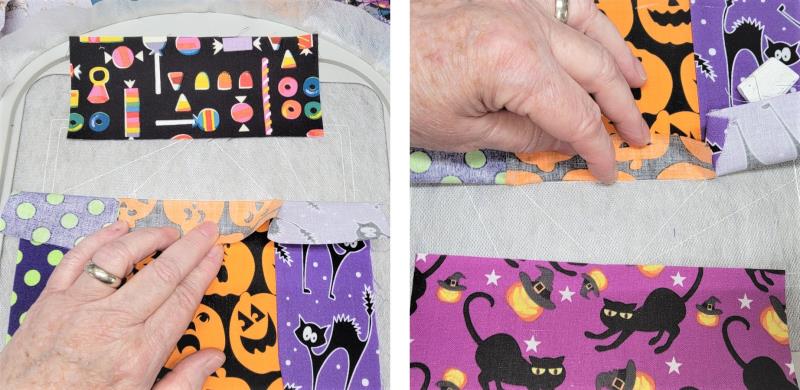
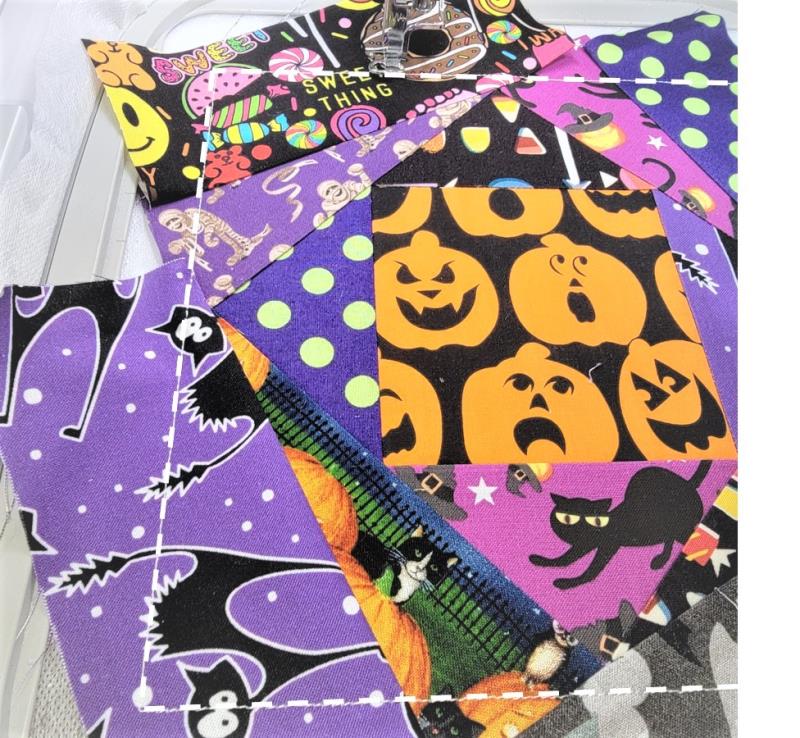
To help with where to place the cut edges of the subsequent fabrics, fold back the edges of the center square along the stitched line and finger press. This will give a line on the right side of the fabric showing where the stitching lines will be. Mark a line ¼” outside of this creased line.
(Click Image to Enlarge)
Step 9:
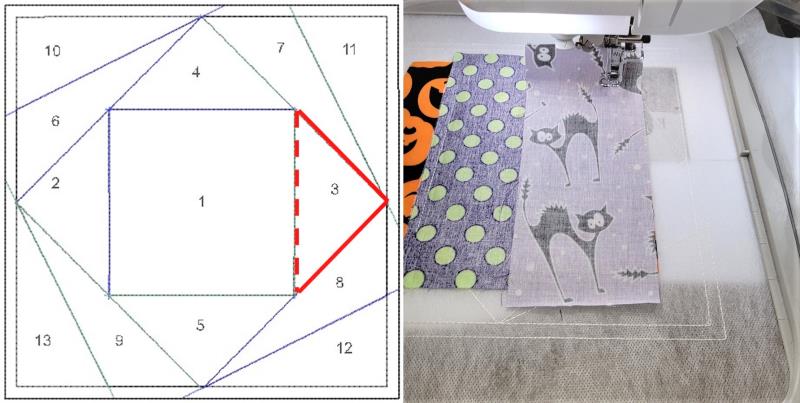
Following the guide, piece 2 is the next to be stitched down. The fabric needs to cover the entire area to the outer edge at the left. The dotted line is the seam line that will be sewn.
(Click Image to Enlarge)
Step 10:
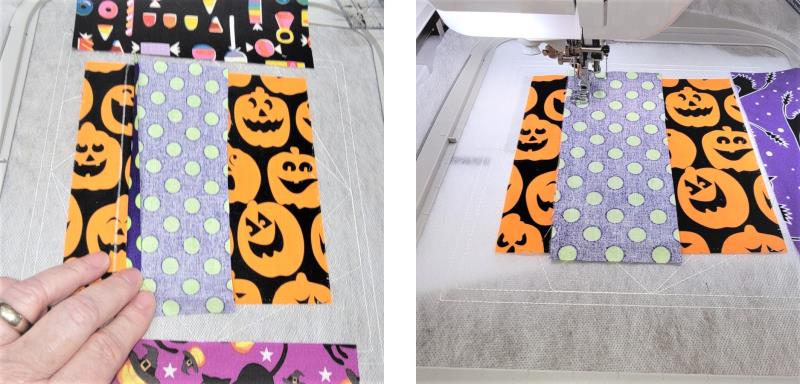
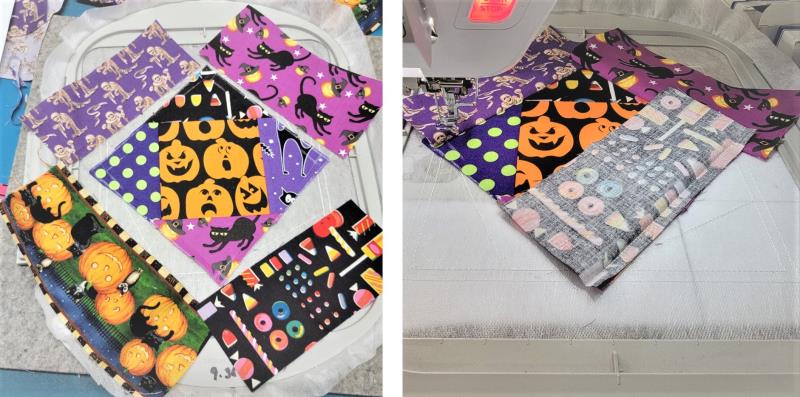
Lay the fabric for area 2, right side down, with the raw edge along the marked line; this gives a ¼” seam allowance. Place the hoop back on the machine and stitch Color 2, the seam line.
(Click Image to Enlarge)
Step 11:
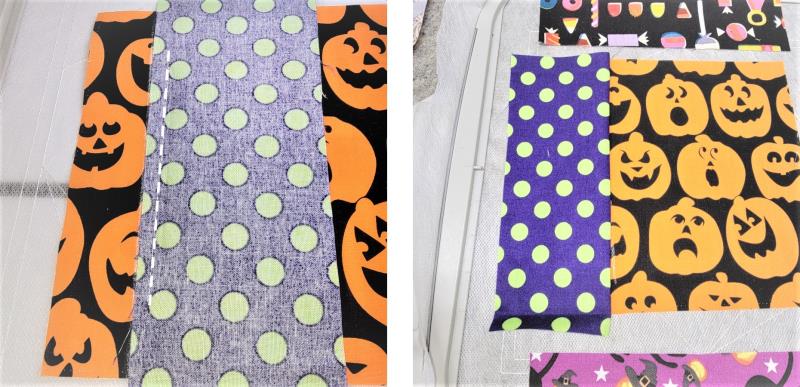
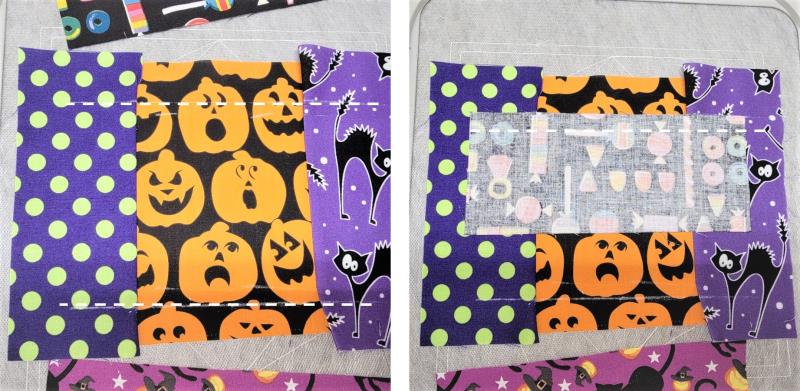
Here is the sewn seam as indicated by the dotted line. Flip the fabric to the left so that the right side is up. Press the seam with the small iron. Now all the rest of the pieces are done in the same manner: marking, laying the fabric right side down, stitching the seam, and then flipping the fabric to the right side.
(Click Image to Enlarge)
Step 12:
The next fabric is to cover area 3. Mark the line ¼” away from the fold line like was done before, place fabric 3 right side down matching the cut line to the marked line. Stitch Color 3, to stitch the seam.
(Click Image to Enlarge)
Step 13:
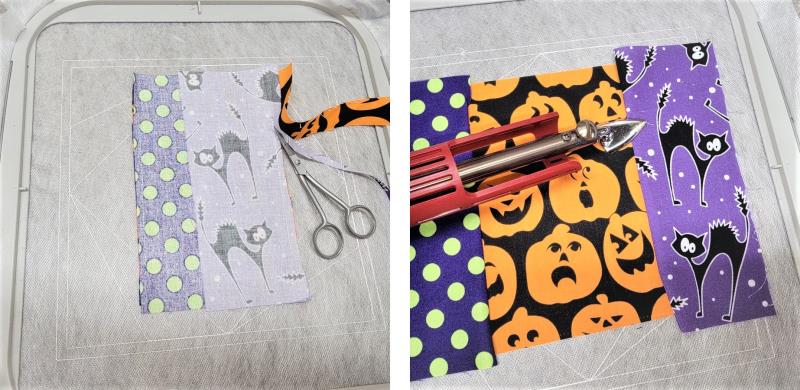
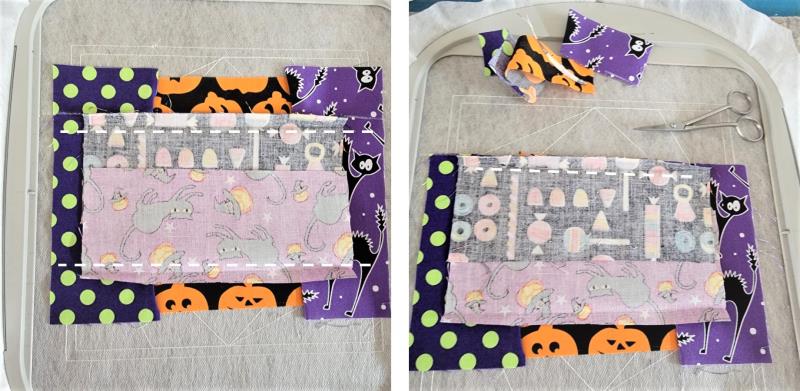
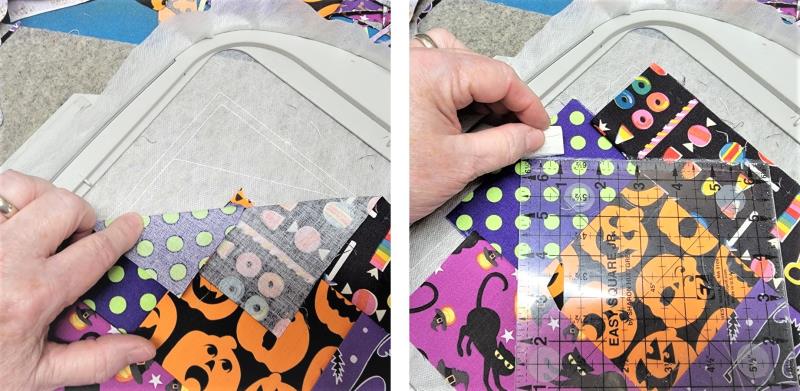
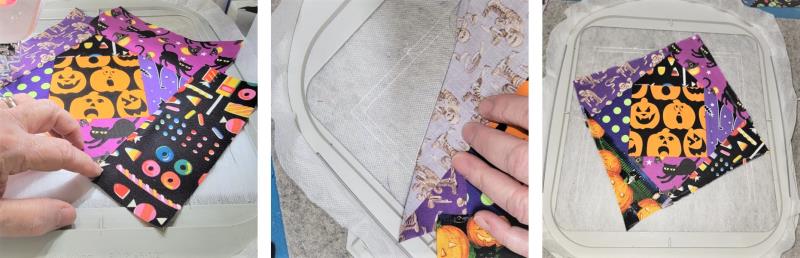
Trim the 2nd and 3rd fabric seam allowances down to 1/4”. Fold the fabrics to the right side and press the seams with the small iron.
(Click Image to Enlarge)
Step 14:
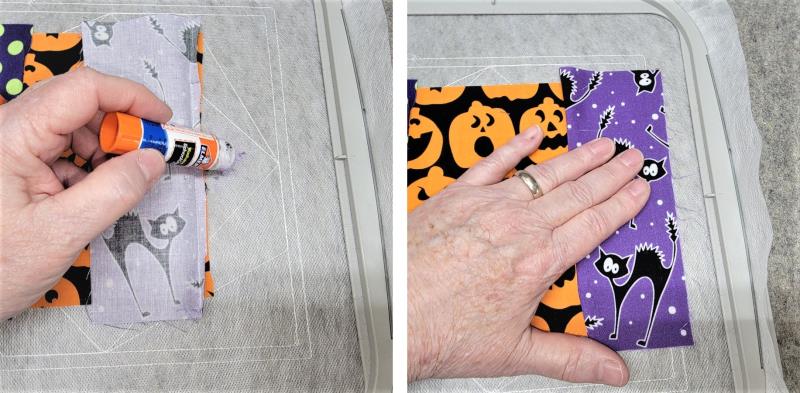
Place a dab of the fabric glue down under the fabrics and press them in place.
(Click Image to Enlarge)
Step 15:
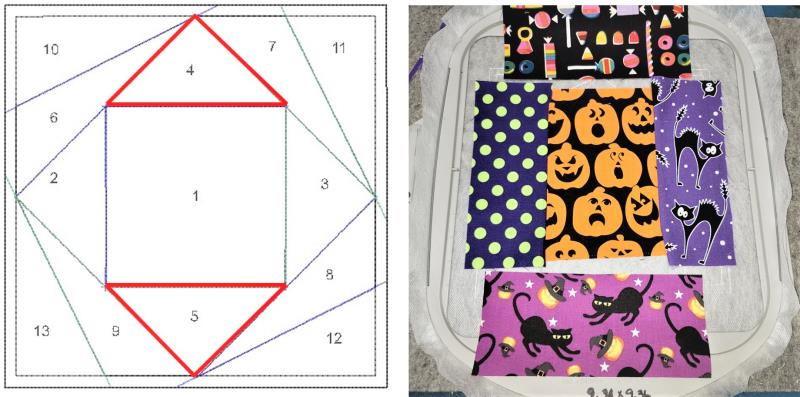
Now repeat the steps for pieces 4 and 5.
(Click Image to Enlarge)
Step 16:
Fold back the center fabric along the stitching line, crease.
(Click Image to Enlarge)
Step 17:
Mark ¼” away from the creased line. Place fabric 4 with the cut edge along the marked line. Stitch the seam.
(Click Image to Enlarge)
Step 18:
Repeat for fabric 5. Trim the seam allowances to ¼”; press the fabrics into position.
(Click Image to Enlarge)
Step 19:
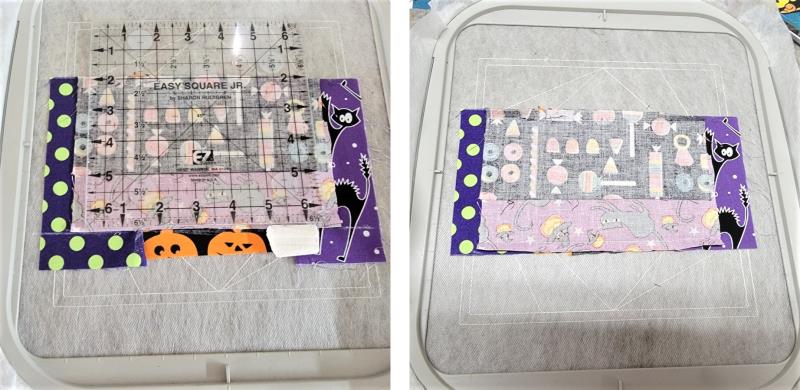
If it helps for measuring and cutting, use a small ruler with a straight edge for marking the placement line and trimming line for the seam allowances.
(Click Image to Enlarge)
Step 20:
Place a small amount of glue stick down and press the fabric into place.
(Click Image to Enlarge)
Step 21:
Continue the same steps for fabric 5.
(Click Image to Enlarge)
Step 22:
Follow the guide for fabric 6. Fold back the fabrics along the line and crease.
(Click Image to Enlarge)
Step 23:
Mark a line ¼” beyond the creased line.
(Click Image to Enlarge)
Step 24:
Tip: if it is easier for you, the fabrics can be trimmed after marking and then the next fabric placed right side down with the cut edge matching the trimmed edge. To me this adds an extra step, but it may be easier for you.
(Click Image to Enlarge)
Step 25:
Choose the next four fabrics. When choosing the fabrics, make sure the same prints are not touching each other; plain fabrics may also be used—they don’t all have to be prints.
(Click Image to Enlarge)
Step 26:
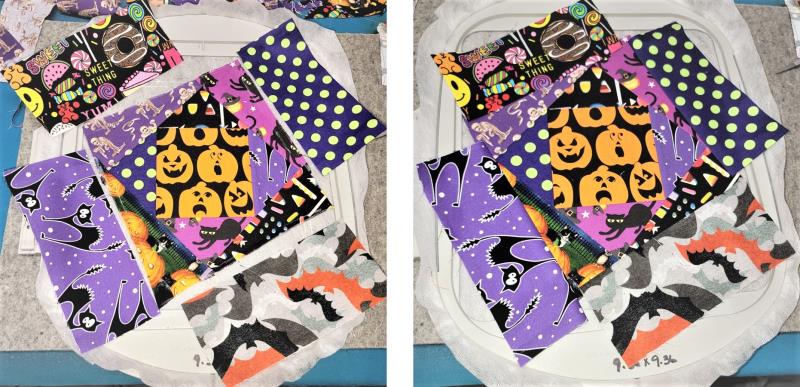
Follow the steps to place down the remaining fabrics.
(Click Image to Enlarge)
Step 27:
Fabrics can be duplicated, just make sure they are placed around the block in a pleasing manner.
(Click Image to Enlarge)
Step 28:
The last seam to stitch is around the whole block, which will tack down all the outer fabric edges.
(Click Image to Enlarge)
Step 29:
Remove the piece from the hoop and trim all the way around the block using the preferred seam allowance—1/4” was used for the project. I was doing.
(Click Image to Enlarge)
Step 30:
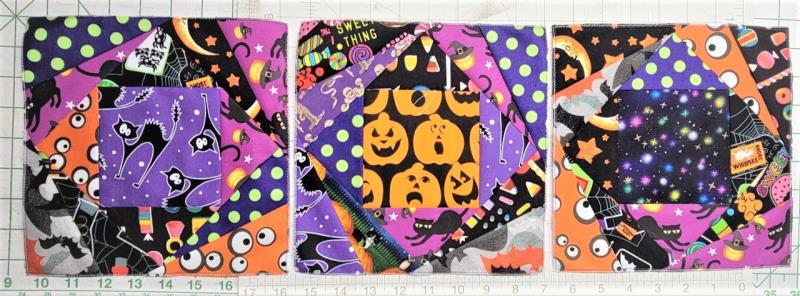
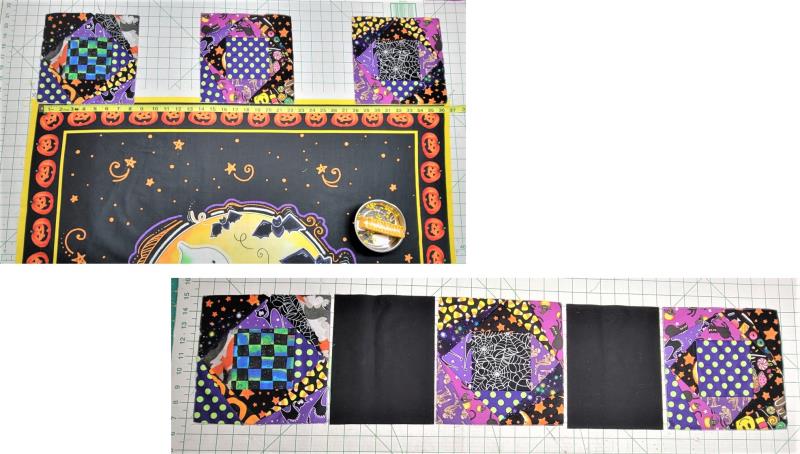
Stitch as many of the ITH Twister blocks needed for the project. I stitched three for the top of the panel,
(Click Image to Enlarge)
Step 31:
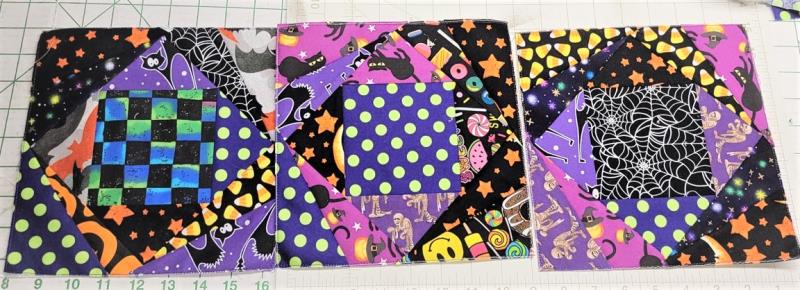
and three for the bottom. I used left over scraps and yardage to cut the fabrics.
(Click Image to Enlarge)
Step 32:
All printed panels differ in their size, so decide where the blocks are to be placed in your project. I decided to place the blocks to match the outer edges of printed panel and then measured and cut plain black fabric to stitch between the blocks.
(Click Image to Enlarge)
Step 33:
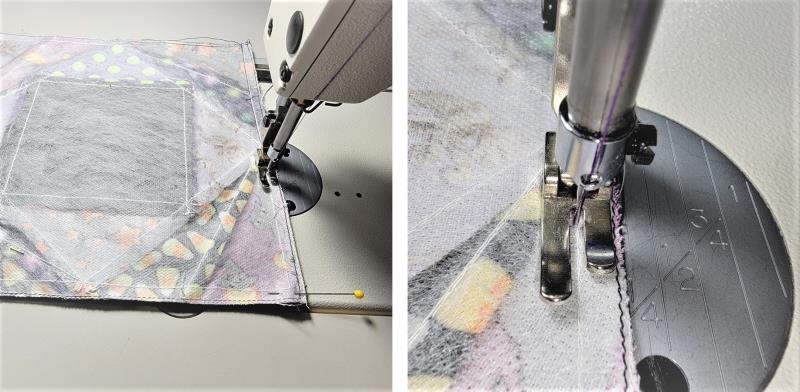
When stitching the sections together, the outer seamline of the block was used as a guide for stitching.
(Click Image to Enlarge)
Step 34:
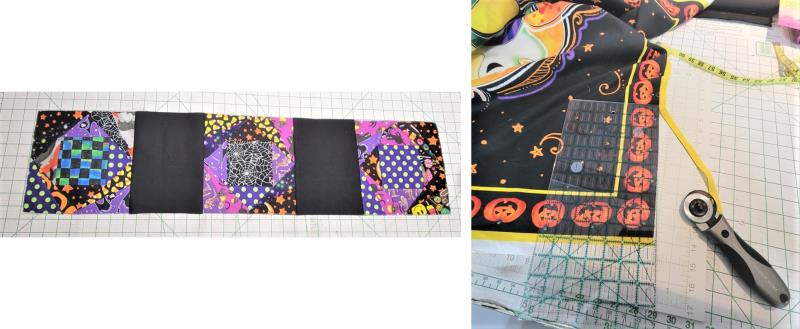
The panel was squared up.
(Click Image to Enlarge)
Step 35:
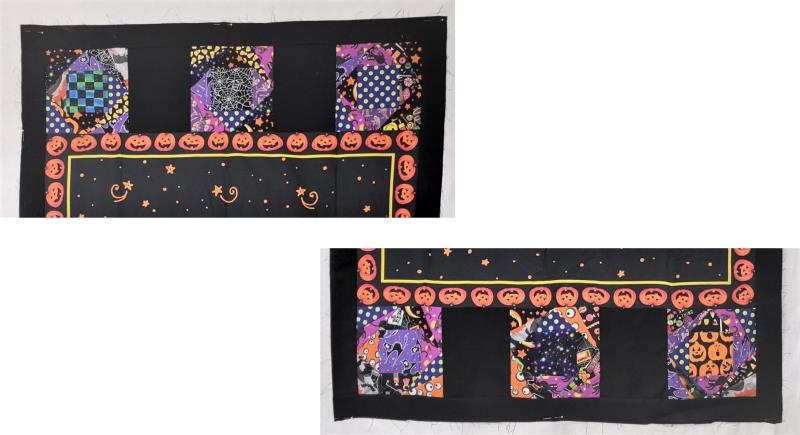
The block sections were stitched to the top and bottom of the quilt. Small borders were added to further enlarge the quilt. Do what you’d like for the size you need.
(Click Image to Enlarge)
Step 36:
(Click Image to Enlarge)
Quilt and bind your project as desired. Please check out the quilting designs listed in the Related Products Links to quilt your project in the hoop!
Ramona Baird has been in the embroidery industry for over 23 years. She and her husband owned a commercial and retail embroidery store in Arizona for many years. She is an experienced digitizer having been mentored by award-winners Pat Williams and Lindee Goodall. Ramona is a contributor to “Creative Machine Embroidery” magazine having 5 covers to her credit. Ramona has worked for Wilcom America and served many years as Education Director for the American Sewing Guild. With a degree in fashion design, she is able to design and execute patterns which Pat Williams says are “out of the box” in creativity and application. Ramona likes to challenge the boundaries of embroidery and bring new and exciting designs, ideas, and projects to EmbroideryDesigns.com. She wants embroiderers of all levels to increase their skills and enjoyment in using their embroidery machine for gift-making and personal pleasure.