Border OptionsHugging border, circle, square, or rectangle — with a 3mm satin stitch.
Backing OptionsAvailable with iron-on, sew-on, or velcro backing.
Fast ShippingShipped quickly from the USA.
Free Online Tools
Powerful embroidery utilities that save time and prevent costly mistakes.
Stitch AssistantRECOMMENDED
Get the exact stabilizer, machine settings, needle, and thread color sequence for every embroidery design you purchase — based on that design's stitch density, dimensions, and color count.
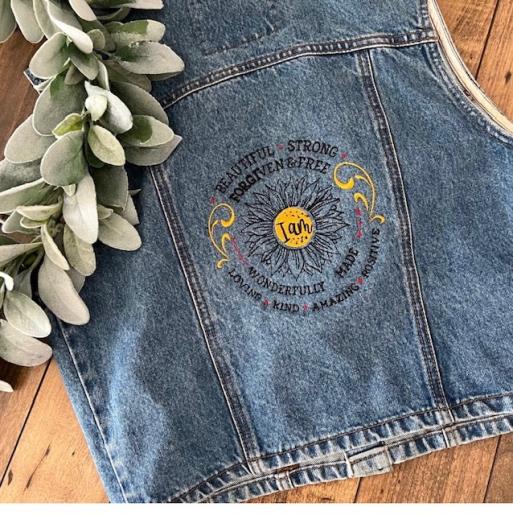
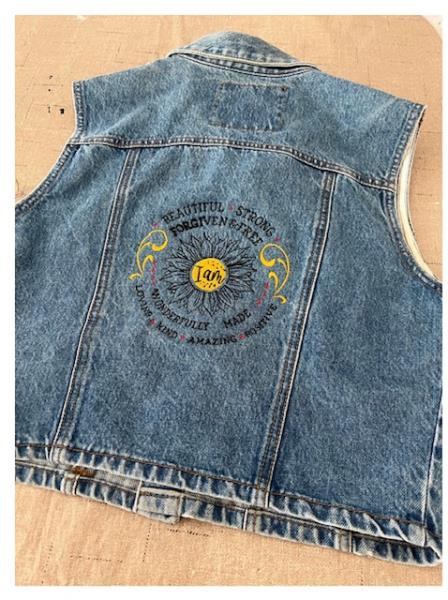
Enhance your denim vest with a striking applique featuring inspirational words and decorative flourishes. This project allows you to personalize your clothing with meaningful expressions of self-affirmation. Step-by-step instructions are included.
Step
of
Applique Denim Vest with Motivational Words
By Linda Mills
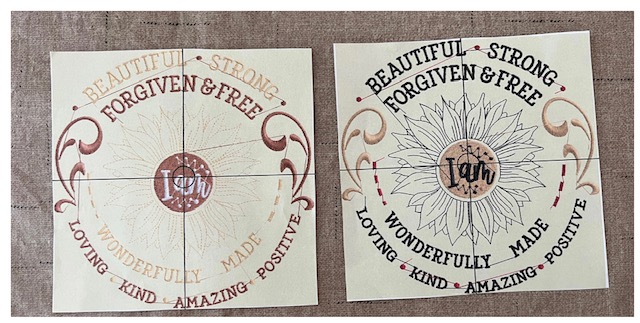
Denim is a great fabric to embroider on as it is such a durable fabric to withstand the stitch out of an embroidery design. Denim can shrink so you will want to launder before you add your embroidery design. Refer to embroidery design file thread color chart for stitch out or your choice of colors. An embroidery software program was used to edit thread colors for a visual. Refer to picture of paper template of design ( Step 2) as the one on the left reveals the colors from the embroidery design file and the right reveals the edited version. As you can see different thread colors can change the softness and boldness of an embroidery design. Either way this design will look great on the back of your vest. Use a size 11or 75/11 sharp sewing needle or embroidery needle to embroider onto denim. Embroidery design filed used in this tutorial: 5.92” x 5.89”. Hoop size: 6” x 10”
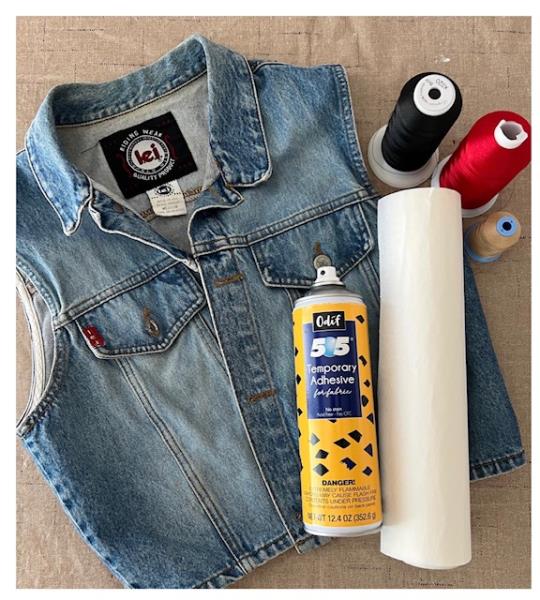
Step 1:
Gather all supplies and review instructions before beginning.
(Click Image to Enlarge)
Step 2:
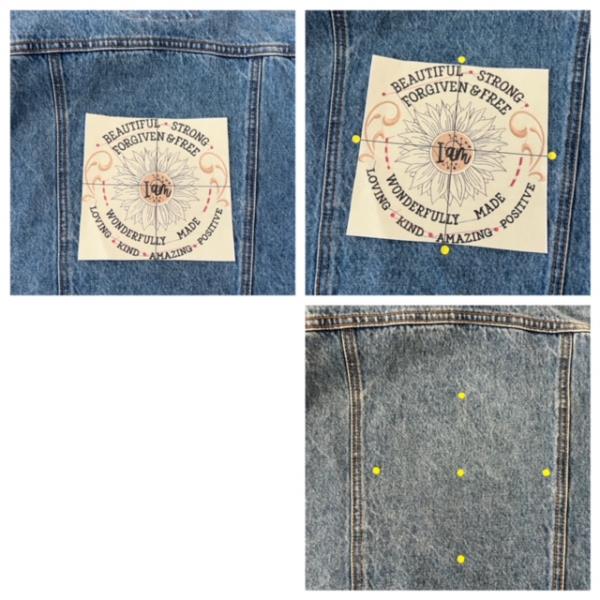
Print out a paper template of embroidery design file.
(Click Image to Enlarge)
Step 3:
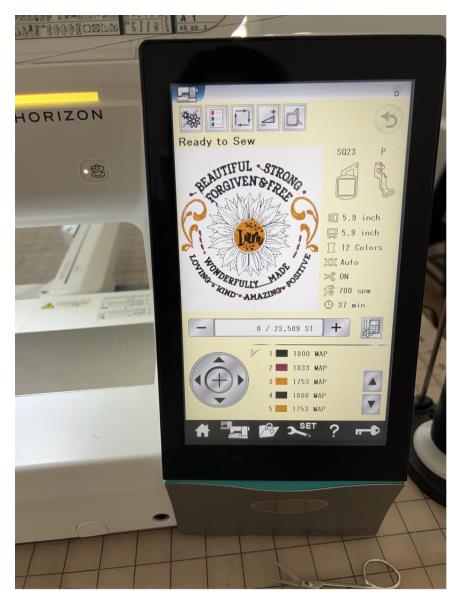
Load embroidery design file "I Am" into your machine.
(Click Image to Enlarge)
Step 4:
Center place paper design template on to back of vest. Mark axis points.
(Click Image to Enlarge)
Step 5:
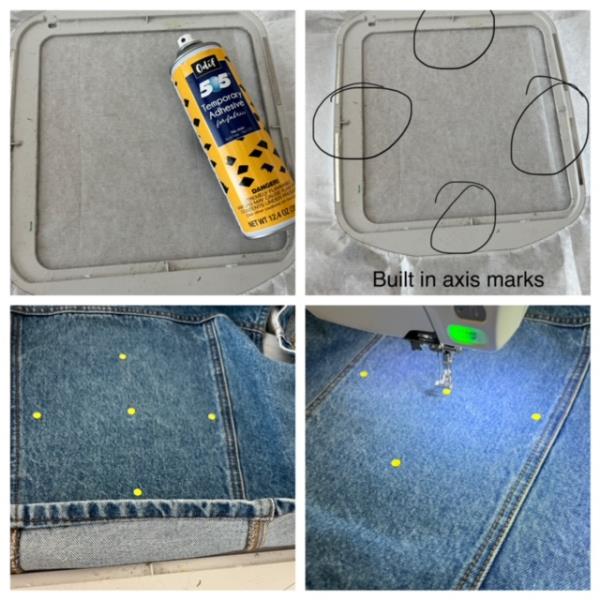
Hoop stabilizer Spray temporary adhesive spray directly onto stabilizer. Center place vest matching axis points to hoops built in axis markings. Finger press down onto stabilizer to secure and smooth out. If needed spray additional temporary adhesive spray.
(Click Image to Enlarge)
Step 6:
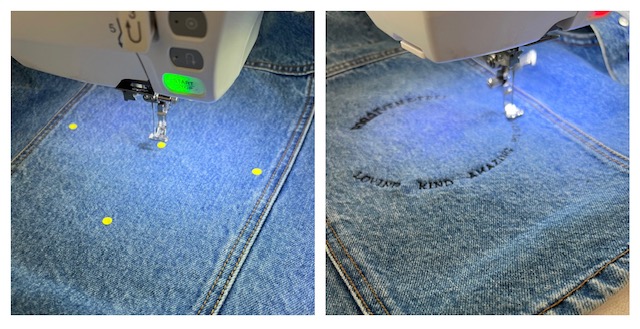
Attach hoop to machine. Confirm center needle placement. Stitch out at 700 SPM ( Stitches Per Minute) will take approximately 35 min. Begin the embroidering stitch out process.
(Click Image to Enlarge)
Step 7:
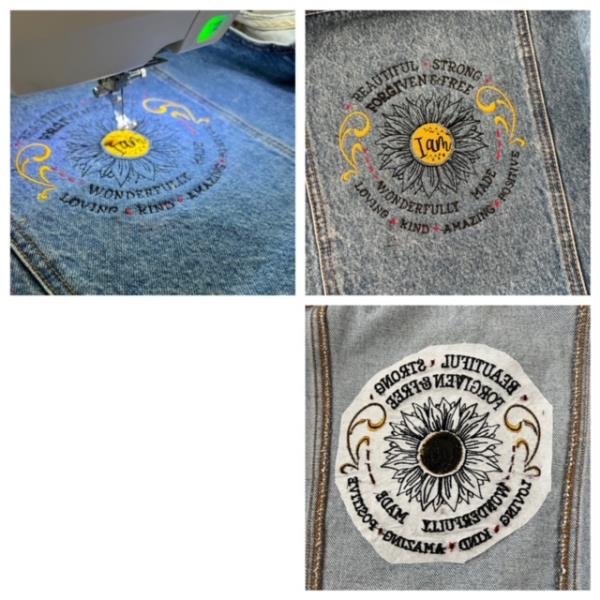
Stitch out complete. Detach hoop. Cut/trim jump stitches and loose thread ends from front and back. Trim stabilizer ¼” – ½” away from stitched design. Iron press if needed.
(Click Image to Enlarge)
Step 8:
Great job! Your personalized “I Am” styled embroidered vest is complete! Check out the ED website for additional designs for personalizing your style.