















































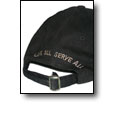


Backfield In Motion: Programming and Sewing Cap Backs Embroidery Project
Overcoming the challenges of cap back embroidery is essential to surviving in today’s competitive marketplace.
Materials
Project Preview Video

Cut Away Stabilizer - 2.5 Oz wt.

Cut Away Stabilizer - 2 oz wt.
Overcoming the challenges of cap back embroidery is essential to surviving in today’s competitive marketplace.
Sewing on the back of a cap can be a challenge (just like everything else about embroidery) due to a combination of factors including limited area, a compound curved surface (two directions) and various obstructions. Combine this with a low profit margin and cap backs suddenly began to lose their appeal as a viable embroidery option. However, cap back embroidery is still very popular; thus, you must overcome the obstacles if you want to survive in a competitive marketplace. There are two distinct challenges with sewing on the back of a cap: programming and hooping. Though they both work hand-in-hand, each one will be addressed separately. |

Hooping Cap Backs Before taking on a cap back job, you must first understand what hooping options are available to you, as this will define how much area is available to you for sewing. Most embroiderers mistakenly believe that their only choice is to use a 12cm round hoop. This is incorrect. There are three very viable methods for framing the back of a cap. Each requires a different frame and each yields a different amount of sewing space.
|


Method #2: Clamping System
Clamping systems, such as the ones manufactured by HoopTech, have revolutionized the embroidery industry, simplifying difficult hooping jobs and even making formerly impossible tasks quite doable. The first advantage of a clamp over a tubular frame is sewing area. This method provides access above the opening and partly down the sides, allowing for wider designs and longer text. (In fact, there are clamp frames specifically designed for sewing on the back of a cap.) |

In addition, the hooping process is much easier, as it’s done on the machine. Simply open the clamp, slide the back of the cap in, and then lock the clamp down. On other nice thing about a clamping system is that it’s not limited to sewing on a cap back. Using different size clamp frames, the system can be applied to many difficult hooping applications, therefore providing multiple solutions to various embroidery challenges.
In most cases, this cap frame will fit the same driver and gauge as your standard 270 frame, (Check with your Manufacturer.) eliminating the need to change drivers when switching from fronts to backs. Hooping is quick and simple, and since the frame is curved, it mates up to the curved cap back quite well. Comparing the three methods listed, it’s apparent that there are multiple choices available to you, but there may be some investment required. How much you want to spend really depends on how versatile you want to be, as the tools you have will dictate how much space is available for sewing, what kinds of cap styles you can sew on and how much time it will take to produce the embroidery. Before you can take on the first job, you have to know your limitations, which will depend on your equipment. |

Programming Cap Backs Programming the back of a cap can be as much of a challenge as hooping. Obviously, the space available for sewing is defined by the types of frames in your shop. But more daunting than that is matching the arc of your text to the arc of the rear opening of the cap (of course fitted caps have no opening.) Maybe you’ll get lucky and the customer only wants short straight text or perhaps a logo, neither of which will tie into the arc of the rear opening. But since the majority of jobs do involve arced text, you will be tasked with trying to align it with the keyhole.
These two examples illustrate two very important points, of which you have NO CONTROL OVER. The first is that the rear opening is rarely a true arc; the second is that the shape changes with each individual wearer. With this understanding of the product limitations firmly entrenched in your mind, you are now ready to proceed to the actual embroidery programming phase. If you are dealing with a fitted cap, a straight line of text or a pre-existing design, then the programming aspect is pretty straightforward without any real obstacles, other than fitting the embroidery into the allowable space as defined by the design of the cap and the hooping methodology that will be employed On the other hand, if you are dealing with embroidery that needs to be aligned with some portion of the keyhole area, then you be faced with a very real challenge. The key is to success to project some kind of reference arc onto your computer screen, so that you have a reasonable facsimile of the keyhole shape. This will then provide a basis for laying out your text. |


Visual Estimation Method
This is the quickest and easiest method for setting up arced lettering on a cap back. Simply place the cap (to be embroidered) on top of your computer monitor and try various layouts until you find one that looks appropriate for the job. Of course, there is not a very high level of accuracy, but it works ok in many cases. |

Trace Method
If you need a little more accuracy, try tracing the rear opening onto a piece of paper, then tape the paper to your computer screen for reference. Tracing is easier than it sounds. It’s actually quite difficult to accurately trace the shape of the rear opening, due to curved nature of the cap. Try placing the cap and paper over the corner of a table to allow easier access. Even then, you may end up with a not-so-perfect drawing (see picture above). An alternative is to cut out the rear portion of the cap and then lay this on top of paper and trace. Bottom-line, tracing will yield a more accurate reference for your programming. |

Duplication Method
It is possible to duplicate the shape of the rear opening using various engineering tools such as Dividers and French Curves. Dividers are perfect for transferring a true or nearly true arc to paper. A French Curve is a rectangular device much like a ruler, which is flexible so that it can be positioned to match any complex shape. Though slow and tedious, you can potentially duplicate the exact shape and size onto paper and either scan it and project the image or cut it out and tape it on the screen. |

Armed with the concepts discussed here, you should be able to tackle cap backs with confidence, though challenges will still arise. But before making any job commitments, be sure you have the right tools and the price with worth the time that you will have to put into the project. After all, Time Is Money. |
